Sticky Honey Garlic Chicken Wings: Unlock Crispy Perfection!
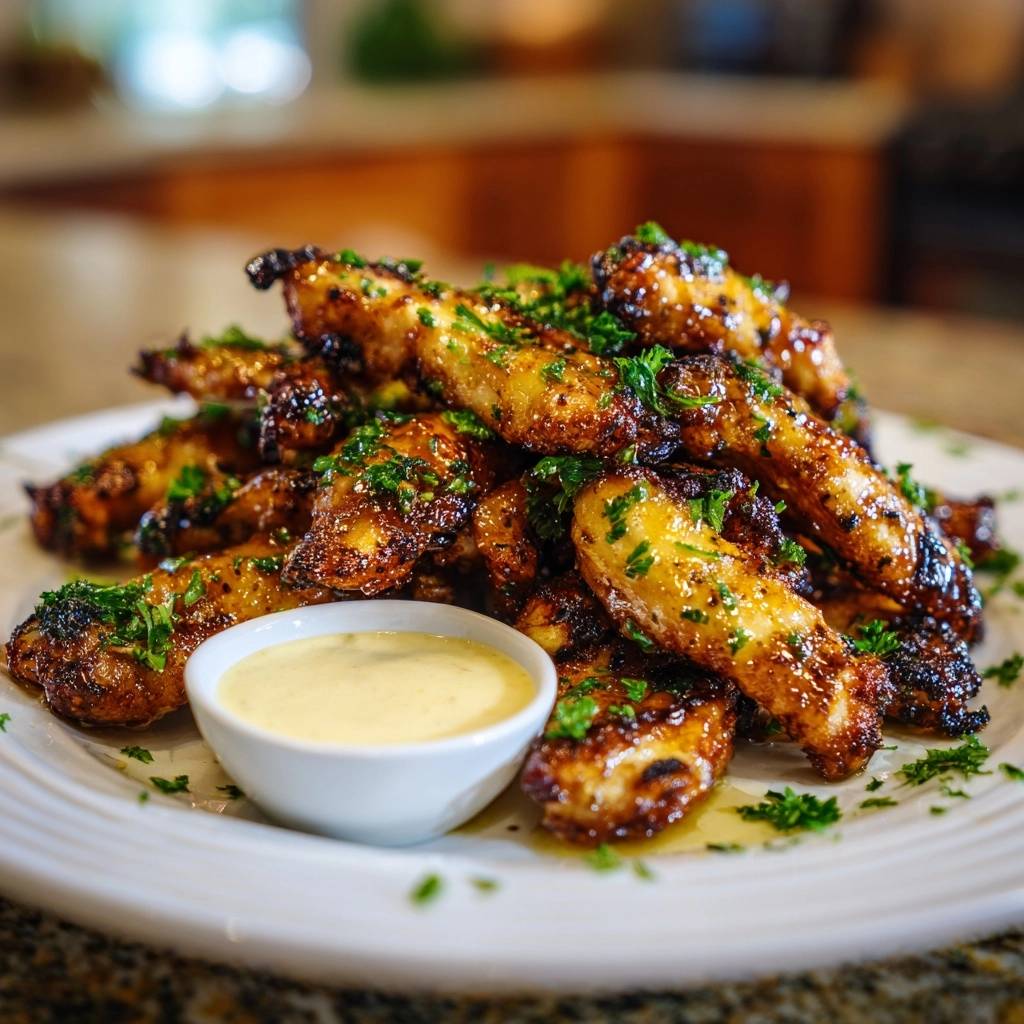
Making truly crispy, sticky-sweet chicken wings at home can feel like a culinary quest, often ending in soggy disappointment. I know that frustration all too well, but I’m here to assure you that dry, bland, or flabby wings are a thing of the past.
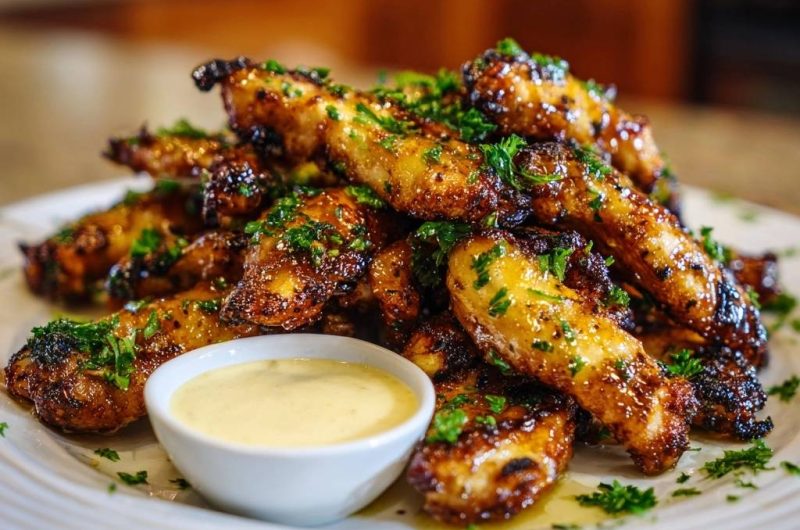
This recipe for Sticky Honey Garlic Chicken Wings unlocks the ultimate secret to unbelievably crispy skin and a luscious, finger-licking glaze that adheres beautifully. Get ready for wing perfection that will have everyone asking for your secret!
Why This Sticky Honey Garlic Chicken Wings Recipe Is a Game Changer
Forget everything you thought you knew about homemade wings. This recipe isn’t just another rendition; it’s a meticulously crafted guide designed to deliver maximum flavor and an unbeatable texture every single time.
The Secret to Unbelievably Crispy Wings, Every Time
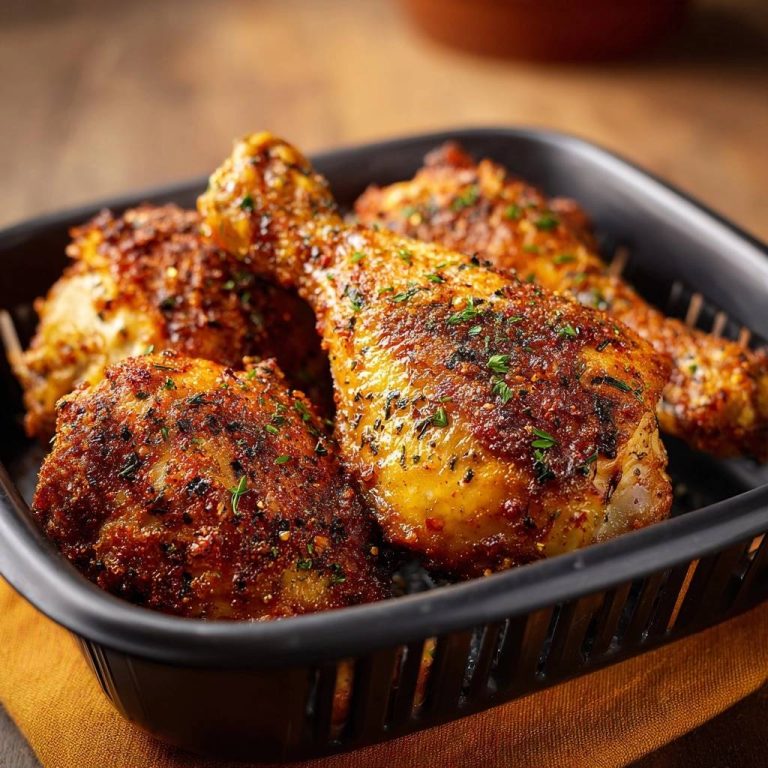
The magic starts with a simple, yet powerful technique: a touch of baking powder combined with strategic air circulation in the oven. This dynamic duo transforms chicken skin into a shatteringly crisp marvel, a textural contrast that elevates the entire dish.
That Irresistibly Sticky, Finger-Licking Glaze
Our honey garlic glaze strikes the perfect balance of sweet, savory, and tangy, creating a depth of flavor that’s utterly addictive. It’s designed to cling to every crispy nook and cranny, ensuring each bite is bursting with taste and that satisfying stickiness.
Effortless Preparation for Maximum Flavor
Despite the gourmet results, this recipe is incredibly straightforward, utilizing accessible ingredients and clear, easy-to-follow steps. It’s perfect for home cooks who want to impress without spending hours in the kitchen, proving that exceptional flavor doesn’t require complex methods.
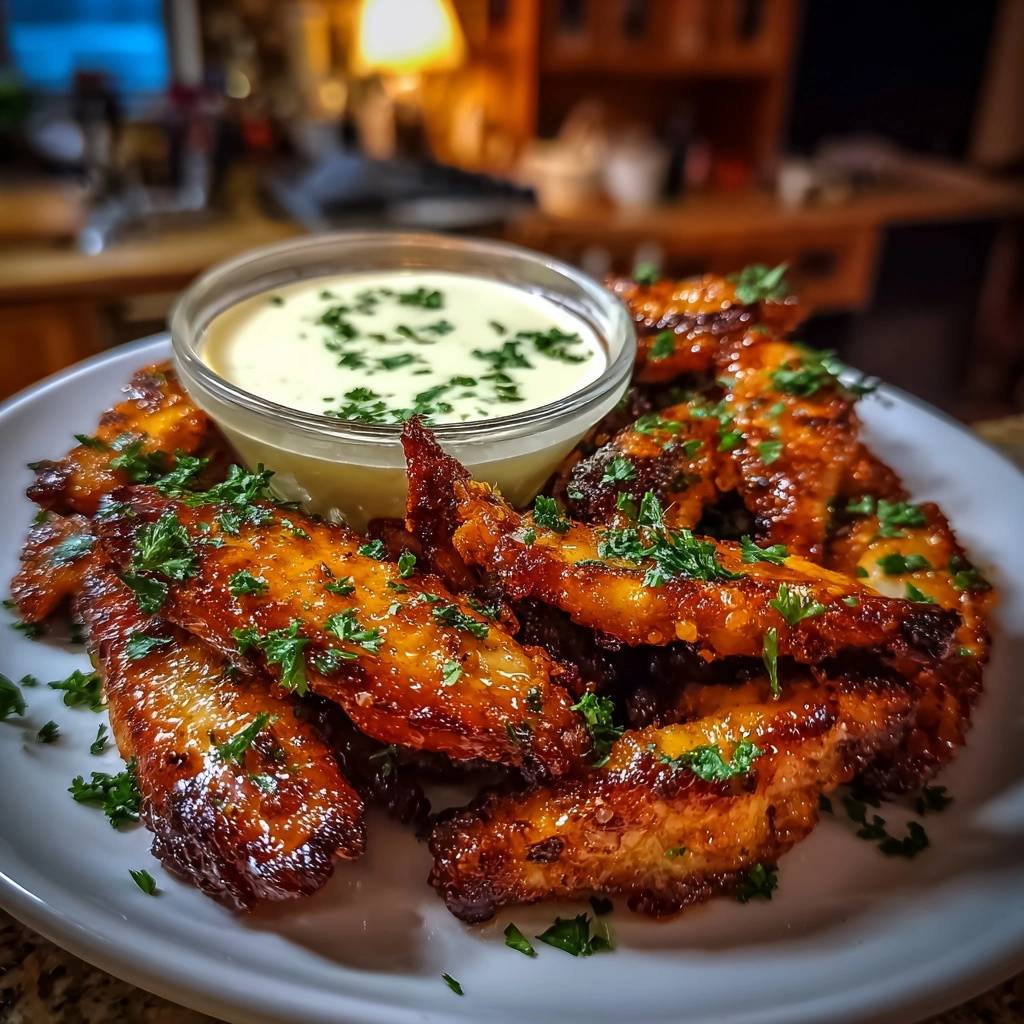
The Essential Ingredients for Your Sticky Honey Garlic Chicken Wings
Crafting perfect Sticky Honey Garlic Chicken Wings begins with understanding each ingredient’s role. Quality and proper preparation are key to unlocking the best flavors and textures.
For the Wings: Quality Matters
Start with fresh, good-quality chicken wings. You can use a mix of drumettes and flats, or your preferred cut. The most important step here is to ensure they are thoroughly patted dry; surface moisture is the enemy of crispiness.
The Crispy Skin Dry Rub Powerhouse
Baking Powder (aluminum-free): This is your secret weapon for crispy skin. It helps break down the skin’s proteins, creating tiny bubbles that crisp up beautifully.
Salt & Black Pepper: Essential seasonings that enhance the chicken’s natural flavor.
Garlic Powder & Onion Powder: These aromatic powders infuse a foundational savory depth into the wings before they even hit the glaze.
Smoked Paprika: Adds a subtle smoky note and a gorgeous reddish hue, making the wings even more appealing.
Crafting the Irresistible Honey Garlic Glaze
Honey: Provides the signature sweetness and contributes significantly to the glaze’s sticky texture. Maple syrup is a good alternative.
Soy Sauce (low sodium preferred): Delivers a crucial salty, umami depth. Opting for low-sodium helps control the overall saltiness.
Apple Cider Vinegar: Adds a bright, tangy counterpoint to the sweetness, balancing the glaze. Fresh lemon juice works wonderfully too.
For those who love these sticky wings, this technique also works beautifully for crispy glazed chicken wings.
Brown Sugar: Enhances sweetness and helps create a beautiful caramelization when broiled.
Fresh Minced Garlic: Absolutely essential for that pungent, aromatic garlic punch that defines the flavor profile.
The Creamy Dijon Dip: A Perfect Companion
This simple, tangy dip perfectly complements the rich, sweet, and savory wings. Mayonnaise provides the creamy base, Dijon mustard adds a zesty kick, and a touch of honey and lemon juice brightens everything up.
Tools for Sticky Honey Garlic Chicken Wings Success
Having the right tools simplifies the process and guarantees the best possible outcome for your Sticky Honey Garlic Chicken Wings.
Essential Baking & Prepping Equipment
A large baking sheet lined with parchment paper is crucial for easy cleanup. An oven-safe wire rack placed on top is non-negotiable, as it allows air to circulate completely around each wing, which is the cornerstone of crispy skin.
Mixing Bowls and Saucepan
You’ll need a large bowl for tossing the wings with oil and seasoning, and a smaller bowl for mixing the dry rub ingredients. A small saucepan is perfect for simmering the honey garlic glaze to the right consistency without scorching.
Crafting Perfection: Your Step-by-Step Guide to Sticky Honey Garlic Chicken Wings
Step 1: Prep for Perfection (The Crispy Skin Secret!)
Preheat your oven to 400°F (200°C) and prepare your baking setup. Line a large baking sheet with parchment paper, then place an oven-safe wire rack on top. This crucial arrangement allows hot air to circulate completely around each wing, which is fundamental for crispy skin.
The most vital step for achieving truly crispy wings is to pat them bone dry with paper towels. Remove all surface moisture from every single piece; moisture is the enemy of crispiness.
Step 2: Season and Crisp-Coat
In a large bowl, toss the thoroughly dried chicken wings with olive oil, ensuring each piece is lightly coated. This helps the seasoning adhere evenly.
In a separate small bowl, combine the baking powder, salt, pepper, garlic powder, onion powder, and smoked paprika. Sprinkle this powerful seasoning mix over the wings, tossing vigorously until every piece is perfectly coated.
The aluminum-free baking powder is your secret weapon here. It creates tiny bubbles on the chicken skin, helping to break down proteins and leading to an unbelievably crispy exterior.
Step 3: Bake to Golden Perfection
Arrange the seasoned wings in a single layer on the prepared wire rack, making sure no pieces are touching. Overcrowding will steam the wings instead of crisping them, so use a second baking sheet if necessary.
Bake for an initial 30 minutes. Then, carefully flip each wing and continue baking for another 20-30 minutes, or until the wings are gloriously golden brown and thoroughly cooked. The internal temperature, checked with a meat thermometer, should reach 165°F (74°C).
Step 4: Whip Up the Irresistible Glaze
While your wings are baking, prepare the star of the show: the honey garlic glaze. In a small saucepan, combine the honey, low-sodium soy sauce, apple cider vinegar, brown sugar, and fresh minced garlic.
If you enjoy sticky wings, these spicy gochujang chicken wings bring a bold, savory heat.
Bring the mixture to a gentle simmer over medium heat, stirring continuously until the brown sugar has completely dissolved. Allow it to cook for just 2-3 minutes, watching closely as it thickens slightly to a syrupy consistency. Remove from heat immediately.
Step 5: Glaze, Toss, and Caramelize to Sticky Bliss
Once your wings are perfectly crispy and cooked, remove them from the oven. Transfer the hot wings to a clean large bowl and pour the warm, thickened glaze over them. Toss gently but thoroughly, ensuring every single wing is beautifully coated.
For an extra layer of stickiness and a touch of delicious caramelization, return the glazed wings to the wire rack on the baking sheet. Broil for 2-3 minutes, keeping a very close eye on them to prevent burning, until the glaze is bubbling and slightly charred in tempting spots.
Step 6: Crafting the Creamy Dijon Companion
In a small bowl, whisk together the mayonnaise, Dijon mustard, a touch of honey or sugar, fresh lemon juice, and a pinch of salt until the dip is perfectly smooth and creamy. Adjust seasoning to your taste.
Step 7: Presenting Your Wing Masterpiece
Carefully transfer the glorious Sticky Honey Garlic Chicken Wings to a serving platter. Garnish generously with vibrant fresh chopped parsley for a pop of color and freshness. Serve them immediately with the irresistible creamy Dijon dip on the side.
Prepare for rave reviews and the satisfying crunch of truly crispy, flavorful wings!
Chef’s Secrets: Elevate Your Sticky Honey Garlic Chicken Wings Game
Unlock even greater success with these expert tips for your homemade chicken wings, ensuring every batch is phenomenal.
The Ultimate Dryness: Pat, Don’t Just Dab!
Pat, Don’t Just Dab! For truly crispy skin, you must remove as much surface moisture as possible. Use a generous amount of paper towels and thoroughly pat down every crevice of each wing piece. You want them bone dry – this step is non-negotiable for crispy results.
Mastering the Baking Powder Advantage
Mastering the Baking Powder Advantage: Always use aluminum-free baking powder. The slight alkalinity of the baking powder raises the skin’s pH, which encourages the breakdown of proteins, leading to an incredibly crispy, almost crackling texture when baked. Don’t skip it!
Broiling for the Perfect Glaze Adherence
Broiling for the Perfect Glaze Adherence: The final broil is what takes your wings from glazed to truly sticky and slightly caramelized. Watch them constantly during this step – broiler heat is intense, and the sugars in the glaze can burn quickly. A minute or two can make all the difference between perfection and char.
Internal Temperature: Your Guide to Doneness
Internal Temperature: Your Guide to Doneness: While visual cues are helpful, the most accurate way to ensure your chicken wings are safely cooked through is to use a meat thermometer. Aim for an internal temperature of 165°F (74°C) in the thickest part of the wing, avoiding the bone.
What to Serve with Sticky Honey Garlic Chicken Wings
These Sticky Honey Garlic Chicken Wings are a meal in themselves, but thoughtful pairings can enhance the entire dining experience, whether for a casual gathering or a game night.
Classic Sides for Wing Night
Sticky Honey Garlic Chicken Wings are the star of any meal, but pairing them with the right sides can elevate the experience. Think classic comfort foods like crispy sweet potato fries, a vibrant coleslaw, or a fresh garden salad to cut through the richness of the glaze. Even simple steamed rice can be a delightful accompaniment to soak up any extra sauce!
Refreshing Drink Pairings
Complement the sweet and savory flavors of these wings with refreshing beverages. A crisp sparkling water can balance the richness. For non-alcoholic options, iced tea with lemon, sparkling lemonade, or even a simple glass of chilled water with cucumber slices works wonderfully to cleanse the palate.
What to Serve Alongside
Those sticky, garlicky wings call for something earthy and creamy on the side. Mushrooms are a natural match for the sweet-savory glaze.
- For a rich, silky contrast to the crisp wings, scoop up Creamy Skillet Mushrooms with their buttery sauce.
- If you want a lighter, herb-forward option that soaks up any extra honey garlic sauce, try the Skillet Garlic Herb Mush
Make Ahead & Storage Tips for Your Sticky Honey Garlic Chicken Wings
Thoughtful planning can extend the enjoyment of your Sticky Honey Garlic Chicken Wings, making them perfect for meal prep or future cravings.
Can You Make Them Ahead?
While these Sticky Honey Garlic Chicken Wings are best enjoyed fresh from the oven, you can prepare them partly in advance. You can season the wings with the dry rub and refrigerate them for up to 24 hours before baking. This allows the flavors to meld, but ensure they are still patted dry before baking for maximum crispiness.
Storing Leftover Wings
Leftover wings can be stored in an airtight container in the refrigerator for up to 3-4 days. For longer storage, freeze them in a single layer on a baking sheet until solid, then transfer to a freezer-safe bag or container for up to 2-3 months.
Reheating for Continued Enjoyment
To reheat, arrange cold wings on a wire rack over a baking sheet and bake at 375°F (190°C) for 10-15 minutes, or until heated through and crisp again. An air fryer also works wonderfully for reheating, bringing back that satisfying crunch in just a few minutes.
Troubleshooting Common Sticky Honey Garlic Chicken Wings Woes
Even expert cooks encounter challenges. Here’s how to tackle common issues when making your Sticky Honey Garlic Chicken Wings.
Problem: My Wings Aren’t Crispy!
Solution: The most common culprit is moisture. Ensure your wings are bone dry before seasoning. Double-check you used baking powder (not baking soda!), that your oven was at the correct temperature, and that the wings were arranged in a single layer on a wire rack without touching. Overcrowding steams, it doesn’t crisp!
Problem: The Glaze Isn’t Sticky Enough
Solution: The glaze needs to simmer long enough to thicken slightly before tossing with the wings. If it’s too thin, return it to the heat and cook for another minute or two until it coats the back of a spoon. Also, don’t skip the final broil – that’s key for caramelization and ultimate stickiness.
Problem: The Glaze Burned During Broiling
Solution: Broilers are powerful! Sugars burn quickly. Ensure you are watching the wings like a hawk during the broiling step, literally for seconds at a time. If your broiler is particularly aggressive, consider moving the baking sheet to a lower rack in the oven to give yourself a bit more buffer.
Frequently Asked Questions About Sticky Honey Garlic Chicken Wings
Here are answers to common questions, ensuring you have all the information you need for perfect Sticky Honey Garlic Chicken Wings.
Can I make these Sticky Honey Garlic Chicken Wings gluten-free?
Absolutely! To make this recipe gluten-free, simply substitute the regular soy sauce with a gluten-free tamari or coconut aminos. All other ingredients are naturally gluten-free, ensuring you don’t miss out on any flavor or crispiness.
What if I don’t have apple cider vinegar?
No problem! Fresh lemon juice is an excellent substitute for apple cider vinegar in the glaze. It provides a similar tangy acidity that beautifully balances the sweetness of the honey and brown sugar. White wine vinegar can also work in a pinch.
Can I cook these wings in an air fryer?
Yes, you can! To cook in an air fryer, follow steps 1 and 2 (drying and seasoning). Arrange wings in a single layer in your air fryer basket, ensuring not to overcrowd. Cook at 380°F (195°C) for 20-25 minutes, flipping halfway, until crispy and cooked through. Then, proceed with glazing as per step 5.
Is aluminum-free baking powder really necessary?
While any baking powder will help with crispiness, aluminum-free baking powder is highly recommended. It prevents any metallic aftertaste that can sometimes occur with traditional baking powders, ensuring the pure, delicious flavor of your sticky honey garlic chicken wings shines through.
Ready to Impress? Share Your Sticky Honey Garlic Chicken Wings Masterpiece!
You’ve now unlocked the secrets to crafting truly irresistible Sticky Honey Garlic Chicken Wings – crispy skin, a luscious, perfectly balanced glaze, and a creamy dip that ties it all together. This recipe is a testament to how simple techniques can elevate a classic dish into something truly extraordinary.
So, gather your ingredients, follow these steps, and prepare to delight your family and friends. We guarantee these wings will become a beloved staple in your culinary repertoire. Don’t forget to snap a photo of your masterpiece and share it with us – we love seeing your creations!
Chicken Wings
Course: AppetizerCuisine: AmericanDifficulty: mediumServings4
servingsPrep time20
minutesCooking time1
hourCalories550
kcalTotal time80
minutesUnlock the secret to perfectly crispy, sticky-sweet chicken wings at home. This recipe guarantees unbelievably crispy skin and a luscious honey garlic glaze that’s finger-licking good. Say goodbye to soggy wings and hello to wing perfection!
Ingredients
2 pounds chicken wings (drumettes and flats, separated)
1 tablespoon olive oil
1 teaspoon baking powder (aluminum-free)
1 teaspoon salt
1/2 teaspoon black pepper
1 teaspoon garlic powder
1/2 teaspoon onion powder
1/2 teaspoon smoked paprika
For the Honey Garlic Glaze:
1/2 cup honey (or maple syrup)
1/4 cup soy sauce (low sodium preferred)
2 tablespoons apple cider vinegar (or fresh lemon juice)
1 tablespoon brown sugar
2 cloves garlic, minced
1 tablespoon fresh parsley, chopped (for garnish)
For the Creamy Dijon Dip:
1/2 cup mayonnaise
1 tablespoon Dijon mustard
1 teaspoon honey (or sugar)
1 teaspoon fresh lemon juice
Pinch of salt
Directions
- Prep for Perfection (The Crispy Skin Secret!): Preheat your oven to 400 degrees F (200 degrees C). Line a large baking sheet with parchment paper, then place an oven-safe wire rack on top. This setup allows air to circulate for maximum crispiness. Now, for the most crucial step: pat your chicken wings bone dry with paper towels. This removes surface moisture, which is the enemy of crispy skin. Ensure every piece is as dry as possible.
- Season and Crisp-Coat: In a large bowl, toss the dried wings with olive oil. In a small bowl, combine the baking powder, salt, pepper, garlic powder, onion powder, and smoked paprika. Sprinkle this seasoning mix evenly over the wings, tossing well to coat every piece. The baking powder is our secret weapon here; it helps break down the chicken skin, allowing it to get incredibly crispy.
- Bake to Golden: Arrange the seasoned wings in a single layer on the prepared wire rack, ensuring no pieces are touching. Bake for 30 minutes. Flip the wings and bake for another 20-30 minutes, or until golden brown and cooked through. The internal temperature should reach 165 degrees F (74 degrees C).
- Whip Up the Glaze: While the wings are baking, prepare the honey garlic glaze. In a small saucepan, combine the honey, soy sauce, apple cider vinegar, brown sugar, and minced garlic. Bring to a gentle simmer over medium heat, stirring until the brown sugar dissolves. Cook for 2-3 minutes, until the glaze thickens slightly. Remove from heat.
- Glaze and Finish: Once the wings are cooked and crispy, remove them from the oven. In a clean large bowl, pour the warm glaze over the hot wings and toss gently to coat evenly. For an extra sticky and slightly caramelized finish, return the glazed wings to the wire rack on the baking sheet and broil for 2-3 minutes, watching carefully to prevent burning, until the glaze is bubbling and slightly charred in spots.
- Mix the Dip: In a small bowl, whisk together the mayonnaise, Dijon mustard, honey, lemon juice, and a pinch of salt until smooth and creamy.
- Serve it Up: Transfer the Sticky Honey Garlic Chicken Wings to a serving platter. Garnish generously with fresh chopped parsley. Serve immediately with the creamy Dijon dip on the side. Get ready for rave reviews and no more soggy wing complaints!
Notes
- Baking powder is key for achieving unbelievably crispy skin!