Mastering Crispy Air Fryer Herb Chicken
We’ve all been there, staring at a plate of “healthy” air fryer chicken that looks more like it was boiled than fried. The skin is rubbery, the seasoning has slid off into the bottom of the basket, and that promised crunch is nowhere to be found. It’s a common frustration that leads many to believe the air fryer just can’t compete with a deep vat of oil.
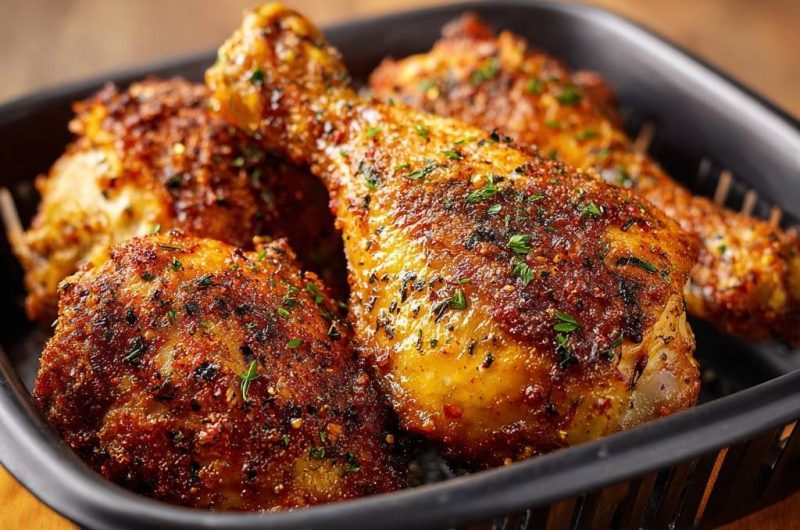
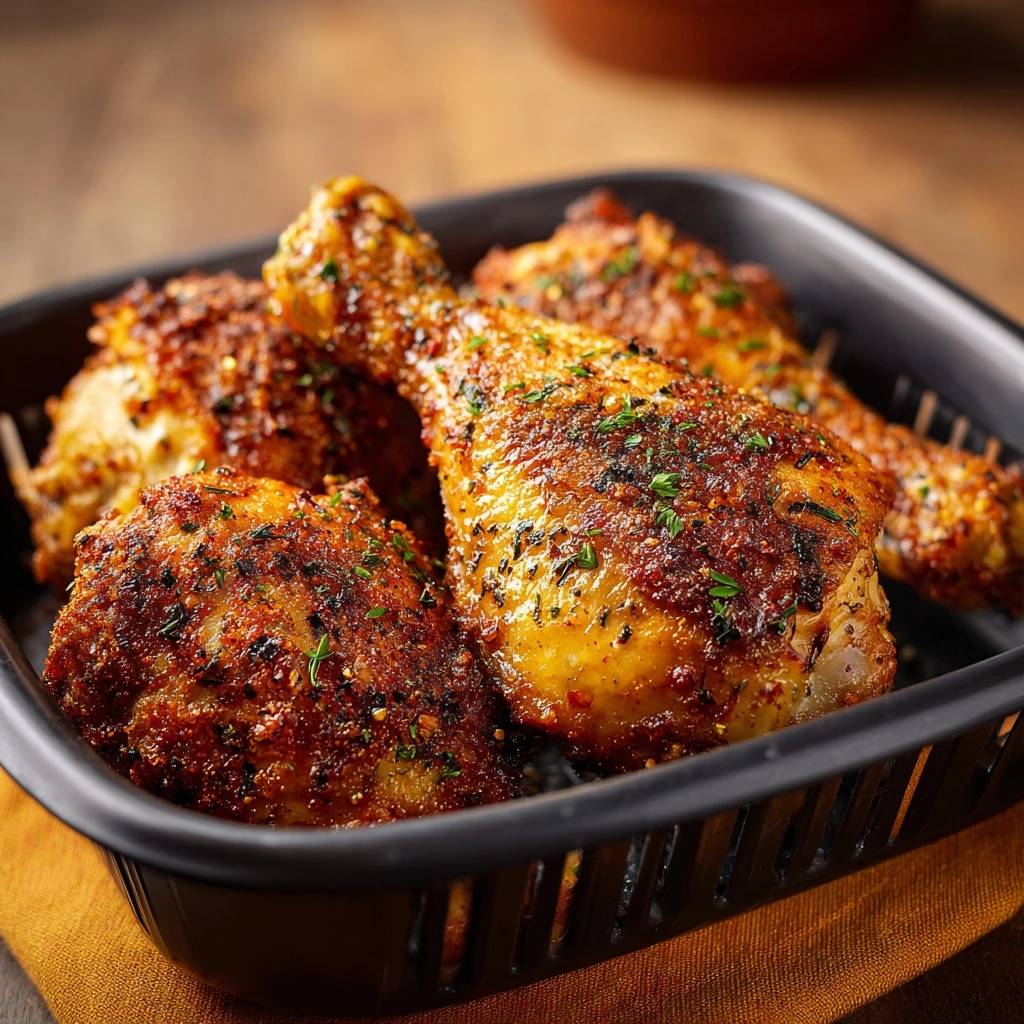
However, the secret to perfect air fryer chicken isn’t about the machine itself, but about moisture management and a specific textured rub. By using a dry-rub technique that incorporates a small amount of baking powder and a high-heat blast, you can lock in the juices while achieving a crackling, golden exterior. This method creates a mahogany crust that rivals any traditional fried chicken without the heavy grease.
The real trick I’ve found is treating the skin like a science project rather than just a surface for salt. You have to break down the proteins on the surface to get that “bubbly” texture we all crave. If you follow this specific workflow, you’ll never deal with soggy, pale skin again. It’s all about creating the right environment for the heat to do its job effectively.
The Science of Skin: Why Baking Powder Works
You might think baking powder belongs in cookies, but it’s actually the MVP of crispy poultry. When you rub baking powder onto chicken skin, it raises the pH level of the surface. This chemical shift allows the proteins to break down more efficiently, which accelerates the Maillard reaction—the process responsible for browning and flavor.
As the chicken cooks at high heat, the baking powder creates tiny micro-blisters across the skin. These little bubbles increase the surface area, resulting in a much crunchier mouthfeel than you’d get with just salt and pepper. Unlike a heavy flour dredge, which can sometimes turn gummy in an air fryer, this method keeps the coating light and shatteringly crisp.
Furthermore, the baking powder helps to draw out deep-seated moisture from the skin. Since steam is the ultimate enemy of a good crunch, drying out that exterior layer is vital. This simple pantry addition transforms the skin into a delicate, crackling shell that protects the tender meat underneath.
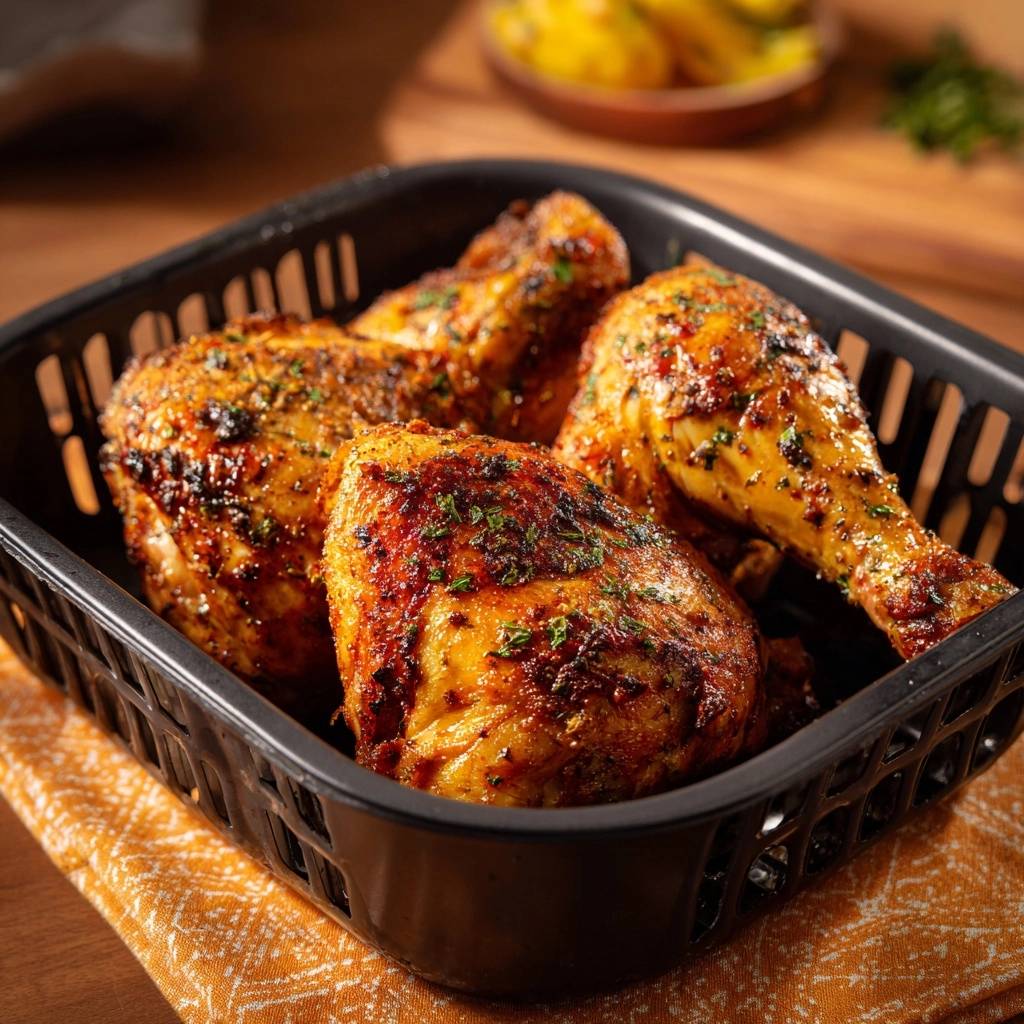
Essential Components for Crispy Air Fryer Herb Chicken
Quality ingredients are the foundation of this dish, and it starts with the cut of meat. For the best results, you absolutely need bone-in, skin-on thighs and drumsticks. The bone acts as an insulator, keeping the meat from drying out during the intense 400°F air circulation, while the skin provides the fat necessary for “frying” the herbs.
The spice profile here is a balance of earthy herbs and smoky heat. Smoked paprika is essential because it provides a deep, rich color that makes the chicken look like it spent hours in a rotisserie. I always recommend using kosher salt over table salt because the larger grains help physically break up the skin’s surface for better texture.
In addition to the spices, the choice of oil matters. You want a high-smoke-point oil like light olive oil or avocado oil. These can handle the high heat of the air fryer without smoking or developing a bitter taste, ensuring your herb crust stays bright and savory.
Selecting the Right Poultry Cuts
While chicken breasts are popular, they often struggle in the air fryer at high temperatures. Dark meat, like thighs and drumsticks, contains more connective tissue and fat, which means it stays succulent even when the skin is blasted to a crisp. If you use breasts, they’ll likely turn into sawdust before the skin ever gets crunchy.
The Dry Rub: Herb and Spice Ratios
I prefer using dried thyme and oregano for the actual cooking process. Fresh herbs have a high water content and tend to burn or turn bitter under the high-velocity fan of an air fryer. By using dried herbs in the rub and saving the fresh parsley for a garnish, you get the concentrated flavor during the cook and a pop of brightness at the end.
Preparation: Eliminating Moisture for Maximum Crunch
If there is one rule you cannot break, it’s this: the chicken must be bone-dry before it touches the oil. I’m talking “desert-dry” levels of preparation. Use several paper towels to pat down every single nook and cranny of the chicken pieces until the paper comes away completely clean.
Any moisture left on the skin will immediately turn into steam once the air fryer starts. Steam softens the skin and prevents the baking powder from doing its job. If you have the time, let the chicken sit uncovered in the fridge for 30 minutes after patting it dry to let the air naturally wick away any remaining dampness.
Starting with chicken that is closer to room temperature also helps. If the meat is ice-cold, the outside will cook much faster than the inside, leading to burnt spices and raw centers. Give it about 15 to 20 minutes on the counter to take the chill off before you start the seasoning process.
For the best results with room-temperature meat, try this technique with these crispy spice-rubbed chicken thighs.
Step-by-Step: Coating and Seasoning Techniques
Once the chicken is dry, it’s time for the “Glue and Press” method. Start with a very light coating of olive oil. You don’t want the chicken swimming in it; you just need enough to act as an adhesive for your spice blend. Too much oil can actually lead to a soggy crust or a smoky kitchen.
When you apply the herb and baking powder mixture, don’t just sprinkle it on. You need to firmly press the spices into the skin with your hands. This ensures the coating stays put when the air fryer’s powerful fan starts blowing. If the spices are just sitting loosely on top, they’ll end up at the bottom of the basket instead of on your dinner.
Make sure the coating is thick and even, especially on the underside of the thighs. You want every bite to have that concentrated herb flavor. This thick layer of seasoning also acts as a barrier, helping to keep the natural juices of the chicken locked inside the meat while the outside crisps up.
The High-Heat Air Frying Process
Preheating your air fryer is a non-negotiable step for this recipe. You want the chicken to sizzle the moment it hits the basket. If you put the chicken in a cold machine, the fat will render out slowly, resulting in a greasy texture rather than a crisp one. Set it to 400°F and let it run for at least 5 minutes before loading.
The “Single Layer Rule” is your best friend here. It is tempting to crowd the basket to finish faster, but air fryers rely on 360-degree airflow to create crunch. If the pieces are touching or overlapping, the air can’t reach those spots, and you’ll end up with “soggy shoulders” where the chicken pieces were pressed together.
As the chicken cooks, you’ll hear a distinct sizzling sound. That’s the fat rendering out and the baking powder reacting with the skin. The smell of toasted thyme and garlic will fill your kitchen, which is a great indicator that the Maillard reaction is in full swing. Keep an eye on the color; you’re looking for a deep, burnished gold.
The Mid-Way Flip and Temperature Checks
At the 12-minute mark, you must flip the chicken. This ensures the fat that has pooled on the top has a chance to drip off, and the bottom gets direct exposure to the heating element. Use an instant-read thermometer to check the thickest part of the thigh; you are aiming for exactly 165°F for the perfect balance of safety and juiciness.
Post-Cook Care: The Wire Rack Secret
The biggest mistake people make is taking beautiful, crispy chicken and putting it directly onto a flat plate. The heat from the chicken will create condensation on the bottom of the plate, which the skin will immediately soak up. Within two minutes, your crunchy bottom will be mushy and sad.
Instead, transfer the chicken to a wire cooling rack set over a baking sheet. This allows air to circulate under the meat while it rests, keeping the skin crispy all the way around. Let it rest for at least 5 minutes. This allows the juices to redistribute so they don’t all run out the moment you take your first bite.
What to Serve with Crispy Air Fryer Herb Chicken
If you’re looking for more ways to enjoy chicken with bright, balanced flavors, these two recipes pair naturally with the herb-crusted texture of air-fried chicken.
- For a cold, creamy contrast that uses the same protein, try the Creamy Cranberry Pecan Chicken Salad
Troubleshooting Common Air Fryer Chicken Issues
If your air fryer starts smoking, you likely used too much oil or have old grease at the bottom of the unit. A light coating is all you need. If the skin looks pale even after the full cook time, you probably overcrowded the basket. Next time, cook in two batches to ensure the air can move freely around each piece.
Sometimes the herbs can taste slightly bitter. This usually happens if the chicken was placed too close to the heating element or if the spices burnt before the meat was done. If your air fryer is small, try lowering the temperature to 375°F for the last 5 minutes of cooking to protect the delicate herbs while the meat finishes reaching temperature.
If the skin is crispy but the meat is dry, you likely overcooked it. Every air fryer model is different, so start checking the internal temperature a few minutes early. Remember that the chicken will continue to rise a few degrees in temperature while it rests on the wire rack.
Optimal Side Dishes for Herb-Crusted Poultry
Since this chicken is rich and savory, I love pairing it with something bright and acidic. A simple arugula salad with a heavy squeeze of lemon and a shaving of parmesan cuts through the fat perfectly. The peppery greens complement the dried thyme and oregano in the chicken rub beautifully.
If you enjoy this bright, acidic contrast, you’ll love how it cuts through the rich coating of this crispy herb-crusted chicken.
Roasted root vegetables are another fantastic option. You can even toss some carrots or baby potatoes in the air fryer after the chicken is done. They’ll pick up some of those leftover herb flavors. For a more Mediterranean vibe, a cold cucumber and tomato salad with a splash of vinegar provides a refreshing contrast to the hot, crunchy chicken.
Storage and Reheating for Retaining Texture
If you have leftovers, store them in an airtight container in the refrigerator for up to three days. However, be prepared for the skin to soften as it sits. Whatever you do, do not use the microwave to reheat this chicken! The microwave will turn the skin into a rubbery mess that is nearly impossible to chew.
The only way to bring this chicken back to life is the air fryer. Pop the cold leftovers back into the basket at 350°F for about 4 to 5 minutes. This will render the fat again and crisp the skin back up to nearly its original glory. It’s the best way to enjoy “day two” chicken without sacrificing the texture.
Expert Tips for Recipe Success
If you are cooking for a large family, don’t try to squeeze 8 pieces into one basket. It’s much better to cook in two batches. You can keep the first batch warm in a low oven (around 200°F) on a wire rack while the second batch finishes. This ensures everyone gets a truly crispy piece of chicken.
I generally recommend avoiding parchment liners for this specific recipe. While they make cleanup easier, they block the airflow to the bottom of the chicken. If you must use them, choose the perforated kind with holes, but for the absolute best crunch, placing the chicken directly on the greased basket rack is the way to go.
Always check your baking powder before starting. If it’s older than six months, it might not be active enough to create those micro-blisters on the skin. You can test it by dropping a pinch into a little hot water; if it bubbles vigorously, you’re good to go. If not, it’s time for a new tin.
How should I store leftovers?
Store your chicken in an airtight container in the fridge for up to 3 days. To keep it as fresh as possible, let the chicken cool completely on a wire rack before putting it in the container. This prevents steam from building up inside the box, which would make the skin even soggier during storage.
Why is my chicken skin still rubbery?
Rubbery skin is almost always caused by excess moisture or low heat. Ensure you pat the chicken bone-dry with paper towels before adding oil. Also, make sure you preheat the air fryer to 400°F. If the temperature isn’t high enough, the fat won’t render properly, leaving the skin tough instead of crisp.
Can I use a different oil?
Yes, you can use any oil with a high smoke point. Avocado oil, grapeseed oil, or light olive oil work best. Avoid using extra virgin olive oil if possible, as its lower smoke point can cause it to burn and taste bitter at the high 400°F temperature required for this recipe.
What if I don’t have baking powder?
While the baking powder is the “secret” to the bubbly texture, you can omit it if necessary. The chicken will still be tasty, but the skin will be more like traditional roasted chicken rather than “fried” chicken. Do not substitute baking soda, as it has a much stronger metallic taste and won’t produce the same results.
How do I know when the chicken is done?
The safest and most accurate way is to use an instant-read meat thermometer. Insert it into the thickest part of the thigh or drumstick without hitting the bone. Once it reaches 165°F, it is safe to eat. Dark meat is actually quite forgiving and can even go up to 175°F while remaining juicy.
Can I use this method for chicken wings?
Absolutely! This baking powder and high-heat method works incredibly well for wings. You will likely need to reduce the cooking time to about 15-18 minutes total, shaking the basket every 5 minutes to ensure all sides of the smaller pieces get equal air exposure.
Crispy Chicken
Course: Main CourseCuisine: AmericanDifficulty: easyYields4
servingsPrep Time10
minutesCook Time25
minutesCalories350
kcalTotal Time35
MinutesA foolproof method for bone-in chicken that solves the problem of rubbery skin. By using a specific herb blend and baking powder, this recipe creates a crackling, golden exterior while keeping the meat juicy.
Ingredients
4 chicken drumsticks and thighs, bone-in and skin-on
2 tablespoons olive oil
1 tablespoon garlic powder
1 tablespoon smoked paprika
1 teaspoon dried thyme
1 teaspoon dried oregano
1 teaspoon kosher salt
1/2 teaspoon cracked black pepper
1/2 teaspoon red pepper flakes
1 teaspoon baking powder (The secret for skin texture)
Fresh parsley and extra thyme, finely chopped for garnish
Directions
- The most important step for crispy skin is to ensure the chicken is bone-dry. Use paper towels to pat every inch of the chicken pieces until no surface moisture remains. Moisture creates steam, and steam is the enemy of crunch.
- In a small bowl, whisk together the garlic powder, smoked paprika, thyme, oregano, salt, pepper, red pepper flakes, and the baking powder. The baking powder raises the pH level on the chicken skin, breaking down the proteins for a more textured, “bubbly” crispness as seen in the image.
- Lightly coat the chicken pieces in olive oil. This acts as the glue for your spices and helps conduct the heat for even browning.
- Rub the spice blend generously over the chicken, pressing it firmly into the skin so it adheres. Ensure the coating is thick and even to achieve that deep mahogany crust.
- Preheat your air fryer to 400 degrees F. Preheating is essential to ensure the skin starts crisping the second it hits the basket.
- Place the chicken in the air fryer basket in a single layer. Do not overcrowd the basket. Air must circulate freely around each piece to prevent soggy spots.
- Cook for 12 minutes, then flip each piece. Cook for another 10 to 13 minutes until the skin is deep golden brown, textured, and the internal temperature reaches 165 degrees F.
- Remove the chicken and let it rest on a wire rack for 5 minutes. Resting on a flat plate can cause the bottom to steam and lose its crunch, but a rack keeps the skin crispy all the way around.
- Garnish with a fresh dusting of chopped parsley and thyme to match the vibrant green flecks in the photo, and serve immediately.
Notes
- The secret ingredient is baking powder, which raises the pH level of the skin to create a bubbly, extra-crunchy texture. Always rest the chicken on a wire rack to prevent the bottom from steaming.