Sweet & Sticky Crispy Chicken Noodles: The Lasting Crunch Secret
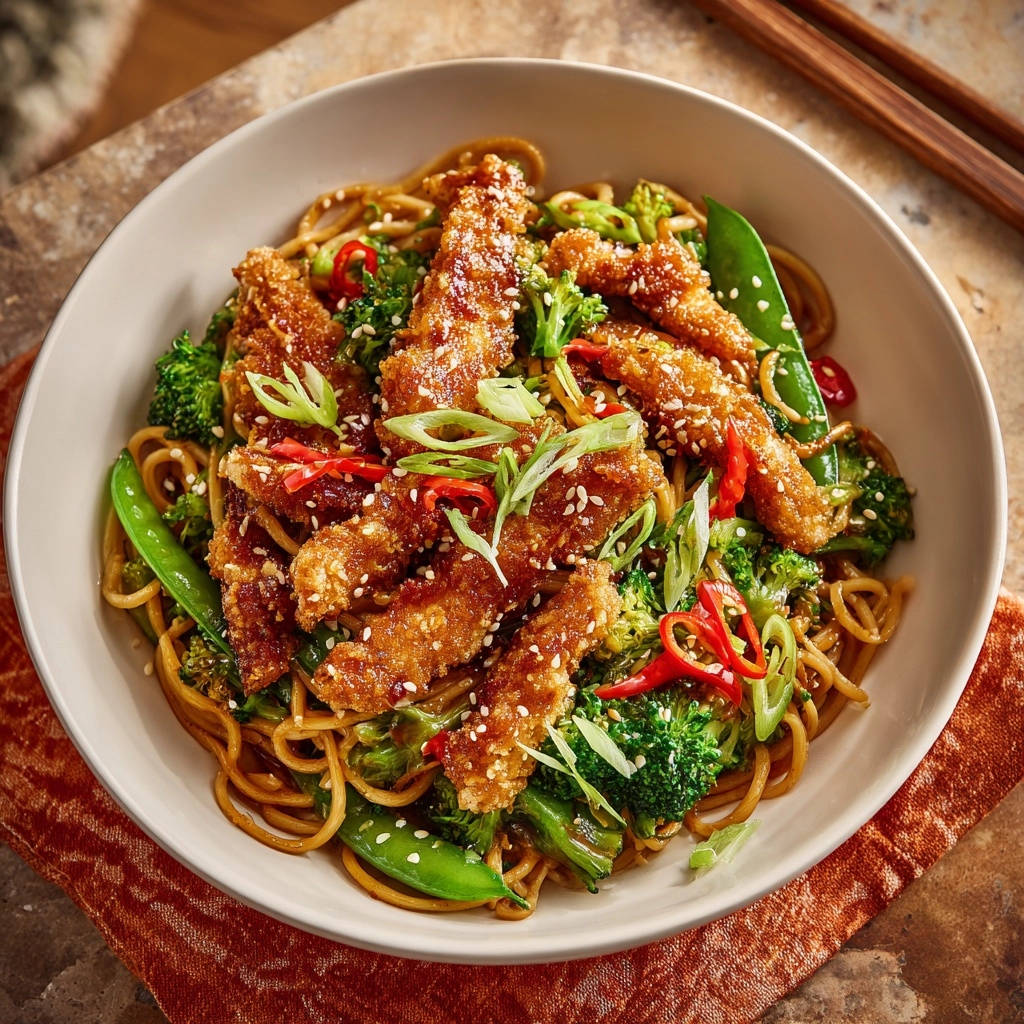
Who hasn’t experienced the disappointment of perfectly crispy chicken turning soggy the moment it touches a delicious sauce? My journey to conquer this culinary challenge led me to perfect these incredible Sweet & Sticky Crispy Chicken Noodles, guaranteeing that satisfying crunch lasts until the very last bite.
This recipe isn’t just about incredible flavor; it’s about a reliable technique that delivers truly sauce-proof crispiness, making it your ultimate choice for homemade takeout nights.
Beyond the Takeout Box: Why THIS Crispy Chicken Noodle Recipe Reigns Supreme
Cracking the Code: The Secret to Sauce-Proof Crispiness
The magic behind our lasting crispiness lies in a multi-pronged approach. We thoroughly dry the chicken, use a dual flour and cornstarch coating, and critically, rest the chicken on a wire rack both before and after frying.
This careful preparation allows for superior air circulation and drainage, creating a robust crust that stands up beautifully to our luscious sweet and sticky sauce.
A Weeknight Game-Changer: Fast, Flavorful, and Family-Approved
Transform your busy weeknights with this dynamic dish that comes together quicker than ordering takeout. The vibrant flavors of these Sweet & Sticky Crispy Chicken Noodles are a guaranteed crowd-pleaser.
It’s an ideal choice for families seeking both speed and exceptional taste without compromising on quality or excitement.
The Perfect Balance: Sweet, Savory, and Satisfying
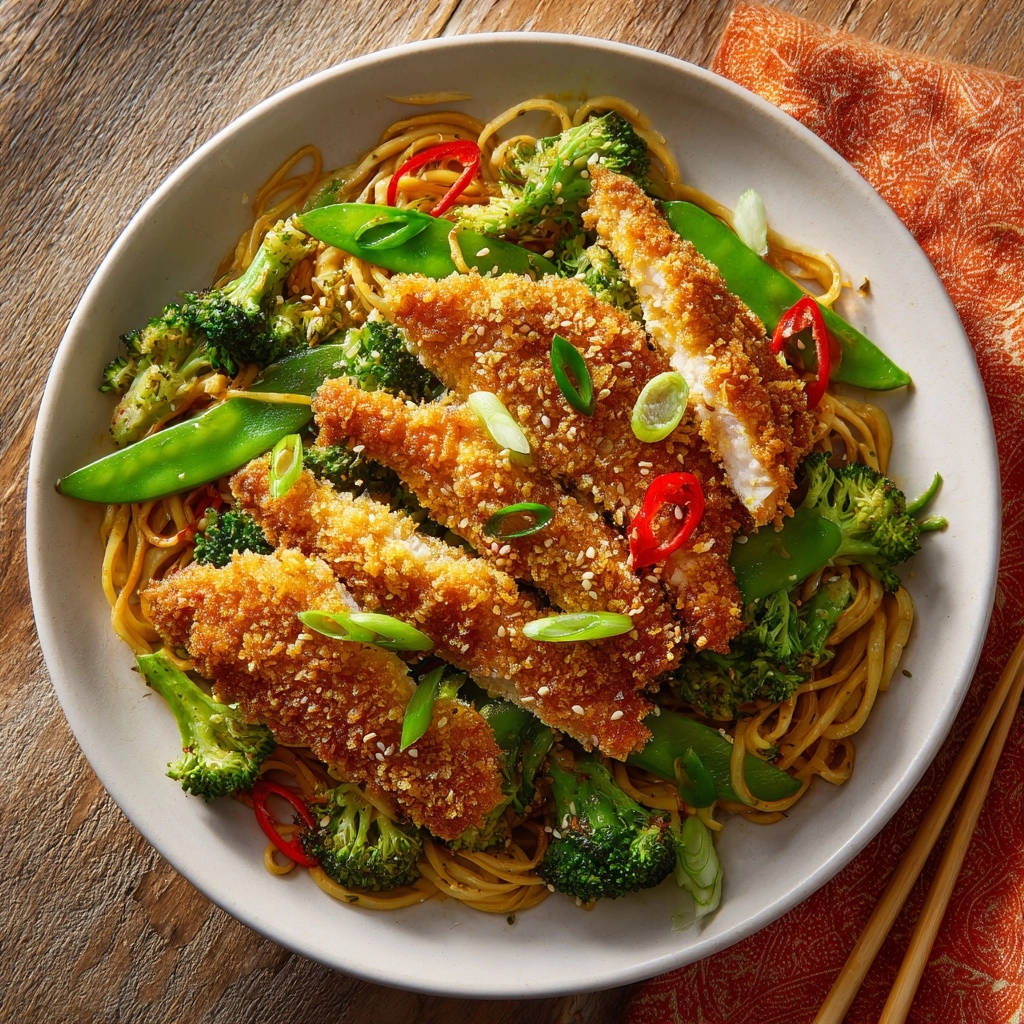
Our signature sweet and sticky sauce strikes an exquisite balance, tantalizing your taste buds without being overly sugary or heavy. Its savory depth from soy and ginger perfectly complements the crispy chicken.
This carefully crafted sauce ensures every forkful of chicken, noodles, and vibrant vegetables is harmonious and deeply satisfying.
If you love that glossy sauce coating every noodle, the same technique works beautifully in this chicken and broccoli stir-fry.
The Building Blocks of Brilliance: Ingredients for Your Sweet & Sticky Creation
For the Golden Crispy Chicken
Quality chicken and the right coating are paramount for achieving that irresistible crunch.
- 1.5 pounds boneless, skinless chicken breast, cut into 1-inch strips
- 1/2 cup all-purpose flour
- 1/2 cup cornstarch, divided (a key player in achieving lasting crispiness)
- 1 large egg, beaten
- 1 teaspoon salt
- 1/2 teaspoon black pepper
- 3 cups neutral oil (like vegetable or canola) for frying
Crafting the Irresistible Sweet & Sticky Sauce
This sauce is the heart of our Sweet & Sticky Crispy Chicken Noodles, offering a perfect blend of complex flavors.
- 1/2 cup low sodium soy sauce (for better flavor control)
- 1/4 cup brown sugar, packed
- 2 tablespoons rice vinegar
- 1 tablespoon fresh grated ginger (adds a bright, pungent warmth)
- 2 cloves garlic, minced
- 1 teaspoon sesame oil
- 1/4 cup water or vegetable broth
- 1 tablespoon cornstarch (for thickening)
Noodles & Vibrant Veggies: The Perfect Pairing
Fresh vegetables and the right noodles complete this satisfying meal, adding texture and nutrition.
- 8 ounces lo mein or egg noodles (these hold sauce beautifully)
- 3 cups broccoli florets
- 1 cup snow peas
- 1 tablespoon neutral oil (for stir-frying)
Garnishes for That Extra “Wow”
Garnishes add a fresh finish and a final burst of flavor and color.
- 2 scallions, thinly sliced
- 1 tablespoon sesame seeds
- 1 red chili, thinly sliced (optional, for a kick)
Essential Gear for Crispy Chicken Noodle Success
Must-Have Equipment for Frying Perfection
Achieving truly crispy chicken requires the right tools to maintain consistent oil temperature and proper drainage.
Heavy-Bottomed Pot or Dutch Oven: This ensures even heat distribution and stability, critical for safe and consistent frying.
Deep-Fry Thermometer: Absolutely essential for monitoring oil temperature; consistency prevents soggy or burnt chicken.
Wire Rack: Use one set over a baking sheet for both resting coated chicken before frying and draining fried chicken. This allows air to circulate, maintaining crispness.
Wok or Skillet: Your Noodle & Veggie Companion
A large skillet or wok is perfect for stir-frying your vegetables and noodles, and for bringing the entire dish together with the sauce.
Its wide surface and high sides make it ideal for quick, high-heat cooking and easy tossing.
Your Step-by-Step Journey to Sweet & Sticky Crispy Chicken Noodles Perfection
- Prepping Your Chicken: The Foundation for Crispiness
Begin by patting your chicken strips exceptionally dry with paper towels. Removing excess moisture is the absolute first step to achieving that coveted crispy exterior, preventing steaming during frying.
In a shallow dish, whisk together the flour, 1/4 cup of the cornstarch, salt, and black pepper for your dry coating. In a second shallow dish, beat the egg thoroughly.
- Dredging for Superior Crunch
Dip each chicken strip into the beaten egg, allowing any excess to drip off. This provides the necessary adhesion for the dry coating.
Next, dredge the chicken thoroughly in the flour and cornstarch mixture, pressing gently to ensure an even, complete, and robust coating. Place all coated chicken strips on a clean wire rack to air dry slightly; this initial coating and air exposure are key for crispness.
- Frying for that Signature Crunch: Techniques That Work
Heat about 3 inches of neutral oil in a large heavy-bottomed pot or Dutch oven over medium-high heat until it reaches 350-375°F (175-190°C). Use a thermometer for accuracy.
Carefully add chicken strips in batches, ensuring not to overcrowd the pot. Overcrowding dramatically drops the oil temperature, preventing crisping and leading to greasy chicken. Fry for 4 to 6 minutes, turning occasionally, until the chicken is golden brown and cooked through.
Remove the chicken with a slotted spoon and immediately place it back on the wire rack set over a paper towel-lined baking sheet. This allows air to circulate around the chicken and drains excess oil, helping it stay incredibly crisp. Do not stack or cover the fried chicken.
- Cooking Your Noodles & Sautéing Veggies
Cook your lo mein or egg noodles according to the package directions until al dente. Drain them and rinse briefly under cold water to prevent sticking, then toss with a tiny bit of neutral oil.
In a large skillet or wok, heat 1 tablespoon of neutral oil over medium-high heat. Add the broccoli florets and stir-fry for 3 to 4 minutes until they are vibrant green and slightly tender-crisp.
Add the snow peas and stir-fry for another 1 to 2 minutes until just tender. Remove the cooked vegetables from the skillet and set aside to avoid overcooking them in the sauce.
- Whipping Up the Irresistible Sauce
In a small bowl, whisk together the soy sauce, brown sugar, rice vinegar, fresh ginger, minced garlic, sesame oil, and water or vegetable broth. This forms the flavorful base of your sticky sauce.
In a separate tiny bowl, whisk the remaining 1 tablespoon of cornstarch with 2 tablespoons of cold water to create a smooth, lump-free slurry. This will be used to thicken the sauce.
- Thickening the Sauce & Coating Veggies
Pour the whisked sauce mixture into the same skillet you used for the veggies. Bring the sauce to a gentle simmer over medium heat, allowing the flavors to meld.
Whisk in the cornstarch slurry and continue to cook, stirring constantly, until the sauce thickens to your desired coating consistency. It should be thick enough to coat the back of a spoon.
Return the cooked vegetables to the skillet with the thickened sauce and toss well to coat them evenly. This ensures every piece is infused with flavor.
- The Crucial Final Toss: Locking in Crispness
Add the cooked noodles to the skillet with the sauce and vegetables. Toss everything together to combine, ensuring the noodles are well coated.
Now for the crucial step to keep that crunch: just before serving, add the freshly fried, crispy chicken to the skillet. Toss very gently and quickly to coat the chicken in the sauce, minimizing its time submerged.
- Garnish and Serve Immediately
Serve your Sweet & Sticky Crispy Chicken Noodles immediately, garnished generously with thinly sliced scallions, sesame seeds, and the optional sliced red chili for a vibrant finish and a touch of heat.
Enjoy that lasting crunch and incredible flavor! Prompt serving is key for the best experience.
Mastering the Art: Expert Tips for Unforgettable Sweet & Sticky Crispy Chicken Noodles
Maximizing Chicken Crispness: Before and During Frying
Achieving truly sauce-proof crispiness starts long before frying. Always pat your chicken exceptionally dry to eliminate surface moisture, which is the enemy of a crisp crust.
Maintain your oil temperature between 350-375°F (175-190°C) with a thermometer, and fry in small batches to prevent temperature drops. After frying, immediately transfer the chicken to a wire rack, never stack or cover it, to allow steam to escape and maintain its crunch.
Perfecting Your Sweet & Sticky Sauce: Consistency is Key
For the ideal sauce, ensure your cornstarch slurry is smooth and lump-free before whisking it into the simmering sauce. Cook and stir until the sauce clings lightly to a spoon, achieving that perfect sweet and sticky coating.
Taste the sauce and adjust to your preference: a dash more rice vinegar can add brightness, or a pinch of brown sugar can balance any excessive saltiness. For extra depth, a tiny splash of rice vinegar with a pinch of sugar can be transformative.
Ingredient Swaps and Flavor Twists
Feel free to customize your Sweet & Sticky Crispy Chicken Noodles with your favorite additions. Shrimp or firm tofu can be substituted for chicken, adjusting cooking times accordingly.
Beyond broccoli and snow peas, consider adding thinly sliced carrots, bell peppers, or baby corn for more color and texture. A sprinkle of crushed peanuts or cashews adds a delightful nutty crunch.
Avoiding Common Pitfalls for Perfect Results
Don’t overcrowd your skillet when stir-frying vegetables; this steams them instead of searing. Cook them until tender-crisp to retain their vibrant color and texture, removing them before they become mushy.
The most crucial tip for this recipe: only combine the crispy chicken with the sauce and noodles at the very last moment, right before serving. This brief contact time is what preserves the chicken’s incredible crunch.
Solving Common Culinary Conundrums: Sweet & Sticky Crispy Chicken Noodles Fixes
My Chicken Lost Its Crunch – What Happened?
The most common culprit for soggy chicken is steam. This can happen if the chicken wasn’t patted dry enough initially, or if it was covered or stacked after frying, trapping moisture.
Ensure you always use a wire rack for draining and cooling. Additionally, adding the chicken to the sauce too early or letting it sit in the sauce for too long before serving will inevitably soften the crisp exterior.
Sauce Drama: Too Runny or Too Thick?
If your sauce is too runny, simply whisk a little more cornstarch with cold water to create a fresh slurry, then slowly whisk it into the simmering sauce until it reaches your desired thickness. Cook for another minute to remove any starchy taste.
If the sauce becomes too thick, thin it out gradually with a tablespoon or two of hot water or vegetable broth, stirring until the consistency is just right.
Sticky Noodles No More: Prevention Tips
To prevent your noodles from clumping together, always rinse them briefly under cold water immediately after draining. This washes away excess starch that causes sticking.
Tossing them with a small amount of neutral oil right after rinsing also creates a barrier, keeping them separate and easy to incorporate into your Sweet & Sticky Crispy Chicken Noodles.
Enjoying & Extending the Life of Your Sweet & Sticky Crispy Chicken Noodles
Presentation Pointers: Serving Your Masterpiece
Serve your Sweet & Sticky Crispy Chicken Noodles family-style in a large, attractive serving bowl, allowing everyone to help themselves. Alternatively, plate individual servings for a more elegant presentation.
Always finish with a generous sprinkle of your fresh garnishes – the bright green scallions and white sesame seeds provide a beautiful contrast against the rich sauce and golden chicken.
Smart Storage & Reheating for Crispy Leftovers
Store any leftover Sweet & Sticky Crispy Chicken Noodles in an airtight container in the refrigerator for up to 3 days. To best preserve the chicken’s crispiness, if possible, store the chicken separately from the noodles and sauce.
When reheating, warm the noodles and sauce gently in a microwave or on the stovetop. Reheat the chicken separately in an air fryer at 375°F (190°C) for 5-7 minutes or in a preheated oven at 400°F (200°C) for 8-10 minutes until warmed through and crisp. Combine just before serving for the best texture.
Your Burning Questions About Sweet & Sticky Crispy Chicken Noodles, Answered
Can I make this recipe gluten-free or vegetarian?
Absolutely! For a gluten-free version, simply swap the regular soy sauce for tamari and ensure your noodles are gluten-free (e.g., rice noodles). The rest of the ingredients are typically naturally gluten-free.
To make it vegetarian, substitute the chicken with extra-firm tofu or tempeh, pressed and cubed, then coated and fried as directed. You can also use additional vegetables or plant-based protein alternatives like edamame.
What are the best noodles to use?
Lo mein or egg noodles are excellent choices because they have a great texture and soak up the sauce beautifully. However, you can also use ramen noodles (without the seasoning packet), spaghetti, or even linguine if those are what you have on hand.
For a lighter option, consider wider rice noodles, ensuring they are cooked al dente to prevent them from breaking apart when tossed with the sauce.
Is it possible to bake or air fry the chicken instead?
While deep frying offers the ultimate crispiness for these Sweet & Sticky Crispy Chicken Noodles, you can air fry or bake for a healthier alternative. For air frying, toss coated chicken with 1-2 tablespoons of oil and cook at 400°F (200°C) for 15-20 minutes, flipping halfway, until golden and cooked through.
For baking, arrange coated chicken on a parchment-lined baking sheet, mist with cooking spray, and bake at 400°F (200°C) for 20-25 minutes, flipping halfway. While these methods yield good results, the crispness won’t be as profound or sauce-resistant as deep-fried chicken.
How can I adjust the spice level?
The recipe as written is quite mild. To increase the spice, you can add 1/2 to 1 teaspoon of sriracha or chili garlic sauce to the sauce mixture, or include more of the thinly sliced red chili as a garnish.
For a subtler heat, a pinch of red pepper flakes added to the sauce or a dash of ground white pepper in the chicken coating works wonderfully. Adjust to your personal preference!
Your Kitchen Awaits: Dive into the World of Crispy Chicken Noodles!
You now possess the secrets to creating truly exceptional Sweet & Sticky Crispy Chicken Noodles that boast a lasting crunch and incredible flavor. This isn’t just a meal; it’s a culinary triumph that will elevate your weeknight dinners and impress anyone lucky enough to share it.
Embrace the techniques, trust the process, and get ready to enjoy the ultimate homemade takeout experience. We encourage you to try this recipe, share your delicious creations, and let us know how much you loved that perfect, sauce-proof crispiness!
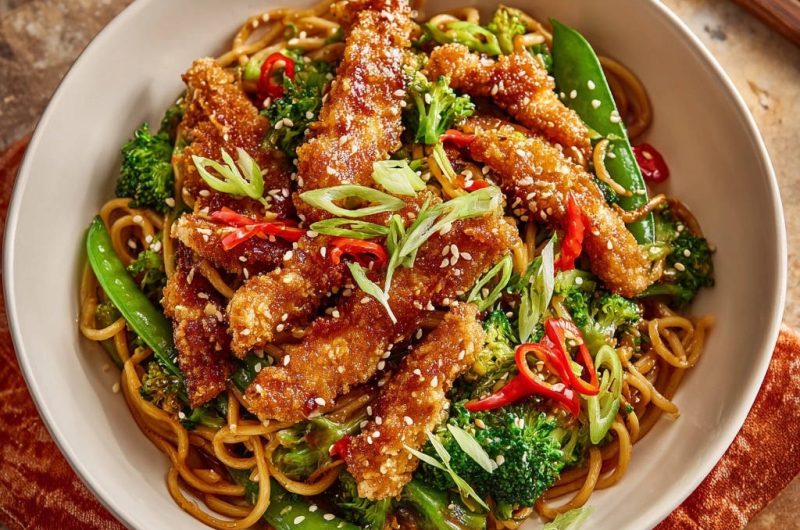
Crispy Chicken Noodles
Course: Main CourseCuisine: AsianDifficulty: medium4
servings25
minutes35
minutes750
kcal60
minutesTired of soggy chicken in your takeout-style dishes? This recipe cracks the code to perfectly crispy chicken bathed in a sweet and savory sauce, served over noodles and fresh veggies. Enjoy a delicious homemade meal that keeps its satisfying crunch!
Ingredients
For the Crispy Chicken:
1.5 pounds boneless, skinless chicken breast, cut into 1-inch strips
1/2 cup all-purpose flour
1/2 cup cornstarch, divided
1 large egg, beaten
1 teaspoon salt
1/2 teaspoon black pepper
3 cups neutral oil (like vegetable or canola) for frying
For the Sauce:
1/2 cup low sodium soy sauce
1/4 cup brown sugar, packed
2 tablespoons rice vinegar
1 tablespoon fresh grated ginger
2 cloves garlic, minced
1 teaspoon sesame oil
1/4 cup water or vegetable broth
1 tablespoon cornstarch
For the Noodles & Veggies:
8 ounces lo mein or egg noodles
3 cups broccoli florets
1 cup snow peas
1 tablespoon neutral oil
For Garnish:
2 scallions, thinly sliced
1 tablespoon sesame seeds
1 red chili, thinly sliced (optional)
Directions
- Prepare Chicken: Pat your chicken strips very dry with paper towels. In a shallow dish, whisk together the flour, 1/4 cup of the cornstarch, salt, and black pepper. In another shallow dish, beat the egg.
- Dredge Chicken: Dip each chicken strip into the beaten egg, letting any excess drip off. Then, dredge the chicken thoroughly in the flour and cornstarch mixture, pressing gently to ensure an even and complete coating. Place the coated chicken strips on a clean wire rack. This initial coating and air exposure are key for crispness.
- Fry Chicken (The Crispy Secret!): Heat about 3 inches of neutral oil in a large heavy-bottomed pot or Dutch oven over medium-high heat until it reaches 350-375F. Carefully add chicken strips in batches, making sure not to overcrowd the pot. Overcrowding drops the oil temperature and prevents crisping. Fry for 4 to 6 minutes, turning occasionally, until the chicken is golden brown and cooked through. Remove the chicken with a slotted spoon and place it back on the wire rack set over a paper towel-lined baking sheet. This allows air to circulate around the chicken and drains excess oil, helping it stay incredibly crisp. Do not stack or cover the fried chicken.
- Cook Noodles & Veggies: Cook your lo mein or egg noodles according to the package directions. Drain them and rinse briefly under cold water to prevent sticking, then toss with a tiny bit of neutral oil. In a large skillet or wok, heat 1 tablespoon of neutral oil over medium-high heat. Add the broccoli florets and stir-fry for 3 to 4 minutes until they’re vibrant green and slightly tender-crisp. Add the snow peas and stir-fry for another 1 to 2 minutes. Remove the cooked vegetables from the skillet and set aside.
- Make Sauce: In a small bowl, whisk together the soy sauce, brown sugar, rice vinegar, fresh ginger, minced garlic, sesame oil, and water or vegetable broth. In a separate tiny bowl, whisk the remaining 1 tablespoon of cornstarch with 2 tablespoons of cold water to create a smooth slurry.
- Combine Sauce & Veggies: Pour the whisked sauce mixture into the same skillet you used for the veggies. Bring the sauce to a gentle simmer over medium heat. Whisk in the cornstarch slurry and continue to cook, stirring constantly, until the sauce thickens to your desired coating consistency. Return the cooked vegetables to the skillet with the thickened sauce and toss well to coat.
- Final Assembly & Serve: Add the cooked noodles to the skillet with the sauce and vegetables. Toss everything together to combine. Now for the crucial step to keep that crunch: just before serving, add the freshly fried, crispy chicken to the skillet. Toss very gently and quickly to coat the chicken in the sauce, minimizing its time submerged. Serve immediately, garnished generously with sliced scallions, sesame seeds, and the optional sliced red chili for a little kick. Enjoy that lasting crunch!
Notes
- The key to crispy chicken is proper dredging, frying in batches, and adding to the sauce just before serving.