Mastering Skillet Chicken Pot Pie with Puff Pastry
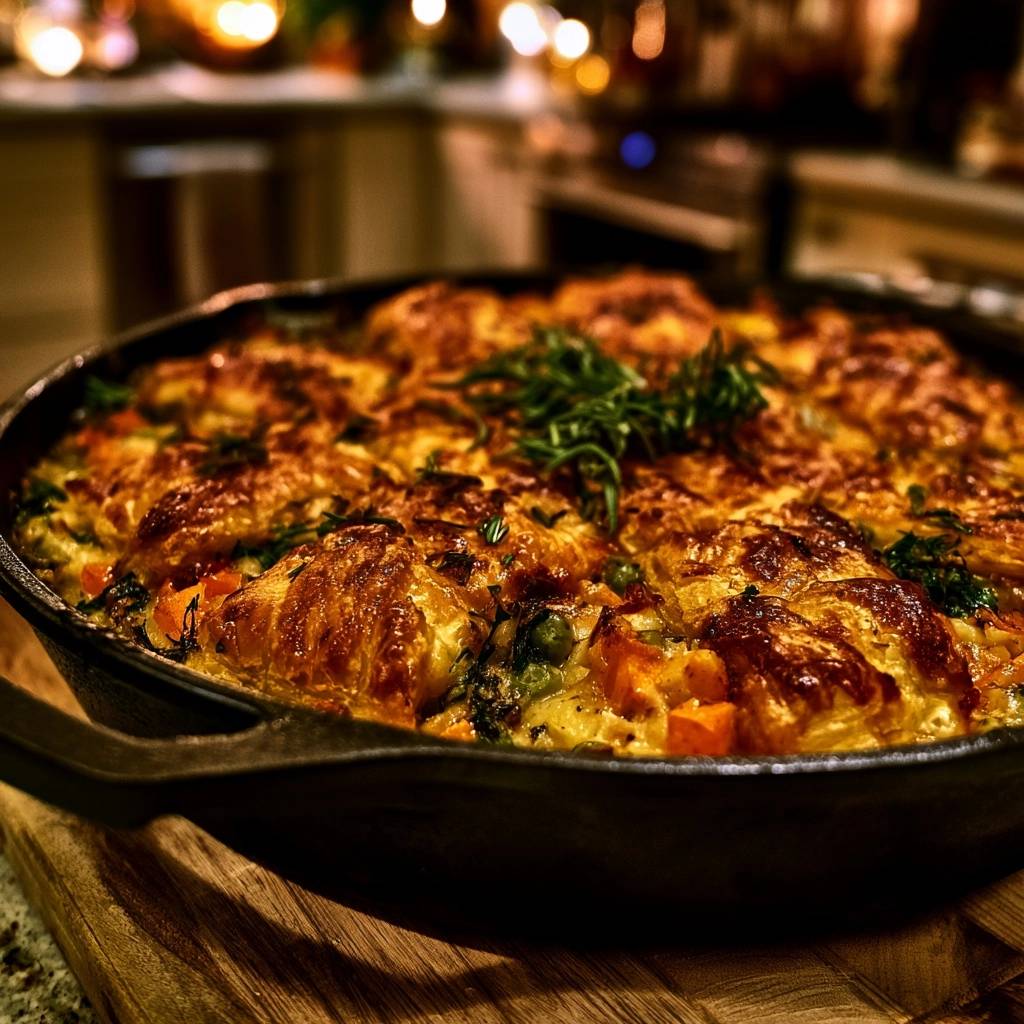
Imagine pulling a bubbling skillet from the oven, the surface covered in golden, shattered layers of pastry that crackle the moment your spoon touches them. Most home cooks struggle with the dreaded “soggy bottom,” where the underside of the crust turns into a gummy, unappetizing paste. This happens because trapped steam from the filling has nowhere to go, effectively boiling the dough instead of baking it.
The secret to a perfect pot pie lies in the skillet-to-oven method and a clever “tiling” technique. By ditching the traditional bottom crust and using a cast iron pan, you control the heat distribution from the start. This approach ensures the filling stays thick and velvety while the puff pastry achieves its maximum height and crunch.
I’ve found that the real trick is all about temperature management. If you slap cold dough onto a boiling hot filling, you create instant condensation that ruins the pastry’s structure. By letting the filling rest for just a few minutes before topping it, you create a stable base that allows the pastry to soar in the high heat of the oven.
The Science of Shatteringly Crisp Puff Pastry
Puff pastry is a marvel of culinary engineering, relying on hundreds of thin layers of fat sandwiched between layers of dough, a process called lamination. When that cold fat hits a hot oven, the water in the butter evaporates instantly. This creates steam that forces the dough layers apart, resulting in that iconic “lift” and flaky texture.
To achieve this, a 425°F oven is absolutely non-negotiable. If the temperature is too low, the fat will simply melt out of the dough before the steam can do its job, leaving you with a greasy, flat mess. High heat ensures the pastry sets its structure quickly, locking in those airy gaps before the moisture from the chicken filling can migrate upward.
The “Leidenfrost effect” also plays a minor role here; by allowing the filling to cool for ten minutes, you reduce the immediate steam pressure against the raw dough. This cooling period is a scientific necessity. It prevents the bottom of the pastry squares from becoming saturated with liquid, ensuring that every bite—from the top to the very bottom of the crust—remains crisp and dry.
Essential Components for a Velvety Filling
For a quick skillet meal, chicken breast is the superior choice because it browns rapidly without becoming tough. When you sear the cubed meat in butter, you’re developing a deep flavor base that carries through the entire dish. Just make sure the chicken is dry before it hits the pan so it browns rather than steams.
The heart of the sauce is the roux, a simple 1:1 mixture of butter and all-purpose flour. You must cook this mixture until it smells slightly nutty and loses its raw white color. This step stabilizes the sauce, ensuring it stays thick and glossy even after twenty minutes in a hot oven. If you skip this, your filling might end up tasting like raw flour.
Aromatics like dried thyme and fresh rosemary provide that classic “Sunday roast” profile that defines a good pot pie. While thyme melds into the sauce, the rosemary sprinkled on top adds a piney, woodsy fragrance that cuts through the richness. Using heavy cream instead of milk is another pro move; the higher fat content prevents the sauce from breaking or curdling under the intense 425°F heat.
Selecting the Right Skillet for Even Heat
While you can use a stainless steel pan, a 10 or 12-inch cast iron skillet is the gold standard for this recipe. Cast iron has incredible heat retention, meaning it stays hot even when you add cold ingredients like chicken broth or frozen peas. This consistent heat helps the bottom of the filling stay at a simmer while the oven works on the pastry.
Stainless steel is a decent runner-up, but it doesn’t hold heat quite as well, which might lead to a slightly thinner sauce. Avoid non-stick pans for this specific dish. Most non-stick coatings aren’t rated for 425°F, and they won’t give you the beautiful brown bits (fond) at the bottom of the pan that add so much flavor to the gravy.
Step-by-Step: Searing Chicken and Building the Base
Start by getting your skillet nice and hot before adding the butter and chicken. Don’t overcrowd the pan; if you dump all the meat in at once, the temperature drops and the chicken releases juices, causing it to boil. You want a golden-brown sear on the outside to trigger the Maillard reaction, which creates those savory, complex flavors.
Once the chicken is set aside, the vegetables go in to pick up all those browned bits left in the pan. Sauté the onions and carrots until the onions are translucent and soft. When you stir in the flour, it will coat the vegetables and look a bit pasty at first. Keep stirring for two minutes; this is where the magic happens as the flour toasts and prepares to thicken your broth.
The Tiling Technique: Preventing Pastry Saturation
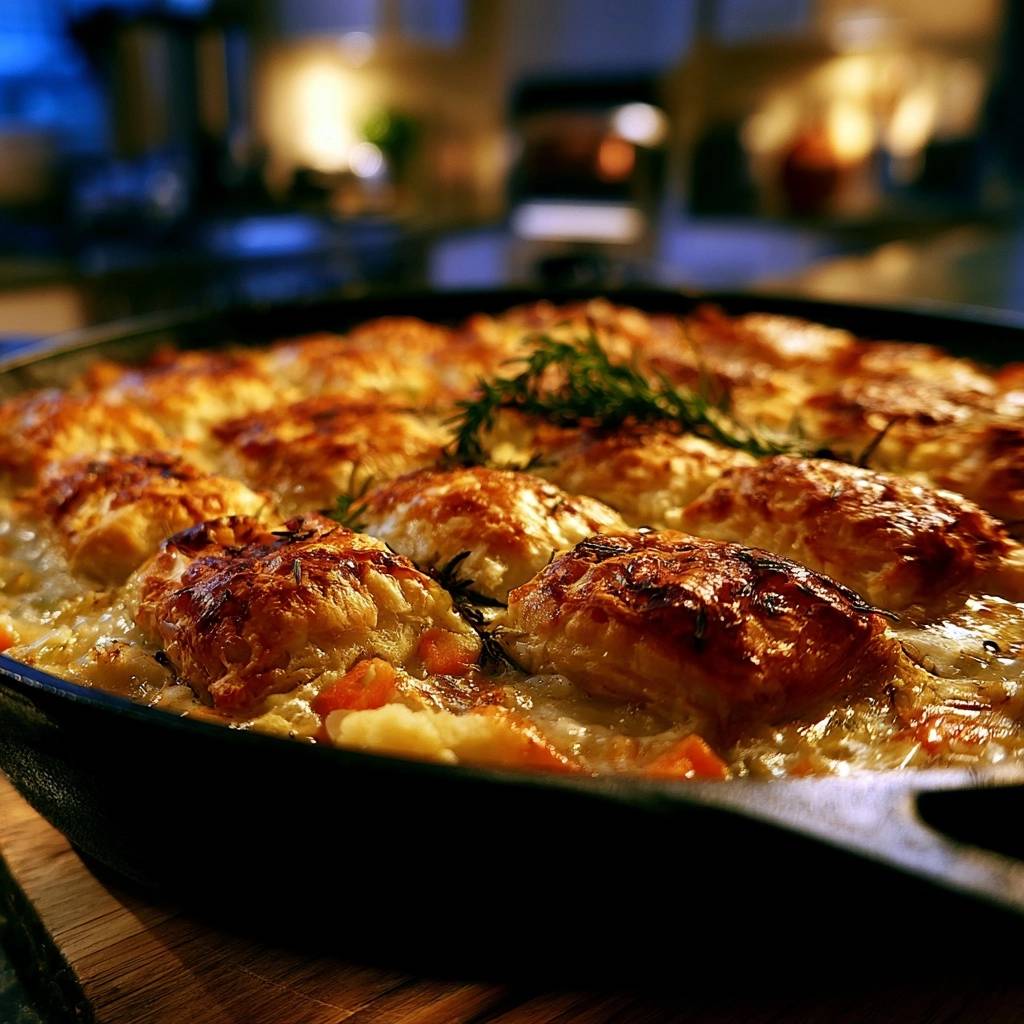
Instead of draping a solid sheet of puff pastry over the skillet, I recommend cutting the dough into 2-inch squares. This “shingling” or “tiling” method is a total game-changer for texture. When you lay the squares over the filling in an overlapping pattern, you create dozens of tiny “chimneys” where steam can escape freely.
In a solid-sheet pie, the steam gets trapped under the dough, creating a soggy, wet layer that never cooks through. By tiling the pastry, you allow the moisture to vent out while the edges of each square get extra crispy. It also makes serving much easier, as you can scoop out individual “tiles” of pastry with each portion of chicken and gravy.
Make sure to leave very small gaps between some of the tiles. You aren’t looking for a perfect seal; you’re looking for a breathable lid. This ensures the underside of the pastry stays as light and airy as the top, avoiding that gummy texture that ruins so many traditional pot pies.
Oven Management and the Egg Wash Finish
Before the skillet goes into the oven, brush the pastry generously with an egg wash made of one egg and a splash of water. The protein in the egg creates a deep, lacquered mahogany color, while the water creates a final burst of steam to help the layers separate. This is what gives the pie that professional, bakery-style look.
Position your oven rack in the middle-to-upper third of the oven. This placement is crucial because it keeps the pastry away from the direct heat of the bottom element while allowing the hot air circulating at the top to crisp the dough. You want the filling to bubble at the same time the pastry reaches its peak height and golden color.
Troubleshooting Common Pot Pie Pitfalls
If you find your sauce is too thin after simmering, don’t panic. Simply let it simmer for an extra three or four minutes before adding the pastry. The sauce will also thicken significantly as it rests after baking. If it’s still watery, a small cornstarch slurry (one teaspoon cornstarch mixed with a tablespoon of cold water) stirred into the boiling filling will fix it instantly.
Sometimes the pastry might look dark brown on the outside but feel soft or raw in the center. If this happens, loosely “tent” the skillet with a piece of aluminum foil. This protects the surface from burning while allowing the heat to penetrate the center of the dough tiles. Also, ensure your skillet isn’t overfilled; leave about half an inch of headspace to prevent the gravy from boiling over and soaking the pastry.
Flavor Variations and Vegetable Swaps
This recipe is incredibly flexible. If you aren’t a fan of peas, try adding sliced mushrooms or leeks for a more earthy, sophisticated flavor. Leeks should be sautéed with the onions until very soft. If you decide to use high-water vegetables like zucchini or spinach, sauté them separately first to cook out the moisture, or your filling will become runny.
For a different herb profile, swap the thyme for sage or even a little bit of tarragon. Tarragon has a slight licorice note that pairs beautifully with chicken and cream. You can also add a squeeze of fresh lemon juice at the very end of the stovetop process to brighten the heavy flavors of the cream and butter.
Make-Ahead Strategies and Storage Tips
You can easily prepare the chicken and vegetable filling up to two days in advance. Store it in an airtight container in the fridge, but do not put the pastry on top yet. When you’re ready to eat, reheat the filling in the skillet on the stove until it’s simmering, then proceed with the tiling and baking steps as usual.
Leftovers should be stored in the refrigerator for up to three days. Whatever you do, avoid the microwave for reheating! A microwave will turn that beautiful puff pastry into a limp, chewy mess. Instead, use an air fryer at 350°F for 5 minutes or a toaster oven. This dry heat revives the fat in the pastry, making it shatteringly crisp all over again.
Expert Tips for Professional Results
The most important tip is to keep your puff pastry in the refrigerator until the very second you are ready to place it on the skillet. If the dough gets too warm, the butter layers will merge, and you’ll lose that spectacular lift. Cold dough hitting a hot oven is the secret to those high, flaky layers.
Use a digital thermometer to check the center of the filling if you’re unsure; it should hit at least 165°F to ensure the chicken is perfectly cooked and the sauce is set. Finally, give the pie a full five minutes to rest on the counter after it comes out of the oven. This allows the starch molecules in the sauce to firm up, so you get a thick gravy rather than a soup.
Frequently Asked Questions
Can I use frozen vegetables instead of fresh?
Yes, frozen vegetables work perfectly in this recipe. In fact, frozen peas are often better than fresh because they hold their shape and bright green color. You don’t even need to thaw them; just stir them into the hot filling right before you add the pastry tiles.
What if I don’t own a cast-iron skillet?
You can use any large, oven-safe sauté pan or even a deep 9×13 baking dish. If using a baking dish, prepare the filling in a regular pot first, then pour it into the dish. Just remember to let the filling cool slightly before adding the pastry to prevent sogginess.
Why did my puff pastry not rise?
The most common reason is that the oven wasn’t hot enough or the pastry became too warm before baking. Always preheat your oven for at least 20 minutes. If the pastry feels soft or sticky while you’re cutting it, pop it back in the freezer for 5 minutes to firm up the butter.
Can I substitute the heavy cream for a dairy-free alternative?
You can use full-fat coconut milk or a heavy cream alternative, but the flavor will change slightly. Avoid thin milks like almond or rice milk, as they don’t have enough fat to stabilize the sauce, which may cause the filling to become watery or break during the bake.
How do I prevent the rosemary from burning in the high heat?
To protect the fresh herbs, toss them in a tiny bit of olive oil or the egg wash before sprinkling them over the pastry. This light coating of oil acts as a heat shield, allowing the rosemary to crisp up and release its oils without turning into bitter, black charcoal.
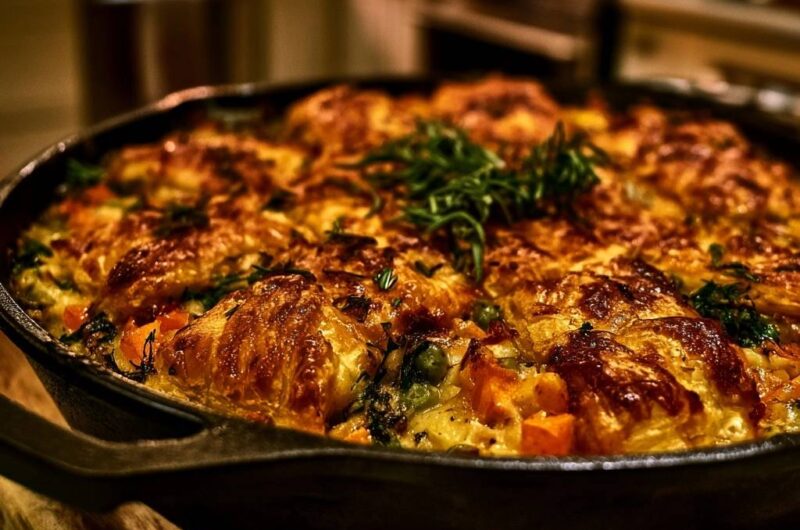
Skillet Chicken Pot Pie with Puff Pastry
Course: Main CourseCuisine: AmericanDifficulty: easy6
servings15
minutes35
minutes50
Minutes485
kcalAmerican
Ingredients
1 pound boneless skinless chicken breasts, cubed
3 tablespoons unsalted butter
1 cup diced carrots
1 cup frozen peas
1 small yellow onion, diced
2 cloves garlic, minced
1/4 cup all-purpose flour
2 cups chicken broth
1/2 cup heavy cream
1 teaspoon dried thyme
1 teaspoon salt
1/2 teaspoon black pepper
1 sheet frozen puff pastry, thawed but cold
1 egg, beaten with 1 tablespoon water (egg wash)
2 sprigs fresh rosemary, roughly chopped
1 tablespoon fresh parsley, chopped
Directions
- Preheat your oven to 425 degrees F. High heat is essential for puff pastry to “lift” before the moisture from the filling can soak into the dough.
- In a large (10 or 12-inch) oven-safe cast iron skillet, melt the butter over medium-high heat. Add the cubed chicken and cook until browned on all sides. Remove the chicken with a slotted spoon and set aside.
- In the same skillet with the remaining fat, add the carrots and onions. Sauté for 5-6 minutes until the onions are translucent. Stir in the garlic and cook for 1 minute until fragrant.
- Sprinkle the flour over the vegetables. Stir constantly for 2 minutes to cook the flour; it should smell slightly nutty. This creates a stable roux that prevents the filling from being too watery.
- Slowly whisk in the chicken broth and heavy cream. Bring to a gentle simmer, stirring frequently until the sauce thickens enough to coat the back of a spoon. Stir in the cooked chicken, frozen peas, thyme, salt, and pepper. The chicken is done when it reaches 165°F (74°C) in the thickest part.
- Remove the skillet from the heat. Let the filling rest for 5-10 minutes. This cooling period is vital; placing cold pastry onto a boiling liquid creates immediate condensation and a soggy crust.
- While the filling rests, cut the puff pastry sheet into 2-inch squares.
- Arrange the pastry squares on top of the filling in a “shingled” or tiled pattern, leaving very small gaps between some pieces to allow steam to escape. Brush the pastry generously with the egg wash and sprinkle with the chopped fresh rosemary.
- Place the skillet in the oven and bake for 20 to 25 minutes. The pastry should be deep golden brown, highly puffed, and visibly dry/crisp.
- Remove from the oven and let it rest for 5 minutes to allow the sauce to set. Garnish with fresh parsley and serve directly from the skillet.
Notes
- The cooling period for the filling and the high oven temperature are vital to prevent a soggy crust. Leaving small gaps between pastry squares allows steam to escape during baking.