Blue Blossom Gelatin: Flawless Floral Delights
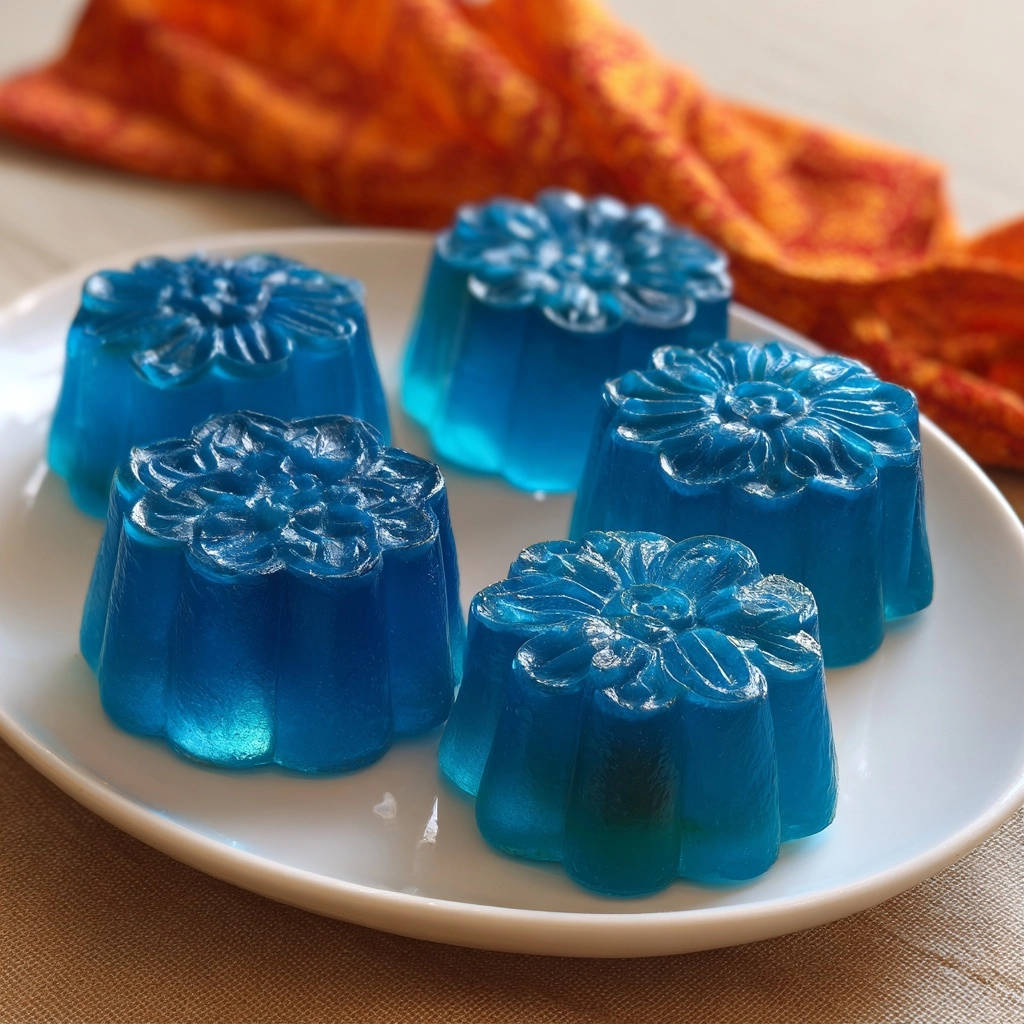
There’s nothing more disheartening than crafting beautiful gelatin desserts, only for them to stick or break when you try to unmold them from intricate designs. I’ve experienced that frustration countless times myself, especially with delicate shapes like these stunning blossoms. But through extensive trial and error, I discovered a remarkably simple trick that guarantees your jiggle treats will slide out perfectly every single time, making this Blue Blossom Gelatin recipe your new go-to for effortless elegance.
Say Goodbye to Sticky Gelatin: The Blue Blossom Secret
This Blue Blossom Gelatin recipe isn’t just another dessert; it’s a solution to a common culinary frustration. We’re focusing on achieving perfect, intact shapes that truly impress, without the usual struggle.
It stands out because it directly addresses the challenge of unmolding delicate gelatin, ensuring a beautiful presentation every time you serve these elegant treats.
Why This Recipe Wins for Intricate Molds
Intricate molds, while visually appealing, often pose the biggest challenge for unmolding gelatin. This recipe is specifically engineered to overcome those hurdles, ensuring every petal and detail of your floral gelatin emerges pristine.
The precise balance of ingredients combined with a genius unmolding technique means your beautiful shapes remain intact, ready for display.
Effortless Elegance: Perfect Results Every Time
Imagine professional-looking gelatin blooms that practically unmold themselves. That’s the promise of this recipe.
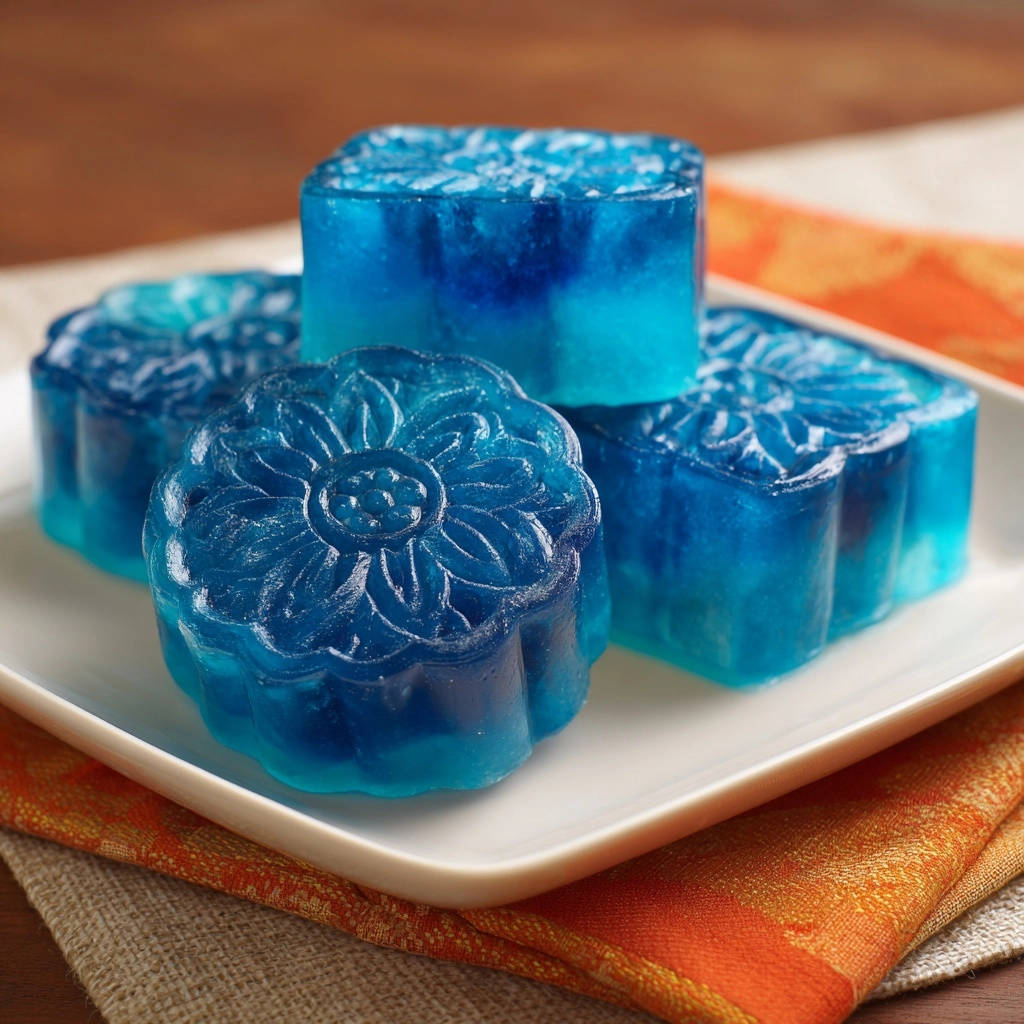
The unique unmolding trick eliminates guesswork, making it incredibly easy for even novice home cooks to achieve stunning, perfectly shaped gelatin desserts with absolute confidence.
Gather Your Bloom: Essential Ingredients
Creating these beautiful blue blossom gelatin treats requires just a few simple ingredients. Each plays a vital role in achieving the perfect texture, color, and easy release of your finished dessert.
The Heart of the Jiggle: Unflavored Gelatin
Unflavored gelatin powder is the essential setting agent, providing the structure for your floral gelatin. Using unflavored ensures you control the sweetness and flavor profile entirely.
A standard 0.25 oz packet (about 7g) is precisely what’s needed for this recipe’s perfect consistency.
Liquid Foundations: Water, Hot & Cold
Both cold and boiling water are critical for successful gelatin preparation. Cold water is used first to “bloom” the gelatin, allowing it to hydrate evenly and prevent lumps when dissolved.
Boiling water then provides the necessary heat to fully dissolve the bloomed gelatin, creating a smooth, clear liquid base for your Blue Blossom Gelatin.
Sweetness and Sparkle: Sugar & Color
Granulated sugar is entirely optional but highly recommended for a balanced, palatable sweetness. Adjust the quantity to suit your preference, remembering gelatin can taste bland without some sweetness.
A few drops of blue food coloring transform your gelatin into vibrant, eye-catching floral delights. Start with a small amount and add more to achieve your desired intensity, ensuring even distribution.
Your Canvas: Silicone Flower Molds
Silicone molds are paramount for this recipe, especially when creating intricate floral shapes. Their flexible, non-stick nature is key to the effortless unmolding technique we’ll employ.
Unlike rigid molds, silicone allows for gentle manipulation, ensuring your delicate Blue Blossom Gelatin shapes release without tearing or damage.
Crafting Your Blue Blossom Masterpiece: Step-by-Step
Follow these detailed steps carefully to create stunning, perfectly formed Blue Blossom Gelatin that everyone will adore.
- The Bloom Begins: Hydrating Your Gelatin
In a medium bowl, sprinkle the unflavored gelatin powder evenly over the 1/2 cup cold water. Allow it to sit undisturbed for 5 minutes to “bloom” or soften. This crucial step ensures a smooth, lump-free mixture later on, as it allows the granules to fully absorb the liquid.
- Dissolving Magic: Creating the Liquid Base
Bring 1 cup of water to a rolling boil. Carefully pour the boiling water over the bloomed gelatin mixture and stir continuously for about 2 minutes, or until the gelatin is completely dissolved and the mixture is clear. If incorporating sugar, stir it in now until it fully dissolves as well, ensuring no grittiness.
- Coloring Your Creation: Achieving the Perfect Hue
Add a few drops of blue food coloring to the liquid gelatin mixture. Stir well until you achieve your desired shade of vibrant blue. For a deeper, more dramatic blue blossom, add a few more drops incrementally, stirring after each addition.
- Filling the Petals: Pouring into Molds
Carefully pour the liquid Blue Blossom Gelatin mixture into your small silicone flower molds. Fill them almost to the top, leaving a small space to prevent overflow when moving the molds into the refrigerator.
- The Chill Factor: Setting for Success
Place the filled molds in the refrigerator for at least 4 hours, or until the gelatin is completely firm and set. For the most reliable and perfectly stable results, chilling overnight is highly recommended, ensuring the gelatin is fully solidified for easy unmolding.
- Unmolding Perfection: The Warm Water Trick Revealed
Once the gelatin is fully chilled and firm, fill a shallow bowl or sink with warm (not hot) water. Briefly dip the bottom of each silicone mold into the warm water for about 10 to 15 seconds. It’s critical to ensure no water gets into the gelatin itself during this step, as it could compromise the shape.
- Presentation & Enjoyment: Serving Your Gelatin Blooms
Remove the mold from the warm water, invert it onto your serving plate, and gently press on the bottom of the mold. The gelatin should release easily and slide out with its beautiful flower shape intact. If it feels stuck, dip it for another 5 seconds and try again, being careful not to over-warm it, which could cause melting.
Unlock Gelatin Genius: Expert Tips & Tricks
Mastering Blue Blossom Gelatin is easy with these insider tips. They’ll help you achieve perfect results every time, from blooming to serving.
Precision Bloom: Why Cold Water Matters. Always start with cold water for blooming. This allows the gelatin granules to fully hydrate evenly before being introduced to hot water, preventing any unsightly clumps and ensuring a wonderfully smooth texture in your finished gelatin.
The Art of Dissolution: No Lumps Allowed. Stir continuously when adding boiling water until the gelatin is completely dissolved. Any undissolved bits will result in a grainy or uneven texture in your Blue Blossom Gelatin. A whisk can be very effective here to break up any potential lumps quickly.
Color Confidence: Achieving Vibrant Shades. Start with a few drops of food coloring and add more incrementally until you reach your desired intensity. Remember, the color will appear slightly lighter when liquid and will deepen slightly once the gelatin is fully set and chilled.
Chill for Glory: Patience is Key. Resist the urge to rush the chilling process. A fully set gelatin is much less prone to breaking or tearing during unmolding. Overnight chilling truly yields the best results for perfectly firm and stable gelatin blooms.
Mastering the Warm Water Dip: Your Unmolding MVP. The key to flawless unmolding is a brief, controlled dip. Too long, and your gelatin may start to melt; too short, and it won’t release easily. Practice with one mold first to get the timing just right for your specific molds and water temperature.
Troubleshooting Your Blue Blossom Gelatin
Even seasoned cooks encounter issues. Here are common problems with Blue Blossom Gelatin and how to easily fix them.
Why Won’t My Gelatin Set?
The most common culprits are insufficient gelatin blooming, not enough chilling time, or adding certain acidic fruits directly to the mixture. Ensure your gelatin is fully dissolved and chill for the recommended minimum of 4 hours, or ideally overnight.
Over-boiling the gelatin mixture can also degrade its setting power; ensure it only comes to a boil to dissolve and then is immediately removed from heat.
My Gelatin is Sticky or Broken Upon Unmolding
This usually means the gelatin wasn’t fully set, or the warm water dip wasn’t quite right. Ensure ample chilling time.
For unmolding, the warm water dip should be quick and targeted, allowing just the very outer layer to loosen without melting the entire shape. If still stuck, try another brief 5-second dip.
The Color Isn’t Evenly Distributed
Uneven color typically happens if the food coloring wasn’t thoroughly mixed in. After adding the drops, stir vigorously for at least a minute to ensure the color disperses uniformly throughout the liquid gelatin mixture.
Adding coloring to warm, not hot, gelatin can sometimes help prevent streaks, as intense heat might affect some dyes.
Your Blue Blossom Gelatin Questions Answered
Curious about variations, storage, or alternatives? Here are answers to common questions about making and enjoying your Blue Blossom Gelatin.
Can I Use Different Flavors or Colors?
Absolutely! This recipe is a fantastic base for endless creativity. You can use different food colorings to make purple, green, or rainbow gelatin, or swap the plain water for fruit juices (like clear apple or white grape) for different flavors, as long as they are not overly acidic.
If you’re looking for other delightful no-bake desserts to experiment with, consider trying decadent pumpkin pie truffles for a different texture and flavor profile.
How Long Does Blue Blossom Gelatin Last?
Properly stored Blue Blossom Gelatin can last in the refrigerator for up to 5-7 days. Keep it covered tightly to prevent it from drying out or absorbing refrigerator odors.
For best taste and texture, consume within 3-4 days of preparation.
Are There Alternatives to Silicone Molds?
While silicone molds are highly recommended for their flexibility and ease of unmolding, you can use small metal or plastic molds. However, the warm water dip method might need to be slightly adjusted, or you might need to run a thin, wet knife around the edges to help release the gelatin.
For non-silicone molds, a very light spray of neutral cooking oil before pouring the gelatin can also aid in release, though it’s often not necessary with the warm water trick.
Can I Make This Recipe Ahead of Time?
Yes, Blue Blossom Gelatin is an excellent make-ahead dessert. Its stability improves with longer chilling, so preparing it a day or even two in advance is perfectly fine and often recommended for busy schedules or parties.
Just ensure it’s kept well-covered in the refrigerator until ready to serve.
Beyond the Bloom: Serving & Storing Your Creations
Once your Blue Blossom Gelatin is ready, elevate the experience with thoughtful presentation and proper storage.
Creative Serving Suggestions
These floral gelatin treats are beautiful on their own, but a dollop of whipped cream, a few fresh berries, or a sprinkle of edible glitter can make them truly spectacular. They are perfect for kids’ parties, springtime gatherings, or as a light, refreshing dessert after any meal.
Consider arranging them on a platter with contrasting colors, perhaps alongside some golden apple crumble bars for a delightful dessert spread.
Optimal Storage for Freshness
To maintain the vibrant color and delicate texture of your Blue Blossom Gelatin, store individual unmolded pieces or the molds themselves (if not yet unmolded) in an airtight container in the refrigerator.
Prevent exposure to air, which can cause the gelatin to dry out and form a tough skin on the surface.
Making Ahead: Planning for Perfection
Preparing these gorgeous Blue Blossom Gelatin treats a day in advance is ideal. This allows ample chilling time, ensuring they are perfectly firm and robust for the unmolding process.
It also takes the pressure off last-minute dessert preparations, leaving you free to enjoy your event.
Ready to Shine? Share Your Blue Blossom Gelatin Art!
Now that you have the secret to perfectly unmolded Blue Blossom Gelatin, it’s time to unleash your creativity in the kitchen. These stunning, jiggle treats are not only a feast for the eyes but also a delight for the palate.
Give this recipe a try, impress your guests, and transform your dessert table into a vibrant garden of edible blooms. Don’t forget to share your beautiful creations with us!
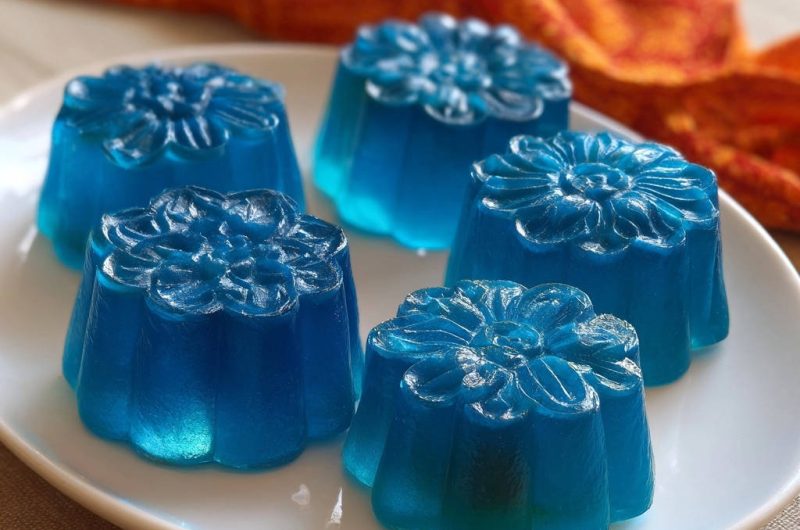
Blue Blossom Gelatin
Course: DessertCuisine: AmericanDifficulty: easy4
(depending on mold size)10
minutes30
kcal240
minutesFrustrated by sticky gelatin desserts? This recipe shares a simple trick to ensure your beautiful Blue Blossom Gelatin shapes slide out perfectly every time. Enjoy perfectly formed, vibrant blue treats that are a breeze to unmold and serve.
Ingredients
1 packet (0.25 oz or 7g) unflavored gelatin powder
1/2 cup cold water (for blooming gelatin)
1 cup boiling water
1/4 cup granulated sugar (optional, adjust to taste)
A few drops blue food coloring
Small silicone flower molds
Directions
- In a medium bowl, sprinkle the gelatin powder evenly over the 1/2 cup cold water. Let it sit for 5 minutes to “bloom” or soften. This is important for a smooth mixture.
- Bring 1 cup of water to a boil. Carefully pour the boiling water over the bloomed gelatin mixture and stir continuously for about 2 minutes, or until the gelatin is completely dissolved. If you are using sugar, stir it in now until it fully dissolves as well.
- Add a few drops of blue food coloring to the mixture, stirring until you achieve your desired shade of blue.
- Carefully pour the liquid gelatin mixture into your silicone molds. Fill them almost to the top, leaving a little space.
- Place the molds in the refrigerator for at least 4 hours, or until the gelatin is completely firm and set. For the best and most reliable results, chilling overnight is recommended.
- This is the simple trick for perfect unmolding: Once the gelatin is fully chilled and firm, fill a shallow bowl or sink with warm (not hot) water. Briefly dip the bottom of each silicone mold into the warm water for about 10 to 15 seconds. Be careful not to let any water get into the gelatin itself.
- Remove the mold from the warm water, invert it onto your serving plate, and gently press on the bottom of the mold. The gelatin should release easily and slide out with its beautiful shape intact. If it feels stuck, dip it for another 5 seconds and try again.
- Serve your beautiful blue blossom gelatin immediately and enjoy your perfectly formed treats!
Notes
- The secret to perfect unmolding is briefly dipping the chilled silicone mold in warm water.