Perfect Apple Crumble Bars: The Secret to Clean Slices
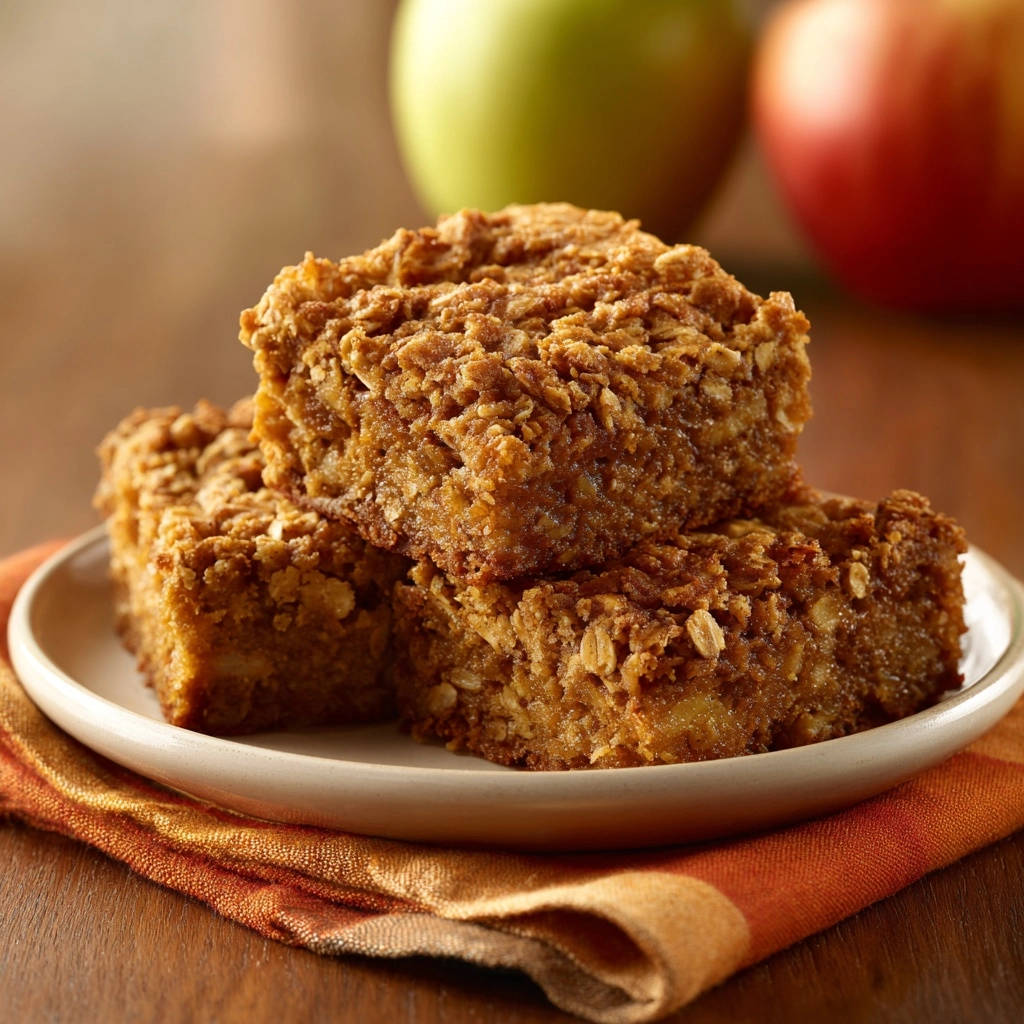
There’s nothing quite like the comforting aroma of apples and cinnamon baking, but I used to dread the moment I had to cut into my beautiful apple crumble bars, only for them to crumble into a messy heap. After years of testing and perfecting, I’ve finally unlocked the ultimate secret to achieving perfectly clean, satisfying slices of these Perfect Apple Crumble Bars every single time.
This recipe isn’t just about incredible flavor; it’s about the pure joy of serving up pristine, bakery-worthy treats without the usual frustration. Get ready for crumble bars that hold their shape and delight with every bite.
Why These Perfect Apple Crumble Bars Will Be Your Go-To
Beyond their irresistible taste, these crumble bars offer distinct advantages that make them a standout recipe in your baking repertoire.
The “No-Fail Slices” Promise: Our Game-Changing Trick
The biggest frustration with many crumble bar recipes is their tendency to fall apart. Our method prioritizes a crucial cooling step that ensures the bars set completely, allowing you to achieve perfectly defined edges without a crumb out of place.
Effortless Elegance: Simple Steps, Stunning Results
Despite their professional appearance, these bars are surprisingly straightforward to prepare. The instructions are designed for clarity, ensuring a smooth baking process even for novice bakers, leading to consistently impressive results.
The Ultimate Crowd-Pleaser: Loved by All Ages
With their comforting blend of sweet apples, buttery crumble, and warm spices, these bars appeal to everyone. They are ideal for potlucks, family gatherings, or simply a cozy afternoon treat.
For a perfect pairing, try our Mastering the Golden Cherry Cobbler: The Anti-Soggy Method.
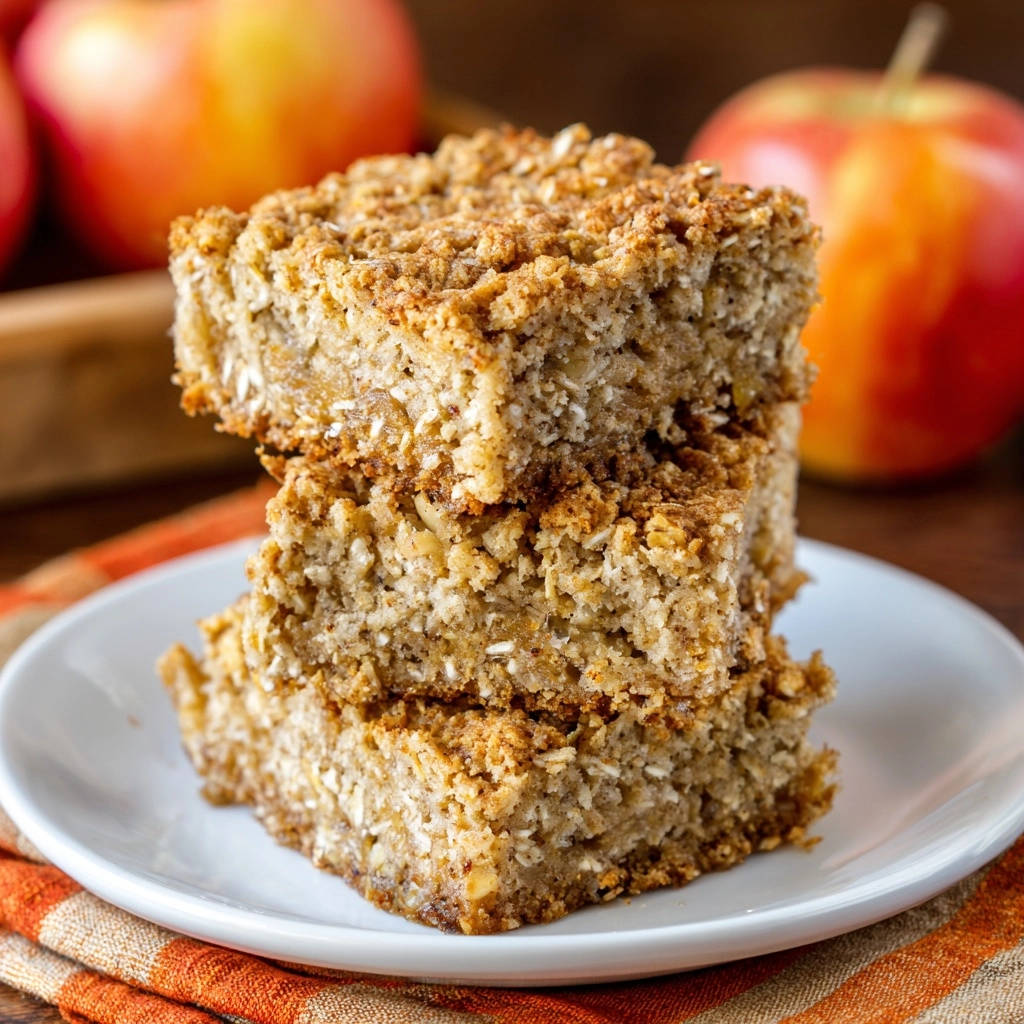
The Building Blocks: Essential Ingredients for Sublime Apple Crumble Bars
Understanding the role of each ingredient is key to mastering these delicious bars. Quality ingredients elevate the final product.
The Cold Butter Magic: Achieving the Perfect Crumb
Using cold unsalted butter, cut into cubes, is paramount for the crumble. The cold fat prevents the butter from fully melting into the flour too quickly, creating pockets that result in that desired flaky, crumbly texture.
Unsalted butter allows you to control the overall saltiness of the dish, ensuring a balanced flavor profile.
Choosing Your Apples: Sweetness, Tartness & Texture
The right apple variety makes all the difference. For these bars, Granny Smith or Honeycrisp apples are ideal.
Granny Smith offers a tartness that perfectly balances the sweetness of the crumble, while Honeycrisp provides a delightful crispness and slight sweetness, holding their shape well during baking.
The Humble Oats & Flavorful Spices: Aromatic Depth
Old-fashioned rolled oats add essential chewiness and a wholesome texture to the crumble topping. They absorb moisture, contributing to the bar’s structural integrity.
The blend of ground cinnamon and nutmeg infuses the bars with a warm, inviting aroma and classic apple pie flavor. These spices are the heart of the crumble’s appeal.
Equip Your Kitchen: Tools for Perfect Crumble Bar Success
Having the right equipment makes the baking process smoother and ensures consistent results.
9×13 inch Baking Pan: This standard size is crucial for achieving the correct thickness for your bars.
Parchment Paper: A non-negotiable tool that ensures easy removal of the baked bars and facilitates clean cutting.
Large Mixing Bowls: Essential for combining dry ingredients and preparing the apple filling separately.
Pastry Blender or Fork: Critical for cutting cold butter into the flour mixture, creating that perfect crumbly dough.
Wire Rack: Necessary for cooling the bars evenly and completely, a vital step for clean slices.
Sharp Knife: A good knife is indispensable for cutting the cooled bars into neat squares or rectangles.
Baking Brilliance: Your Step-by-Step Guide to Perfect Apple Crumble Bars
- Prepare Your Pan and Oven:
Preheat your oven to 375 degrees Fahrenheit (190 degrees Celsius) to ensure a consistent baking temperature from the start. Line a 9×13 inch baking pan with parchment paper, leaving a generous overhang on the sides.
This overhang acts as handles, making it incredibly easy to lift the entire slab of bars out of the pan once cooled. Lightly grease the parchment paper to prevent any sticking.
- Combine Dry Ingredients:
In a large bowl, whisk together the all-purpose flour, light brown sugar, baking soda, ground cinnamon, ground nutmeg, and salt. Whisking ensures all ingredients are evenly distributed, leading to uniform flavor throughout the crumble.
- Cut in the Cold Butter:
Add the cold cubed butter to the dry mixture. Use a pastry blender or your fingertips to cut the butter into the dry ingredients until the mixture resembles coarse crumbs.
This method creates small pockets of butter that will melt during baking, forming the signature crumbly texture.
- Form the Dough:
In a separate small bowl, whisk together the large egg and vanilla extract. Pour this wet mixture into the flour and butter mixture.
Mix with a spoon or your hands just until combined and a soft, slightly crumbly dough forms. Avoid overmixing, as this can develop the gluten too much, resulting in a tough texture.
- Press the Base Layer:
Take about two-thirds of the prepared dough mixture and press it evenly into the bottom of your prepared baking pan. Use the back of a spoon or your hands to ensure a compact, level base layer.
- Prepare the Apple Filling:
In another bowl, combine the peeled, cored, and diced apples with the cornstarch (or additional all-purpose flour) and granulated sugar. Toss gently until the apples are evenly coated.
The cornstarch is vital here; it helps to thicken the apple juices released during baking, preventing a soggy bottom and keeping the filling intact.
- Layer the Apples:
Spread the coated apples evenly over the pressed dough base in the baking pan. Ensure they form an even layer to promote consistent baking and distribution in every bar.
- Crumble the Topping:
Crumble the remaining one-third of the dough mixture evenly over the top of the apples. Distribute it loosely to create that characteristic golden, crunchy crumble topping.
- Bake to Golden Perfection:
Bake for 30-35 minutes, or until the topping is golden brown and the apples are tender when pierced with a fork. Keep an eye on the edges; they should be lightly golden.
- The Crucial Cooling Step:
Once baked, remove the pan from the oven and place it on a wire rack to cool completely at room temperature. This is the most critical step for achieving clean slices.
Allow them to cool for at least 2-3 hours, or even longer, until they are firm to the touch. This patience prevents crumbling and ensures the bars hold their shape.
- Lift and Slice:
Once fully cooled and firm, use the parchment paper overhang to gently lift the entire slab of bars from the pan. Transfer them to a cutting board.
Using a sharp knife, cut into squares or rectangles. Clean your knife between cuts for the absolute cleanest lines. Enjoy your perfectly set, non-sloppy Perfect Apple Crumble Bars!
The Secret Revealed: Achieving Those Picture-Perfect Apple Crumble Bar Slices
The struggle with crumbly, messy bars ends here. The “secret” isn’t a complex technique, but rather an understanding of temperature and patience.
The Science of Cooling: Why Patience Pays Off
When bars come out of the oven, the fats are melted, and the sugars are molten. The structure is soft and fragile. As the bars cool, the butter solidifies again, and the sugar syrup hardens, effectively “gluing” the crumbs and filling together.
Rushing this cooling process means cutting into a warm, soft structure that is destined to fall apart. Complete cooling allows the bars to set and firm up, providing the stability needed for clean, sharp cuts.
The Refrigerator Advantage: For Ultra-Clean Cuts
For the absolute cleanest, most professional-looking cuts, consider an extra step. After your bars have fully cooled to room temperature (at least 2-3 hours), transfer the pan to the refrigerator for an additional 30-60 minutes.
This quick chill further solidifies the fats and sugars, making the bars extra firm and easy to slice with precision, resulting in truly picture-perfect Perfect Apple Crumble Bars.
Mastering Your Bake: Tips & Troubleshooting for Apple Crumble Bars
Even seasoned bakers encounter hiccups. Here are some expert insights to ensure your crumble bars are always a success, along with solutions for common issues.
Expert Baking Tips for Flawless Results
Don’t Overmix the Dough: Overmixing develops gluten, which can lead to a tough or less crumbly texture. Mix just until the ingredients are combined and a soft dough forms.
Select the Right Apples: Stick to firm, tart, or slightly sweet varieties like Granny Smith or Honeycrisp. Softer apples can turn mushy, leading to a watery filling.
Achieve the Perfect Crumble Texture: When cutting in the butter, aim for a mixture that resembles coarse meal with some pea-sized crumbs. This balance ensures both a tender base and a crisp topping.
Common Hurdles & Quick Fixes
Why Are My Bars Falling Apart?
The most common culprit is insufficient cooling. Ensure your bars cool completely at room temperature for at least 2-3 hours, or even longer. For extra security, chill them in the refrigerator for 30-60 minutes before slicing.
Another factor could be over-mixing the dough, which compromises its crumbly structure. Ensure you mix only until just combined.
My Crumble is Too Hard/Soft!
If your crumble is too hard, you might have overworked the dough or overbaked it. Ensure you’re cutting in the butter properly and baking until just golden brown.
If it’s too soft or greasy, your butter might not have been cold enough, or you might have used too much. Make sure the butter is straight from the fridge and accurately measured.
Soggy Bottom Blues?
A soggy bottom usually indicates too much moisture from the apples. Ensure your apples are well-coated with cornstarch (or flour), which acts as a thickener. Also, make sure you’re using firm apple varieties that don’t release excessive liquid.
Proper baking time is also key; the bars need to bake long enough for the apple juices to thicken and the base to cook through.
Serving Suggestions & Smart Storage for Your Crumble Bars
Once you’ve mastered these Perfect Apple Crumble Bars, you’ll want to enjoy them fully and store them smartly to maintain their fresh taste and texture.
Delightful Ways to Serve Your Bars
These bars are divine on their own, offering a perfect balance of sweet and tangy with a satisfying crunch. For an elevated experience, serve them slightly warm with a scoop of vanilla bean ice cream, a dollop of fresh whipped cream, or a drizzle of caramel sauce.
If you enjoy the buttery, spiced base of these bars, you might also love the rich contrast in these sea salt dark chocolate chunk cookies.
They also make a fantastic addition to a dessert platter or as a comforting snack with a cup of coffee or tea.
Keeping Them Fresh: Storage Tips
Store cooled Perfect Apple Crumble Bars in an airtight container at room temperature for up to 3-4 days. This keeps them moist and prevents them from drying out.
For longer storage, you can refrigerate them for up to a week. If you prefer them warm, a quick zap in the microwave or a few minutes in a low oven will bring them back to life.
Make-Ahead Magic: Prepare & Enjoy Later
These bars are excellent for making ahead. You can prepare the entire batch, cool them completely, and then store them as described. They retain their delicious flavor and texture for days.
For longer-term planning, fully baked and cooled bars freeze beautifully. Wrap individual bars tightly in plastic wrap, then place them in a freezer-safe bag or container for up to 3 months. Thaw at room temperature or gently reheat.
Your Perfect Apple Crumble Bars Questions, Answered
Can I Use Different Apples?
Absolutely! While Granny Smith and Honeycrisp are recommended for their balance of flavor and texture, you can experiment with other firm varieties like Fuji, Gala, or Braeburn. Just be mindful of their sweetness and adjust the added sugar if necessary. Avoid overly soft or mealy apples.
Are These Bars Gluten-Free?
The base recipe is not gluten-free due to the all-purpose flour. However, you can easily adapt it by substituting the all-purpose flour with a high-quality 1:1 gluten-free baking flour blend. Ensure your rolled oats are certified gluten-free as well, as some oats can be cross-contaminated during processing.
Can I Freeze Apple Crumble Bars?
Yes, these bars freeze exceptionally well! Once completely cooled, cut them into individual portions. Wrap each bar tightly in plastic wrap, then place them in a freezer-safe airtight container or heavy-duty freezer bag. They can be stored in the freezer for up to 3 months.
To thaw, simply place them at room temperature for a few hours, or gently warm them in the oven for a quick treat.
How Do I Know When They’re Done Baking?
Look for a golden brown topping and bubbling apple filling around the edges of the pan. You can also gently pierce an apple with a fork through the crumble layer; it should feel tender, not hard. The aroma filling your kitchen will also be a strong indicator of doneness.
Ready to Bake? Your Apple Crumble Bars Journey Awaits!
With the secret to perfect slices now in your hands, you’re ready to transform your baking game. These Perfect Apple Crumble Bars are more than just a dessert; they’re a testament to how simple techniques can yield extraordinary results.
What to Serve with Apple Crumble Bars
These bars have a buttery crust and a soft apple filling, so pair them with something light and fruity for a weekend breakfast or brunch spread.
- Start the meal with a stack of Fluffy Blueberry Pancakes for a bright, berry-forward contrast to the warm apple spice.
- For a heartier option that shares the same cozy oatmeal vibe, try these Fluffy Oatmeal Pancakes alongside the bars for a double dose of comforting texture.
Go ahead, gather your ingredients, and experience the pure satisfaction of baking and serving crumble bars that are as beautiful as they are delicious. Share your creations and savor every perfectly cut piece!
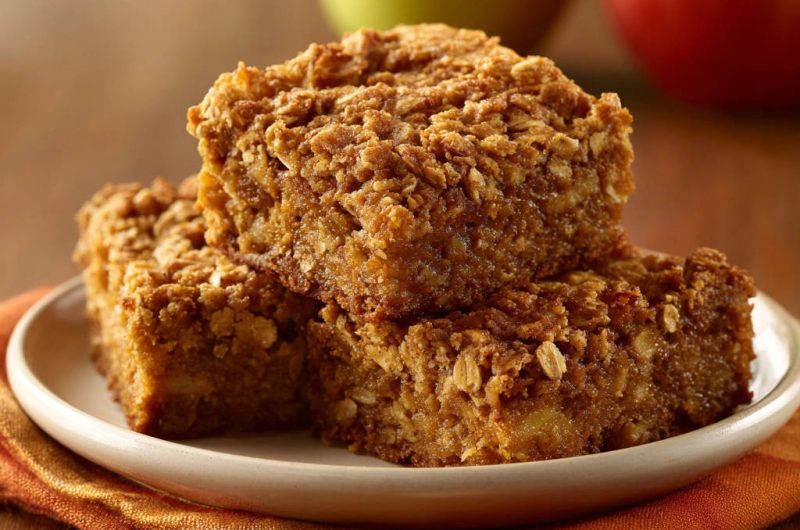
Apple Crumble Bars
Course: DessertCuisine: AmericanDifficulty: medium12
bars25
minutes35
minutes320
kcal240
minutesTired of apple crumble bars falling apart? This recipe reveals the key to perfectly clean, satisfying slices every single time. Learn the simple trick to achieve firm, non-sloppy bars that hold their shape beautifully after baking.
Ingredients
1 and 1/2 cups all-purpose flour
1 cup packed light brown sugar
1/2 teaspoon baking soda
1/2 teaspoon ground cinnamon
1/4 teaspoon ground nutmeg
1/4 teaspoon salt
3/4 cup (1 and 1/2 sticks) cold unsalted butter, cut into cubes
1 large egg
1 teaspoon vanilla extract
2 cups old-fashioned rolled oats
3 medium apples (about 3 cups peeled, cored, and diced), such as Granny Smith or Honeycrisp
1 tablespoon cornstarch (or additional all-purpose flour)
1 tablespoon granulated sugar
Directions
- Preheat your oven to 375 degrees Fahrenheit (190 degrees Celsius). Line a 9×13 inch baking pan with parchment paper, leaving an overhang on the sides to easily lift the bars out later. Lightly grease the parchment paper.
- In a large bowl, whisk together the flour, brown sugar, baking soda, cinnamon, nutmeg, and salt.
- Add the cold cubed butter to the flour mixture. Use a pastry blender or your fingertips to cut the butter into the dry ingredients until the mixture resembles coarse crumbs.
- In a separate small bowl, whisk together the egg and vanilla extract. Pour this into the flour and butter mixture. Mix with a spoon or your hands until just combined and a soft dough forms. It will be slightly crumbly.
- Press about two-thirds of the dough mixture evenly into the bottom of the prepared baking pan. This will form your base layer.
- In another bowl, combine the diced apples with the cornstarch and granulated sugar. Toss gently until the apples are evenly coated.
- Spread the coated apples evenly over the pressed dough base in the baking pan.
- Crumble the remaining one-third of the dough mixture evenly over the top of the apples.
- Bake for 30-35 minutes, or until the topping is golden brown and the apples are tender when pierced with a fork.
- This is the crucial step for perfect slices: Once baked, remove the pan from the oven and place it on a wire rack to cool completely at room temperature. This means letting them cool for at least 2-3 hours, or even longer, until they are firm to the touch. For the cleanest cuts, you can even chill them in the refrigerator for 30-60 minutes after they’ve cooled to room temperature.
- Once fully cooled and firm, use the parchment paper overhang to lift the entire slab of bars from the pan. Place on a cutting board and cut into squares or rectangles with a sharp knife. Enjoy your perfectly set, non-sloppy apple crumble bars!
Notes
- Cooling completely at room temperature for at least 2-3 hours, or even chilling, is crucial for perfectly clean slices.