Crispy Fried Salmon & Avocado Rolls: Perfectly Crispy, Never Greasy!
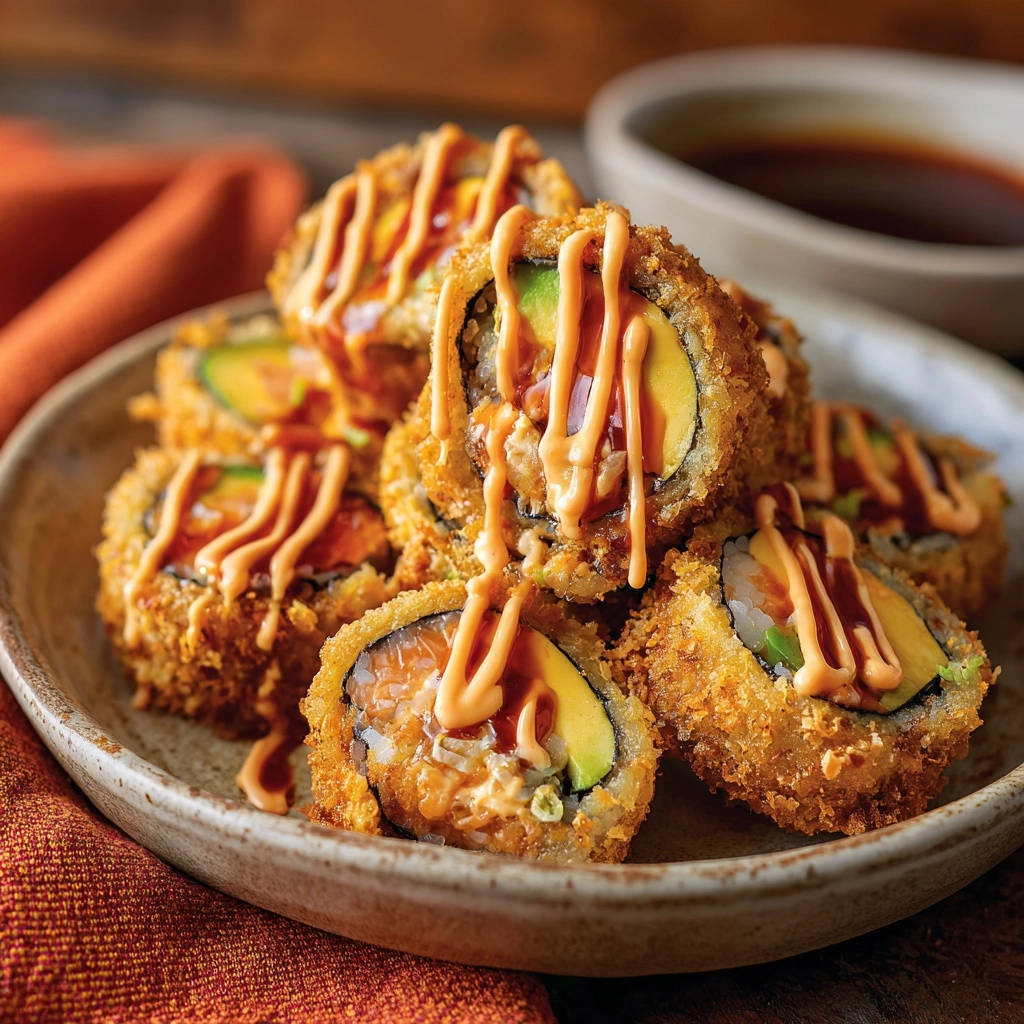
There’s something truly satisfying about a perfectly crispy fried sushi roll. For years, I struggled to achieve that ideal crunch at home without them turning out disappointingly greasy or soft. This recipe for Crispy Fried Salmon & Avocado Rolls is the game-changer you’ve been searching for, guaranteeing that golden, shatteringly crisp exterior every single time.
Why These Crispy Fried Salmon & Avocado Rolls Are Your New Favorite
Unlike many recipes that leave you with oil-soaked disappointments, this guide focuses on precision to deliver an exceptional experience. You’ll achieve restaurant-quality results right in your own kitchen.
The magic lies in our meticulous breading process and exact temperature control, ensuring maximum crispness without any greasiness. The combination of rich salmon and creamy avocado provides a delightful flavor balance that will impress everyone.
These rolls are surprisingly straightforward to make, and their crowd-pleasing appeal makes them perfect for family dinners or entertaining friends. Prepare to elevate your homemade sushi game to a whole new level.
The Essential Ingredients: Building Blocks for Crispy Perfection
Sushi Rice: The Foundation of Flavor
High-quality sushi rice is paramount; its specific starch content ensures the ideal texture for rolling. Proper seasoning with rice vinegar, sugar, and salt infuses that signature sweet and tangy sushi flavor.
Nori, Salmon & Avocado: The Core Filling Trio
Fresh, good-quality nori seaweed sheets are essential for a sturdy roll. Choosing between flaked cooked salmon or thinly sliced sushi-grade raw salmon offers versatility, while ripe, creamy avocado adds a crucial textural contrast.
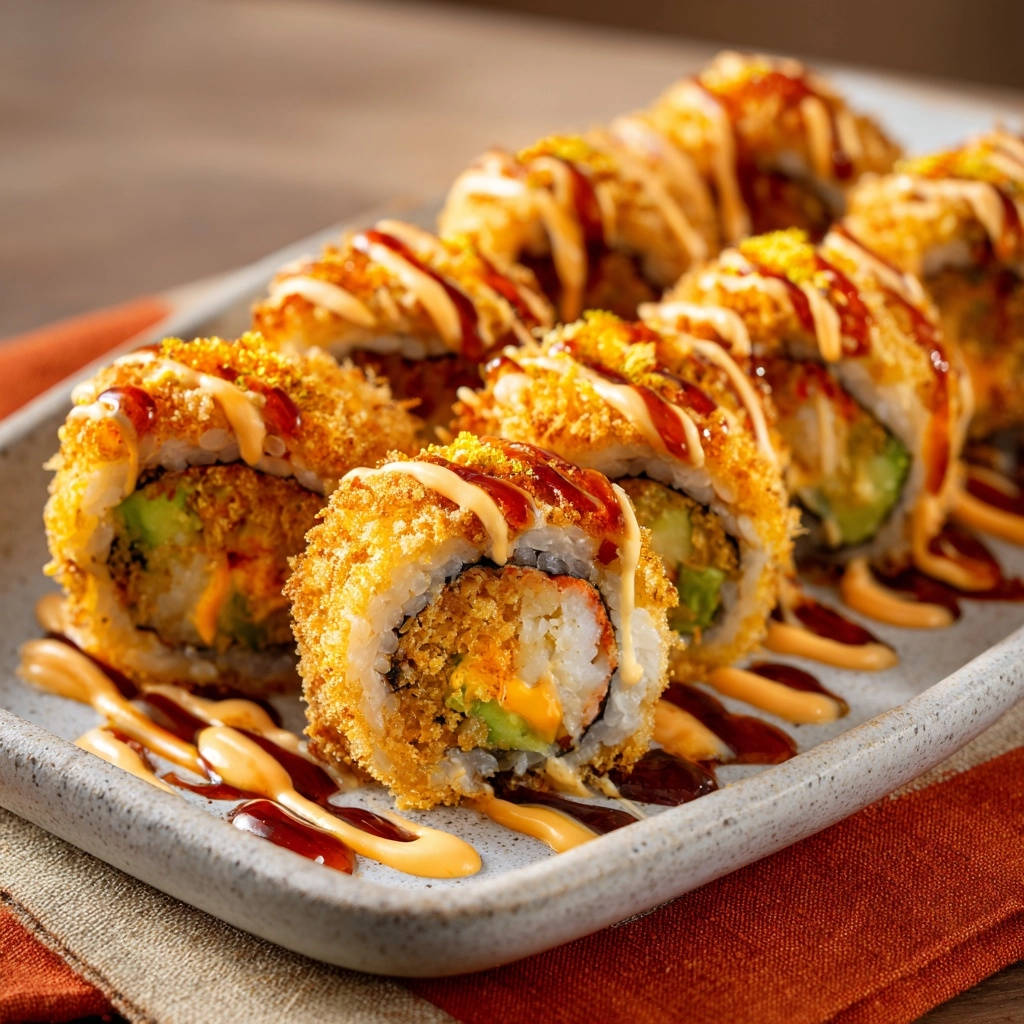
The Golden Coating: Flour, Eggs, and Panko
Each component in the breading station plays a vital role. All-purpose flour creates a dry base, eggs act as the binder, and coarse panko breadcrumbs are the secret to that incredibly light, airy, and super crispy exterior.
Sauces and Accompaniments: Elevating the Experience
A spicy mayonnaise, crafted from mayonnaise and sriracha, adds a creamy kick. Sweet soy glaze provides a beautiful umami finish, while a dash of traditional soy sauce completes the dipping experience.
Essential Tools for Your Crispy Fried Sushi Adventure
Bamboo Sushi Mat: Crucial for tight, even rolling, ensuring your rolls hold their shape when fried.
Deep-Frying Pot or Skillet: A heavy-bottomed pot or Dutch oven ensures consistent heat distribution and prevents scorching.
Cooking Thermometer: Absolutely vital for perfect oil temperature control, which is the key to preventing sogginess and achieving optimal crispness.
Wire Rack & Paper Towels: Essential for proper draining after frying, allowing excess oil to drip away and maintaining a lasting crisp texture.
Sharp, Moistened Knife: A very sharp knife, lightly moistened, will slice through the rolls cleanly without tearing the nori or squishing the fillings.
Your Path to Crispy Fried Salmon & Avocado Rolls Perfection: A Detailed Guide
Prepare Sushi Rice with Precision
Cook your sushi rice according to package directions, typically involving rinsing and specific water ratios. Once perfectly cooked, transfer it to a large bowl.
In a separate small bowl, whisk together the rice vinegar, sugar, and salt until they are fully dissolved. Gently fold this flavorful seasoning into the warm rice, ensuring it’s evenly distributed without mashing the grains.
Allow the seasoned rice to cool completely to room temperature. This cooling step is crucial; warm rice is too sticky to handle and can steam the nori, impacting texture.
Ready Your Fillings: Salmon & Avocado
Prepare your salmon as desired: if using cooked salmon, flake it into small, manageable pieces. If opting for sushi-grade raw salmon, thinly slice it against the grain for tender bites.
Next, thinly slice the ripe avocado. Ensure your slices are uniform in thickness so they distribute evenly throughout the roll, creating a balanced bite.
Master the Sushi Roll Technique
Lay a nori sheet, shiny side down, on your bamboo sushi mat. Dampen your hands slightly and evenly spread a thin layer of the cooled sushi rice over the nori, leaving about a 1-inch border at the top edge of the sheet.
Arrange a horizontal line of your prepared salmon and avocado fillings across the center of the rice. Carefully begin to roll the sushi tightly using the bamboo mat, pressing gently to create a compact cylinder.
As you reach the end, moisten the exposed top edge of the nori with a little water to create a seal. Continue rolling firmly to complete the roll, then gently press to ensure it’s securely sealed. Repeat this process for your remaining rolls.
Set Up Your Breading Station Efficiently
To ensure a smooth coating process, set up three shallow dishes or plates in an assembly line. In the first dish, place your all-purpose flour.
In the second dish, whisk the two large eggs until they are smooth and well-combined. Finally, in the third dish, spread out the panko breadcrumbs.
This organized station makes it easy to move each roll seamlessly from one coating to the next.
Coat Each Roll for Maximum Crispness
Begin by rolling each sushi roll thoroughly in the all-purpose flour, making sure it’s lightly coated on all sides. Gently shake off any excess flour.
Next, dip the floured roll into the whisked egg, ensuring it is fully and evenly covered. Let any excess egg drip off briefly.
Finally, transfer the egg-coated roll to the panko breadcrumbs. Roll it generously, pressing gently with your hands to make sure the panko adheres well and creates a thick, even crust on all sides. This triple-coating is absolutely crucial for achieving that ultimate, satisfying crunch.
Achieve Optimal Frying Temperature (The Secret Weapon!)
In a heavy-bottomed pot or deep skillet, pour enough vegetable oil to be at least 2-3 inches deep. Heat the oil over medium-high heat.
This step is critical: use a cooking thermometer to monitor the oil temperature, aiming for a precise range of 350-375°F (175-190°C).
Maintaining this exact temperature is paramount. If the oil is too cool, the panko will absorb too much oil, leading to a greasy, soggy roll. If it’s too hot, the exterior will burn before the inside is properly heated through. Precision here guarantees a perfectly golden and crisp result.
Fry the Rolls to Golden Perfection
Carefully place 1-2 coated sushi rolls into the hot oil, using tongs to gently lower them. It’s essential not to overcrowd the pot, as this will significantly lower the oil temperature and compromise crispness.
Fry for 2-4 minutes, turning the rolls occasionally with your tongs, until all sides are evenly golden brown and appear incredibly crispy. Throughout the frying process, continually monitor the oil temperature with your thermometer and adjust your heat as needed to keep it within the optimal range.
Drain Properly for Lasting Crispness
As soon as the rolls reach their perfect golden crispness, use tongs to remove them immediately from the hot oil. Transfer them directly to a wire rack set over a baking sheet lined with paper towels.
This draining method is vital for achieving and maintaining maximum crispness. The wire rack allows air to circulate around all sides of the rolls, enabling excess oil to drip away efficiently and preventing the bottom from becoming soggy, which can happen if placed directly on paper towels.
Slice and Serve Immediately
Once the fried rolls have cooled slightly for a minute or two (enough to handle comfortably), it’s time to slice them. Use a very sharp knife that has been lightly moistened with water.
Slice each roll into 6-8 uniform pieces. Moistening the knife prevents rice and fillings from sticking, ensuring clean, professional-looking cuts that hold their shape beautifully.
Whip Up Your Signature Sauces
While the rolls are cooling briefly, prepare your delicious accompanying sauces. For the spicy mayonnaise, combine the mayonnaise and sriracha sauce in a small bowl, adjusting the sriracha to your preferred level of heat.
Have your sweet soy glaze ready. These two sauces offer a perfect balance of creamy heat and sweet, savory umami that truly complements the fried rolls.
Drizzle, Dip, and Delight!
Artfully drizzle the sliced Crispy Fried Salmon & Avocado Rolls with your freshly made spicy mayonnaise and sweet soy glaze. The visual appeal is almost as satisfying as the taste.
Serve them immediately while they are still warm and at their peak crispness. Offer extra soy sauce on the side for dipping. Prepare for an unparalleled crunch and an explosion of flavor!
If you enjoy this crispy salmon technique, these salmon sushi bites use a similar method for a golden crunch.
Chef’s Secrets: Elevate Your Crispy Fried Salmon & Avocado Rolls Game
The Golden Rule of Oil Temperature: Consistency is key. Fluctuating oil temperature leads to greasy or soft rolls. Invest in a reliable thermometer and adjust heat as needed; a steady temperature is your best friend for crispy results.
If you enjoy crispy salmon, try this glazed salmon and broccoli bowl for a different take on dinner.
Don’t Overcrowd the Pot: This is a common mistake! Frying too many rolls at once drastically drops the oil temperature, resulting in less crispy, oil-soaked rolls. Fry in small batches for consistent perfection.
Panko vs. Regular Breadcrumbs: Panko is non-negotiable for this recipe! Its larger, flakier structure creates a superior, airy crunch and absorbs less oil compared to fine, dense breadcrumbs, making a huge difference in crispness.
The Power of the Wire Rack: Never drain your fried rolls directly on just paper towels. The wire rack allows air circulation all around the rolls, ensuring every side stays crispy as they cool and excess oil drips away.
Moistening Your Knife: Lightly wetting your knife between slices prevents rice and fillings from sticking. This simple trick ensures you get clean, professional-looking cuts every time, keeping your rolls intact and beautiful.
Raw vs. Cooked Salmon Considerations: If using raw sushi-grade salmon, ensure it’s from a trusted source for freshness and kept very cold until just before rolling. Cooked salmon offers an easier, equally delicious, and very safe alternative for home cooks.
Troubleshooting Common Challenges: Perfecting Your Fried Rolls
My Rolls are Soggy or Greasy!
This is almost always due to incorrect oil temperature. If the oil is too cool, the panko absorbs oil instead of crisping up, leading to a greasy result. If it’s too hot, the exterior burns before the roll is properly heated through, sometimes leaving a soft interior.
Always use a cooking thermometer and meticulously maintain the specified temperature range of 350-375°F (175-190°C). Additionally, ensure proper draining on a wire rack immediately after frying to allow excess oil to drip away, which is crucial for lasting crispness.
The Coating Isn’t Sticking Well!
Ensure the sushi rolls are evenly coated in flour first; this creates a dry, slightly tacky surface for the egg to adhere to properly. Then, make sure the entire roll is fully covered in the whisked egg before transferring it to the panko breadcrumbs.
Finally, gently but firmly press the panko onto all sides of the roll. This pressure ensures the breadcrumbs create a robust and even crust that won’t fall off during frying.
My Rolls are Falling Apart During Frying!
This usually indicates that the initial sushi roll wasn’t rolled tightly enough or the nori wasn’t properly sealed at the end. When rolling with the bamboo mat, make sure to apply firm, even pressure to create a compact cylinder.
Adequately moisten the top edge of the nori with water before completing the roll to create a secure, adhesive seal that will hold during the frying process.
The Rice is Too Sticky/Hard to Work With!
The sushi rice must be cooled completely to room temperature before handling and rolling. If it’s too warm, it becomes overly sticky and difficult to spread evenly on the nori, sticking to your hands and the mat.
If the rice is too cold, it can become stiff and less pliable. Ensure the rice is properly seasoned and given ample time to cool to the ideal temperature, making it much easier to work with.
Frequently Asked Questions About Crispy Fried Sushi Rolls
Can I make these Crispy Fried Salmon & Avocado Rolls ahead of time?
For optimal crispness and flavor, it’s highly recommended to fry and serve the rolls immediately. However, you can prepare the sushi rolls (steps 1-3) up to a few hours in advance, keeping them tightly covered in the refrigerator. The breading and frying steps should ideally be done just before you plan to serve them.
What kind of oil is best for deep frying?
Vegetable oil, canola oil, and peanut oil are all excellent choices for deep frying your Crispy Fried Salmon & Avocado Rolls. They are preferred due to their high smoke points and neutral flavors, which won’t overpower the delicate taste of your sushi.
Can I use other fillings for fried sushi rolls?
Absolutely! This recipe provides a fantastic base, and you can certainly experiment with a variety of other fillings. Consider cooked shrimp, imitation crab meat, cream cheese, crisp cucumber, or even sweet potato tempura. The key is to ensure your chosen fillings are not excessively wet, which could lead to a soggy roll.
How do I store leftover fried sushi rolls?
Leftover Crispy Fried Salmon & Avocado Rolls can be stored in an airtight container in the refrigerator for up to 1-2 days. While they will inevitably lose some of their initial crispness, they remain delicious. To regain some texture, reheat them gently in an oven or air fryer for a few minutes; avoid the microwave, as it will make them rubbery.
Is it safe to deep fry at home?
Yes, deep frying at home is safe when proper precautions are strictly followed. Always use a heavy-bottomed pot that can accommodate the oil and food without overflowing. Keep a lid nearby to smother any potential oil fires, and crucially, never leave hot oil unattended. Always monitor your oil temperature correctly to prevent splatters and burns.
Serving Suggestions & Creative Pairings
While the creamy spicy mayo and luscious sweet soy glaze are classic accompaniments, feel free to get creative with your presentation. A sprinkle of toasted sesame seeds adds both visual appeal and a delightful nutty crunch to your Crispy Fried Salmon & Avocado Rolls.
For a refreshing counterpoint to the rich, fried rolls, consider serving a side of tangy pickled ginger or a crisp, light cucumber salad. They cleanse the palate beautifully.
What to Serve Alongside
These rolls already bring crispy salmon and creamy avocado, so a few extras with contrasting textures and bold flavors round out the meal nicely.
- Balance the richness with a side of Sticky Glazed Teriyaki Meatballs — their sweet-savory crust echoes the crunch of the fried rolls.
- Add a cool, spicy kick with Spicy Sesame Wakame Salad; the sesame and seaweed make a natural partner for salmon.
To create a complete and satisfying meal, pair these incredible rolls with a comforting bowl of light miso soup or a simple, vibrant green salad dressed with a bright ginger dressing. They also make fantastic, impressive appetizers for any gathering, easily competing with your favorite restaurant’s offerings. For another crowd-pleasing crispy dish, consider our Crispy Fried Chicken Sandwich.
Ready to Impress? Share Your Crispy Fried Salmon & Avocado Rolls Masterpiece!
You’ve now unlocked the secret to creating perfectly crispy, never-greasy fried sushi rolls right in your own kitchen. This comprehensive recipe for Crispy Fried Salmon & Avocado Rolls is meticulously designed to give you consistent, delicious results every single time, truly transforming your home into your favorite sushi spot.
We absolutely love seeing your culinary successes! Share your Crispy Fried Salmon & Avocado Rolls masterpieces and success stories in the comments below, or tag us on social media. Happy rolling, and most importantly, enjoy every unbelievably crispy, flavorful bite of your homemade sushi!
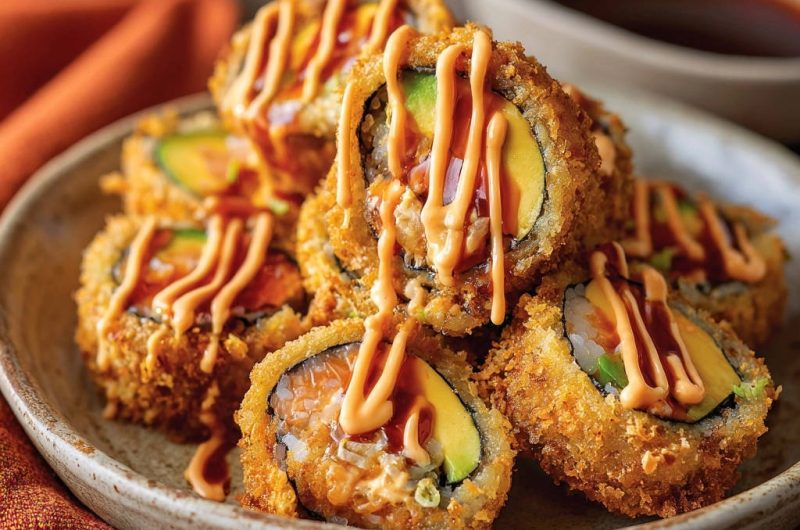
Crispy Fried Salmon Rolls
Course: Main CourseCuisine: AsianDifficulty: medium4
rolls (approx. 24-32 pieces)1
hour25
minutes550
kcal120
minutesDiscover the secret to perfectly crispy fried sushi rolls that are never greasy or soft. This game-changing recipe walks you through every step to achieve golden, crunchy rolls filled with delicious salmon and avocado, ensuring success every time.
Ingredients
1 cup uncooked sushi rice
1 1/2 cups water (for cooking rice)
2 tablespoons rice vinegar
1 tablespoon sugar
1/2 teaspoon salt
4 sheets nori seaweed
1/2 cup cooked salmon, flaked (or sushi-grade salmon, thinly sliced, handled with care)
1 ripe avocado, thinly sliced
1 cup panko breadcrumbs
1/2 cup all-purpose flour
2 large eggs, whisked
4 cups vegetable oil, for frying
1/2 cup mayonnaise
2 tablespoons sriracha sauce (adjust to taste)
1/4 cup sweet soy glaze (like eel sauce)
Soy sauce, for serving
Directions
- Prepare Sushi Rice: Cook sushi rice according to package directions. Once cooked, transfer to a large bowl. In a small bowl, whisk together rice vinegar, sugar, and salt until dissolved. Gently fold this seasoning into the warm rice. Let cool to room temperature.
- Prepare Fillings: If using cooked salmon, flake it. If using sushi-grade raw salmon, thinly slice it. Thinly slice the ripe avocado.
- Roll the Sushi: Place a nori sheet shiny side down on a bamboo sushi mat. Evenly spread a thin layer of sushi rice over the nori, leaving about a 1-inch border at the top. Arrange a line of salmon and avocado fillings horizontally across the center of the rice. Carefully roll the sushi tightly using the mat. Moisten the top edge of the nori to seal the roll. Repeat for remaining rolls.
- Set Up Breading Station: Set up three shallow dishes. In the first, place the all-purpose flour. In the second, whisk the eggs. In the third, place the panko breadcrumbs.
- Coat the Rolls: Roll each sushi roll first in the flour, shaking off excess. Then, dip it into the whisked egg, ensuring it’s fully coated. Finally, roll it generously in the panko breadcrumbs, pressing gently to make sure the panko adheres well to all sides. This triple-coating is key for maximum crispness.
- Heat the Oil (Crucial Step for Crispness!): In a heavy-bottomed pot or deep skillet, pour enough vegetable oil to be at least 2-3 inches deep. Heat the oil over medium-high heat until it reaches 350-375°F (175-190°C). Use a cooking thermometer to monitor the temperature. This precise temperature is absolutely vital to ensure the panko gets perfectly golden and crisp without absorbing too much oil, preventing sogginess.
- Fry the Rolls: Carefully place 1-2 coated sushi rolls into the hot oil, ensuring not to overcrowd the pot, which would lower the oil temperature. Fry for 2-4 minutes, turning occasionally with tongs, until all sides are evenly golden brown and incredibly crispy. Maintain the oil temperature throughout frying.
- Drain Properly: Using tongs, remove the fried rolls from the oil and immediately place them on a wire rack set over a baking sheet lined with paper towels. This allows excess oil to drip away, ensuring maximum crispness and preventing sogginess.
- Slice and Serve: Once slightly cooled, slice each roll into 6-8 pieces using a very sharp, slightly moistened knife.
- Make the Sauces: For spicy mayonnaise, combine mayonnaise and sriracha to taste.
- Drizzle and Enjoy: Drizzle the fried sushi rolls with spicy mayonnaise and sweet soy glaze. Serve immediately with extra soy sauce for dipping.
Notes
- Crucial to maintain oil temperature (350-375°F) and drain on a wire rack for maximum crispness.