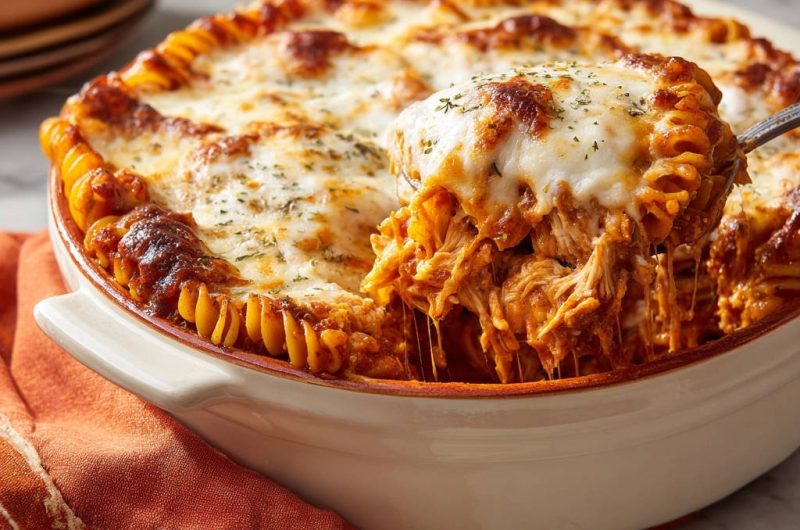
Cheesy Chicken Rotini Bake: The Secret to Saucy Perfection
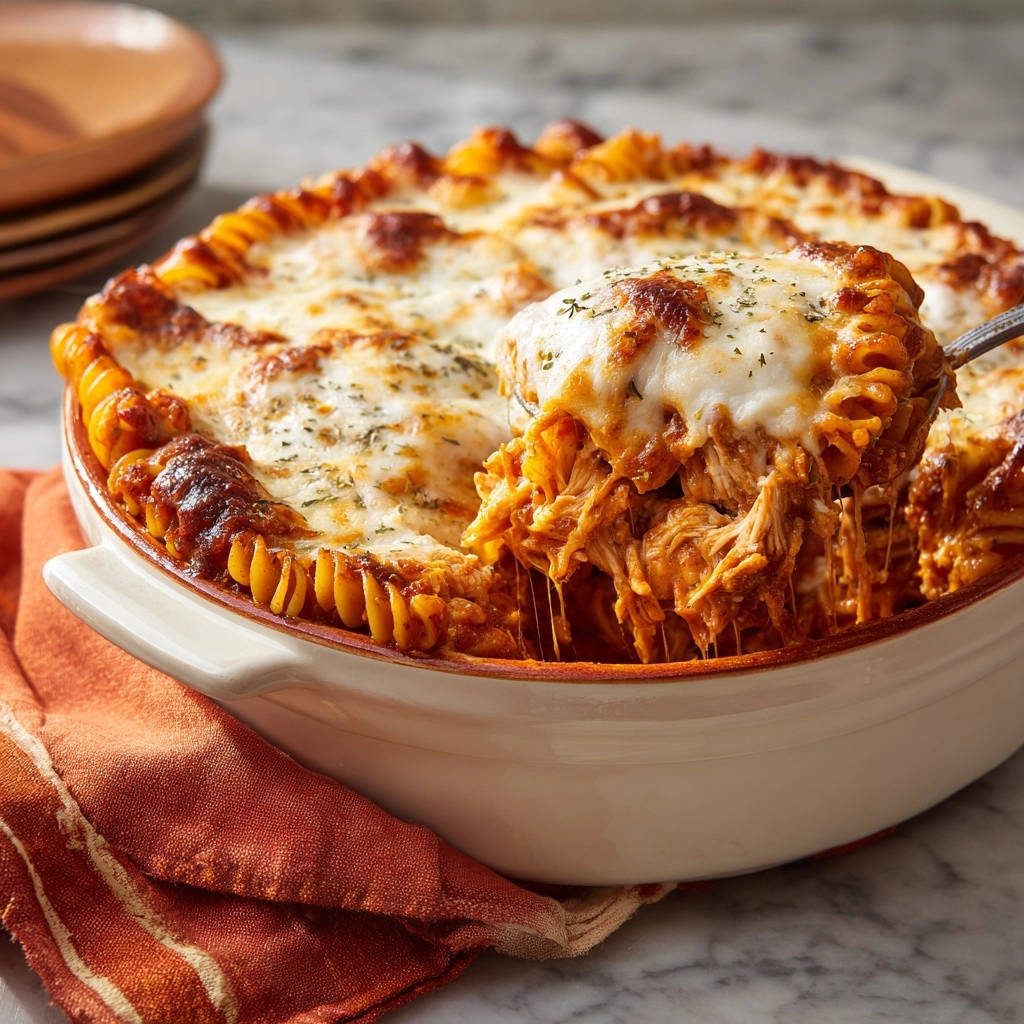
I can’t tell you how many times I’ve pulled a pasta bake from the oven, excited for dinner, only to find the pasta underneath dry and tough. It’s truly disappointing! But I’ve finally cracked the code to achieving perfectly tender, saucy pasta every single time, even after baking.
This Cheesy Chicken Rotini Bake isn’t just a family favorite; it’s a testament to simple techniques that guarantee moist deliciousness, transforming a common kitchen challenge into a triumph.
No More Dry Pasta Bakes: Why This Recipe is a Game-Changer
The quest for a perfectly moist and flavorful pasta bake often ends in frustration, with dry, clumpy pasta lurking beneath a bubbly cheese crust. This common issue stems from overcooking the pasta initially or insufficient moisture during the baking process.
Our Cheesy Chicken Rotini Bake specifically addresses these pitfalls with a few clever techniques. We prioritize moisture retention and flavor absorption from the very start, ensuring tender pasta throughout.
For the same reason you want that saucy rotini perfection, you’ll appreciate the technique in this crispy baked chicken parmesan.
This recipe provides a reliable framework for a truly satisfying baked pasta dish, making it an essential addition to your family dinner ideas.
The Heart of the Dish: Ingredients for Your Cheesy Chicken Rotini Bake
Every ingredient plays a vital role in creating this irresistible baked pasta dish. Understanding their purpose elevates your cooking from following steps to mastering flavors.
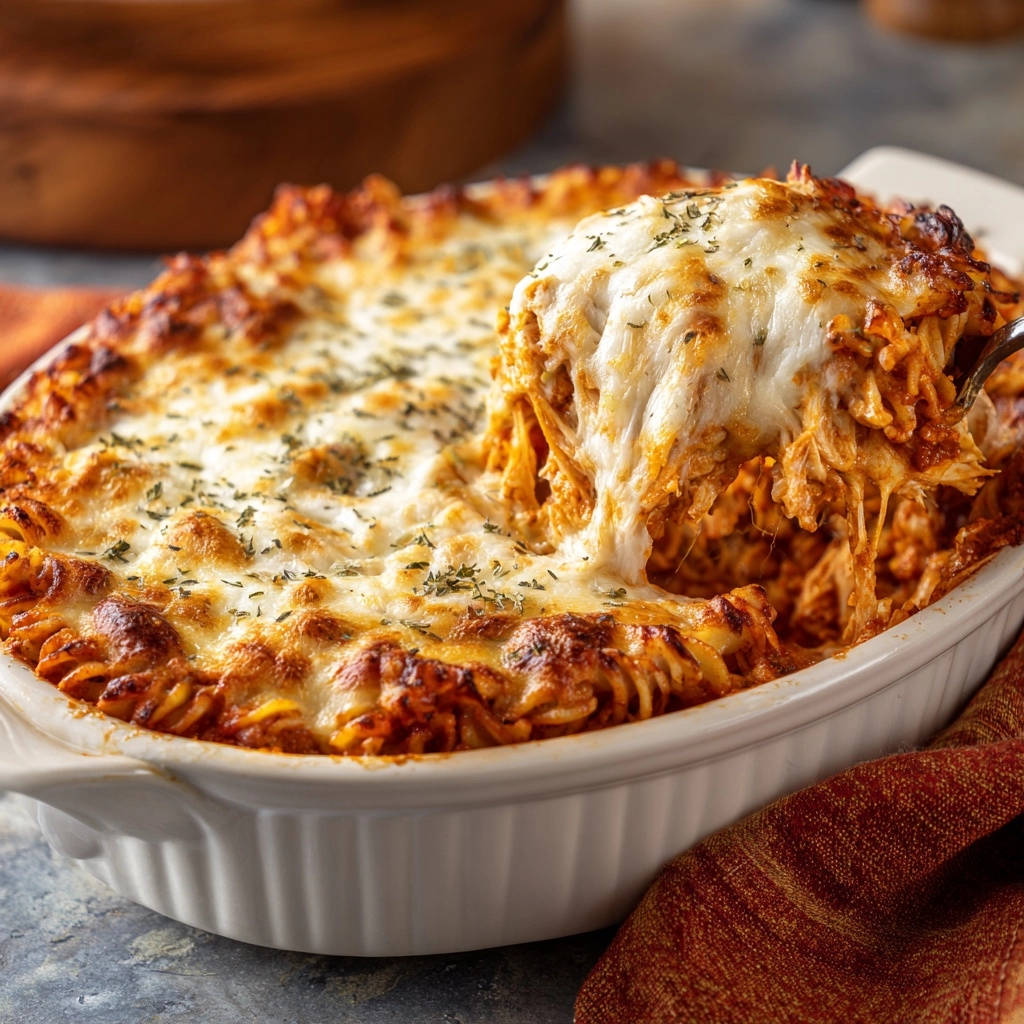
Perfect Pasta Choice: Rotini and Beyond
Rotini pasta, with its spiral shape, excels at holding onto that rich, cheesy sauce, ensuring every bite is flavorful.
For best results, stick with a medium-sized pasta, but penne or cavatappi can also work.
The Lean Protein: Shredded Chicken Breast
Using pre-cooked, shredded chicken breast makes this recipe incredibly quick and convenient.
You can use leftover rotisserie chicken or boil and shred your own chicken ahead of time.
The Flavor Foundation: Crushed Tomatoes and Aromatics
Crushed tomatoes provide a robust, tangy base for the sauce, balancing the richness of the cheese.
Freshly minced garlic and dried herbs like oregano and basil infuse the sauce with classic Italian flavors.
Creamy Goodness: Mozzarella and Parmesan
Shredded mozzarella is the star here, offering that signature gooey, stretchy melt.
A touch of grated Parmesan cheese adds a salty, umami depth that enhances the overall cheesiness.
Balancing Acts: Broth, Oil, and Seasonings
Chicken broth ensures the sauce has enough liquid to hydrate the pasta during baking, preventing dryness.
Olive oil is essential for sautéing and greasing, contributing to texture and flavor.
Salt and black pepper are crucial for seasoning the dish to perfection, allowing the flavors to truly shine.
Essential Tools for Your Rotini Bake Success
Having the right kitchen tools on hand makes the cooking process smooth and enjoyable, especially when creating a substantial comfort food like this Cheesy Chicken Rotini Bake.
9×13 Inch Baking Dish: The ideal size for a family-sized Cheesy Chicken Rotini Bake.
Large Pot for Pasta: Essential for properly cooking the rotini.
Large Saucepan or Dutch Oven: Perfect for simmering the sauce and combining ingredients.
Aluminum Foil: A critical tool for achieving that moist, tender pasta.
Measuring Cups and Spoons: For accurate ingredient proportions.
Crafting Your Cheesy Chicken Rotini Bake: A Step-by-Step Guide
Follow these detailed steps to achieve a perfectly saucy and tender Cheesy Chicken Rotini Bake every time. Each instruction includes vital tips for success.
- Preheat Oven & Prep Dish:
Preheat your oven to 375°F (190°C). Lightly grease a 9×13 inch baking dish with 1 tablespoon of olive oil.
This prevents sticking and helps the bake brown nicely, ensuring an even crust.
- Cook Pasta to Perfection (The Secret Step!):
Bring a large pot of generously salted water to a rolling boil. Add the rotini pasta and cook for 2 minutes less than the package directions for al dente.
This vital step prevents the pasta from becoming dry and tough during baking, allowing it to finish cooking in the oven’s moist heat. Drain the pasta thoroughly after cooking.
- Sauté Aromatics:
While the pasta cooks, in a large saucepan or Dutch oven, heat the remaining 1 tablespoon of olive oil over medium heat.
Add the minced garlic and cook for 1 minute until fragrant, being careful not to burn it, which can make it bitter.
- Simmer the Flavorful Sauce:
Stir in the crushed tomatoes, chicken broth, dried oregano, and dried basil. Bring the sauce to a gentle simmer.
Reduce the heat to low and let it bubble gently for 5-7 minutes to allow the flavors to meld and ensure the sauce has enough liquid to hydrate the pasta in the oven. Season generously with salt and black pepper.
- Combine Chicken with Sauce:
Add the shredded cooked chicken to the sauce and stir to combine well.
This ensures the chicken is well-coated and integrated into the sauce before mixing with the pasta, enhancing flavor throughout.
- Integrate Pasta and Sauce:
Add the slightly undercooked, drained pasta to the sauce with the chicken, stirring gently until every piece of pasta is evenly coated.
This ensures consistent moisture throughout the dish and prevents dry spots in your baked pasta dish.
- Layer the First Half:
Pour half of the pasta mixture into the prepared baking dish. Sprinkle with 1 cup of the mozzarella cheese and all of the Parmesan cheese.
If you love the creamy, cheesy sauce in this rotini bake, try it with the juicy breaded chicken parmesan over rigatoni for a similar comforting meal.
Layering creates pockets of melty cheese throughout the bake, not just on top.
- Top with Remaining Mixture:
Top with the remaining pasta mixture, spreading it evenly in the dish.
- First Bake (Covered for Moisture):
Cover the baking dish tightly with aluminum foil. Bake for 20 minutes.
The foil acts as a steam trap, allowing the pasta to finish cooking perfectly without drying out, a key for a truly moist pasta bake recipe.
- Second Bake (Uncovered for Golden Cheese):
Remove the foil. Sprinkle the remaining 1 cup of mozzarella cheese evenly over the top.
Return the dish to the oven, uncovered, and bake for another 15-20 minutes, or until the cheese is melted, bubbly, and lightly golden brown.
- The Essential Rest:
Let the pasta bake rest for 5-10 minutes before serving. Garnish with dried parsley.
This short rest allows the sauce to set slightly, making for cleaner servings and a more cohesive, delicious dish.
Unlock the Secrets to an Irresistibly Moist Pasta Bake
Achieving a perfectly moist and flavorful pasta bake isn’t magic; it’s about understanding and implementing a few critical techniques. These are the “secrets” that elevate this Cheesy Chicken Rotini Bake above the rest.
The “Al Dente Minus Two” Pasta Strategy
The absolute most crucial tip is to undercook your pasta by 2 minutes from package directions. This isn’t a mistake; it’s a deliberate choice that allows the pasta to absorb the flavorful sauce in the oven without turning mushy or dry, ensuring a tender bite.
Building a Hydrating, Flavorful Sauce Base
Don’t rush the sauce. Simmering for 5-7 minutes not only melds the flavors but also ensures there’s enough liquid in the sauce to hydrate the pasta as it bakes. A well-hydrated, flavorful sauce is key to preventing a dry pasta bake.
The Magic of Foil: Steam-Baking for Tenderness
Covering your baking dish tightly with foil during the initial bake creates a steamy environment. This steam helps the pasta finish cooking gently, preventing the exposed parts from drying out and becoming tough, guaranteeing a consistently tender texture.
The Crucial Rest: Let Flavors Settle
Patience is a virtue! Resting the Cheesy Chicken Rotini Bake for 5-10 minutes after it comes out of the oven allows the sauce to thicken and set. This prevents a watery dish when serving and makes for easier, cleaner portions, allowing all the flavors to truly meld.
Customizing Your Cheesy Chicken Rotini Bake
While this classic Cheesy Chicken Rotini Bake is delicious as-is, don’t hesitate to make it your own with these simple variations. It’s a versatile weeknight meal!
What to Serve Alongside
This cheesy, saucy chicken rotini bake is rich and hearty, so you’ll want sides that cut through the creaminess and add fresh contrast.
- A crisp, tangy Chopped Antipasto Salad brings bright
Add Veggies: Sauté diced bell peppers, onions, or mushrooms with the garlic for added nutrients and flavor, boosting your daily vegetable intake.
Spice It Up: A pinch of red pepper flakes in the sauce can add a pleasant warmth and subtle kick, perfect for those who enjoy a little heat.
Cheese Swaps: Experiment with provolone, white cheddar, or a blend of Italian cheeses for different flavor profiles and melt textures.
Protein Alternatives: Ground turkey or Italian sausage (cooked and crumbled) can be used instead of chicken for a different twist on this creamy chicken pasta, offering a richer flavor.
Perfect Pairings: What to Serve with Your Cheesy Chicken Rotini Bake
A hearty pasta bake deserves complementary sides that enhance the meal without overpowering it. Here are some ideal pairings for your Cheesy Chicken Rotini Bake.
Fresh Green Salad: A simple mixed greens salad with a light vinaigrette provides a refreshing contrast to the rich pasta bake, cutting through the creaminess.
Garlic Bread or Breadsticks: Perfect for soaking up any extra sauce, making sure no delicious drop goes to waste.
Steamed Green Beans or Broccoli: Adds a healthy, vibrant side dish that offers a gentle crunch and balances the meal.
Plan Ahead: Make-Ahead & Storage Tips
This Cheesy Chicken Rotini Bake is perfect for meal prepping, allowing you to enjoy a delicious home-cooked meal even on busy days. These tips ensure optimal freshness and flavor.
Can I Make This Ahead?
Yes! Assemble the entire Cheesy Chicken Rotini Bake (through step 8) in the baking dish, cover tightly with plastic wrap and then foil, and refrigerate for up to 2 days. Add an extra 10-15 minutes to the covered baking time if baking directly from the fridge.
Storing Leftovers
Store any leftover Cheesy Chicken Rotini Bake in an airtight container in the refrigerator for up to 3-4 days. It reheats beautifully in the microwave or oven, making for a quick lunch or dinner.
Freezing Instructions
For longer storage, the assembled and unbaked pasta bake can be frozen for up to 3 months. Thaw in the refrigerator overnight before baking as directed, or bake from frozen, increasing the covered baking time by about 30-45 minutes until bubbly and heated through.
Common Bake Bumps? Quick Fixes for Your Rotini Dish
Even expert cooks encounter small challenges. Here are quick solutions for common issues you might face with any baked pasta dish, ensuring your Cheesy Chicken Rotini Bake is always a success.
Pasta is Still a Bit Dry After Baking?
If your pasta feels a little dry, it might be due to not enough sauce liquid or over-baking uncovered. Next time, ensure the sauce simmers long enough to be slightly thin, and strictly adhere to the foil-covered baking time to trap steam.
For an immediate fix, you can stir in a splash of warm chicken broth or milk directly into the individual serving to add moisture.
Sauce Seems Too Thin or Thick?
If the sauce is too thin, let it simmer uncovered for a few extra minutes to reduce and thicken slightly. If it’s too thick, add a little extra chicken broth or even a splash of pasta water until it reaches your desired consistency.
Cheese Not Golden Brown Enough?
If your cheese isn’t as golden and bubbly as you’d like, after removing the foil, you can place the dish under the broiler for 1-2 minutes. Watch it very carefully to prevent burning; cheese can go from perfect to charred very quickly.
Your Top Questions About This Cheesy Chicken Rotini Bake Answered
We’ve gathered and answered some common questions to help you master this delightful Cheesy Chicken Rotini Bake. Consider these tips for your next family dinner.
Can I use a different type of pasta for this bake?
Absolutely! While rotini is fantastic for holding sauce, you can easily substitute other medium-sized pasta shapes like penne, ziti, or cavatappi. Just remember to cook it 2 minutes less than al dente according to package directions, as per our key strategy.
What if I don’t have pre-cooked chicken?
No problem at all! You can quickly cook 1.5 lbs of boneless, skinless chicken breast or thighs. Simply poach, boil, or pan-fry until cooked through, then shred or dice before adding to the sauce. This adds minimal extra time to your preparation.
Can I make this vegetarian?
Yes, you can! Omit the chicken and replace it with sautéed mushrooms, cooked lentils, or plant-based chicken substitutes for a hearty vegetarian option. Use vegetable broth instead of chicken broth for a fully vegetarian version of this baked pasta dish.
Is this recipe spicy?
As written, this Cheesy Chicken Rotini Bake is not spicy, offering a mild and family-friendly flavor profile. However, you can easily add a pinch of red pepper flakes to the sauce for a little kick, or more to taste if you prefer a bit of heat!
Your Delicious Journey Awaits: Share and Enjoy!
You’re now equipped with the ultimate recipe for a Cheesy Chicken Rotini Bake that promises tender pasta, rich sauce, and gooey cheese every single time. Say goodbye to dry, disappointing pasta bakes forever and hello to a new family favorite!
We encourage you to try this comforting recipe and discover the simple secrets to its success. Don’t forget to share your culinary creations with us – we love seeing your delicious results and hearing how this baked pasta dish brings joy to your table!
Cheesy Chicken Rotini Bake
Course: Main CourseCuisine: Italian-AmericanDifficulty: easyServings6
servingsPrep time20
minutesCooking time45
minutesCalories450
kcalTotal time60
minutesDiscover the secret to a perfectly moist and tender Cheesy Chicken Rotini Bake. This family-favorite recipe ensures saucy pasta every time, even after baking. With shredded chicken, crushed tomatoes, and plenty of cheese, it’s a comforting dish everyone will love.
Ingredients
1 pound rotini pasta
2 tablespoons olive oil, divided
3 cups shredded cooked chicken breast
1 (28 ounce) can crushed tomatoes
1/2 cup chicken broth
2 cloves garlic, minced
1 teaspoon dried oregano
1/2 teaspoon dried basil
Salt to taste
Black pepper to taste
2 cups shredded mozzarella cheese, divided
1/4 cup grated Parmesan cheese
1 teaspoon dried parsley, for garnish
Directions
- Preheat your oven to 375°F (190°C). Lightly grease a 9×13 inch baking dish with 1 tablespoon of olive oil.
- Bring a large pot of salted water to a rolling boil. Add the rotini pasta and cook for 2 minutes less than the package directions for al dente. This vital step prevents the pasta from becoming dry and tough during baking, allowing it to finish cooking in the oven’s moist heat. Drain the pasta thoroughly.
- While the pasta cooks, in a large saucepan or Dutch oven, heat the remaining 1 tablespoon of olive oil over medium heat. Add the minced garlic and cook for 1 minute until fragrant.
- Stir in the crushed tomatoes, chicken broth, dried oregano, and dried basil. Bring the sauce to a gentle simmer, then reduce the heat to low and let it bubble gently for 5-7 minutes to allow the flavors to meld and ensure the sauce has enough liquid to hydrate the pasta in the oven. Season generously with salt and black pepper.
- Add the shredded cooked chicken to the sauce and stir to combine well.
- Add the slightly undercooked, drained pasta to the sauce with the chicken, stirring gently until every piece of pasta is evenly coated. This ensures consistent moisture throughout the dish.
- Pour half of the pasta mixture into the prepared baking dish. Sprinkle with 1 cup of the mozzarella cheese and all of the Parmesan cheese.
- Top with the remaining pasta mixture, spreading it evenly in the dish.
- Cover the baking dish tightly with aluminum foil. Bake for 20 minutes. The foil acts as a steam trap, allowing the pasta to finish cooking perfectly without drying out.
- Remove the foil. Sprinkle the remaining 1 cup of mozzarella cheese evenly over the top.
- Return the dish to the oven, uncovered, and bake for another 15-20 minutes, or until the cheese is melted, bubbly, and lightly golden brown.
- Let the pasta bake rest for 5-10 minutes before serving. This short rest allows the sauce to set slightly. Garnish with dried parsley.
Notes
- Undercooking pasta slightly and covering the dish with foil during initial baking are key to a moist result.