Mastering Sticky Mongolian Beef Bowls: The Science of Velveting
Most home cooks have experienced the disappointment of a rubbery, chewy stir-fry that feels more like a jaw workout than a gourmet meal. You follow the recipe exactly, yet the beef turns out gray and tough instead of having that signature restaurant-style snap. The secret to bridging the gap between a mediocre weeknight dinner and high-end takeout results lies in a specific culinary technique called velveting.
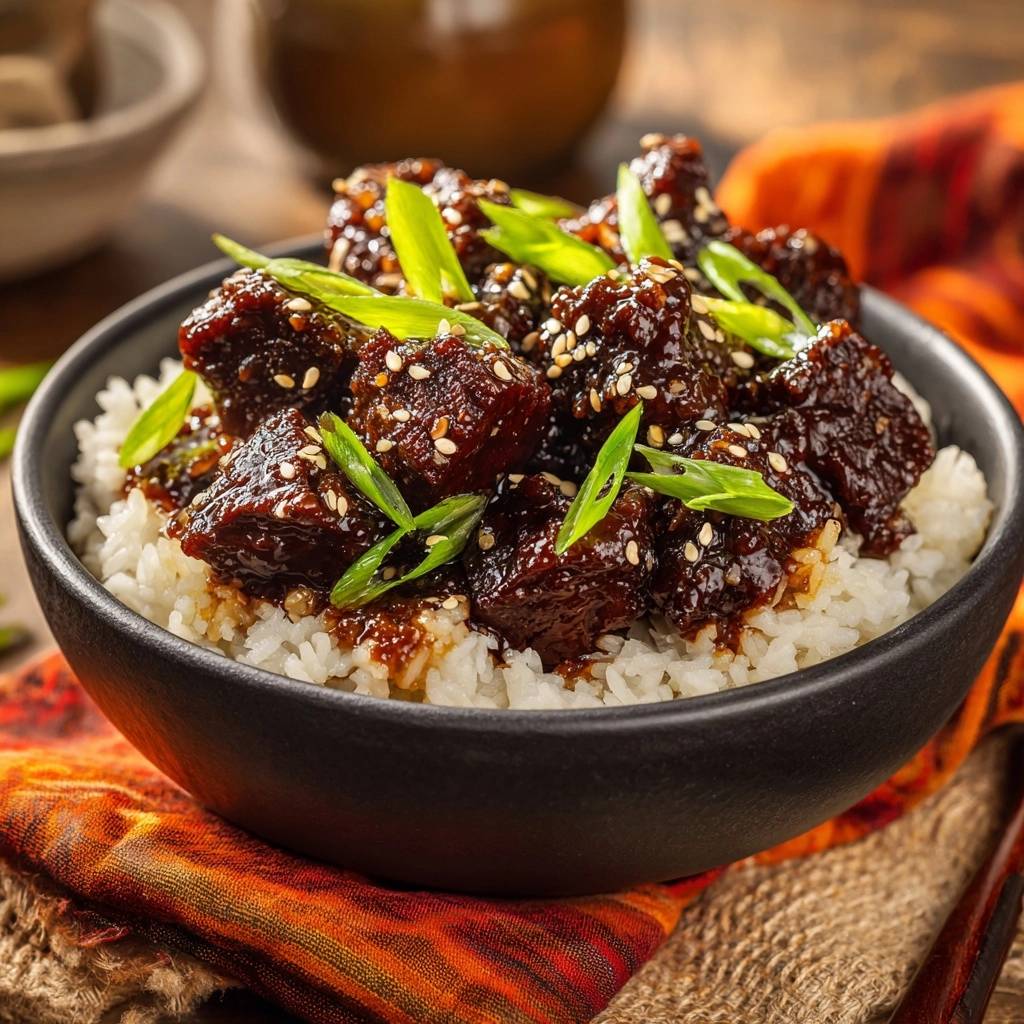
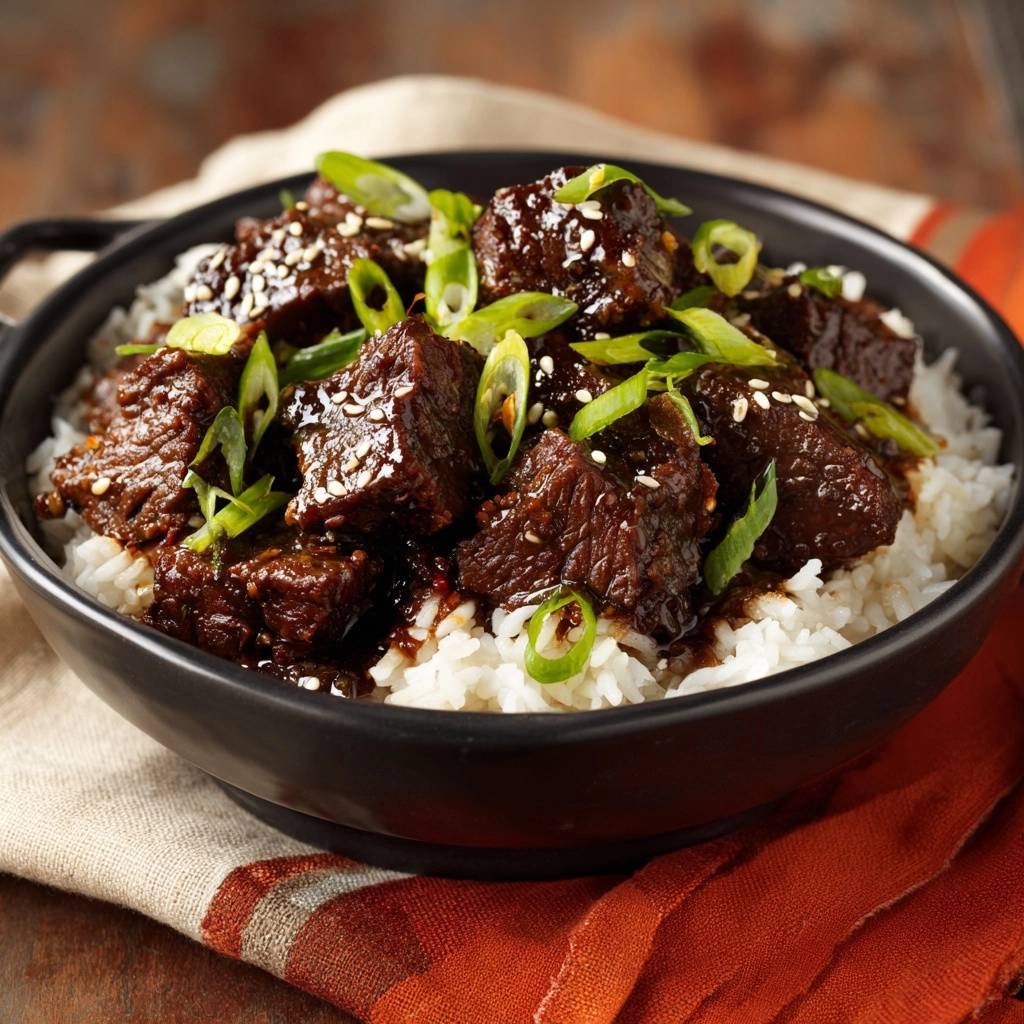
Sticky Mongolian Beef Bowls are defined by their intense, mahogany-colored lacquer and meat so tender it practically melts. This guide focuses on achieving that perfect balance of sweet and savory while maintaining a 30-minute timeline. With about 510 calories per serving, you’re getting a protein-packed meal that looks and tastes like it came from a professional kitchen.
The magic happens when you combine a protective starch barrier with a high-heat flash-fry. This process ensures the interior of the beef stays succulent while the exterior develops a craggy, dark crust. I’ve found that once you master this simple two-step method, you’ll never settle for a basic stir-fry again. Oh man, the way the sauce clings to that crispy coating is absolutely addictive!
The Chemistry of Tender Beef: Why Velveting Works
The “Anti-Chewy Secret” isn’t just a catchy name; it’s rooted in food science. By tossing your beef cubes in a frothy egg white and cornstarch mixture, you’re creating a physical and chemical shield. The alkaline nature of the egg white helps to gently break down the tough muscle fibers on the surface of the meat, making it significantly more tender.
Furthermore, the cornstarch acts as a “sacrificial crust.” When the beef hits the hot oil, the starch dehydrates and crisps up instantly, protecting the delicate protein underneath from the direct, aggressive heat. This prevents the meat from seizing up and becoming dry. Traditional Chinese velveting often involves poaching, but this flash-fry version gives you the added benefit of a golden-brown texture.
In addition to texture, this coating serves as a primer for your sauce. Without it, the glossy sugar reduction would simply slide off the smooth surface of the meat. Instead, the starch absorbs the liquid, bonding the beef and the sauce into one cohesive, sticky bite. It’s the difference between beef sitting in a puddle and beef being truly lacquered.
Essential Components for Sticky Mongolian Beef Bowls
Quality ingredients are the backbone of this dish, especially since the sauce relies on a heavy reduction. You must use low-sodium soy sauce here. As the water evaporates during the simmering process, the salt concentration intensifies; using regular soy sauce will result in a dish that is far too salty to enjoy.
The choice of sugar is equally vital for that deep, rich color. Dark brown sugar contains more molasses than light brown sugar, which provides a complex, earthy sweetness and helps achieve that beautiful mahogany hue. It also creates a thicker, more stable syrup that coats the back of a spoon perfectly.
Selecting the Right Cut: Flank vs. Sirloin
Flank steak is the traditional choice for Mongolian beef because of its intense beefy flavor and long fibers. However, sirloin is a fantastic alternative if you prefer a slightly more tender starting point. Regardless of the cut, you must slice the meat against the grain to ensure the shortest possible muscle fibers in every bite.
If you find the meat difficult to cube uniformly, try popping it in the freezer for about 20 minutes. This firms up the fat and muscle, allowing your knife to glide through for clean, one-inch cubes. Consistent sizing is key because it ensures every piece of beef finishes cooking at exactly the same time.
Aromatics: The Power of Fresh Ginger and Garlic
Please skip the jarred garlic and powdered ginger for this recipe. Fresh aromatics contain volatile oils that release a punchy, vibrant aroma the moment they hit the hot oil. These oils infuse the entire base of the sauce, providing a depth of flavor that processed versions simply cannot replicate.
When you sauté the minced garlic and ginger for those 30 seconds, you’re looking for them to become fragrant without turning brown. Garlic turns bitter very quickly once it burns, so keep your spoon moving. This short window is all it takes to wake up the flavors and set the stage for the soy and sugar reduction.
Step-by-Step: Achieving the Perfect Flash-Fry
The frying stage is where the texture is won or lost. You aren’t just cooking the meat; you’re building a foundation for the sauce. Therefore, you need to be attentive to the visual and auditory cues of your skillet to ensure the beef doesn’t steam in its own juices.
Phase 1: The Starch Coating and Resting Period
After you’ve coated the beef in the egg white and cornstarch, let it rest for at least 10 minutes. This allows the starch to fully hydrate and adhere to the meat. If you fry it immediately, the coating might flake off in the oil, leaving you with a messy pan and naked beef.
The beef should look tacky and thick, not dripping with liquid. If it looks too wet, a tiny extra sprinkle of cornstarch can help. This resting period is the perfect time to prep your green onions or get your jasmine rice steaming so everything finishes together.
Phase 2: Managing Skillet Temperature and Batch Cooking
Heat your oil until it is shimmering and just starting to show a faint wisp of smoke. If the oil isn’t hot enough, the beef will soak up the grease and become soggy. You want to hear a loud, aggressive sizzle the moment the meat touches the pan.
Crucially, do not overcrowd the skillet. If you add too much meat at once, the temperature of the oil will drop, and the beef will release moisture and steam. Work in two batches to maintain that high heat, ensuring each cube develops a craggy, dark, and crispy crust that can stand up to the heavy sauce.
The Reduction: Crafting a Glossy Sugar Lacquer
Once the beef is set aside, it’s time to build the sauce. After sautéing your aromatics, pour in the soy sauce, water, and brown sugar. Bring this mixture to a vigorous boil. You are looking for the water to evaporate until the bubbles become large, slow, and “glassy” in appearance.
This method of building a rich sauce works just as well for a tender beef curry over rice.
Use the spoon test to check your progress. Dip a metal spoon into the sauce; it should coat the back of the spoon in a thick, translucent layer rather than running off like water. Only then should you stir in the toasted sesame oil. Adding the sesame oil at the very end preserves its delicate, nutty aroma which can be destroyed by prolonged boiling.
When you return the beef to the pan, the reaction is almost instant. The residual starch on the beef acts as a thickener, bonding with the sugar syrup to create a thick, sticky lacquer. Toss it rapidly for about 30 to 60 seconds. You want every nook and cranny of that crispy beef to be enveloped in the glossy reduction.
Troubleshooting Common Stir-Fry Obstacles
If your beef ends up soggy, the culprit is almost always low heat or overcrowding the pan. Ensure the oil is shimmering before you start, and give the meat space to breathe. If the sauce feels too thin and won’t stick, you likely didn’t reduce the sugar and soy mixture long enough before adding the beef back in.
For those who find the dish too salty, double-check that you used low-sodium soy sauce. If you only have regular soy sauce on hand, you can cut it with a bit more water, but the flavor profile will shift. Lastly, if the sauce tastes burnt, you may have let the sugar boil for too long at too high a heat; keep a close eye on it once it starts to thicken.
Flavor Variations and Ingredient Swaps
You can easily adjust the heat level of this dish by playing with the crushed red pepper flakes. If you like a lingering burn, add a teaspoon of chili crisp at the very end. For a milder version, omit the flakes entirely; the ginger and garlic still provide plenty of aromatic warmth without the spice.
If you want to add vegetables like broccoli or snap peas, steam them separately and toss them in at the very last second. Do not cook them in the sauce reduction, as they will release water and thin out your beautiful sticky lacquer. For a different sweetness, honey or coconut sugar can work, though they may result in a slightly softer coating than brown sugar.
Optimal Pairings for Sticky Mongolian Beef Bowls
Jasmine rice is the gold standard for this dish. Its floral aroma and slightly sticky texture make it the perfect sponge for the extra Mongolian sauce. The contrast between the fluffy white rice and the dark, intense beef is visually stunning and palate-cleansing.
To balance the richness of the sugar and beef, I highly recommend a side with some acidity. A simple smashed cucumber salad with rice vinegar or some charred bok choy with a squeeze of lime provides a fresh, bright counterpoint. These acidic elements cut through the sweetness and keep the meal feeling balanced rather than heavy.
Make-Ahead Strategies and Storage Logistics
While this beef is best served immediately to enjoy the contrast of the crispy crust and tender interior, it does make for a great lunch the next day. Store leftovers in an airtight container in the refrigerator for up to three days. The sauce will thicken further as it cools, so it will be very “set” when you take it out.
To reheat, avoid the microwave if possible, as it will make the beef rubbery. Instead, toss the beef in a dry skillet over medium heat. Add a tiny splash of water to loosen the sauce and stir constantly until the beef is warmed through and the lacquer becomes glossy again. The sauce itself can be whisked together in bulk and stored in the fridge for a week for even faster prep.
Expert Tips for Restaurant-Quality Presentation
Presentation is all about height and contrast. When you plate the rice, use a fork to fluff it up into a mound rather than packing it down. Place the heavy beef cubes on top so they sit high in the bowl. This “skyscraper” effect makes the portion look generous and professional.
The garnish is not just for show. Slicing the green onions on a long, sharp diagonal creates elegant strips that add visual movement to the dish. A heavy sprinkle of toasted sesame seeds provides a micro-texture that pops against the smooth, dark sauce. These small details signal to your guests—or just yourself—that this isn’t just a basic weeknight meal.
Frequently Asked Questions
Can I use a different starch like arrowroot or potato starch?
Yes, you can substitute arrowroot or potato starch for cornstarch in equal amounts. Both will provide a similar “velveting” effect and help create a crispy exterior. Potato starch actually tends to get even crispier than cornstarch, though the sauce might end up slightly more translucent. Avoid using all-purpose flour, as it will create a doughy, heavy breading rather than a light, crisp shell.
Is it possible to make this in an Air Fryer?
Making this specific recipe in an air fryer is tricky because of the wet egg white coating. The batter may drip through the basket before it sets, leading to a mess and a loss of the protective barrier. If you must use an air fryer, you would need to spray the coated beef generously with oil and cook at 400°F, but you will likely lose that signature “shattered” crispy texture that shallow frying provides.
How do I prevent the garlic from burning during the 30-second sauté?
The key is to have all your liquid ingredients (soy sauce, water, sugar) measured and ready in a bowl before the garlic hits the pan. Garlic burns in a heartbeat at high temperatures. By having your liquids ready, you can pour them in the moment the garlic becomes fragrant, which instantly drops the temperature of the pan and stops the garlic from browning further.
Can I substitute the soy sauce for Liquid Aminos or Tamari?
You certainly can. Tamari is an excellent gluten-free substitute that offers a very similar deep, savory flavor. Liquid aminos are also a great alternative, though they tend to be slightly sweeter and less salty than traditional soy sauce. If using aminos, you might want to slightly reduce the amount of brown sugar to maintain the flavor balance of the sauce.
What is the best way to clean a wok after a sticky sugar reduction?
Don’t scrub the pan while it’s dry! The easiest way to clean up a sticky sugar sauce is to take advantage of the sugar’s solubility. Once you’ve plated the food, pour a cup of water into the hot pan and bring it to a boil. The boiling water will dissolve the hardened sugar and starch in seconds, allowing you to simply wipe the pan clean with a sponge.
Mongolian Beef
Course: Main CourseCuisine: Asian FusionDifficulty: easy4
servings15
minutes15
minutes510
kcal30
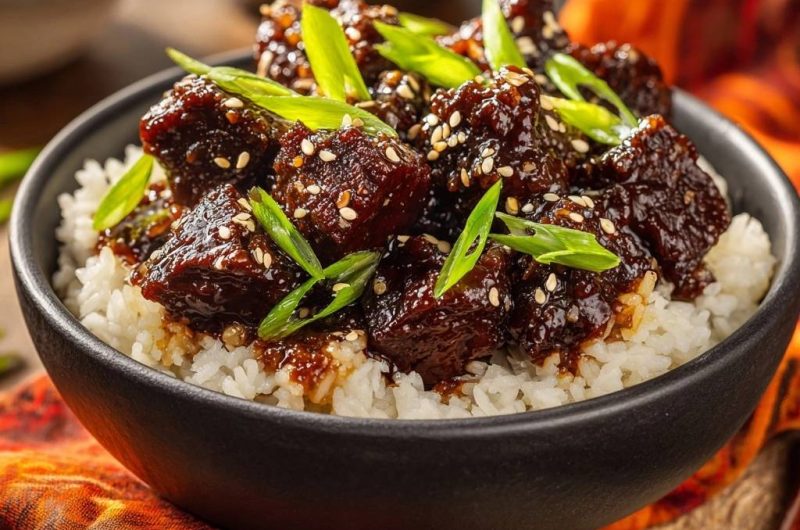
MinutesA restaurant-quality beef stir-fry featuring tender flank steak coated in a rich, glossy, and sweet soy-based lacquer. The recipe uses a specific cornstarch and egg white coating to ensure the meat remains tender while achieving a crispy exterior.
Ingredients
1.5 lbs flank steak or sirloin, cut into 1-inch cubes
1 egg white, whisked until frothy
1/3 cup cornstarch (for coating)
1/2 cup vegetable oil (for shallow frying)
1/2 cup low-sodium soy sauce
1/2 cup water
3/4 cup dark brown sugar (packed)
1 tablespoon fresh ginger, minced
4 cloves garlic, minced
1 teaspoon crushed red pepper flakes
1 teaspoon toasted sesame oil
2 cups cooked white jasmine rice
3 green onions, sliced diagonally into long strips
1 tablespoon toasted sesame seeds
Directions
- The Anti-Chewy Secret: In a medium bowl, toss the beef cubes with the whisked egg white until coated. Add the cornstarch and toss again until every piece is thickly coated and no dry powder remains. Let it sit for 10 minutes. This creates a “velvet” barrier that keeps the interior tender while providing a surface for the sauce to cling to.
- Heat the vegetable oil in a large skillet or wok over medium-high heat until shimmering.
- Carefully add the beef in a single layer (work in two batches to maintain heat). Fry for 3-4 minutes, turning occasionally, until the beef develops a dark, crispy, golden-brown crust. Remove the beef with a slotted spoon and drain on paper towels. Discard all but 1 tablespoon of oil from the pan.
- In the same pan, add the garlic, ginger, and red pepper flakes. Sauté for 30 seconds until fragrant.
- Pour in the soy sauce, water, and dark brown sugar. Bring to a boil over medium-high heat, stirring constantly to dissolve the sugar.
- Simmer the sauce for 4-6 minutes. You are looking for a “syrupy” reduction; the sauce should coat the back of a spoon and look dark and glossy. Stir in the sesame oil.
- Return the crispy beef to the pan. Toss rapidly for 30-60 seconds. The residual cornstarch on the beef will instantly bond with the sugar reduction to create a thick, sticky lacquer.
- Serve immediately over bowls of warm white rice. Garnish heavily with the diagonally sliced green onions and toasted sesame seeds to match the visual presentation.
Notes
- The secret to the texture is the two-step velveting and flash-frying process. Ensure the oil is shimmering before adding the beef to achieve the signature craggy crust.