Mastering Crispy Baked Chicken Parmesan Without the Soggy Breading
Most home cooks struggle with Chicken Parmesan because the breading turns into a mushy mess once it hits the sauce. You spend all that time breading and frying, only to have the moisture from the marinara turn your hard work into a soggy disappointment. This recipe solves that frustration by using a specific double-sear and elevated baking method that locks in the crunch while keeping the chicken incredibly juicy.
The secret lies in the “Anti-Soggy” philosophy. By flash-searing the breaded cutlets in a hot pan before they ever touch the baking dish, you create a moisture-proof barrier. This barrier stays crispy even under a blanket of melted mozzarella. It’s the perfect balance of a golden, shattered-glass crust and a tender, succulent interior that rivals any high-end Italian restaurant.
I’ve found that the real trick is leaving the edges of the chicken exposed during the bake. If you drown the entire cutlet in sauce, you lose the texture. By strategically saucing only the center, you get that classic cheesy bite while the perimeter stays wonderfully crisp. Let’s dive into the techniques that make this dish a weeknight hero.
The Physics of the Perfect Chicken Crunch
Achieving a superior crunch isn’t just about the ingredients; it’s about the Maillard reaction. When you sear the chicken in a shimmering pan, the proteins and sugars in the breading react to the high heat. This creates that deep brown color and complex, savory flavor that baking alone simply cannot replicate.
Panko breadcrumbs are the MVP of this process. Unlike traditional Italian breadcrumbs, which are fine and sandy, Panko is flaky and jagged. These larger flakes create more surface area and tiny air pockets. These pockets allow heat to circulate, ensuring the crust dries out and crisps up rather than steaming against the meat.
The initial sear acts as a protective shield. It hardens the crust so that when you add the marinara later, the sauce sits on top of the barrier rather than soaking into the breading. This structural integrity is what keeps the chicken from becoming “bready” or gummy during the final 15 minutes in the oven.
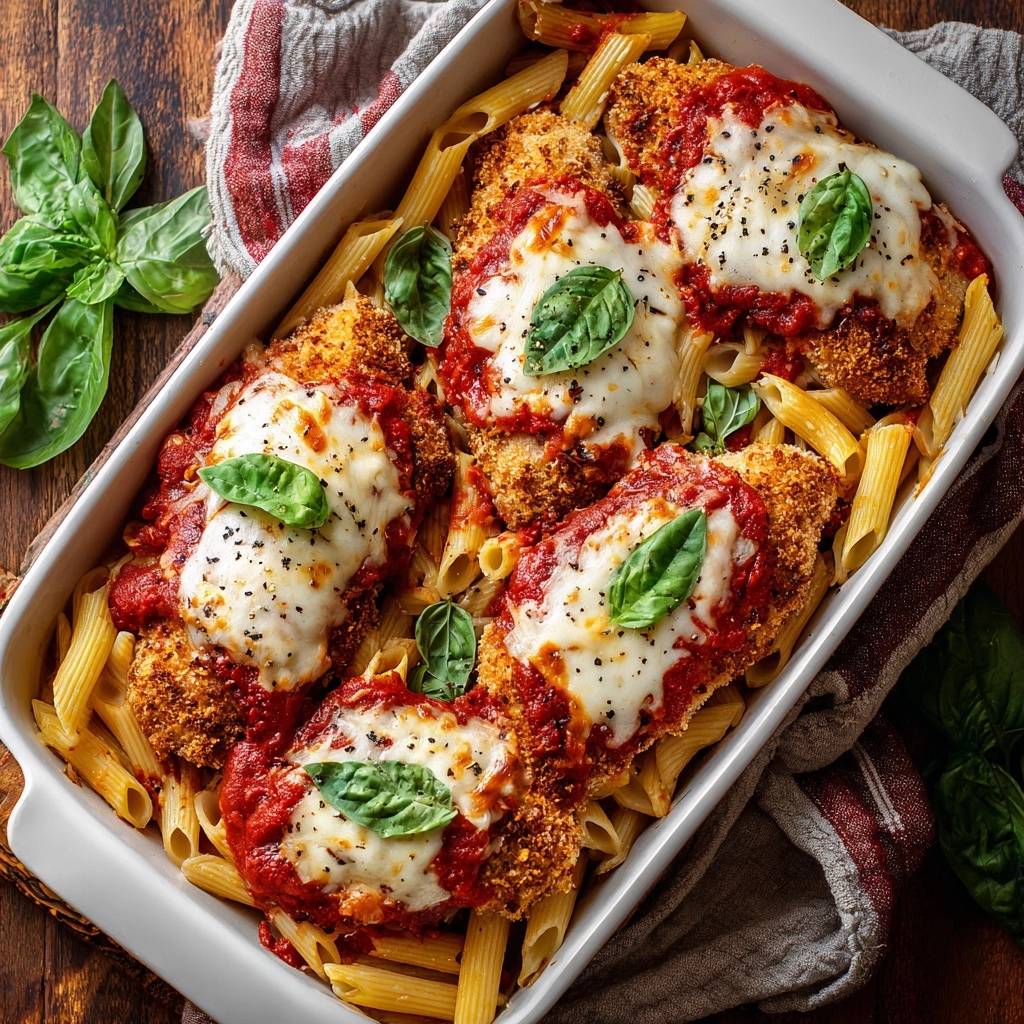
Essential Components for Crispy Baked Chicken Parmesan
Quality ingredients are the foundation of this dish. For the cheese, I always recommend buying a low-moisture mozzarella block and grating it yourself. Pre-shredded cheeses are coated in potato starch to prevent clumping, which can interfere with that perfect, stretchy melt. Low-moisture cheese also prevents excess water from leaking onto your crispy chicken.
Pounding the chicken to a uniform 1/2-inch thickness is a non-negotiable step. If one side is thicker than the other, the thin part will dry out before the center is safe to eat. Use a meat mallet or even a heavy skillet to even them out. This ensures every bite is equally juicy and the breading browns at the same rate.
Panko provides the texture, but the Parmesan in the breading provides the “umami” punch. Mixing the two creates a salty, nutty crust that seasons the meat from the outside in. Don’t skip the dried oregano and garlic powder in the breading station; they provide that nostalgic “red sauce joint” aroma that fills your kitchen.
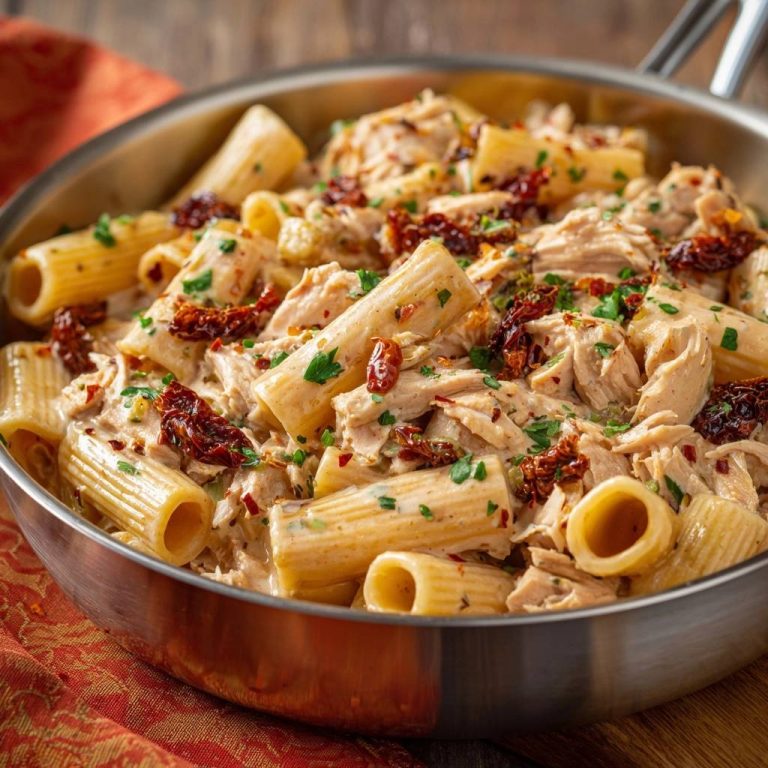
This breading technique works beautifully for a hearty chicken parmesan over rigatoni as well.
Selecting the Right Marinara and Pasta
Since we are baking the chicken on a bed of pasta, the consistency of your marinara matters. A thin, watery sauce will pool at the bottom and make the rigatoni mushy. Choose a thick, slow-simmered marinara that clings to the noodles. Rigatoni is the superior choice here because its large ridges and hollow center act like little pipes, capturing the sauce and cheese much better than thin spaghetti ever could.
The Three-Station Dredging System
Organization is the key to a mess-free kitchen. Set up your flour, beaten eggs, and Panko mixture in three wide, shallow bowls. When you dredge the chicken in the flour, make sure to shake off every bit of excess. You only want a thin, invisible layer to help the egg stick; too much flour creates a “skin” that will peel off the chicken later.
Use the “dry hand/wet hand” technique to keep your fingers from becoming breaded themselves. Use your left hand for the dry flour and Panko, and your right hand for the egg wash. Press the chicken firmly into the Panko mixture at the final station. You want to physically push the crumbs into the meat to ensure a thick, even coating that won’t fall off in the skillet.
Step-by-Step: Achieving the Golden Flash-Sear
Before the chicken ever sees the oven, it needs a date with a hot skillet. Heat two tablespoons of olive oil over medium-high heat until it is shimmering and dancing. If the oil isn’t hot enough, the breading will just soak up the grease and become heavy. You should hear a loud sizzle the moment the chicken touches the pan.
Sear the cutlets for about 3 minutes per side. You aren’t trying to cook the chicken all the way through right now; you are only setting the crust. Look for a deep, golden-brown color that looks ready to eat. This high-heat flash-sear locks in the juices and ensures the breading stays attached to the meat during the assembly phase.
If you are cooking in batches, don’t crowd the pan. Crowding drops the temperature of the oil and causes the chicken to steam rather than fry. If the pan looks dry after the first batch, add another splash of oil and let it get back up to temperature before adding more chicken. This patience pays off in the final texture.
Assembling the Rigatoni and Chicken Base
The “bed of pasta” technique is a game-changer for easy cleanup and flavor. By the time you assemble the dish, your rigatoni should be slightly undercooked. It will absorb the steam and sauce in the oven to reach that perfect al dente bite. Tossing the pasta with a little olive oil and a cup of sauce before it hits the baking dish is vital.
This light coating of oil and sauce acts as insurance. It prevents the noodles on the edges from becoming crunchy or dry in the high heat of the oven. Spread the pasta in an even layer so it creates a flat platform for your seared chicken breasts. This elevation allows air to circulate around the chicken, further protecting that crispy bottom.
The same method of baking the chicken on a wire rack works beautifully for this crispy lemon chicken Milanese.
Strategic Saucing to Protect the Crust
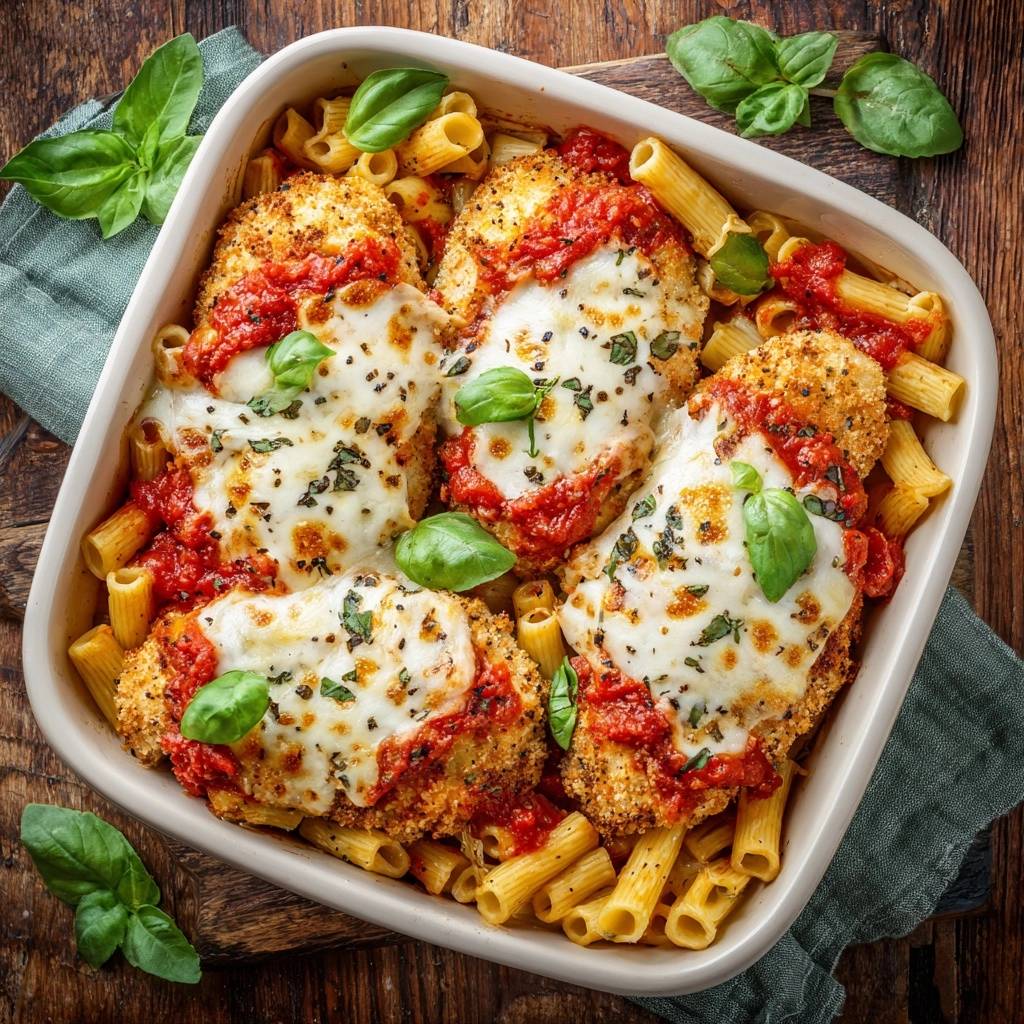
This is where most people go wrong. Instead of pouring the remaining marinara over the entire dish, use the “Center-Spoon” method. Carefully spoon the sauce only over the middle third of each chicken breast. This leaves the golden, seared edges exposed to the dry, circulating heat of the oven, keeping them incredibly crunchy.
Add small dollops of sauce to the surrounding pasta to keep things moist, but keep the chicken’s perimeter clear. When you add the mozzarella, pile it high on top of the sauced portion. As it melts, it will drape over the sides slightly, but the very edges of the breading will remain untouched by moisture, preserving that satisfying “crunch” in every mouthful.
Oven Calibration and the Melting Phase
We bake this at 425°F because we want speed. A lower temperature would take too long to melt the cheese, potentially overcooking the chicken and making it rubbery. At this high heat, the mozzarella bubbles and develops those beautiful golden-brown spots in about 12 to 15 minutes, which is exactly how long the chicken needs to finish cooking.
The only way to be 100% sure your chicken is perfect is to use an instant-read thermometer. You are looking for an internal temperature of 165°F. Pull the dish out as soon as it hits that mark. Let the dish rest for 5 minutes before serving. This allows the juices to redistribute so they don’t run out the moment you cut into the meat.
Troubleshooting Common Texture Issues
If you find your breading is slipping off the chicken, you likely had too much flour or the chicken was too wet before dredging. Always pat the meat dry with paper towels before starting. If the cheese isn’t browning but the chicken is done, move the rack to the top position for the last 2 minutes of baking to give it a quick blast of heat.
If the pasta feels a little dry after you pull it out, don’t panic. You can gently stir a few tablespoons of hot pasta water or a little extra warm marinara into the rigatoni sections around the chicken. This will loosen the sauce instantly without affecting the crispy crust you worked so hard to create on the meat.
Optimal Side Dishes for Chicken Parmesan
Since this dish is rich, cheesy, and carb-heavy, you want sides that offer a bright, acidic contrast. A simple arugula salad tossed with a sharp lemon vinaigrette is my favorite pairing. The peppery bite of the greens cuts right through the melted mozzarella and fried breading, refreshing your palate between bites.
Roasted broccolini with plenty of charred garlic and a squeeze of fresh lemon is another fantastic option. The bitterness of the brassica balances the sweetness of the marinara sauce. Avoid heavy sides like garlic bread or creamy salads; you already have plenty of comfort happening in the main baking dish!
What to Serve with This Chicken Parmesan
A crisp, oven-baked chicken cutlet pairs well with bright, crunchy salads that cut through the richness. Here are two sides that match the texture and flavor.
- For a hearty, seasonal option with roasted squash and a tangy dressing, try this Crispy Roasted Butternut Squash Kale Salad — the earthy kale and sweet squash balance the savory chicken and cheese.
- If you prefer something warm and savory, the Warm Bacon Mushroom Arugula Salad brings peppery arugula and smoky mushrooms that echo the baked crunch of the chicken Parmesan.
Storage and Reheating for Maximum Retention
If you have leftovers, the microwave is your enemy. It will turn that crispy crust into a soggy sponge in seconds. Instead, store the chicken and pasta in an airtight container in the fridge for up to 3 days. To reheat, place the chicken in an air fryer at 350°F for 4-5 minutes. This will recrisp the Panko beautifully.
If you don’t have an air fryer, the oven works too. Place the leftovers in a small baking dish, cover the pasta with foil to keep it from drying out, but leave the chicken uncovered. Bake at 350°F until the cheese is bubbly again. The rigatoni stays surprisingly fresh, though it will absorb more sauce the longer it sits.
Freezing Instructions for Meal Prep
For the best results, freeze the seared chicken cutlets separately from the pasta and sauce. Once you have flash-seared the breaded chicken, let them cool completely and freeze them on a baking sheet before transferring to a bag. When you’re ready to eat, assemble the dish with fresh pasta and sauce, then bake from frozen, adding about 10 minutes to the cook time.
Frequently Asked Questions
How do I keep the chicken from getting soggy the next day?
The best way to maintain texture is to store the chicken separately from any extra sauce. When reheating, use an air fryer or a toaster oven. These methods use dry, circulating heat to pull moisture out of the breading, whereas a microwave traps steam and makes the crust soft. Even 5 minutes in a hot oven can bring back a significant amount of the original crunch.
Can I use chicken thighs instead of breasts?
Yes, boneless skinless chicken thighs work beautifully and are actually harder to overcook. However, they usually take about 5-7 minutes longer in the oven than pounded breasts. Make sure to trim any excess fat so the breading can adhere properly to the meat. The flavor will be richer, but the cook time will need to be monitored closely with a thermometer.
What if I don’t have Panko breadcrumbs?
If you can’t find Panko, you can make a coarse substitute by pulsing toasted white bread in a food processor until you have large crumbs. Avoid using the very fine, canned Italian breadcrumbs if you want a distinct crunch. Another trick is to crush up plain cornflakes or crackers; they provide a similar “shattered” texture that holds up well under sauce and cheese.
Why is my chicken tough or rubbery?
This usually happens for two reasons: overcooking or skipping the pounding step. If the chicken isn’t an even thickness, the outside will be overdone by the time the center is safe. Additionally, if you cook the chicken past 165°F, the muscle fibers tighten and squeeze out all the moisture. Always use a meat thermometer to pull the dish out at the exact right moment.
Can I make this gluten-free?
Absolutely. You can substitute the all-purpose flour with a 1-to-1 gluten-free flour blend and use gluten-free Panko-style crumbs, which are usually made from rice flour. For the pasta, use a sturdy gluten-free rigatoni made from corn or brown rice. Just be careful not to overcook the gluten-free pasta during the initial boil, as it tends to break apart more easily in the oven.
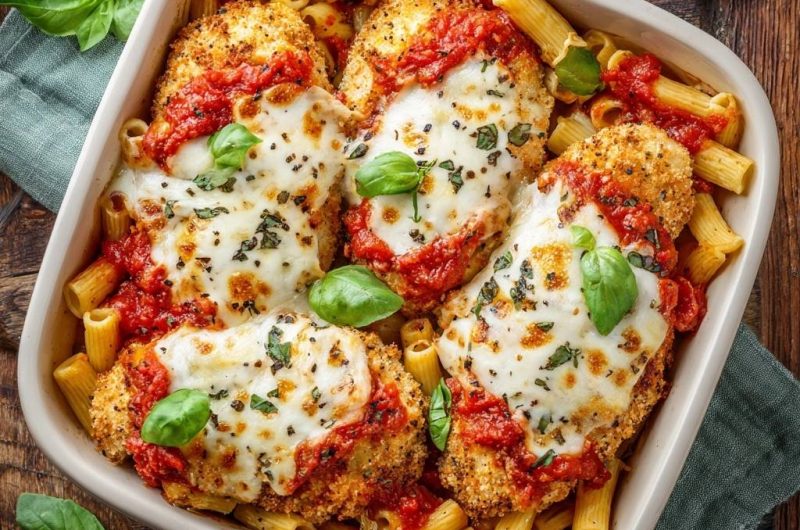
Chicken Parmesan
Course: Main CourseCuisine: Italian-AmericanDifficulty: easy4
servings15
minutes25
minutes580
kcal40
MinutesA revolutionary take on a classic dish that solves the problem of soggy breading. By flash-searing Panko-crusted chicken before baking it over a bed of rigatoni, this recipe maintains a crunch that stands up to marinara and melted mozzarella.
Ingredients
4 boneless skinless chicken breasts, pounded to 1/2-inch thickness
1 pound rigatoni pasta
3 cups marinara sauce, divided
1.5 cups shredded mozzarella cheese
1 cup Panko breadcrumbs
1/2 cup grated Parmesan cheese
2 large eggs, beaten
1/2 cup all-purpose flour
3 tablespoons olive oil, divided
1 teaspoon dried oregano
1 teaspoon garlic powder
1/2 teaspoon dried basil
Fresh basil leaves for garnish
Salt and black pepper to taste
Directions
- Preheat your oven to 425°F (220°C). Boil a large pot of salted water and cook the rigatoni until it is 2 minutes shy of al dente (it will finish cooking in the oven). Drain the pasta and toss with 1 cup of marinara sauce and 1 tablespoon of olive oil to prevent sticking. Spread the pasta evenly into a large 9×13 inch baking dish.
- Set up three shallow bowls for the breading station. Place flour in the first bowl. Place beaten eggs in the second. In the third bowl, combine Panko, Parmesan cheese, garlic powder, oregano, and dried basil. Season the chicken breasts generously with salt and pepper.
- Dredge each chicken breast in the flour, shaking off the excess. Dip into the egg wash, then press firmly into the Panko mixture, ensuring a thick, even coating on all sides.
- Heat 2 tablespoons of olive oil in a large skillet over medium-high heat. Once the oil is shimmering, sear the chicken for 3 minutes per side until the crust is deep golden brown and crispy. The chicken will not be cooked through yet.
- Arrange the seared chicken breasts directly on top of the bed of pasta. Spoon the remaining marinara sauce specifically over the center of each chicken breast and in small dollops over the surrounding pasta, leaving the crispy edges of the chicken exposed.
- Top the sauced portion of each breast with a generous amount of mozzarella cheese. Sprinkle a little extra dried oregano or black pepper over the cheese for visual detail.
- Bake for 12 to 15 minutes until the cheese is melted, bubbly, and shows golden-brown spots, and the chicken reaches an internal temperature of 165°F.
- Remove from the oven and let rest for 5 minutes. Garnish with plenty of fresh basil leaves before serving to provide the bright, aromatic finish shown in the image.
Notes
- To ensure the breading stays crispy, only apply sauce to the center of the chicken breasts, leaving the edges exposed. Use an instant-read thermometer to ensure chicken reaches 165 degrees Fahrenheit.