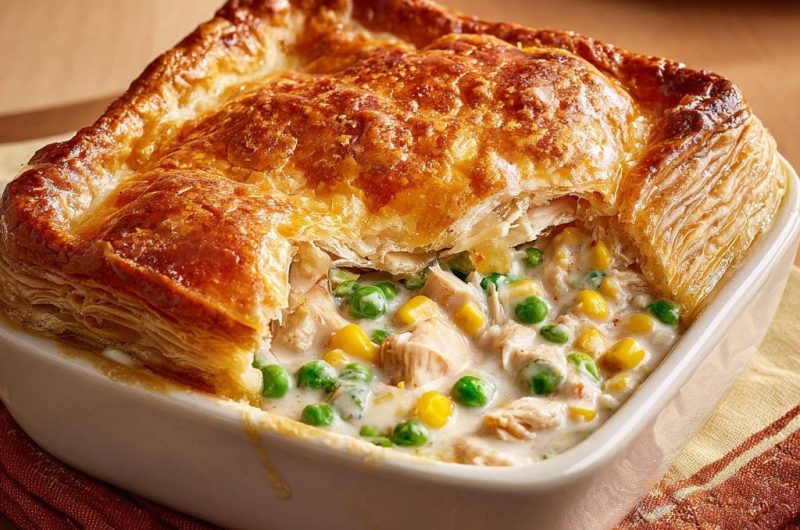
Classic Chicken Pot Pie: The Secret to a Puffy Golden Crust
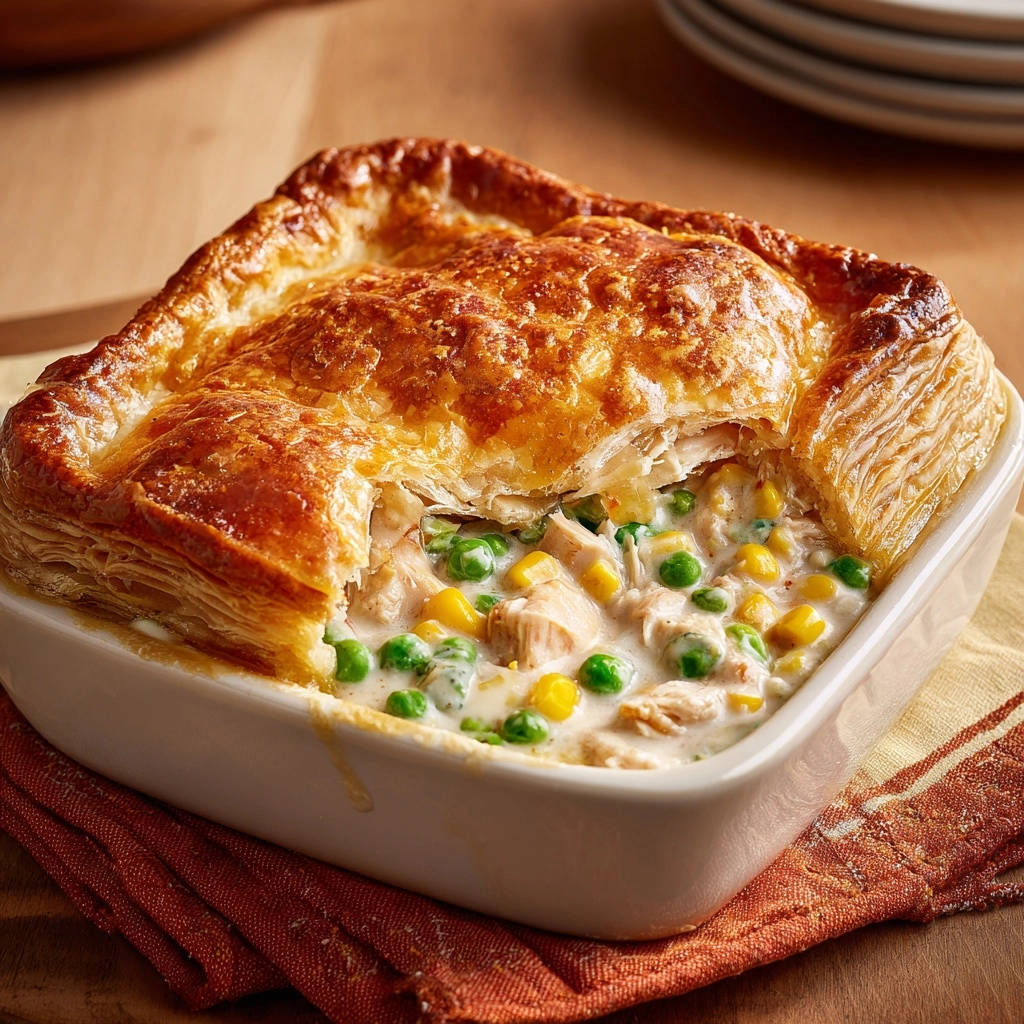
I remember a time when achieving that perfect, gloriously puffed and golden crust on a Classic Chicken Pot Pie felt like an elusive dream. My pies were delicious inside, but the top always fell flat. That was until I discovered one simple, game-changing trick, and now every single time, I get that irresistibly flaky, golden-brown crust that truly elevates this comforting classic.
Why This Classic Chicken Pot Pie Recipe Is Your New Go-To
This recipe isn’t just another pot pie; it’s a meticulously crafted guide designed to deliver perfection with ease. It stands out because we tackle the most common pot pie challenge head-on, ensuring a truly exceptional result that looks as good as it tastes.
Achieve the “Irresistibly Puffy” Crust Every Time
Say goodbye to soggy bottoms and flat tops. This Classic Chicken Pot Pie recipe guarantees a beautifully puffed, flaky, and deep golden crust that makes every bite an experience. We reveal the simple secrets to consistent pastry perfection.
Flavor That Comforts: A Homestyle Classic
Beyond the crust, you’ll find a rich, velvety filling packed with tender chicken, sweet peas, and corn, all seasoned with classic herbs. It’s the ultimate homestyle comfort food, promising warmth and satisfaction with every spoonful.
Effortless Elegance for Weeknights and Gatherings
Despite its impressive appearance and profound flavor, this Classic Chicken Pot Pie is surprisingly straightforward to prepare. It’s an ideal dish for a cozy weeknight meal yet elegant enough to impress guests at any gathering.
Gather Your Kitchen Essentials: Tools for Pot Pie Perfection
Having the right tools at hand makes the cooking process smoother and more enjoyable. These essentials will help you craft your perfect pot pie.
Essential Bakeware: Choosing the Right Dish
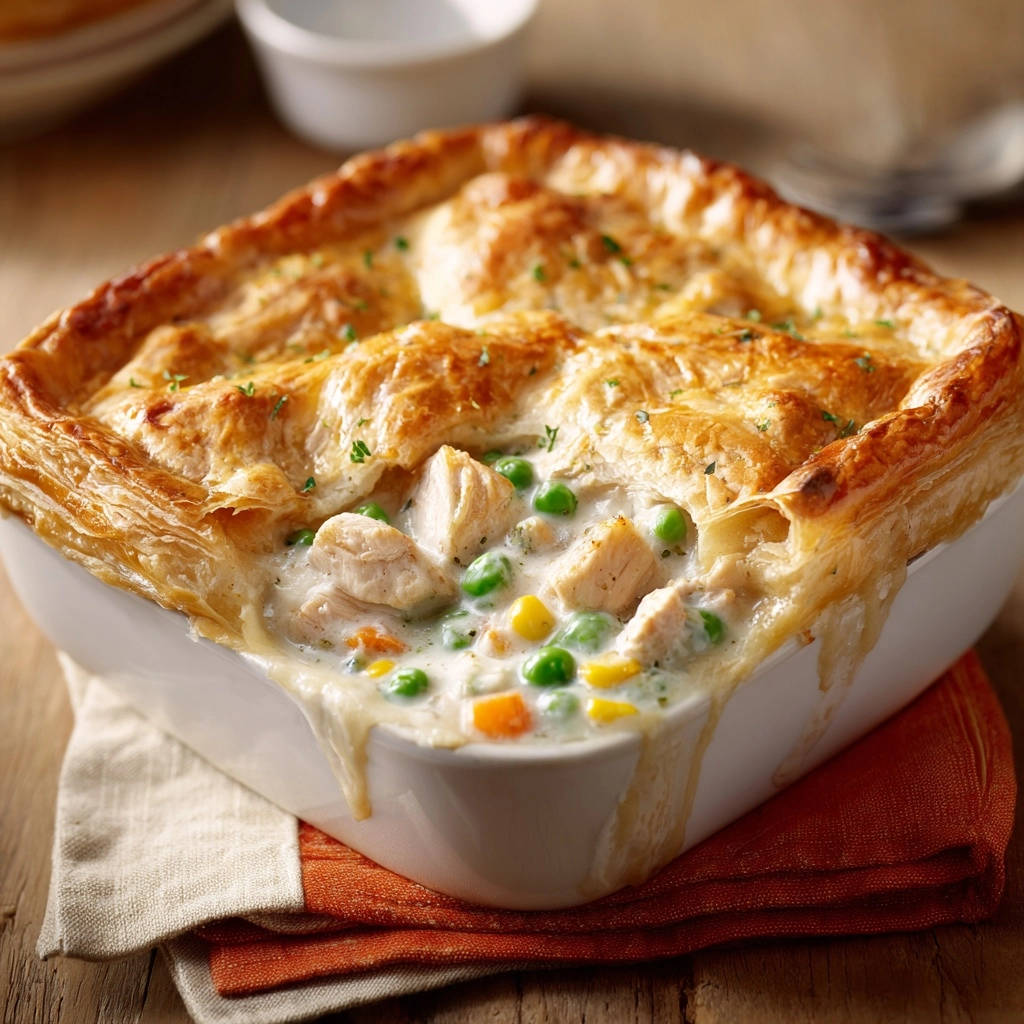
A sturdy oven-safe baking dish (8×8 inch square or similar capacity) is key for even cooking and serving. Its dimensions ensure the filling-to-crust ratio is just right.
Mixing and Stirring: Saucepans and Whisks
A large saucepan or Dutch oven provides ample space for building the rich filling. A reliable whisk is indispensable for creating a smooth, lump-free roux and velvety sauce.
Crust Crafting: Pastry Wheels and Brushes
A pastry wheel or sharp knife helps you neatly trim the puff pastry to fit your dish. A pastry brush is crucial for applying the egg wash evenly, ensuring uniform golden color and crispness.
The Heart of the Home: Ingredients for Your Classic Chicken Pot Pie
Quality ingredients are the foundation of any great dish. Here’s a closer look at what makes this Classic Chicken Pot Pie so special.
For the Rich and Creamy Filling
Unsalted Butter: The foundation for sautéing and building flavor for your Classic Chicken Pot Pie. Using unsalted allows you to control the overall saltiness.
Aromatic Vegetables (Onion & Garlic): Finely diced, they provide the essential savory base. Cooking them until softened releases their sweet, pungent aromatics.
All-Purpose Flour: Creates the roux, thickening the sauce to perfection. It’s vital for achieving that luscious, creamy consistency.
Chicken Broth & Whole Milk: The liquid base that transforms into a luscious, velvety sauce. Whole milk adds richness, while broth brings savory depth.
Cooked Chicken: Shredded or diced, a great way to use leftovers or quickly prepare for this dish. Rotisserie chicken is an excellent shortcut. For an extra flavorful chicken base, consider making your own golden slow cooker lemon herb chicken.
For those who love this hearty filling, these individual chicken pot pies offer the same creamy goodness with extra crunch.
Frozen Peas & Corn: Adding bursts of sweetness and vibrant color. They cook quickly right in the sauce, so no need to thaw beforehand!
Dried Thyme, Salt & Black Pepper: The classic seasoning trio that defines comforting pot pie flavor. Thyme especially complements the chicken and vegetables beautifully.
The Star of the Show: The Golden Crust
Frozen Puff Pastry: The secret to an effortlessly puffy, flaky, and golden top. Ensure it’s thawed according to package directions; it should be pliable but still cold.
Large Egg: Beaten for the essential egg wash, which guarantees a deep golden color and a beautiful crisp texture that sets this pot pie apart.
Your Path to Classic Chicken Pot Pie Perfection: A Step-by-Step Guide
Prepare the Filling Base
In a large saucepan or Dutch oven, melt the unsalted butter over medium heat until shimmering. Add the finely diced onion and cook, stirring occasionally, until it softens and becomes translucent, which usually takes about 5 minutes. This gentle sautéing builds a sweet, aromatic base.
Stir in the minced garlic and continue cooking for just 1 minute more, until it becomes fragrant. Be careful not to let the garlic brown, as it can turn bitter and impart an unpleasant flavor to your sauce.
Craft the Silky Roux
Sprinkle the all-purpose flour directly over the softened onion and garlic mixture. Stir constantly with a whisk or wooden spoon for 1 to 2 minutes.
During this time, the flour will absorb the butter and cook out its raw taste, creating a thick, light-colored paste known as a roux. This step is crucial for thickening your sauce smoothly and preventing lumps.
Build the Velvety Sauce
Gradually pour in the chicken broth, a little at a time, whisking continuously to prevent lumps from forming. The mixture will initially be very thick, but keep whisking until it becomes smooth and homogenous.
Next, whisk in the whole milk. Bring the sauce to a gentle simmer, continuing to stir. As it simmers, the starch in the roux will fully activate, and the sauce will thicken beautifully to a creamy, luscious consistency.
Incorporate the Remaining Filling Ingredients
Once the sauce has thickened, stir in the cooked chicken, frozen peas, frozen corn, dried thyme, salt, and black pepper. Mix everything well to ensure all ingredients are evenly coated in the rich sauce.
Cook for 2 to 3 minutes, just long enough for the vegetables to heat through and their flavors to meld with the sauce. Remove the saucepan from the heat to prevent overcooking the chicken and vegetables.
Assemble Your Pot Pie
Carefully pour the warm chicken and vegetable filling into your chosen oven-safe baking dish (an 8×8 inch square or similar capacity works perfectly). Ensure the dish isn’t overfilled, leaving space for the crust.
Spread the filling evenly in the dish, creating a flat surface for your puff pastry to rest upon. This helps with even crust cooking.
For a perfect pairing, try our Skillet Chicken Shepherds Pie with Crispy Mash Topping.
The Golden & Puffy Crust Secret: The Magic Touch
Unroll the thawed puff pastry sheet onto a lightly floured surface. Using a knife or pastry wheel, trim the pastry to be slightly larger than your baking dish, allowing for a small overhang of about half an inch to an inch on all sides. This extra pastry allows for shrinkage and a good seal.
Gently lay the puff pastry over the filling, centering it. Press down lightly around the edges to seal it against the dish, letting the overhang drape naturally or crimping it slightly for decoration. This creates a tight seal, trapping steam inside to help the pastry puff.
The Egg Wash Secret: Brush the entire surface of the puff pastry evenly with the beaten egg wash. This step is absolutely crucial for achieving that deep, irresistible golden color and helps create a perfectly crisp texture as it bakes. Don’t miss any spots!
The Steam Escape Trick: Make 3 to 4 small slits in the center of the pastry with a sharp knife. These vents are vital, as they allow steam to escape during baking, preventing a soggy crust and promoting an even, beautiful rise for your Classic Chicken Pot Pie.
Bake to Golden Perfection
Place your baking dish on a baking sheet. This acts as a safety measure to catch any potential drips or bubbling over, keeping your oven clean and making transfer easier.
Bake in a preheated oven at 400°F (200°C) for 25 to 30 minutes, or until the pastry is gloriously puffed up, deeply golden brown, and cooked through. Keep an eye on it towards the end to prevent over-browning.
Rest and Savor
Once baked, carefully remove the pot pie from the oven. Let it rest for 5 to 10 minutes before serving. This resting period is important because it allows the hot filling to set slightly, preventing it from being too runny and making it easier to serve without burns. It also helps the crust become even flakier and easier to cut.
Chef’s Secrets: Elevate Your Classic Chicken Pot Pie Game
Unlock even more flavor and perfection with these expert tips and tricks.
Don’t Skip the Egg Wash
The beaten egg wash is more than just for color; it creates a crisp, golden-brown crust and acts as a barrier, enhancing the pastry’s texture and preventing it from becoming dry. Ensure full, even coverage right up to the edges.
Perfectly Timed Slits
Making those small slits (about 1-inch long) in the puff pastry before baking is non-negotiable. They are essential for allowing steam to escape, preventing a ballooned or soggy crust, and ensuring an even, beautiful rise. Without them, steam can get trapped and make the crust soggy.
Cool Your Filling (If Making Ahead)
If you’re assembling the pot pie ahead of time, ensure your filling is completely cooled before adding the puff pastry. Placing cold pastry on a hot filling can make the crust soggy and prevent it from puffing properly due to excess moisture.
Choosing Your Chicken
This recipe is perfect for leftover rotisserie chicken or any cooked chicken you have on hand. For best flavor, ensure it’s well-seasoned or cooked in broth. You can also use poached or roasted chicken breasts or thighs, shredded or diced.
Vary Your Vegetables
While peas and corn are classic, feel free to experiment! Diced carrots, green beans, mushrooms, or even small broccoli florets can be added to the filling. Just ensure harder vegetables like carrots are pre-cooked slightly for tenderness.
Troubleshooting Common Classic Chicken Pot Pie Conundrums
Even seasoned cooks encounter challenges. Here’s how to resolve common pot pie issues.
What Goes With Chicken Pot Pie
A creamy chicken pot pie with its buttery crust calls for something with crunch and heat on the side. These two breads fit that role.
- Pull apart warm, cheesy bread studded with corn and bell peppers — this Cheesy Corn Pepper Pull-Apart Bread adds a sweet, peppery contrast to the savory pot pie filling.
- For extra protein and a spicy kick, the
Problem: My Crust Isn’t Golden or Puffy
Solution: The egg wash is absolutely key for that deep golden color; ensure you’ve brushed the entire surface evenly before baking. For puffiness, make sure your puff pastry is properly thawed (pliable but still cold) and you’ve made the necessary steam slits. Oven temperature also matters; confirm your oven is preheated to 400°F (200°C).
Problem: The Filling Is Too Runny
Solution: This usually means the roux wasn’t cooked long enough, not enough flour was used, or the sauce didn’t simmer to thicken adequately. Next time, cook the flour for the full 1-2 minutes to eliminate the raw taste and allow starches to develop. Ensure the sauce comes to a noticeable simmer, stirring constantly, until it visibly thickens before adding other ingredients.
Problem: My Pot Pie Crust Is Soggy on the Bottom
Solution: A common culprit is not allowing steam to escape (revisit the slits!) or placing puff pastry over a very hot filling. If making the Classic Chicken Pot Pie ahead, cool the filling completely before topping with pastry. Also, consider placing the pot pie on the lowest rack for the last 5-10 minutes of baking to crisp up the bottom if your oven allows.
Serving Suggestions and Storage Tips for Your Pot Pie
Make the most of your delicious Classic Chicken Pot Pie with these practical tips.
Serving Your Hearty Classic Chicken Pot Pie
This satisfying Classic Chicken Pot Pie is a meal in itself, perfect with a simple side salad like a fresh garden salad or some crisp crispy baked asparagus. Crusty bread is also wonderful for soaking up any extra creamy sauce. It’s truly a dish that brings comfort to the table and warms the soul.
Storing Leftovers for Later Enjoyment
Any leftover pot pie should be stored in an airtight container in the refrigerator for up to 3-4 days. While the crust might lose some of its initial crispness, the flavors of the filling remain wonderfully satisfying.
Reheating for Continued Comfort
For best results, reheat individual servings in the oven at 350°F (175°C) until warmed through and the crust has re-crisped slightly, usually about 15-20 minutes. You can also use a microwave, but be aware the crust will likely remain soft and may not regain its crisp texture.
Can I Freeze This Chicken Pot Pie?
Yes, you can freeze individual portions of the baked pot pie. Wrap tightly in plastic wrap and then foil, and freeze for up to 2-3 months. Thaw in the refrigerator overnight and reheat as above. You can also freeze the unbaked assembled pot pie, wrapped well, and then bake from frozen, adding extra baking time (around 45-60 minutes).
Frequently Asked Questions About Classic Chicken Pot Pie
Can I use a different type of pastry for this recipe?
While this recipe specifically highlights puff pastry for its signature ‘puffy golden crust,’ you can certainly experiment. A traditional pie crust (store-bought or homemade) would also work, but the texture will be denser and less airy. You could also try biscuits on top for a ‘biscuits and gravy’ style pot pie, which offers a different kind of comfort.
What if I don’t have cooked chicken on hand?
No problem! You can quickly cook chicken specifically for this Classic Chicken Pot Pie. Simply poach, boil, or bake about 1 pound of boneless, skinless chicken breasts or thighs until cooked through. Shred or dice it, then proceed with the recipe. Rotisserie chicken is also a fantastic shortcut that adds great flavor with minimal effort.
Can I make this Classic Chicken Pot Pie vegetarian?
Absolutely! To make a delicious vegetarian pot pie, substitute the chicken broth with vegetable broth and omit the chicken. You can add extra vegetables like diced potatoes, mushrooms, green beans, or even some cannellini beans to the filling for more substance. Ensure you season well to maintain a rich flavor profile, perhaps with a pinch more herbs.
Can I prepare the filling ahead of time?
Yes, the chicken pot pie filling can be made up to 2 days in advance and stored in an airtight container in the refrigerator. When ready to bake, gently reheat the filling if it’s very cold, then pour it into your baking dish and proceed with adding the puff pastry and baking. Ensure the filling isn’t piping hot when adding the pastry to prevent a soggy crust.
Ready to Impress? Share Your Classic Chicken Pot Pie Masterpiece!
Now that you hold the secrets to an irresistibly puffy, flaky, and beautifully golden crust, you’re ready to create the ultimate Classic Chicken Pot Pie. This recipe isn’t just about food; it’s about creating comforting memories around your table, easily and deliciously.
We encourage you to embark on this culinary adventure. Don’t forget to share your creations with us! We love seeing your delicious results and hearing about your family’s rave reviews. Happy baking and savoring!
Chicken Pot Pie
Course: Main CourseCuisine: AmericanDifficulty: mediumServings4
servingsPrep time25
minutesCooking time30
minutesCalories450
kcalTotal time60
minutesDiscover the secret to an irresistibly puffy, flaky, and beautifully golden crust with this Classic Chicken Pot Pie. A cozy, comforting dinner filled with tender chicken and vegetables in a creamy sauce, topped with perfect puff pastry.
Ingredients
2 tablespoons unsalted butter
1 small onion, finely diced
2 cloves garlic, minced
1/4 cup all-purpose flour
1 1/2 cups chicken broth
1/2 cup whole milk
2 cups cooked chicken, shredded or diced
1 cup frozen peas
1 cup frozen corn
1 teaspoon dried thyme
1/2 teaspoon salt
1/4 teaspoon black pepper
1 sheet frozen puff pastry, thawed
1 large egg, beaten
Directions
- Prepare the Filling: In a large saucepan or Dutch oven, melt butter over medium heat. Add diced onion and cook until softened, about 5 minutes. Stir in minced garlic and cook for 1 minute more until fragrant.
- Make the Roux: Sprinkle flour over the onion and garlic mixture. Stir constantly for 1 to 2 minutes until a thick paste (roux) forms.
- Build the Sauce: Gradually whisk in chicken broth until smooth, then whisk in milk. Bring to a simmer, stirring, until the sauce thickens.
- Add Remaining Filling Ingredients: Stir in cooked chicken, peas, corn, thyme, salt, and pepper. Cook for 2 to 3 minutes until heated through. Remove from heat.
- Assemble Pot Pie: Pour the chicken and vegetable filling into an oven-safe baking dish (about 8×8 inch square or similar capacity).
- The Golden & Puffy Crust Secret:
- Unroll the thawed puff pastry sheet onto a lightly floured surface. Using a knife or pastry wheel, trim the pastry to be slightly larger than your baking dish, allowing for a small overhang.
- Gently lay the puff pastry over the filling, ensuring it drapes over the edges of the dish.
- Brush the entire surface of the puff pastry evenly with the beaten egg wash. This is crucial for that deep golden color and helps create a perfectly crisp texture.
- Make 3 to 4 small slits in the center of the pastry with a sharp knife. This allows steam to escape, preventing a soggy crust and promoting an even, beautiful rise.
- Bake: Place the baking dish on a baking sheet (to catch any potential drips) and bake in a preheated oven at 400°F (200°C) for 25 to 30 minutes, or until the pastry is gloriously puffed and a rich golden brown.
- Rest and Serve: Let the pot pie rest for 5 to 10 minutes before serving to allow the filling to set slightly and prevent burns.
Notes
- Brushing with egg wash and making slits are key for a golden, puffy crust. Don’t forget to rest before serving.