Mastering Spiced Snickerdoodle Cupcakes with the Reverse-Creaming Method
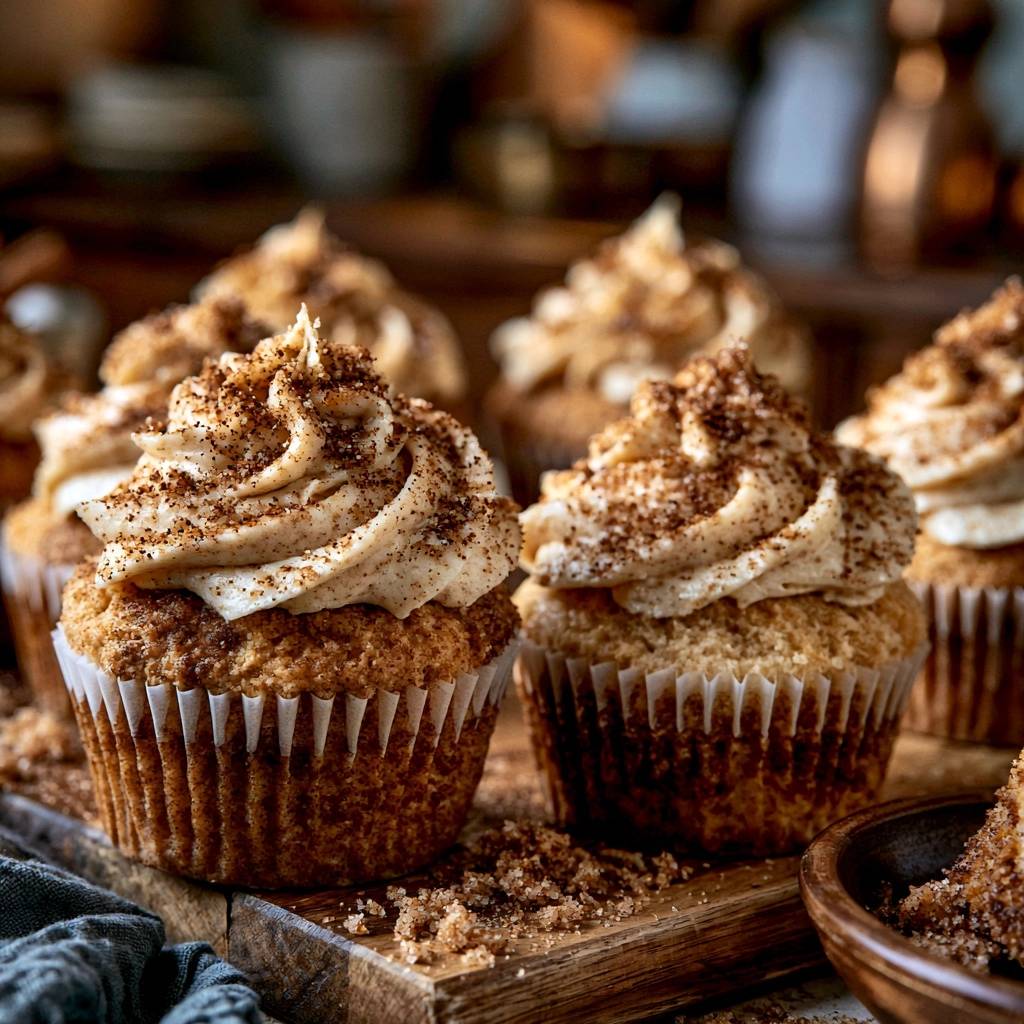
Imagine biting into a cloud that tastes exactly like your favorite childhood cookie. The first thing you notice is the crunch of cinnamon sugar, followed immediately by a crumb so soft it practically dissolves on your tongue. It’s a far cry from those heavy, muffin-like cupcakes that often leave you reaching for a glass of water just to finish a single bite.
Most home bakers struggle with density because they follow the traditional creaming method, which can easily lead to over-mixed, tough cakes. This recipe changes the game by focusing on the “Non-Dense Muffin Trick.” We’re aiming for a professional, velvet-like texture that feels light yet holds up perfectly under a generous swirl of spiced frosting.
The secret to this bakery-style success lies in how we handle the fats and flour. By using the reverse-creaming method, you ensure the flour particles are fully coated in butter before any liquid touches the bowl. This simple technical shift prevents the gluten from toughening up, giving you a foolproof way to achieve that elusive, tender crumb every single time you bake.
The Science of the Reverse-Creaming Technique
To understand why these cupcakes are so tender, we have to look at the chemistry of gluten. When flour meets liquid and you start stirring, gluten strands begin to form and bond. While this is great for a chewy loaf of bread, it’s the enemy of a delicate cupcake. If you overwork the batter, those strands become tight and elastic, resulting in a rubbery or bread-like texture.
The reverse-creaming method flips the script by mixing the dry ingredients with the butter first. As the paddle attachment works the cubed butter into the flour and sugar, it creates a physical fat barrier around the flour proteins. Because fat repels water, the flour can’t fully hydrate the moment you add the milk and eggs. This significantly inhibits gluten development, keeping the structure delicate.
When you look into your mixing bowl during this stage, you aren’t looking for a smooth batter yet. Instead, you want to see a texture that resembles fine, damp sand. This “sand-like” consistency is the hallmark of a professional crumb. It ensures that the air bubbles created during baking are small and uniform, rather than large and irregular, which is what creates that luxurious, melt-in-your-mouth sensation.
Essential Components for Spiced Snickerdoodle Cupcakes
Quality ingredients are the foundation of a great Snickerdoodle. Since cinnamon is the star of the show, I recommend using a high-quality Saigon cinnamon if you can find it. It has a higher oil content and a more intense, spicy-sweet punch than standard grocery store varieties. This depth of flavor is what separates a generic spice cake from a true Snickerdoodle masterpiece.
Temperature control is your best friend in the kitchen. You must use room temperature eggs and milk to ensure a proper emulsion. If you add cold milk to your butter-coated flour, the fat will seize up and clump, ruining that smooth aeration we worked so hard to build. When the ingredients are all at the same temperature, they bond seamlessly into a silky, stable batter.
We also rely on baking powder for the lift here. In a recipe with this much cinnamon, the acidity levels are relatively neutral, so baking powder provides the reliable chemical reaction needed for a consistent rise. It works in tandem with the air trapped during the mixing process to push the cupcakes upward, creating a beautiful domed top that isn’t prone to collapsing.
Selecting the Right Flour and Fat
While many delicate cakes call for cake flour, I prefer All-Purpose flour for this specific recipe. The slightly higher protein content in All-Purpose flour provides the “cookie-inspired” structure that defines a Snickerdoodle. It gives the cupcake enough body to support the heavy cinnamon-cream frosting without becoming crumbly or falling apart when you peel back the liner.
For the fat, always reach for unsalted butter. This allows you to control the precise salt content of the batter. Salt is crucial for balancing the sweetness of the sugar and the warmth of the cinnamon, but pre-salted butter varies too much between brands. By adding your own salt, you ensure the flavors are perfectly tuned to highlight the spice rather than just being sugary.
Step-by-Step: Achieving the Perfect Aerated Crumb
Start by whisking your flour, sugar, baking powder, salt, and cinnamon in your stand mixer bowl. Once the dry ingredients are combined, drop in your cubed, room-temperature butter. Turn the mixer to a low speed. You want to be patient here; let the paddle break the butter down until no large chunks remain and the mixture looks like wet sand.
Keep a close eye on the bowl during this phase. If you go too fast, you’ll end up with flour all over your counters. The goal is a uniform, grainy texture where every speck of flour is glistening with butter. This stage is the most important part of the “Non-Dense Muffin Trick,” so don’t rush it until that sandy look is achieved.
Integrating Liquids Without Overworking the Batter
Once your flour and butter are properly combined, it’s time to introduce the liquids. Whisk your eggs, milk, and vanilla together in a separate jug first. Pour exactly half of this mixture into the bowl. Now, turn the mixer up to medium-high and beat for one full minute. This is the only time you’ll use high speed, as it builds the necessary structure to hold the cupcake together.
After that minute is up, reduce the speed to low and pour in the remaining liquid. Mix just until the streaks of liquid disappear. You might be tempted to keep going to get it perfectly smooth, but resist the urge! Over-mixing at this final stage will develop the gluten we’ve worked so hard to avoid, turning your light cupcakes into tough little pucks.
Precision Baking and Temperature Control
Preheat your oven to 350°F and make sure your rack is in the center position. This temperature is the sweet spot; it’s hot enough to trigger a quick rise from the baking powder but gentle enough that the edges won’t dry out before the center is cooked. Fill your liners about two-thirds full to give them room to grow without spilling over the edges.
Bake for 18 to 20 minutes, but start checking at the 17-minute mark. Use a toothpick to test the center. You want it to come out with a few moist crumbs attached, rather than being bone-dry. Remember that “carry-over cooking” continues for a few minutes after you pull them out of the oven, so pulling them early ensures they stay moist and tender.
Crafting the Silky Cinnamon-Cream Frosting
The frosting is where the “cream” part of the Snickerdoodle experience really shines. Start with softened butter that is pliable but not greasy. Beat the butter on its own for at least 3 to 5 minutes until it turns pale, almost white, and looks incredibly fluffy. This aeration is what makes the frosting feel light on the palate rather than like a heavy brick of sugar.
Add your powdered sugar gradually, about half a cup at a time, with the mixer on low. This prevents a sugar cloud from taking over your kitchen and ensures the sugar dissolves into the butter for a smooth, non-grainy mouthfeel. Once the sugar is in, add your cinnamon, vanilla, and heavy cream. The cream is the secret ingredient that transforms the texture into something pipeable and stable.
Whip the mixture for another few minutes on high speed. You are looking for stiff peaks that hold their shape when you lift the whisk. If the frosting feels too soft, you can add a little more sugar, but usually, a good long whip is all it needs to firm up. The result should be a silky, spiced cloud that complements the tender cake perfectly.
The Signature Cinnamon-Sugar Dusting Technique
To get that iconic Snickerdoodle look, you need to be strategic with your garnish. Mix your cinnamon and sugar in a small bowl. As soon as you pipe a cupcake, immediately dust it with the mixture. You don’t want to wait until you’ve finished the whole batch, or the surface of the frosting might “crust” over, preventing the sugar from sticking.
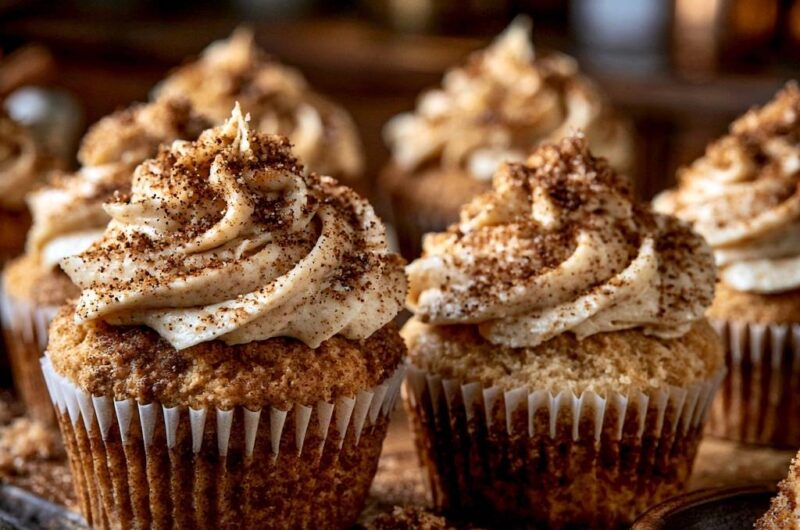
A generous dusting creates a beautiful dark, textured finish that mimics the top of the classic cookie. The ratio should be heavy on the cinnamon to provide that sharp contrast against the sweet frosting. This step isn’t just for looks; it adds a crucial crunch that breaks up the softness of the cupcake and the creaminess of the topping.
Troubleshooting Common Snickerdoodle Baking Issues
If your cupcakes sink in the middle, it’s usually due to one of two things: underbaking or opening the oven door too early. The structure needs time to set, and a sudden drop in temperature can cause the air bubbles to collapse. Always wait until at least 15 minutes have passed before peeking. Also, check your baking powder; if it’s expired, it won’t provide enough lift to keep the centers up.
For those who find their cupcakes are too tough, the culprit is almost always over-mixing the batter after the final liquids were added. Next time, try mixing the last stage by hand with a spatula just until combined. If your frosting is too runny to pipe, it might be that your butter was too warm or your kitchen is too hot. Pop the frosting in the fridge for 15 minutes, then re-whip it to restore its body.
Storage and Make-Ahead Preparation Strategies
These cupcakes are best enjoyed the day they are made, but they store surprisingly well. Keep them in an airtight container on the countertop for up to two days. Interestingly, the cinnamon flavor often deepens and becomes more pronounced after 24 hours. If you need to keep them longer, store them in the refrigerator for up to four days, but let them sit at room temperature for 30 minutes before serving so the butter in the frosting softens.
If you want to get ahead of the game, you can freeze the unfrosted cupcake bases. Wrap them individually in plastic wrap and place them in a freezer bag for up to three months. When you’re ready to serve, thaw them at room temperature and frost them fresh. This preserves the moisture of the cake and ensures the frosting stays light and airy rather than becoming dense in the freezer.
Expert Tips for Professional Presentation
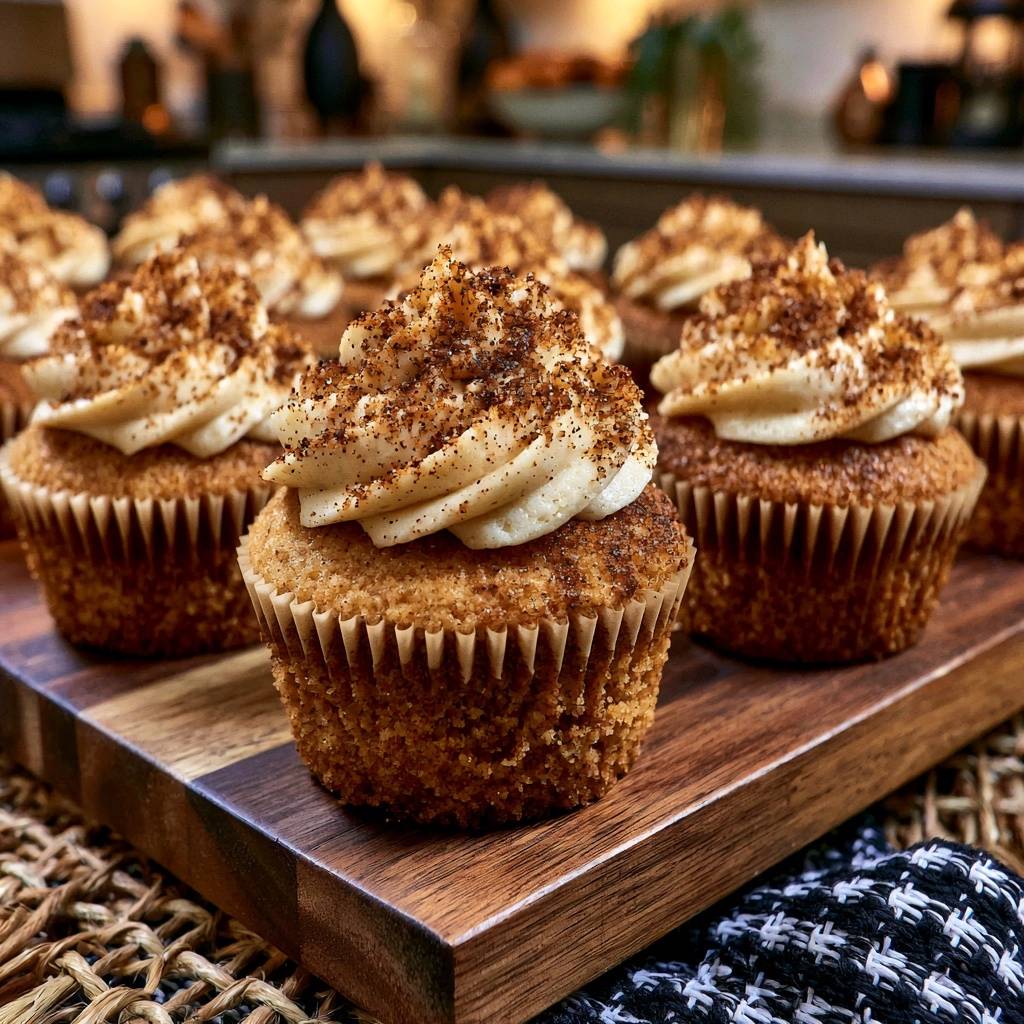
For that classic bakery swirl, use a large star tip like the 1M or 2D. Start in the center, move to the outer edge, and spiral upward in one fluid motion. Using grease-proof liners is another pro move; they won’t turn translucent or look oily after baking, which keeps the presentation looking clean and professional. It’s a small detail that makes a huge difference in the final look.
One final tip for the smoothest frosting: sift your cinnamon and powdered sugar together before adding them to the butter. Cinnamon can sometimes clump, and sifting ensures those tiny brown specks are evenly distributed throughout the cream. This prevents any spicy “hot spots” and gives the frosting a perfectly uniform, speckled appearance that looks as good as it tastes.
How should I store leftover Snickerdoodle cupcakes?
You should store these cupcakes in an airtight container at room temperature for up to 2 days. If your kitchen is particularly warm, you can move them to the refrigerator for up to 4 days, but the cold air can dry out the crumb over time. For the best experience, always bring refrigerated cupcakes back to room temperature before eating so the frosting regains its silky texture. Do not freeze the frosted cupcakes, as the cream frosting can separate and become grainy upon thawing; instead, freeze the unfrosted bases and frost them fresh.
Why did my cupcakes turn out dry and dense?
Dryness usually happens if the cupcakes are overbaked or if the flour was measured incorrectly. Always fluff your flour with a spoon and level it off rather than scooping directly with the measuring cup, which packs the flour down. Density is typically caused by over-mixing the batter once the liquids are added. The reverse-creaming method is designed to prevent this, but you must stop mixing the moment the last bit of milk is incorporated to keep the crumb light and airy.
Can I use a different type of milk or a milk substitute?
Yes, you can substitute the whole milk with 2% milk or even a dairy-free alternative like almond or oat milk. However, whole milk provides the best fat content for a rich, tender crumb. If you use a thinner milk alternative, the cupcakes might be slightly less rich, but the reverse-creaming method will still help maintain a good texture. Avoid using fat-free milk, as the lack of fat can lead to a tougher, less flavorful cake.
What is the best way to get a high frosting swirl?
The key to a high, stable swirl is the temperature of your butter and the whipping time. Ensure your butter is softened but still holds its shape before you start. Whip the frosting for a full 5 minutes until it is very light and stiff. When piping, use a large star tip and apply consistent pressure, starting from the outside and spiraling toward the center. If the frosting feels too soft to hold the peak, chill it in the fridge for 10 minutes before piping.
Can I make these cupcakes gluten-free?
You can substitute the all-purpose flour with a high-quality 1:1 gluten-free baking blend that contains xanthan gum. Because gluten-free flours absorb moisture differently, you may find the batter looks a bit thicker. The reverse-creaming method actually works quite well for gluten-free baking as it helps distribute the fats evenly, but be sure not to overbake them, as gluten-free treats can dry out faster than traditional ones.
Spiced Snickerdoodle Cupcakes
Course: DessertCuisine: AmericanDifficulty: easy12
servings15
minutes20
minutes35
Minutes340
kcalAmerican
Ingredients
1 and 1/2 cups all-purpose flour
1 cup granulated sugar
1 and 1/2 teaspoons baking powder
1/2 teaspoon salt
1 tablespoon ground cinnamon
1/2 cup unsalted butter, room temperature and cubed
2 large eggs, room temperature
1/2 cup whole milk
1 teaspoon vanilla extract
For the Cinnamon-Cream Frosting:
1 cup unsalted butter, softened
3 cups powdered sugar
1 teaspoon vanilla extract
1 teaspoon ground cinnamon (mixed into the frosting)
2 tablespoons heavy cream
2 tablespoons cinnamon-sugar mix (for heavy dusting)
Directions
- Preheat your oven to 350 degrees F and line a standard muffin tin with paper liners.
- In a large bowl, whisk together the flour, sugar, baking powder, salt, and 1 tablespoon of cinnamon.
- To solve the density issue, add the cubed room-temperature butter to the dry ingredients. Mix on low speed using a paddle attachment until the mixture looks like fine, damp sand. This coating of the flour particles is what guarantees a tender, non-dense crumb.
- In a separate small bowl, whisk the eggs, milk, and vanilla together.
- Slowly pour half of the liquid mixture into the flour-butter sand. Beat on medium-high for one full minute to build the structure without toughening the gluten.
- Add the remaining liquid and mix just until combined. Do not overmix at this stage.
- Fill the liners about two-thirds full. Bake for 18 to 20 minutes or until a toothpick comes out clean. Let them cool completely on a wire rack.
- For the frosting, beat the softened butter until pale and fluffy. Gradually add powdered sugar, vanilla, 1 teaspoon of cinnamon, and heavy cream. Whip for 3 to 5 minutes until the frosting is very light and holds a stiff peak.
- Using a star tip, pipe the frosting in a high swirl onto the cooled cupcakes.
- Immediately and generously dust the tops with the cinnamon-sugar mixture to achieve the dark, textured “crunch” finish shown in the image.
Notes
- The secret to the bakery-style crumb is coating the flour in butter first to prevent over-developing gluten. Ensure eggs and milk are at room temperature for the best emulsion.