Classic New York Cheesecake: Crack-Free Perfection
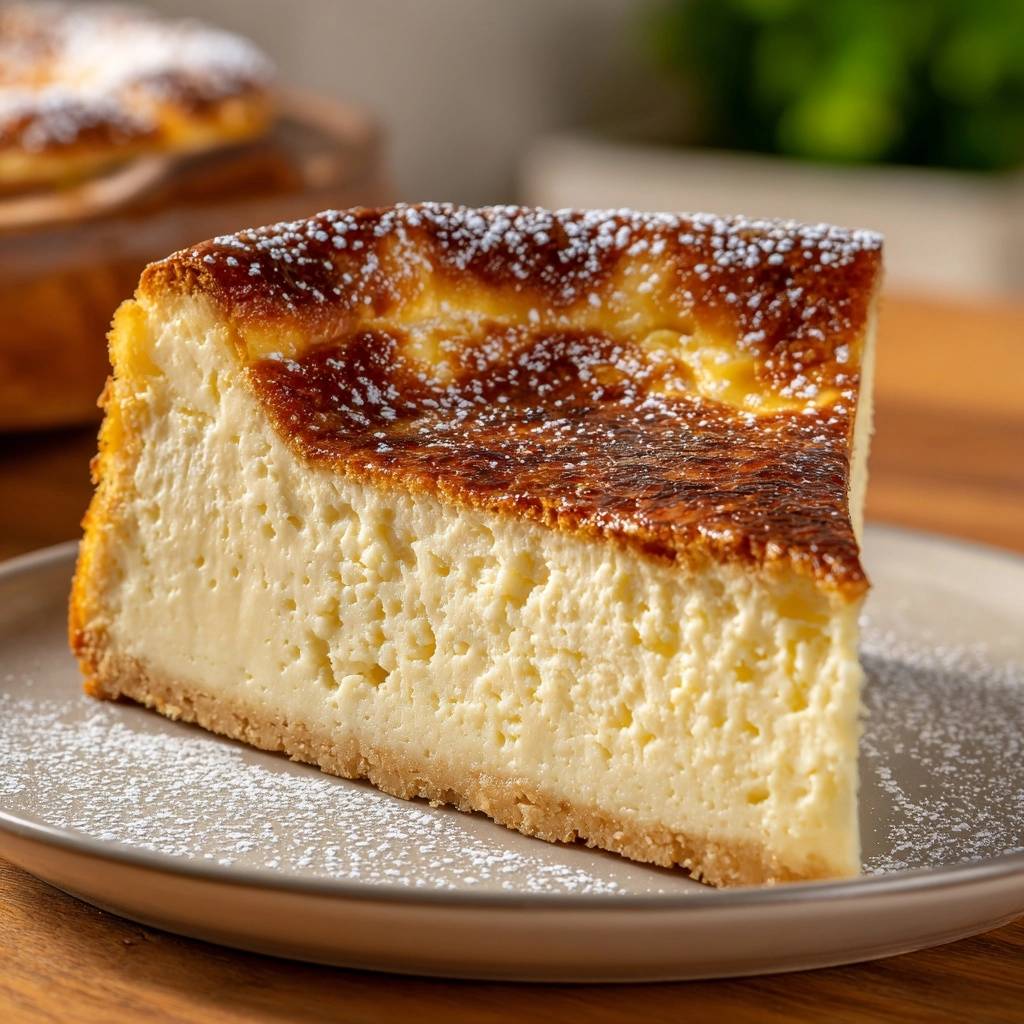
Picture this: your first slice of a towering Classic New York Cheesecake, dense and creamy, with a golden top that doesn’t have a single crack. No sinking center, no fissures ruining the look. This foolproof recipe delivers that pro-level result every time, thanks to a simple water bath and slow cool-down.
If you enjoy working with a dense, creamy batter, you’ll love this approach to a creamy New York cheesecake.
Why does it work so well? Most home bakers skip the even-heat tricks, leading to disasters. However, this method locks in moisture and prevents shocks, so you get silky texture that beats any boxed mix hands down. In addition, the science of gentle baking makes it reliable.
Here’s the expertise kicker: beat the cream cheese smooth before adding eggs one by one. That minimal air incorporation stops bubbles from rising and cracking the top. You’ll taste the difference in every velvety bite of this Classic New York Cheesecake.
Crust Foundation for Classic New York Cheesecake
Graham Cracker Crumbs Role
Two cups of fine graham cracker crumbs form a sturdy base that holds up to the rich filling without turning soggy. They give that classic crunch contrasting the creamy center. Therefore, avoid coarser crumbs; they lead to a crumbly mess.
Melted Butter Binding Technique
Half a cup of melted unsalted butter emulsifies perfectly with the crumbs for crisp edges that snap. Melted beats softened butter here because it binds evenly without oil pools. Press it firmly, and you’ve got structure.
Sugar Integration for Balance
Quarter cup granulated sugar caramelizes lightly during the 10-minute bake at 325°F, adding subtle sweetness. Mix it in thoroughly, then press evenly up the sides one inch for full support. That balance keeps the crust from overpowering the Classic New York Cheesecake.
Rich Filling Ingredients Breakdown
Cream Cheese Softening Secrets
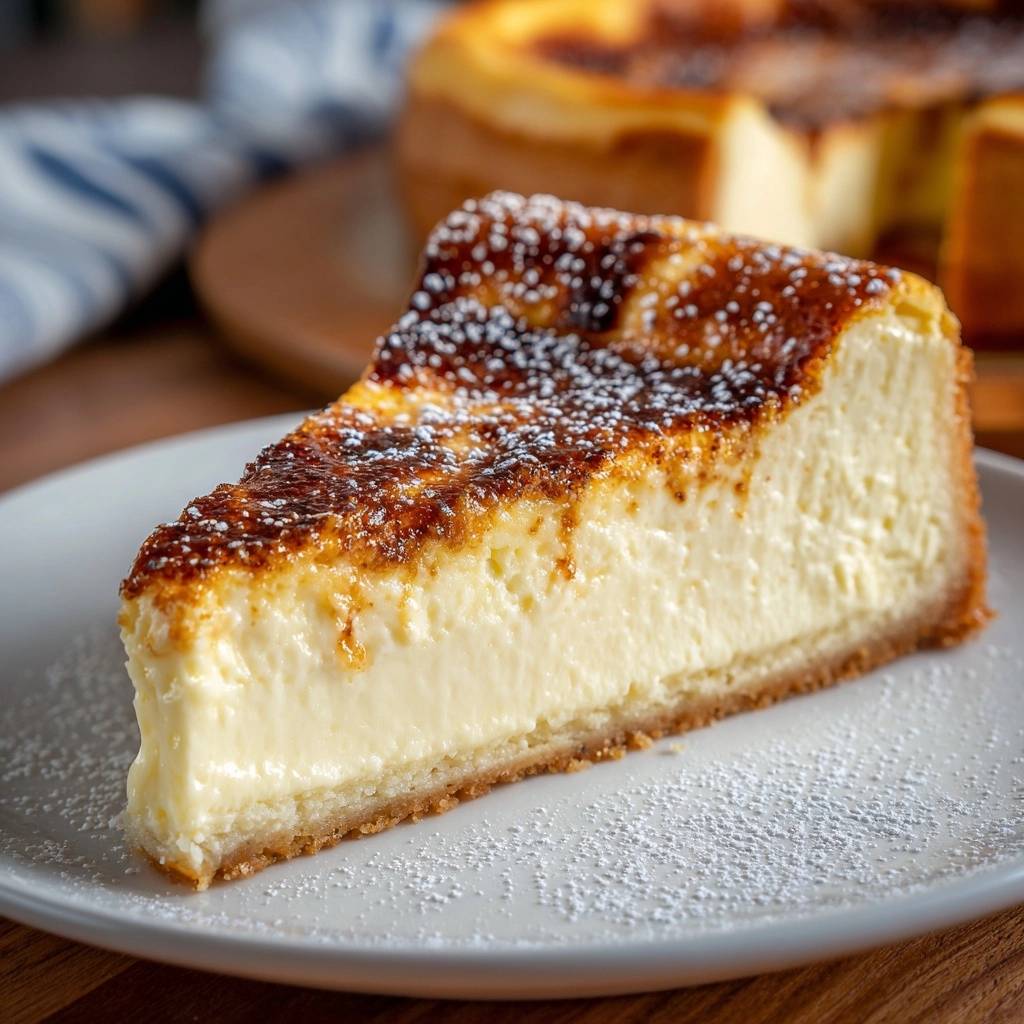
Four 8-ounce packages of softened cream cheese at room temp create a lump-free batter essential for New York density. Higher-fat brands hold creaminess better during baking. Soften them on the counter for an hour; don’t microwave or you’ll curdle the mix.
Sugar and Flour Stabilization
One and a quarter cups sugar dissolves smoothly for creaminess without graininess. The quarter cup flour adds structure, absorbing moisture to prevent cracks, unlike cornstarch which can toughen. Blend at low speed to keep it tender.
Eggs, Sour Cream, Vanilla Harmony
Room-temp four large eggs go in one at a time, beaten just until blended to trap minimal air. One cup sour cream brings tang that cuts richness, while two teaspoons vanilla adds depth. Sequence matters; add them last on low speed for harmony in your Classic New York Cheesecake.
Springform Pan and Foil Prep Essentials
Heavy-Duty Foil Wrapping Method
Triple-layer heavy-duty foil around the outside of your 9-inch springform pan blocks water seepage completely. Test by submerging in a sink; no bubbles means it’s sealed. This step ensures a dry crust every time.
Oven Preheat to 325°F Timing
Preheat to 325°F for a slow start that prevents crust overbaking while the filling sets gently. Position on the middle rack for even heat circulation. Patience here pays off big.
Water Bath Setup for Even Baking
Boiling Water Pour Technique
Place the springform in a roasting pan, then pour boiling water halfway up the sides for steam that mimics a pro oven. Boiling water avoids thermal shock to the batter. Use oven mitts and pour slowly to prevent spills.
Pan Placement in Roasting Tray
Center the foil-wrapped pan in the roasting tray for uniform humidity around the Classic New York Cheesecake. The seal keeps everything leak-proof. You’ll smell the sweet vanilla rising steadily.
Batter Mixing to Avoid Air Bubbles
Cream Cheese Beating Stages
Beat softened cream cheese with sugar on medium until silky smooth, scraping sides often. Add eggs singly, pulsing low after each to blend without whipping in air. Bubbles mean cracks later, so go gentle.
Final Low-Speed Incorporation
Fold in sour cream, vanilla, and flour at the lowest speed, scraping the bowl clean. The batter thickens slightly, looking velvety. Avoid overmixing; tap the bowl to settle any hidden bubbles before pouring.
Baking and Jiggle Test Mastery
55-Minute Bake Indicators
Bake 55 minutes until edges puff and set firm, with a 2-3 inch center still jiggling like Jell-O. Peek through the oven light; don’t open the door. That slight wobble promises creamy perfection inside.
Broiler Golden Top Finish
After baking, pat the top dry, then broil high for 1-2 minutes until golden and caramelized. Rotate halfway and watch closely to avoid burning. It adds that irresistible nutty crust.
Gradual Oven Cooling Process
Cracked Door 1-Hour Method
Turn off the oven, crack the door 4 inches, and let the Classic New York Cheesecake cool inside for one hour. Residual heat traps moisture, preventing sudden contraction cracks. You’ll hear it sigh as it settles.
Room Temp to Fridge Transition
Run a knife around edges, cool fully to room temp, then chill 6 hours or overnight. This firms it for clean slices. Rushing ruins the texture.
Science of Crack-Free New York Cheesecake
Water Bath Humidity Control
The water bath creates steam that keeps oven humidity high, so the top doesn’t dry and crack from evaporation. Gentle, even heat cooks the edges and center uniformly, unlike dry baking. Physics proves it: moist air slows surface hardening.
Slow Cooling Contraction Prevention
Gradual cooling lets egg proteins coagulate evenly, avoiding rapid shrinkage that pulls the top apart. Sudden temp drops cause fissures as the center contracts faster. Therefore, the cracked-door method equalizes it all.
Flour and Overmix Air Dynamics
Flour absorbs excess batter moisture, stabilizing structure during bake. Low mixing limits air bubbles that expand and pop, cracking the surface. Together, they ensure your Classic New York Cheesecake stays flawless.
Avoiding Classic New York Cheesecake Pitfalls
Overbeating Batter Fixes
Too much air shows as bubbly batter or cracked tops. Fix by tapping the bowl firmly pre-pour to pop bubbles. Mix low and brief next time for smooth results.
Water Bath Leak Troubleshooting
Soggy crust means foil leaked; diagnose by wet bottom. Reinforce with extra layers and blot with a dry towel post-bake. Prevention beats cure.
Sinking Center Recovery
Fast cooling causes sinks; fill cracks with sour cream mix before broiling. It masks flaws perfectly. Slow down next bake.
Flavor Twists on Classic New York Cheesecake
Lemon Zest Infusion
Add one tablespoon fresh lemon zest to the batter for bright citrus lift that balances the richness. It wakes up flavors without thinning. Grate finely for even distribution.
Chocolate Swirl Patterns
Dollop melted dark chocolate chips on batter, then swirl with a knife for marbled appeal. Bake as usual; it melts into gooey pockets. Simple wow factor.
Berry Compote Pairing
Simmer strawberries and raspberries with sugar for a thick compote, then spoon over chilled slices. Tart berries cut the cream perfectly. Make ahead for ease.
Make-Ahead Storage for Cheesecake
Freezing Whole Slices Guide
Chill fully 6 hours, slice, wrap individually in plastic then foil. Freeze up to 2 months; thaw in fridge overnight. Texture stays creamy, no ice crystals.
For storing leftovers, try the same method with these blueberry cheesecake bars.
Fridge Life Extension Tips
Cover tightly in an airtight container for up to 5 days; it prevents drying out. Slice only what you need. Pro tip: plastic wrap directly on surface first.
Perfect Pairings with New York Cheesecake
Fresh Fruit Complements
Sliced strawberries or blueberries add juicy acidity that slices through the dense creaminess. Toss with a touch of sugar for shine. Keeps it light and fresh.
Coffee or Tea Matches
Bold roast coffee stands up to the sweetness with its bitterness. Herbal tea like chamomile brings lightness. Both enhance every bite.
What to Serve with Cheesecake
For a lighter contrast to your rich, creamy cheesecake, try these pancake recipes that share a similar fluffy texture and sweet finish.
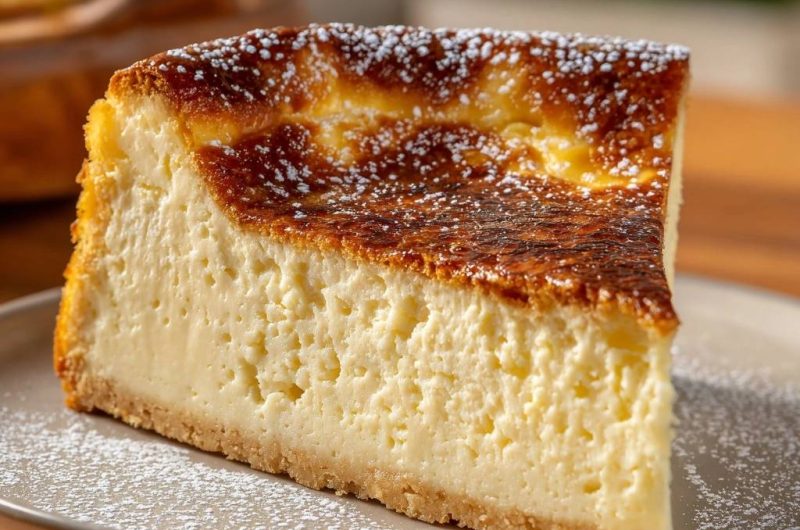
New York Cheesecake
Course: DessertCuisine: AmericanDifficulty: medium12
servings30
minutes1
hour450
kcal480
MinutesTired of cheesecakes that crack and sink? This foolproof method uses a simple water bath and slow oven cool-down to lock in creamy perfection without a single fissure, every single time.
Ingredients
Crust:
2 cups graham cracker crumbs
1/2 cup unsalted butter, melted
1/4 cup granulated sugar
Filling:
4 (8-ounce) packages cream cheese, softened
1 1/4 cups granulated sugar
4 large eggs, room temperature
1 cup sour cream, room temperature
2 teaspoons vanilla extract
1/4 cup all-purpose flour
Topping:
2 tablespoons powdered sugar, for dusting
Directions
- Preheat oven to 325 degrees F. Wrap the outside of a 9-inch springform pan in heavy-duty foil, ensuring no water can seep in.
- Mix graham cracker crumbs, melted butter, and 1/4 cup sugar. Press firmly into the bottom and 1 inch up the sides of the prepared pan. Bake 10 minutes, then cool on a wire rack.
- Beat softened cream cheese and 1 1/4 cups sugar until smooth. Add eggs one at a time, beating just until blended after each. Mix in sour cream, vanilla, and flour at low speed until combined. Avoid overmixing to prevent air bubbles that cause cracks.
- Pour filling into crust. Place springform pan in a large roasting pan. Fill roasting pan with boiling water to halfway up the springform sides. This water bath ensures even, gentle heat for crack-free baking.
- Bake 55 minutes until edges are set but center jiggles slightly. Turn off oven, crack door open 4 inches, and cool cheesecake inside for 1 hour. This gradual cooling prevents sudden temperature drops that crack the top.
- Carefully remove cheesecake from water bath and oven. Preheat broiler to high. Pat top dry if needed, then place pan on center oven rack. Broil 1-2 minutes until top is golden brown and caramelized, rotating pan halfway and watching closely to avoid burning.
- Run a knife around edges and cool to room temperature. Refrigerate 6 hours or overnight.
- Remove pan sides, dust with powdered sugar, and slice. Store covered in fridge up to 5 days.
Notes
- Avoid overmixing the filling to prevent air bubbles that cause cracks. Use room temperature ingredients for smooth texture. Store covered in fridge up to 5 days.