Creamy Baked Custard Tarts: The Secret to Silky Perfection
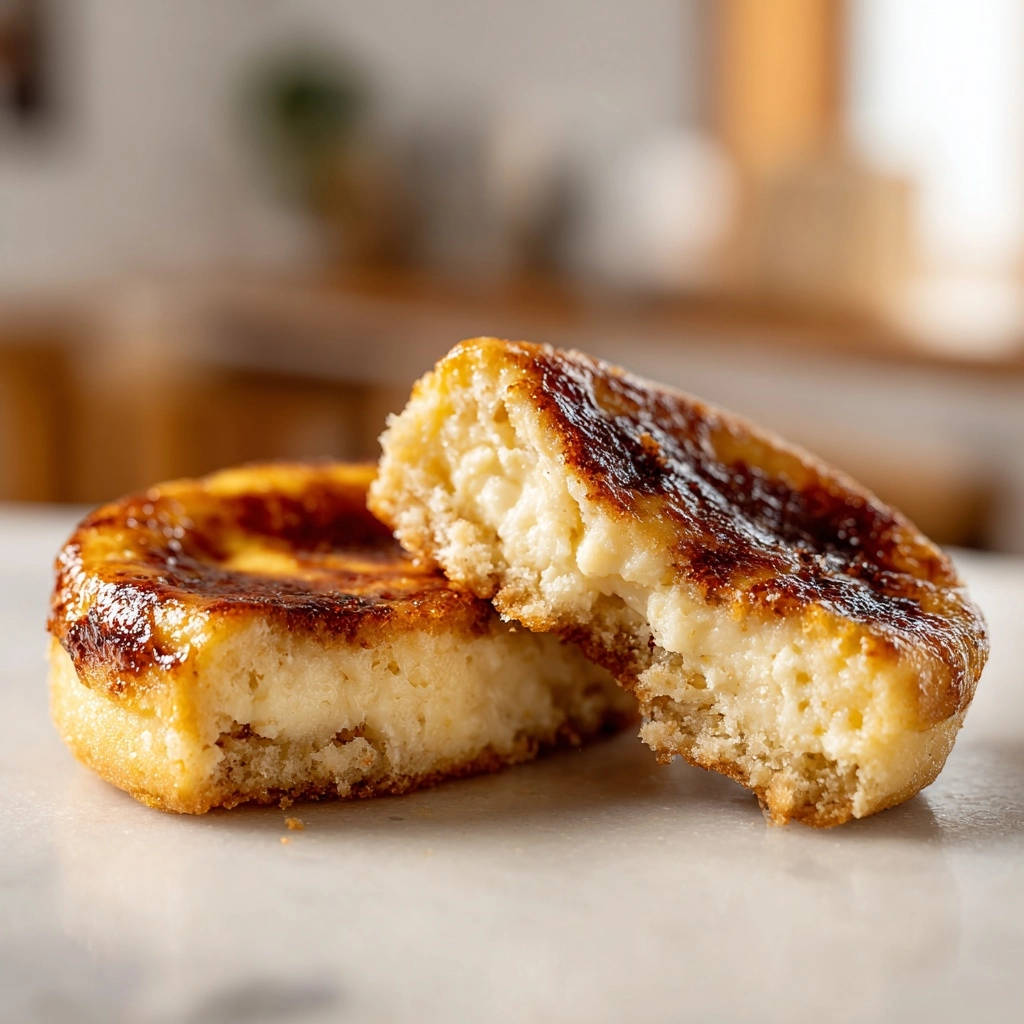
I’ve spent years perfecting the art of the perfect Creamy Baked Custard Tarts, and I know the frustration of a cracked top or rubbery texture. But I’ve unlocked the secret to achieve truly silky, melt-in-your-mouth results every single time with these individual delights.
This recipe for Creamy Baked Custard Tarts transforms a classic into an approachable masterpiece, ensuring a stunning dessert that will impress with its flawless texture and rich, comforting flavor.
Beyond Basic: Why Our Creamy Baked Custard Tarts Shine
This recipe guarantees a consistently silky smooth custard that melts in your mouth with every bite. The precise balance of ingredients and technique ensures an unparalleled texture.
Our unique approach, featuring a crucial water bath, completely eliminates the common woes of cracked tops or rubbery custards. You’ll achieve perfection without the usual stress.
The simple, step-by-step instructions make this recipe incredibly achievable for all skill levels. Even if you’re new to baking, you’ll produce professional-looking and tasting Creamy Baked Custard Tarts.
This method solves the most common frustrations of custard making, from inconsistent baking to lack of a truly rich flavor. Say goodbye to guesswork and hello to consistent success.
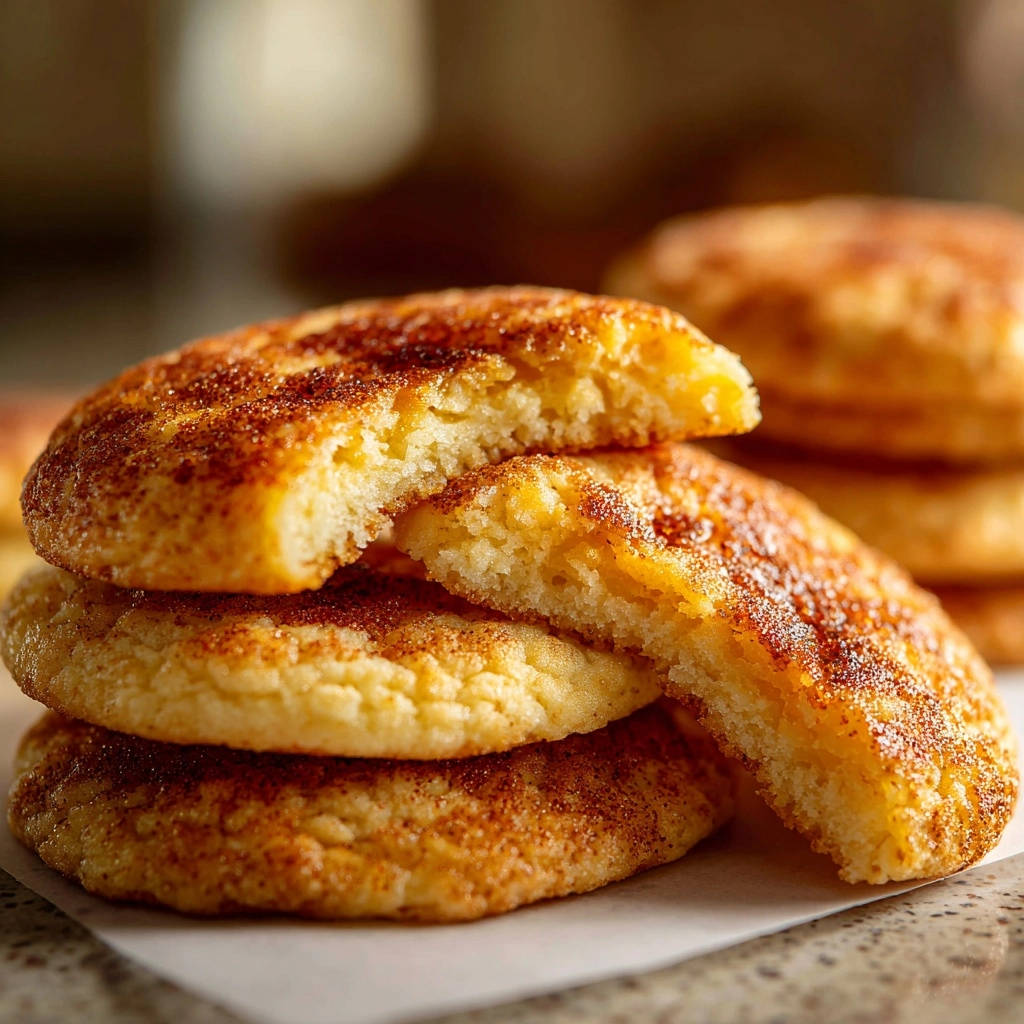
The Heart of the Tart: Key Ingredients for Success
For the Flaky, Buttery Crust
Using cold unsalted butter, cubed, is paramount for achieving a light, flaky tart crust. The cold butter creates steam pockets as it bakes, separating the dough into distinct layers.
Precise measurements of all-purpose flour and granulated sugar ensure the perfect balance of structure and tender sweetness. Just a touch of salt enhances the overall flavor profile of the crust.
Adding ice water, one tablespoon at a time, allows you to control the dough’s consistency without overmixing. Overmixing develops gluten, which leads to a tough, less flaky crust.
Assembling the Silky Custard Filling
The combination of large eggs and an extra large egg yolk provides both structure and incredible richness to the custard. The yolk adds an essential velvety quality and deep yellow hue.
High-quality heavy cream is the foundation for our creamy baked custard tarts, contributing to their luxurious mouthfeel and rich flavor. Don’t substitute with lighter creams, as they won’t yield the same decadent result.
Pure vanilla extract is crucial for a clean, aromatic flavor that complements the richness of the dairy and eggs. A good vanilla elevates the entire custard experience.
Essential Tools for Custard Tart Perfection
4-inch Tart Pans or Ramekins: These individual pans are ideal for even baking and presentation. Their smaller size ensures the custard sets beautifully without overcooking the edges.
Food Processor: A food processor makes quick work of incorporating the cold butter into the flour for the crust, resulting in perfect coarse crumbs with minimal handling, which is key for flakiness.
Fine Mesh Sieve: This tool is non-negotiable for achieving that signature extra silky texture. Straining the custard removes any bits of cooked egg or air bubbles, ensuring a perfectly smooth finish.
Kitchen Torch (Optional, but recommended): For the most professional finish, a kitchen torch creates a beautifully crisp, caramelized sugar topping. It allows for precise control over the browning process.
Whisk: Essential for thoroughly combining the custard ingredients and for the crucial tempering process. A good whisk ensures a smooth, homogeneous mixture.
Saucepan: Used for gently heating the heavy cream and vanilla. Heating the cream helps dissolve the sugar and jumpstarts the cooking process once combined with the eggs.
Baking Sheet with High Sides: This is necessary to create the water bath. The high sides contain the hot water and prevent spills, ensuring a safe and effective baking environment.
Your Path to Flawless Creamy Baked Custard Tarts: Step-by-Step
Mastering the Crust: From Dough to Pan
Begin by combining the flour, cold butter, sugar, and salt in your food processor. Pulse the mixture just until it resembles coarse crumbs, ensuring the butter remains in small pieces for a flaky result.
Gradually add ice water, one tablespoon at a time, pulsing briefly after each addition until the dough just comes together. Be careful not to overmix, as this develops gluten and makes the crust tough.
Once formed, gather the dough into a disc, wrap it tightly in plastic wrap, and refrigerate for at least 30 minutes. Chilling allows the gluten to relax and the butter to firm up, making the dough easier to roll.
On a lightly floured surface, roll out the chilled dough to about 1/8 inch thick. Cut out circles large enough to fit into your 4-inch tart pans, then gently press the dough into the pans, trimming any excess.
Finally, prick the bottoms of the unbaked crusts with a fork several times. This prevents the crust from puffing up during baking, ensuring a flat base for your creamy custard.
The Art of the Custard: Mixing and Tempering
In a medium bowl, whisk together the eggs, egg yolk, and granulated sugar until the mixture is well combined and slightly pale. This aeration helps create a smooth custard texture.
In a separate saucepan, gently heat the heavy cream and vanilla extract over medium-low heat until it just begins to simmer around the edges. Do not let it come to a full boil, as this can scorch the cream.
Slowly pour the warm cream mixture into the egg mixture while constantly whisking. This crucial step, known as tempering, gradually raises the temperature of the eggs, preventing them from scrambling.
Continue whisking until the mixture is completely smooth and uniform. For an even more refined and silky texture, strain the entire custard mixture through a fine mesh sieve into a clean bowl. This removes any tiny cooked egg bits or air bubbles.
The Water Bath Secret: Baking for Silky Smoothness
Carefully pour the strained custard mixture into your prepared tart crusts or ramekins, filling them almost to the top. Place these filled pans on a baking sheet with high sides.
Now comes the most crucial step for Creamy Baked Custard Tarts: the water bath. Carefully pour hot water into the baking sheet around the tart pans, making sure the water comes halfway up the sides of the tart pans.
This water bath creates a gentle, even heat environment, ensuring the custard bakes slowly and uniformly. This controlled heat prevents the custard from cracking on top and ensures it sets into a perfectly silky, non-rubbery texture.
Baking, Cooling, and the Perfect Jiggle
Preheat your oven to 325 degrees F. Ensure your oven is fully preheated before placing the tarts inside, as consistent temperature is vital for even baking.
Carefully transfer the baking sheet with the water bath to the preheated oven. Bake for 30 to 40 minutes, or until the edges are set but the center still has a slight jiggle when gently shaken.
That slight jiggle is your perfect indicator of doneness, meaning the custard is cooked through but still incredibly moist and delicate. Overbaking leads to a rubbery texture.
Carefully remove the baking sheet from the oven. Allow the tarts to cool in the water bath for 15 minutes before carefully removing them. This slow cool-down helps prevent cracking.
Let them cool completely on a wire rack, then transfer to the refrigerator to chill for at least 2 hours, or until thoroughly set. Thorough chilling is essential for the custard to firm up properly and achieve its final, perfect texture.
The Final Flourish: Caramelizing the Topping
Just before serving, sprinkle a thin, even layer of granulated sugar over the top of each chilled custard tart. The sugar will form a beautiful, crisp caramel layer.
Using a kitchen torch, caramelize the sugar until it’s golden brown and bubbly. Keep the torch moving to ensure even browning and prevent burning.
Alternatively, you can place them under a preheated broiler for a minute or two. However, watch them carefully as they can burn very quickly under the broiler. Remove them the moment the sugar reaches a golden caramel color.
Serve immediately to enjoy the delightful contrast between the warm, crisp topping and the cool, silky smooth custard.
Unlock Professional Results: Expert Tips for Your Custard Tarts
Cold Butter is King for Crust: Always use very cold butter, cut into small cubes, for your tart crust. This ensures the butter melts slowly in the oven, creating steam pockets for a truly flaky, tender texture instead of a dense, cookie-like crust.
Don’t Skip the Sieve: Straining the custard mixture through a fine mesh sieve is a small step with a huge impact. It removes any chalazae (the white stringy bits from eggs) and tiny air bubbles, guaranteeing an unparalleled silky smooth texture without any imperfections.
Master the Water Bath: Ensure your water bath uses hot, not warm, water and comes halfway up the sides of your tart pans. This consistent, gentle heat distribution is the ultimate secret to preventing cracks and achieving a perfectly set, uniform custard every time.
Read the Jiggle, Not the Clock: Oven temperatures can vary, so rely on the “slight jiggle” test rather than strict baking time. When gently shaken, the center of the custard should have a subtle wobble while the edges are set. This indicates a perfectly cooked, moist, and tender custard, preventing overbaking which leads to a rubbery texture.
Chill for Success: Allowing the Creamy Baked Custard Tarts to chill thoroughly in the refrigerator for at least two hours is crucial. This not only allows the custard to fully set and firm up but also ensures the caramelization process creates a crisp topping without melting the custard. This thorough chilling is also vital for many other creamy desserts, ensuring a perfect set, much like our Decadent Pumpkin Pie Truffles or classic cheesecakes.
Troubleshooting Common Custard Tart Woes
Why is my custard cracked or rubbery?
A cracked or rubbery custard is usually a sign of overbaking or too high a baking temperature. The water bath helps mitigate this, but ensure your oven temperature is accurate and that you rely on the “jiggle test” for doneness, not just the timer.
Not enough water in the bath, or water that is not hot enough, can also lead to uneven heat, causing the custard to cook too quickly and crack.
My tart crust is soggy! What went wrong?
A soggy crust often results from insufficient pre-baking (if your recipe calls for it, though this one doesn’t) or not pricking the dough enough. Excessive moisture from the custard seeping in can also be a culprit.
Ensuring your crust is adequately chilled before baking and pricking the bottom generously helps prevent a soggy base by allowing steam to escape.
The custard tastes eggy or bland.
An eggy taste can occur if the eggs are not properly tempered or if the custard is overcooked, causing the egg proteins to become too prominent. Ensure your tempering process is slow and thorough.
If the custard tastes bland, it might be due to a lack of good quality vanilla extract or insufficient sugar. Always use pure vanilla and ensure all ingredients are fresh for the best flavor.
Serving & Storing Your Delicious Custard Tarts
Elegant Serving Suggestions
While the caramelized sugar topping is a masterpiece in itself, you can elevate your Creamy Baked Custard Tarts even further. A dusting of powdered sugar adds a touch of simple elegance.
For a perfect pairing, try our Golden Caramelized Pudding Bake: Master the Crunchy Top.
For a burst of freshness, serve them with a handful of fresh berries like raspberries or blueberries. A dollop of lightly sweetened whipped cream or a drizzle of berry coulis also makes a delightful addition.
Storing for Freshness & Make-Ahead Options
Baked Creamy Baked Custard Tarts should be stored in an airtight container in the refrigerator. They will maintain their quality and silky texture for up to 2-3 days.
If you plan to make them ahead, you can prepare and bake the tart shells a day in advance, storing them at room temperature. The custard filling can also be prepared and strained a day ahead, kept covered in the fridge, then poured into the crusts just before baking.
Your Top Creamy Baked Custard Tarts Questions Answered
Can I make these tarts gluten-free?
Yes, you can adapt this recipe to be gluten-free. Simply substitute the all-purpose flour in the crust with a good quality gluten-free all-purpose flour blend that contains xanthan gum. You might need to add a touch more ice water, as GF flours absorb liquid differently.
How long do baked custard tarts last?
Properly stored in an airtight container in the refrigerator, your baked Creamy Baked Custard Tarts will last for up to 3 days. While they are still delicious, the caramelized topping is best enjoyed on the day it’s made for maximum crispness.
Can I skip the water bath? What happens then?
While technically possible, skipping the water bath is strongly discouraged for these Creamy Baked Custard Tarts. Without it, the custard is exposed to direct, uneven heat, which often leads to a cracked surface and a rubbery, overcooked texture around the edges.
The water bath is the critical secret to their signature silky smooth consistency and crack-free appearance, so for best results, do not omit this step.
Can I use different size tart pans?
Yes, you can use different size tart pans, but you will need to adjust the baking time accordingly. For smaller mini tarts (e.g., 2-inch), reduce the baking time by 10-15 minutes.
For a single larger tart (e.g., 8-9 inch), the baking time will increase, potentially to 45-60 minutes or more. Always rely on the “slight jiggle” test for doneness, regardless of pan size.
Ready to Impress? Share Your Custard Tart Masterpiece!
You now possess the secrets to creating truly exceptional Creamy Baked Custard Tarts. The joy of slicing into that perfectly silky custard, topped with crisp, caramelized sugar, is a culinary triumph.
Don’t wait to try this recipe and delight your family and friends with these beautiful and delicious individual desserts. We encourage you to share your culinary creations with us and explore more delicious dessert creations like our Classic Cherry Cheesecake or Raspberry Crumb Bars!
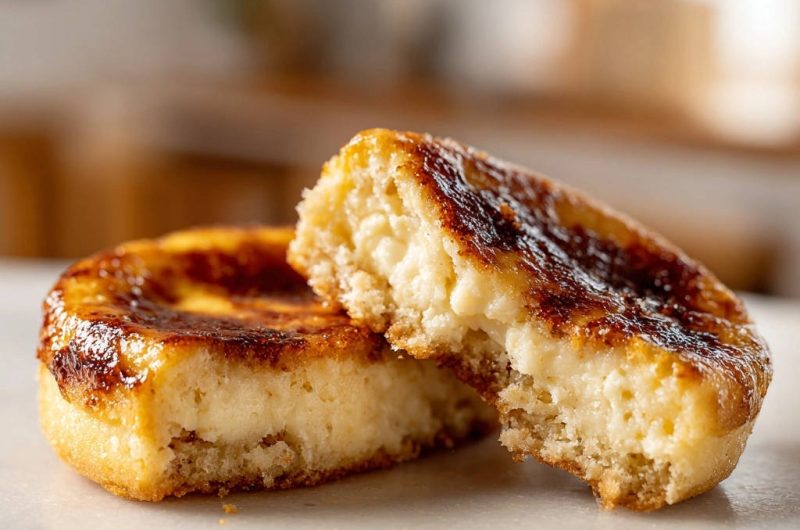
Baked Custard Tarts
Course: DessertCuisine: InternationalDifficulty: medium4
tarts1
hour40
minutes550
kcal300
minutesThis recipe reveals the secret to making absolutely perfect, silky smooth Creamy Baked Custard Tarts. Using a simple water bath, you’ll achieve a lusciously creamy texture without any cracks or rubberiness. Get ready to impress with this delightful baked dessert.
Ingredients
For the Crust:
1 cup all purpose flour
1/2 cup cold unsalted butter, cubed
1/4 cup granulated sugar
1/4 teaspoon salt
2 tablespoons ice water
For the Custard Filling:
2 large eggs
1 large egg yolk
1/2 cup granulated sugar
1 1/2 cups heavy cream
1 teaspoon vanilla extract
Pinch of salt
For the Topping:
2 tablespoons granulated sugar (for caramelizing)
Directions
- Prepare the Tart Crusts: In a food processor, combine flour, cold butter, sugar, and salt. Pulse until the mixture resembles coarse crumbs. Add ice water, one tablespoon at a time, pulsing until the dough just comes together. Do not overmix. Gather the dough into a disc, wrap in plastic wrap, and refrigerate for 30 minutes.
- Preheat Oven and Prep Pans: Preheat your oven to 325 degrees F. Lightly grease four 4-inch tart pans or ramekins. On a baking sheet with high sides, place the prepared tart pans or ramekins.
- Roll and Form Crusts: On a lightly floured surface, roll out the chilled dough to about 1/8 inch thick. Cut out circles large enough to fit into your tart pans. Gently press the dough into the pans, trimming any excess. Prick the bottoms with a fork.
- Prepare the Custard Filling: In a medium bowl, whisk together the eggs, egg yolk, and sugar until well combined and slightly pale. In a separate saucepan, gently heat the heavy cream and vanilla extract over medium low heat until it just begins to simmer around the edges. Do not boil.
- Combine and Strain: Slowly pour the warm cream mixture into the egg mixture, whisking constantly to temper the eggs and prevent scrambling. Continue to whisk until smooth. For an extra silky texture, strain the custard mixture through a fine mesh sieve into a clean bowl.
- The Secret to Silky Smooth Texture (The Water Bath): Carefully pour the strained custard mixture into the prepared tart crusts or ramekins. Now, carefully pour hot water into the baking sheet around the tart pans, making sure the water comes halfway up the sides of the tart pans. This water bath creates a gentle, even heat environment, ensuring the custard bakes slowly and prevents it from cracking or becoming rubbery.
- Bake: Carefully transfer the baking sheet with the water bath to the preheated oven. Bake for 30 to 40 minutes, or until the edges are set but the center still has a slight jiggle when gently shaken. This slight jiggle indicates a perfectly cooked, silky smooth custard.
- Cool and Chill: Carefully remove the baking sheet from the oven. Allow the tarts to cool in the water bath for 15 minutes before carefully removing them from the water. Let them cool completely on a wire rack, then transfer to the refrigerator to chill for at least 2 hours, or until thoroughly set.
- Caramelize Topping: Just before serving, sprinkle a thin, even layer of granulated sugar over the top of each chilled custard tart. Use a kitchen torch to caramelize the sugar until golden brown and bubbly. Alternatively, you can place them under a preheated broiler for a minute or two, watching carefully to prevent burning. Serve immediately and enjoy that perfect silky smooth texture!
Notes
- The water bath technique is crucial for a perfectly silky smooth, crack-free custard.