Classic Meatloaf: Tender, Juicy, & Never Dry
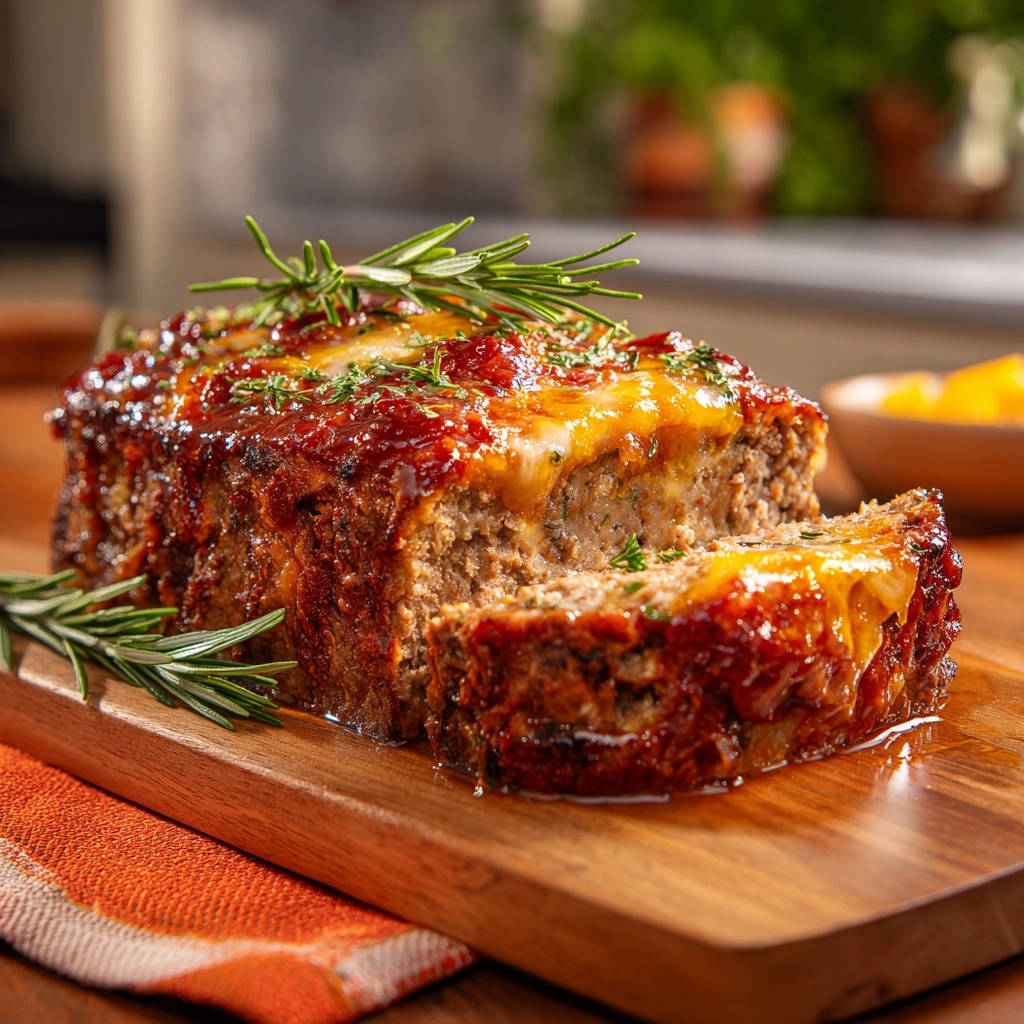
I know the disappointment of a dry, crumbly meatloaf all too well. It used to be my biggest kitchen frustration! But I’ve finally perfected this Classic Meatloaf recipe, guaranteeing a moist, tender, and intensely flavorful result every single time.
This isn’t just another meatloaf; it’s a trusty guide to a comforting, family-favorite meal that will have everyone asking for seconds. You’ll discover the simple secrets that make all the difference, transforming your meatloaf experience forever.
Unlocking Meatloaf Magic: Why This Recipe Stands Out
This isn’t just any old meatloaf; it’s a carefully crafted recipe designed for maximum deliciousness and foolproof success. We’re tackling common pitfalls head-on to ensure your dining experience is nothing short of exceptional.
Say Goodbye to Dry, Tough Meatloaf Forever
The days of dry, bland meatloaf are over. Our recipe uses specific techniques, like strategic ingredient ratios and careful mixing, to lock in moisture and tenderness.
We’ll guide you to achieve that perfect, juicy texture without any guesswork. This ensures every slice of your homemade meatloaf is succulent and enjoyable.
The Perfect Harmony of Flavor and Texture
This Classic Meatloaf boasts a delightful balance of savory ground beef, fresh aromatics, and a signature sweet and tangy glaze. The texture is consistently tender, never dense or rubbery.
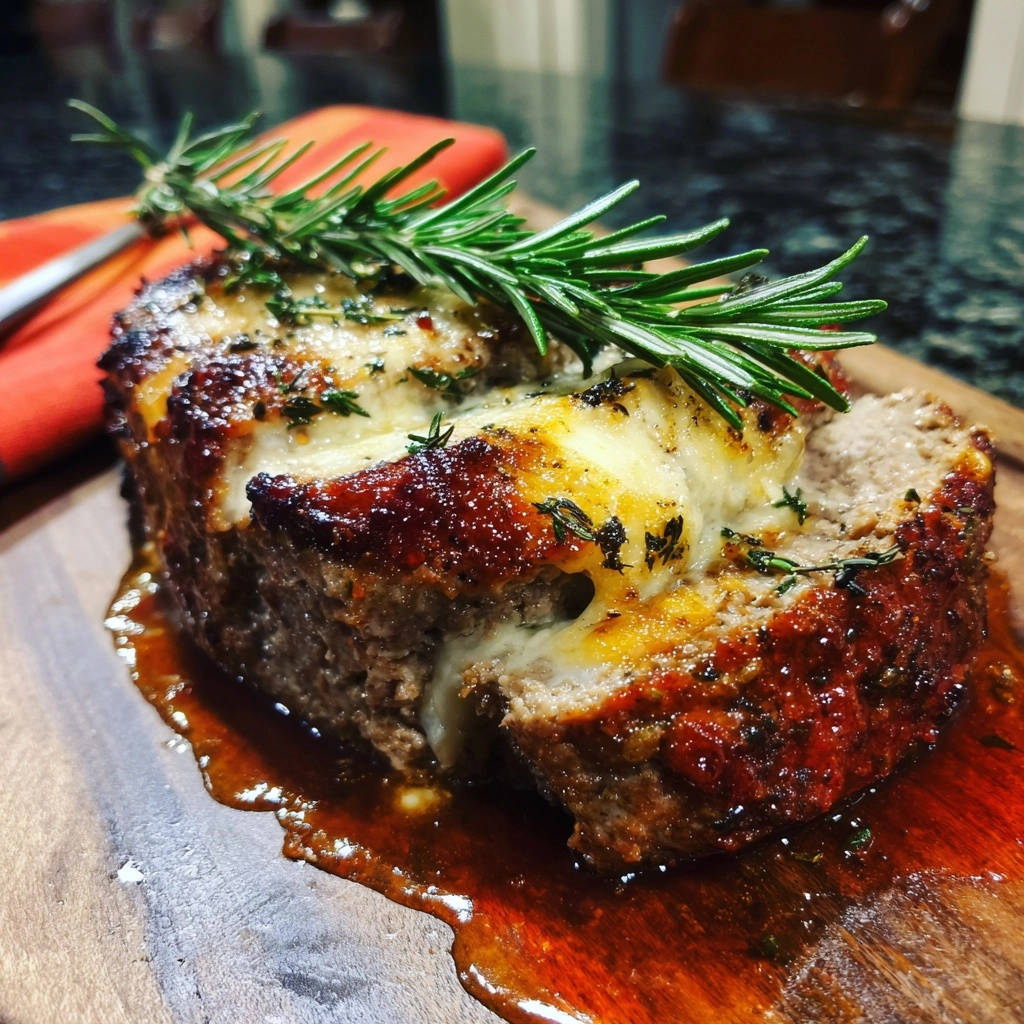
From the subtle herbaceous notes of rosemary to the rich, caramelized glaze, each component contributes to a truly crave-worthy dish. It’s a symphony of flavors that will impress.
A Comforting Weeknight Hero Your Family Will Crave
Meatloaf is the quintessential comfort food, and this recipe delivers on that promise. It’s surprisingly straightforward to prepare, making it an ideal choice for busy weeknights.
Expect rave reviews when you serve up this hearty, flavorful tender meatloaf. It quickly becomes a staple in any family’s dinner rotation.
The Building Blocks: Essential Ingredients for Your Best Meatloaf
Every ingredient in this recipe plays a crucial role in achieving the perfect balance of flavor, moisture, and texture. Understanding their purpose helps you cook with confidence.
Ground Beef: The Heart of the Loaf (Choosing Wisely)
Opting for 80/20 ground beef is paramount for a juicy meatloaf. The fat content renders during baking, infusing the loaf with flavor and preventing it from drying out.
Leaner cuts simply won’t deliver the same moist results. The fat is your friend here, ensuring a tender and rich homemade meatloaf.
Binders and Moisture Boosters: Breadcrumbs, Milk, and Egg
Plain breadcrumbs are more than just fillers; they absorb moisture from the meat and milk, helping to keep the meatloaf tender and preventing it from becoming too dense.
Milk further hydrates the mixture, contributing to overall moistness, while the egg acts as a crucial binder, holding all the ingredients together so your loaf doesn’t crumble.
Aromatic Powerhouses: Onion, Garlic, and Fresh Rosemary
Finely chopped yellow onion and minced garlic provide a foundational layer of savory depth to the meatloaf. They release their aromatic compounds as the loaf bakes.
Fresh rosemary adds a vibrant, earthy, and slightly piney note that beautifully complements the beef. Using fresh herbs elevates the overall flavor significantly.
The Irresistible Glaze: Sweet, Tangy, and Smoky Perfection
Our signature meatloaf glaze is a game-changer. Ketchup provides a classic tomato base and acidity, while light brown sugar adds sweetness and aids in caramelization.
Apple cider vinegar introduces a bright, tangy counterpoint that cuts through the richness, and smoked paprika delivers a subtle, complex smoky depth, enhancing the entire dish.
The Cheesy Finishing Touch: Melty Cheddar Goodness
Shredded cheddar cheese layered on top melts into a bubbly, savory crust during the final bake. It adds a delicious layer of tangy, creamy flavor and an appealing texture contrast.
This cheese topping isn’t just for looks; it seals in moisture and provides a irresistible savory finish to each slice of your Classic Meatloaf.
Gear Up: Essential Tools for Classic Meatloaf Perfection
Having the right tools at hand makes the cooking process smoother and ensures the best possible outcome for your delicious meatloaf recipe.
Mixing Bowls and Measuring Essentials
A large mixing bowl is indispensable for combining the meatloaf ingredients thoroughly without making a mess. Smaller bowls are handy for whisking the glaze separately.
Accurate measuring cups and spoons ensure the ratios of binders and flavorings are just right, which is key for consistency and preventing a dry or crumbly loaf.
The Right Pan for the Job: Loaf Pan or Baking Sheet
A standard loaf pan (9×5 inches) will give your meatloaf a classic, uniform shape. Greasing it ensures easy release after baking.
Alternatively, shaping the meatloaf free-form on a baking sheet allows for more surface area to crisp up, developing a delicious crust all around.
If you love the rich glaze on this meatloaf, you’ll enjoy the sweet, sticky topping on this classic glazed meatloaf too.
Your Secret Weapon: A Reliable Meat Thermometer
A meat thermometer is arguably the most critical tool for perfect meatloaf. It removes all guesswork, allowing you to cook to the precise internal temperature of 160°F.
This ensures your homemade meatloaf is fully cooked and safe, but more importantly, it prevents overbaking which is the number one cause of dryness.
Crafting Your Masterpiece: A Step-by-Step Guide
Preparation is Key: Preheat and Grease
Preheat your oven to 350 degrees Fahrenheit. Lightly grease your chosen cooking vessel, whether it’s a loaf pan or a baking sheet.
Proper preheating ensures even cooking from the start, and greasing prevents sticking, making for an easier release when it’s time to serve your Classic Meatloaf.
The Gentle Mix: Combining Ingredients for Tenderness
In a large mixing bowl, combine the ground beef, breadcrumbs, milk, egg, chopped yellow onion, minced garlic, chopped fresh rosemary, salt, and black pepper.
This is arguably the most crucial step for a tender meatloaf: mix gently with your hands or a spoon until just combined. Overmixing develops gluten in the meat, leading to a tough, dense result.
Forming Your Loaf
Firmly press the mixture into the prepared loaf pan, ensuring it’s evenly distributed, or shape it into a uniform loaf directly on your greased baking sheet.
A consistent shape allows for even cooking, preventing some parts from being undercooked or overcooked, contributing to a perfect meatloaf recipe.
Whisking Up the Signature Glaze
In a separate small bowl, whisk together the ketchup, light brown sugar, apple cider vinegar, and smoked paprika until smooth.
This creates our sweet, tangy, and smoky meatloaf glaze that caramelizes beautifully on the meatloaf, adding layers of flavor.
First Bake with Half the Glaze
Pour about half of the prepared glaze evenly over the top of the formed meatloaf.
This initial layer of glaze will bake into the meatloaf, adding flavor from within and creating a foundation for the second, more vibrant layer.
Initial Baking Period
Bake the meatloaf for 45 minutes.
This allows the meatloaf to begin cooking through and the first layer of glaze to set and develop flavor before the final touches.
Glaze Refresh and Cheese Topping
Remove the meatloaf from the oven. Carefully spread the remaining half of the glaze evenly over the top, then sprinkle the shredded cheddar cheese over the glaze.
Adding the second layer of glaze later ensures a fresh, vibrant flavor and prevents it from burning during the long bake. The cheese will melt into a delicious, bubbly crust.
The Final Bake: Reaching Perfect Temperature
Return the meatloaf to the oven and continue baking for another 15 to 20 minutes, or until the internal temperature reaches 160 degrees Fahrenheit on a meat thermometer.
The cheese should be bubbly and lightly browned. Cooking to the precise temperature of 160°F and not beyond is key to keeping your meatloaf incredibly juicy and safe to eat.
The Golden Rule: Rest for Juiciness
Once baked, remove the meatloaf from the oven and let it rest in the pan for at least 10 minutes before slicing.
This crucial resting period allows the juices to redistribute throughout the loaf, guaranteeing every slice is moist, tender, and holds its shape beautifully.
Slice, Garnish, and Serve
Garnish with fresh rosemary sprigs if desired for an elegant touch and added aroma. Then, slice and serve your perfectly cooked meatloaf.
Enjoy the rich flavors and tender texture that make this Classic Meatloaf a true comfort food legend.
Chef’s Secrets: Elevate Your Meatloaf Game
The Art of Gentle Mixing: Avoiding Toughness
As mentioned in the directions, resist the urge to overmix your meatloaf ingredients. Using your hands allows for better control and helps you feel when ingredients are just combined, preventing the development of tough meat.
For a perfect pairing, try our Glazed Meatloaf Dinner: Tender, Juicy Mastery.
Light hands are the secret to a consistently tender meatloaf. Think of it as folding, not kneading.
Don’t Skimp on Fat: Why 80/20 Beef is Best
While leaner ground beef might seem healthier, the 80/20 fat content is crucial for a truly moist and flavorful meatloaf. The fat renders during cooking, keeping the loaf juicy and tender.
If you absolutely must use leaner beef, consider adding extra moisture like a little more milk, some shredded zucchini, or a tablespoon of olive oil to compensate.
Layering the Glaze for Maximum Flavor
Applying the glaze in two stages isn’t just for aesthetics; it deepens the flavor profile. The first layer bakes in, creating a foundation of savory-sweetness.
The second layer, added later, provides that fresh, vibrant, slightly caramelized crust without burning, ensuring a bright, tangy finish for your meatloaf glaze.
The Non-Negotiable Rest: Juiciness Guaranteed
Do NOT skip the resting period! This 10-minute wait allows the meat’s juices, which have been pushed to the center during baking, to redistribute throughout the entire loaf.
This ensures every slice is moist and tender, and it helps the meatloaf hold its shape better for cleaner, more appealing slices.
Customizing Your Aromatics and Herbs
While fresh rosemary is fantastic, feel free to experiment with other herbs like fresh thyme, sage, or parsley. Ensure your onion and garlic are very finely minced or even grated.
This prevents crunchy bits in your otherwise tender meatloaf, allowing the flavors to meld seamlessly into the mixture.
Beyond Cheddar: Other Cheese Options
While sharp cheddar offers a classic, tangy bite that pairs beautifully, don’t hesitate to personalize your topping. Provolone, mozzarella, or even a smoked Gouda could add unique and delicious dimensions.
Experimenting with different cheeses can create entirely new flavor experiences for your homemade meatloaf.
Troubleshooting Your Meatloaf: Common Issues Solved
Why is My Meatloaf Dry?
If your meatloaf turns out dry, the most common culprits are overmixing the meat, using too lean of ground beef, or overbaking. Ensure you’re using 80/20 ground beef for essential fat.
Mix very gently, only until just combined, and always rely on a meat thermometer to pull it from the oven at 160°F to prevent overcooking.
My Meatloaf is Falling Apart!
A crumbling meatloaf often means there weren’t enough binders (breadcrumbs, egg) or that the loaf wasn’t pressed firmly enough into its shape. Ensure your breadcrumbs and egg are correctly measured.
Another factor could be not allowing it to rest long enough. The resting period helps the loaf set and firm up, making it easier to slice without falling apart. For another hearty comfort food, consider trying our Savory Salisbury Steak with Mushroom Gravy.
The Glaze Isn’t Sticking/Browning Properly
If your glaze isn’t adhering, it might be too thin. Ensure your brown sugar is packed correctly for the right consistency. If it’s not browning, your oven temperature might be off, or it simply needs a few more minutes to caramelize during the second bake.
An oven thermometer can help verify your oven’s accuracy. Ensure the glaze isn’t too runny before applying.
It Tastes Bland
Bland meatloaf usually means insufficient seasoning. Don’t be shy with salt, pepper, and fresh herbs. Taste your mixture before adding the egg (raw meat tasting is only safe for seasoning assessment, not consumption) to adjust seasonings as needed.
A touch more smoked paprika or a dash of Worcestershire sauce can also boost the savory depth in your Classic Meatloaf.
Round Out the Meal
This meatloaf pairs well with things that soak up its juices or add a sharp contrast.
- Cool, creamy Loaded Creamy Potato Salad balances the meatloaf’s richness with tang and texture.
- Bake a batch of Garlic Herb Cheddar Biscuits to mop up every bit of sauce on the plate.
Perfect Pairings: What to Serve Alongside Classic Meatloaf
A great meal is often defined by its side dishes. Here are some perfect accompaniments for your tender and juicy meatloaf.
Classic Comfort Sides
Nothing beats the traditional combination of creamy mashed potatoes and vibrant green beans with a slice of meatloaf. The potatoes soak up any extra glaze, and the beans add a fresh crunch.
These classic pairings enhance the comforting qualities of the meatloaf, making for a truly satisfying meal.
Lighter Accompaniments
For a lighter meal, consider a fresh garden salad with a simple vinaigrette, or perfectly roasted asparagus or broccoli. These options provide a crisp contrast to the richness of the meatloaf.
You might love our recipe for Crispy Baked Asparagus, which offers a bright, flavorful, and healthy complement.
Creative Additions
Elevate your meal with a side of homemade gravy (using pan drippings if baking free-form) or serve with an extra dollop of the meatloaf glaze for those who love extra sauce.
Garlic bread or soft dinner rolls are also fantastic for soaking up every last bit of that delicious glaze.
Smart Prep & Storage: Enjoying Your Meatloaf Longer
Making a delicious Classic Meatloaf is rewarding, and knowing how to store it means you can enjoy it for days or even weeks to come.
Refrigerating Leftovers
Store any leftover meatloaf in an airtight container in the refrigerator for up to 3-4 days. It makes for excellent sandwiches, quick reheated meals, or even meatloaf sliders.
Ensure it’s cooled completely before storing to maintain freshness and prevent bacterial growth.
Freezing for Future Feasts
To freeze, allow the cooked meatloaf to cool completely. You can freeze it whole, in slices, or as mini loaves, wrapped tightly in plastic wrap and then aluminum foil.
It will keep for up to 3 months. Thaw in the refrigerator overnight before reheating gently in the oven or microwave.
Make-Ahead Tips
You can prepare the meatloaf mixture (without baking) up to 24 hours in advance. Form the loaf, cover it tightly, and refrigerate.
Add an extra 5-10 minutes to the initial baking time if baking from a cold state, ensuring it reaches the correct internal temperature.
Classic Meatloaf FAQs: Your Top Questions Answered
Can I use different ground meat?
Yes, you can substitute ground beef with ground turkey, ground beef, or a combination. However, if using leaner meats like ground turkey, you may need to add extra moisture (like a little more milk or even some finely grated zucchini) to prevent a dry meatloaf.
Adjusting the seasonings slightly might also be necessary to complement the flavor of the alternative meat.
What can I use instead of breadcrumbs?
For a gluten-free option, you can use gluten-free breadcrumbs, crushed gluten-free crackers, or even rolled oats (ensure they are gluten-free if necessary).
If avoiding grains entirely, almond flour or finely ground beef rinds can also work, though they may alter the texture slightly, making the loaf a bit denser.
Is it really necessary to rest the meatloaf?
Absolutely! Resting the meatloaf for at least 10 minutes after baking is crucial. This allows the internal juices to redistribute, ensuring a moist and tender slice every time.
Skipping this step often results in a drier, less cohesive meatloaf that can fall apart when sliced.
Can I bake it without a loaf pan?
Yes, you can! This meatloaf recipe specifically mentions shaping it free-form on a baking sheet. This method often results in a crispier exterior due to more surface area exposed to the oven’s heat, though it might spread slightly more.
Ensure your baking sheet is lined with parchment paper or foil for easier cleanup if going free-form.
How do I know when my meatloaf is done?
The most accurate way is to use a meat thermometer. Your meatloaf is perfectly cooked when its internal temperature reaches 160 degrees Fahrenheit.
Visually, the cheese topping should be bubbly and lightly browned, and the glaze will appear beautifully caramelized.
Ready to Create Your Own Classic Meatloaf Legend?
Now that you’re equipped with all the chef’s secrets, the detailed steps, and troubleshooting tips, you’re ready to master this Classic Meatloaf recipe. It’s truly a game-changer for anyone seeking a consistently tender, juicy, and flavorful meal.
Don’t just cook; create a comforting memory for your family and friends. Dive in, enjoy the process, and share your delicious results with us!
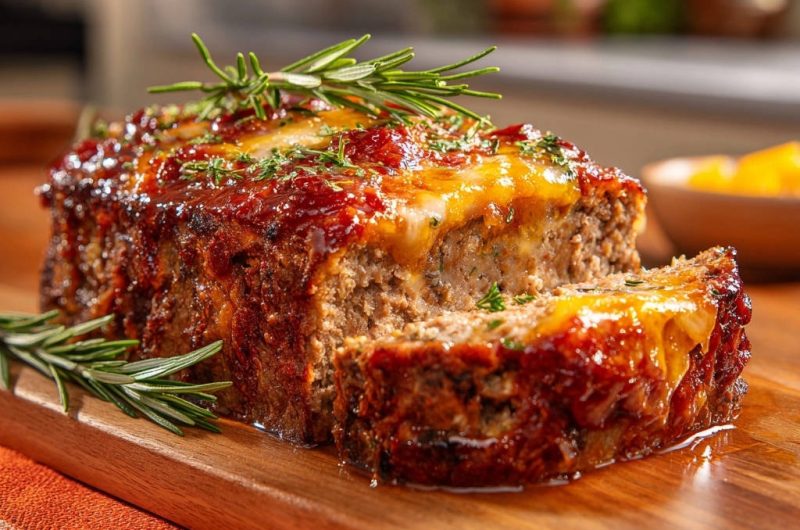
Meatloaf
Course: Main CourseCuisine: AmericanDifficulty: medium6
servings20
minutes1
hour550
kcal80
minutesSay goodbye to dry, tough meatloaf! This recipe shares the simple tricks for a perfectly moist, tender, and flavorful Classic Meatloaf every single time, from gentle mixing to the ideal baking temperature.
Ingredients
1.5 pounds ground beef (80/20 fat content is best)
1 cup plain breadcrumbs
1/2 cup milk (dairy or non-dairy)
1 large egg
1/2 cup finely chopped yellow onion
2 cloves garlic, minced
1 tablespoon fresh rosemary, finely chopped (plus extra sprigs for garnish)
1 teaspoon salt
1/2 teaspoon black pepper
1 cup ketchup
1/4 cup light brown sugar, packed
1 tablespoon apple cider vinegar
1 teaspoon smoked paprika
1/2 cup shredded cheddar cheese
Directions
- Preheat your oven to 350 degrees Fahrenheit. Lightly grease a loaf pan or shape the meatloaf free-form on a baking sheet.
- In a large mixing bowl, combine the ground beef, breadcrumbs, milk, egg, chopped yellow onion, minced garlic, chopped fresh rosemary, salt, and black pepper. This is the crucial step for preventing dryness: mix gently until just combined. Overmixing will lead to a tough meatloaf.
- Firmly press the mixture into the prepared loaf pan, or shape it into a loaf directly on your baking sheet.
- In a separate small bowl, whisk together the ketchup, brown sugar, apple cider vinegar, and smoked paprika to create your glaze.
- Pour half of the glaze evenly over the top of the meatloaf.
- Bake for 45 minutes. Remove from the oven, then carefully spread the remaining half of the glaze over the top.
- Sprinkle the shredded cheddar cheese over the glaze.
- Return the meatloaf to the oven and continue baking for another 15 to 20 minutes, or until the internal temperature reaches 160 degrees Fahrenheit on a meat thermometer. The cheese should be bubbly and lightly browned. Cooking it to just the right temperature and not beyond ensures it stays incredibly juicy.
- Once baked, remove the meatloaf from the oven and let it rest in the pan for at least 10 minutes before slicing. This resting period allows the juices to redistribute throughout the loaf, guaranteeing every slice is moist and tender.
- Garnish with fresh rosemary sprigs if desired, then slice and serve.
Notes
- Mix gently to prevent toughness. Resting for 10 minutes after baking is crucial for a moist loaf.