Mastering Chocolate-Dipped Crispy Rice Bites: The Secret to Soft Texture
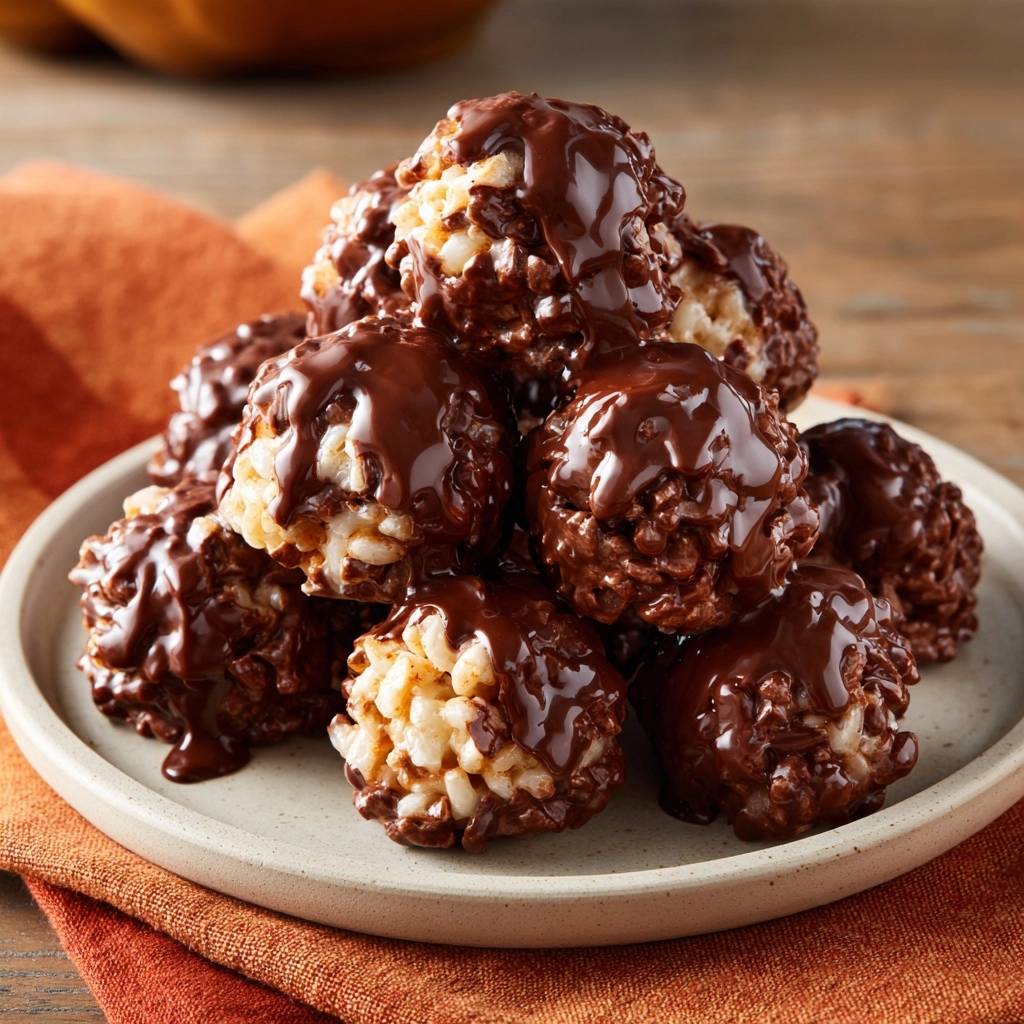
We have all been there. You reach for a nostalgic rice cereal treat, expecting a soft, gooey pull, only to find it has the structural integrity of a sidewalk brick. It is a common kitchen heartbreak that turns a beloved childhood snack into a dental hazard. However, these Chocolate-Dipped Crispy Rice Bites are here to change the narrative with a texture so tender it practically melts.
The secret lies in a sophisticated “low and slow” philosophy that treats marshmallows with the respect they deserve. Instead of the standard flat bars, we are shaping these into elegant spheres and finishing them with a dual-layer chocolate coating. The result is a gourmet bite that looks like it belongs in a high-end confectionery shop but tastes like the best version of your childhood memories.
If you want that professional finish, the real trick is the marshmallow-to-cereal ratio. Most recipes skimp on the binder, but we are upping the butter and marshmallows to ensure every single grain of rice is cushioned in a pillowy cloud. I have found that using a touch of salt is the ultimate pro move here; it cuts through the sugar and makes the chocolate flavor pop.
The Science of Softness: Why Most Treats Fail
Most people treat marshmallow melting as a race, cranking up the heat to get the job done quickly. This is the primary reason treats turn rock-hard within an hour. When you subject marshmallows to high heat, the sugar molecules undergo a process called crystallization. Therefore, the sugar reaches a “hard crack” stage, which essentially turns your snack into a lollipop once it cools down.
In addition to temperature control, moisture retention is your best friend. Standard recipes often use four tablespoons of butter, but we are bumping that up to six. This extra fat creates a more robust moisture barrier around the crispy rice. Consequently, the cereal stays crunchy while the marshmallow remains flexible and soft for days rather than hours.
Temperature Control and Sugar Crystallization
Marshmallows are essentially a delicate foam of sugar, corn syrup, and gelatin. When you heat them past a certain point, the water evaporates and the sugar structure tightens. By keeping the flame at the lowest possible setting, you prevent the sugar from becoming brittle. Residual heat is the most powerful tool in your arsenal; it allows the marshmallows to finish melting gently without the risk of scorching or overcooking.
Essential Components for Chocolate-Dipped Crispy Rice Bites
Quality ingredients make a massive difference when the list is this short. You must start with fresh marshmallows. If that bag has been sitting in your pantry for six months, the marshmallows have already lost the moisture needed for a soft pull. Fresh ones feel bouncy and soft, whereas old ones feel dusty and firm.
Vanilla extract and salt might seem like afterthoughts, but they are essential for a balanced flavor profile. The salt acts as a flavor enhancer, ensuring the treats do not taste one-dimensionally sweet. Meanwhile, a high-quality vanilla extract adds a floral depth that complements the rich chocolate coating perfectly.
For a perfect pairing, try our Pink Heart Rice Krispie Treats: Crumble-Free Perfection.
Selecting the Right Chocolate for Dipping
Semi-sweet chocolate chips are the gold standard for this recipe because they provide a sharp contrast to the sweet marshmallow base. I always add a bit of coconut oil to the melting process. This not only gives the chocolate a professional, glossy sheen but also lowers the melting point. This ensures the chocolate has a gentle “snap” when you bite into it without being too hard to chew.
Cereal Texture and Freshness Standards
The cereal provides the “crispy” in the title, so it needs to be top-notch. If your box has been open for a while, the rice might have absorbed humidity and turned chewy. You can easily fix this by spreading the cereal on a baking sheet and toasting it at 300°F for about five minutes. This restores the crunch and adds a subtle toasted aroma to the finished bites.
Step-by-Step: Crafting the Perfect Marshmallow Base
The technical core of this recipe is the “80% Melt Rule.” You should stir the butter and marshmallows over low heat until you see a thick, white cream, but small, lumpy shapes of the mini marshmallows should still be visible. At this exact moment, you must remove the pan from the heat. The residual warmth will finish the job as you stir vigorously with a greased spatula.
As you stir, you will notice the mixture transforming into a smooth, glossy ribbon. It should smell like toasted sugar and vanilla, not burnt caramel. If the mixture starts to turn golden or brown, you have gone too far and the sugar has begun to caramelize, which will lead to a harder texture once set.
The Low-and-Slow Melting Technique
Set your burner to the lowest possible setting. It might feel like it is taking forever, but patience is the key to a superior texture. Use a silicone spatula and grease it lightly with butter so the marshmallow does not stick. Keep the mixture moving constantly to ensure the heat is distributed evenly across the bottom of the pan.
Folding and Incorporating the Cereal
When it is time to combine, use a folding motion rather than a heavy-handed stir. You want to gently turn the cereal into the marshmallow cream to preserve the tiny air pockets inside the rice. When you lift the spatula, you should see a beautiful “spiderweb” of marshmallow strands stretching between the grains of cereal.
Shaping and Forming Without Over-Compressing
The biggest mistake you can make at this stage is packing the mixture too tightly. If you squeeze the bites into hard spheres, you destroy the airy texture we worked so hard to create. Instead, grease your hands with a little butter and gently roll the mixture into 2-inch spheres. Think of it like handling a snowball; you want just enough pressure to hold the shape, but not enough to crush the interior.
The Dual-Layer Chocolate Coating Process
We use a two-stage dipping method to achieve a gourmet look. The first layer acts as a structural base, while the second layer provides that decadent, dripping aesthetic. This creates a beautiful contrast between the dark chocolate and the golden cereal. It also ensures that every bite has a balanced ratio of chocolate to marshmallow.
Creating the Dark Base Layer
Melt your first batch of chocolate with a small amount of coconut oil. Dip the bottom half of each sphere into the chocolate or use a fork to drizzle thin lines across the base. This creates a “seal” that helps the bite sit flat on a plate and provides a sturdy foundation for the heavier top layer of chocolate.
Achieving the Thick Glossy Drip
For the final finish, you want a slightly higher ratio of coconut oil to chocolate to create a ganache-like viscosity. Use a spoon to pour the warm chocolate over the top of each ball. Let it pool naturally and drip down the sides. This creates those beautiful, thick “tears” of chocolate that make the treats look absolutely irresistible.
Troubleshooting Common Preparation Hurdles
If your marshmallow mixture gets too cold before you finish shaping the balls, do not panic. You can pop the bowl into a warm oven (about 200°F) for two minutes to soften it back up. However, avoid the microwave for this step, as it can easily overheat the sugar and ruin the texture.
Fixing Seized or Dull Chocolate
Chocolate usually seizes if a drop of water gets into the bowl or if it is overheated. If your chocolate looks grainy or dull, stir in a teaspoon of room-temperature coconut oil and whisk vigorously. This can often smooth out the texture and restore the shine, saving your coating from the trash bin.
Managing Sticky Situations
Marshmallow is incredibly sticky, so greasing your tools is mandatory. I prefer using softened butter for my hands and the mixing bowl because it adds a nice flavor. However, a neutral oil spray works perfectly well for the spatula and the baking sheet where the bites will set.
Flavor Variations and Creative Swaps
Once you master the base, you can get creative with flavors. A sprinkle of flaky sea salt over the wet chocolate topping adds a sophisticated touch. You could also stir in some crushed freeze-dried raspberries for a tart contrast or drizzle a bit of melted sunflower butter over the top for a nutty flavor profile that remains completely nut-free.
Storage Solutions for Long-Lasting Chewiness
Never put these treats in the refrigerator for long-term storage. Cold temperatures cause the starch in the cereal to undergo retrogradation, making it go stale faster. Instead, keep them in an airtight container at room temperature. They will stay perfectly chewy and soft for up to four days, though they rarely last that long in most households!
Expert Tips for Professional Results
Can I use marshmallow fluff instead of mini marshmallows?
It is best to stick with mini marshmallows for this specific recipe. Marshmallow fluff has a different density and contains more air and stabilizers, which can result in a treat that is too soft to hold its spherical shape. Mini marshmallows provide the perfect balance of structure and gooeyness once melted correctly.
Why did my chocolate turn white after it set?
This is called “blooming,” and it usually happens when the chocolate is heated too quickly or stored in a place with fluctuating temperatures. While it looks a bit dull, it is perfectly safe to eat. To prevent this, melt your chocolate in short 20-second bursts and stir thoroughly between each interval to keep the temperature stable.
How do I make these ahead for an event?
You can easily make these 24 hours in advance. Just ensure they are stored in a single layer in an airtight container so the chocolate doesn’t smudge. If you need to stack them, place a piece of parchment paper between the layers to keep them from sticking together.
Can I use brown butter for this recipe?
Absolutely! Browning the butter before adding the marshmallows adds a wonderful toasted, nutty flavor that pairs beautifully with the chocolate. Just be sure to keep the heat very low once you add the marshmallows so you don’t overcook the sugars while trying to incorporate the browned butter bits.
What is the best way to reheat a treat that has gone hard?
If a treat has become a bit firm, you can wrap it in a damp paper towel and microwave it for exactly five to seven seconds. This will briefly soften the marshmallow bonds without melting the chocolate coating into a mess. Eat it immediately, as it will firm up again quickly once it cools.
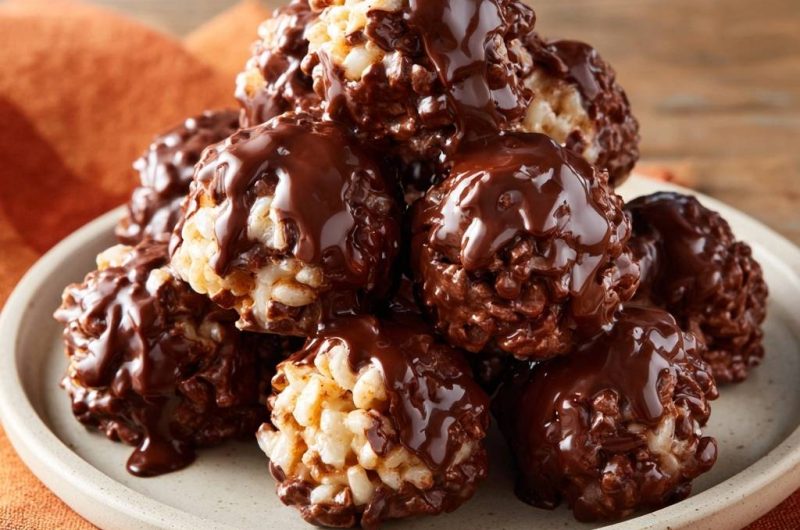
Crispy Rice Bites
Course: DessertCuisine: AmericanDifficulty: easy18
bites15
minutes10
minutes185
kcal55
MinutesA chewy, marshmallow-based cereal treat rolled into spheres and finished with a decadent double-layer chocolate coating. The recipe focuses on low-temperature melting to ensure a soft texture that lasts for days.
Ingredients
6 cups crispy rice cereal
10 ounces (1 bag) fresh mini marshmallows
6 tablespoons unsalted butter (extra butter ensures softness)
1 teaspoon vanilla extract
1/4 teaspoon salt (to balance sweetness)
1.5 cups semi-sweet chocolate chips, divided
2 tablespoons coconut oil, divided
Directions
- Prepare: Grease a large mixing bowl and a baking sheet with butter or non-stick spray. Place the crispy rice cereal in the greased bowl.
- Melt Low and Slow: In a large saucepan over the lowest heat setting, melt the butter. Add the marshmallows and salt, stirring constantly with a greased spatula.
- The Softness Secret: To prevent rock-hard treats, remove the pan from the heat when the marshmallows are about 80% melted (with small lumps still visible). Stir vigorously off the heat until the residual warmth creates a smooth cream. This prevents the sugar from reaching a “hard crack” temperature. Stir in the vanilla.
- Combine: Pour the marshmallow mixture over the cereal. Fold gently until every grain is coated.
- Form: Using greased hands, gently roll the mixture into 2-inch spheres. Do not pack them tightly; over-compressing creates a tough texture. Place on the prepared baking sheet.
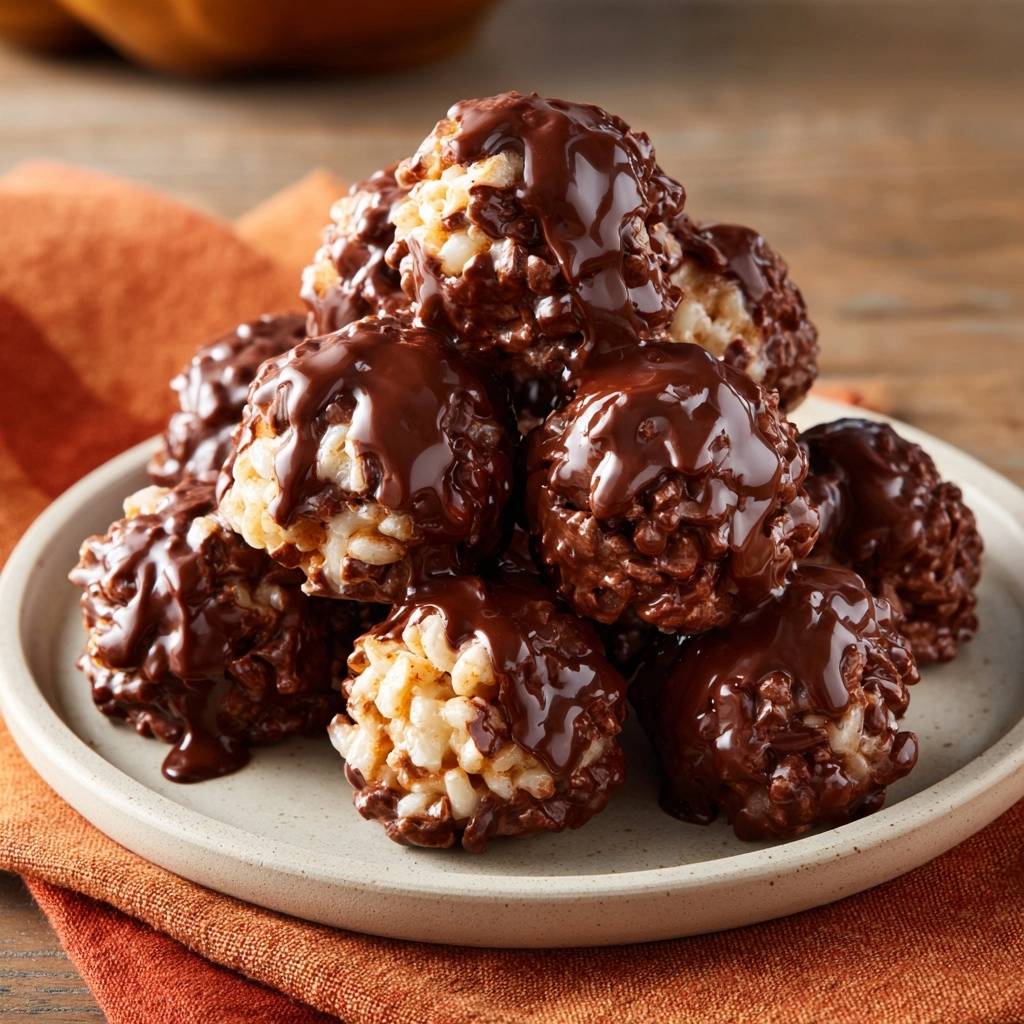
- Base Coat: Melt 1/2 cup of chocolate chips with 1/2 tablespoon of coconut oil in the microwave in 20-second bursts. Lightly roll the bottom half of each ball in this chocolate or drizzle thin lines to create the dark base seen in the image. Let set in the fridge for 5 minutes.
- Glossy Topping: Combine the remaining 1 cup of chocolate chips and 1.5 tablespoons of coconut oil. Microwave in 30-second intervals, stirring until completely smooth and glossy.
- The Finish: Use a spoon to pour a generous amount of the warm chocolate over the top of each ball, allowing it to pool and drip naturally down the sides to achieve the thick, decadent look in the photo.
- Set: Let the treats sit at room temperature for 30 minutes until the chocolate is firm but the center remains soft. Store in an airtight container.
Notes
- The secret to softness is removing the marshmallows from heat when they are only 80% melted. Do not over-compress the mixture when forming balls to maintain a light, airy texture.