Crispy Fried Chicken Sandwich: Perfectly Juicy, Unforgettable Crunch
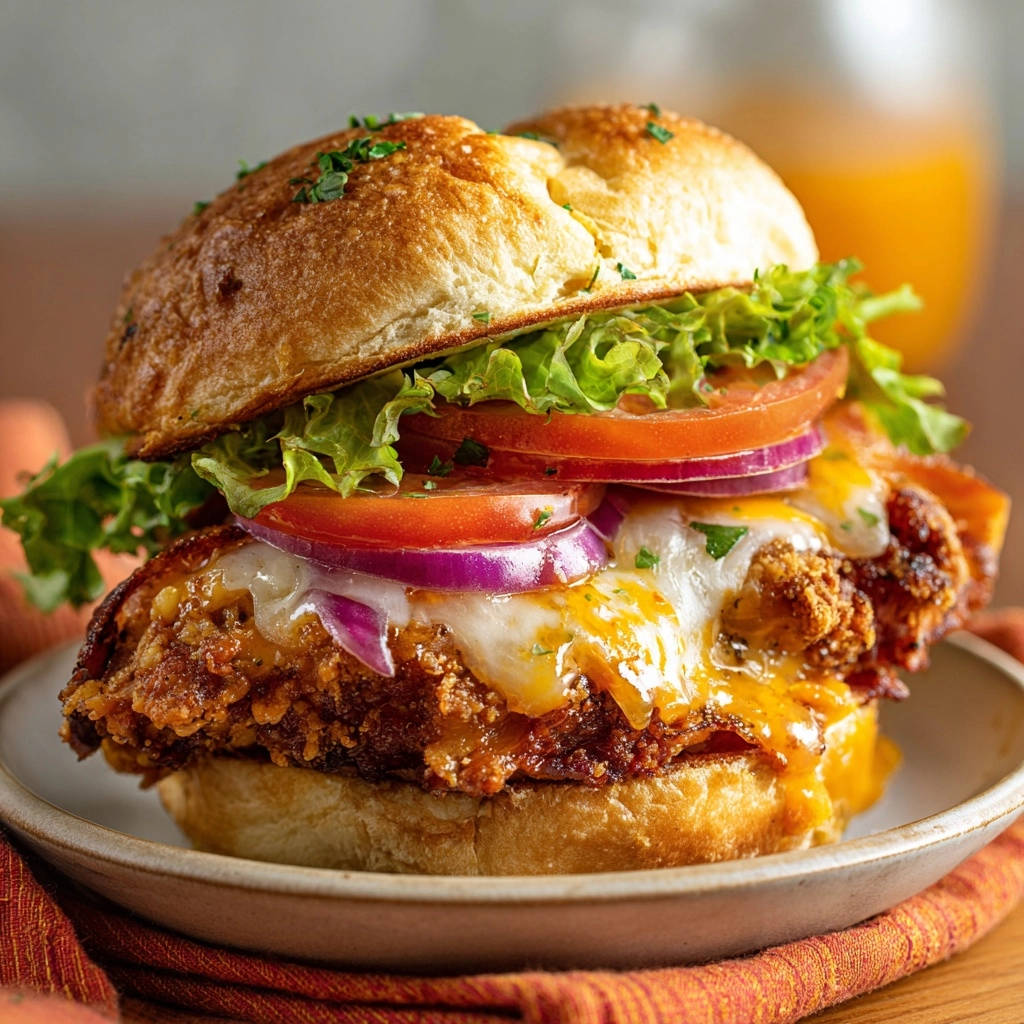
There’s nothing quite like the anticipation of biting into a perfectly crafted Crispy Fried Chicken Sandwich. For years, I chased that elusive balance: a shatteringly crisp exterior yielding to unbelievably moist, tender chicken inside.
This recipe isn’t just a guide; it’s the culmination of countless attempts to conquer the dry chicken dilemma, resulting in a game-changing method that guarantees a juicy, golden-fried masterpiece every single time.
Why This Crispy Fried Chicken Sandwich Belongs in Your Recipe Box
Forget everything you thought you knew about homemade fried chicken. This specific approach elevates the humble Crispy Fried Chicken Sandwich from a fast-food craving to a gourmet experience right in your kitchen.
The Buttermilk Brine Secret: Unlocking Unbeatable Juiciness
The magic starts with a simple buttermilk brine. This acidic soak tenderizes the chicken fibers, allowing them to absorb and retain incredible moisture during frying.
It’s the ultimate insurance policy against dry chicken, ensuring every bite is succulent and flavorful.
Cornstarch Magic: The Key to an Unforgettable Crunch
Our breading isn’t just flour. The addition of cornstarch is a secret weapon, creating a lighter, crispier coating that adheres beautifully to the chicken.
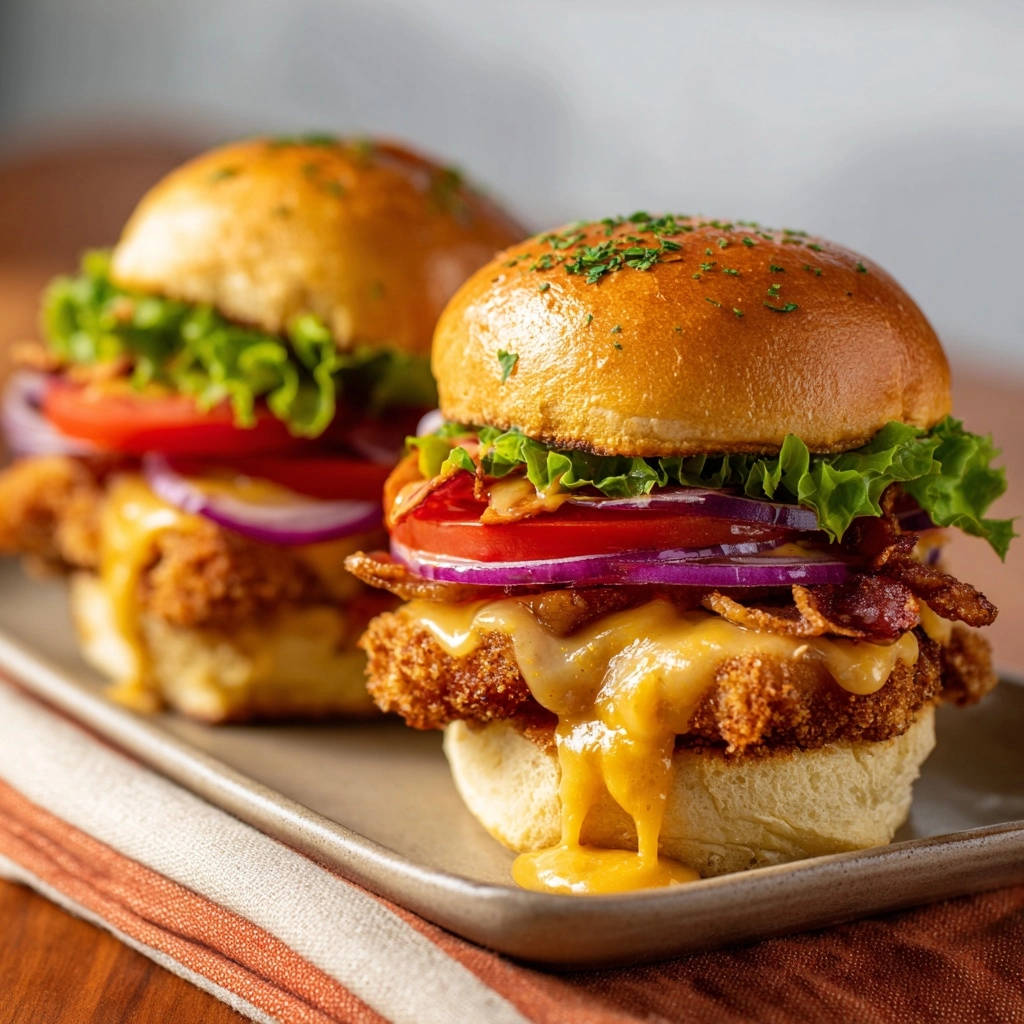
This simple trick delivers that sought-after, satisfying crunch without any greasiness.
Beyond Basic: What Makes This Sandwich a True Game-Changer
This recipe balances ease of preparation with exceptional results. It’s designed to be reliable, eliminating common pitfalls of homemade fried chicken.
The combination of juicy chicken, golden crust, and thoughtful toppings makes this Crispy Fried Chicken Sandwich truly unforgettable.
Gathering Your Essentials: Ingredients for the Perfect Bite
Success begins with quality ingredients. Here’s a breakdown of what you’ll need and why each component is crucial for your perfect Crispy Fried Chicken Sandwich.
Chicken & Brine: The Foundation of Flavor
Boneless, Skinless Chicken Breasts: Aim for pieces around 6 ounces each. Pounding them to a uniform thickness (1/2 to 3/4 inch) is vital for even cooking.
Buttermilk: This is the heart of our juiciness secret. Its acidity tenderizes the meat.
Salt & Black Pepper: Essential seasonings for the brine, enhancing the chicken’s natural flavor.
Optional Hot Sauce: A dash adds a subtle tang and a tiny kick to the marinade, infusing flavor deep into the chicken.
The Golden Breading: Flour, Spices & That Cornstarch Secret
All-Purpose Flour: The base for our crispy coating, providing structure.
Cornstarch: The non-negotiable ingredient for extra crispness and a lighter texture, ensuring your golden crust is superb.
Paprika, Garlic Powder, Onion Powder: This trio creates a balanced, savory flavor profile for the breading.
Optional Cayenne Pepper: For those who love a little heat, cayenne adds a delightful warming spice.
Essential Sandwich Fixings: Building Your Masterpiece
Vegetable Oil: For frying. Choose an oil with a high smoke point like canola or peanut oil.
Brioche Buns or Soft Rolls: Their slightly sweet, rich flavor and soft texture provide the perfect contrast to the crispy chicken.
If you love the crunch of that golden crust, you’ll enjoy the tender texture of this loaded BBQ pulled chicken sandwich.
Cheddar or Monterey Jack Cheese: These melt beautifully, adding a creamy, savory layer.
Cooked Crispy Bacon: Provides a fantastic smoky, salty crunch and depth of flavor.
Lettuce, Tomato, Red Onion: Fresh, crisp toppings offer a vibrant crunch and bright counterpoint to the richness of the fried chicken.
Tools for Your Crispy Fried Chicken Sandwich Adventure
Having the right equipment makes all the difference for a smooth and successful frying experience.
Kitchen Essentials for Frying Success
Meat Mallet or Rolling Pin: Crucial for pounding the chicken to an even thickness, ensuring uniform cooking.
Medium Bowl: For combining the buttermilk brine ingredients and soaking the chicken.
Shallow Dish: Ideal for easily dredging the chicken in the breading mixture.
Large, Heavy-Bottomed Pot or Dutch Oven: Essential for frying. Its thick bottom helps maintain a consistent oil temperature, crucial for crispy results.
Wire Rack Set Over a Paper Towel-Lined Baking Sheet: For draining excess oil, keeping your fried chicken crisp post-fry.
Optional Gadgets for Pro-Level Results
Deep-Fry Thermometer: Highly recommended. Maintaining the oil at a consistent 350°F is key to preventing soggy chicken or burnt breading.
Crafting Your Crispy Fried Chicken Sandwich: A Step-by-Step Guide
Follow these detailed steps to achieve the ultimate Crispy Fried Chicken Sandwich, from brining to building.
Step 1: Prep & Pound for Evenness
Place each boneless, skinless chicken breast between two pieces of plastic wrap. Gently pound them with a meat mallet or rolling pin until they are about 1/2 to 3/4 inch thick.
This crucial step ensures the chicken cooks evenly and quickly, preventing some parts from drying out while others are still cooking.
Step 2: The Moisture Lock: Buttermilk Brine
In a medium bowl, whisk together the buttermilk, 1 teaspoon salt, 1/2 teaspoon black pepper, and the optional hot sauce. Stir until well combined.
Add the pounded chicken breasts to the buttermilk mixture, making sure they are fully submerged. Cover the bowl and refrigerate for at least 30 minutes, or for optimal results, 2 to 4 hours. This tenderizes the chicken and locks in incredible moisture, promising a juicy bite.
Step 3: Breading Perfection: The Crispy Coating
In a separate shallow dish, combine the flour, cornstarch, paprika, garlic powder, onion powder, and cayenne pepper (if using). Whisk these dry ingredients together thoroughly.
Season the breading mixture generously with an additional pinch of salt and pepper. This ensures the crust itself is flavorful.
Remove one chicken breast from the buttermilk, allowing any excess to drip off naturally. Dredge it completely in the seasoned flour mixture, pressing firmly to ensure the breading adheres well. Shake off any excess coating gently. Repeat with the second chicken breast.
Step 4: Hot Oil Immersion: Frying to Golden Perfection
Pour enough vegetable oil into a large, heavy-bottomed pot or Dutch oven to reach about 2 inches deep. Heat the oil over medium-high heat until it registers 350 degrees Fahrenheit on a deep-fry thermometer.
If you enjoy these crispy sandwiches, you’ll also love the smoky flavor of this BBQ chicken melt sandwich.
If you don’t have a thermometer, test the oil by dropping in a small pinch of flour; it should sizzle immediately and vigorously. Carefully place one breaded chicken breast into the hot oil.
Fry for approximately 5 to 7 minutes per side, or until the crust is a beautiful golden brown and visibly crispy. Crucially, ensure the internal temperature of the chicken reaches 165 degrees Fahrenheit using an instant-read thermometer.
Maintain a consistent oil temperature throughout the frying process, adjusting the heat as needed. Once cooked, carefully remove the chicken to a wire rack set over a paper towel-lined baking sheet to drain any excess oil. Repeat with the second chicken breast.
Step 5: Building Your Dream Sandwich
While the fried chicken is still hot, immediately place 2 slices of cheese on top of each piece, allowing the residual heat to melt it slightly and create a gooey layer.
Lightly toast your brioche buns or soft rolls. This adds texture and prevents sogginess.
Assemble your sandwiches: layer the bottom bun with fresh lettuce leaves, followed by the cheesy fried chicken, the crispy cooked bacon, juicy tomato slices, and thin red onion rings. Top with the other half of the bun.
Serve your magnificent Crispy Fried Chicken Sandwich immediately and revel in that guaranteed juicy, crunchy bite!
Elevate Your Crispy Fried Chicken Sandwich: Pro Tips & Variations
Take your fried chicken game to the next level with these expert recommendations and creative twists.
Mastering Oil Temperature for the Perfect Fry
Consistent oil temperature is paramount. Too low, and your chicken will be greasy; too high, and the outside will burn before the inside cooks.
Use a thermometer and adjust your burner as you fry to keep it steady around 350°F for that perfect golden crisp.
Spice it Up: Customizing Your Breading
Experiment with your breading! Add a pinch of smoked paprika for depth, a dash of chili powder for extra warmth, or even a teaspoon of dried herbs like oregano or thyme for an aromatic twist.
For truly fiery chicken, increase the cayenne pepper or add a pinch of ghost pepper powder (use with extreme caution!).
Beyond Brioche: Bun & Topping Adventures
While brioche is classic, try potato rolls for a softer bite or a hearty ciabatta for more chew. Explore different cheeses like provolone or pepper jack.
Consider adding pickles for a sharp tang, a dollop of creamy coleslaw, or a drizzle of a homemade spicy mayo or honey mustard sauce for an explosion of flavor.
Make-Ahead Magic: Prep for Quicker Assembly
You can pound and brine the chicken up to 24 hours in advance, keeping it covered in the refrigerator.
Prepare your breading mixture beforehand and store it in an airtight container. Cook your bacon and chop your fresh toppings ahead of time to make assembly a breeze.
Troubleshooting Common Crispy Fried Chicken Sandwich Challenges
Even seasoned home cooks face issues. Here’s how to tackle common problems and ensure your Crispy Fried Chicken Sandwich is always a triumph.
Why is My Chicken Dry?
Dry chicken usually stems from insufficient brining or overcooking. Ensure your chicken brines for at least 30 minutes, ideally longer, and always pound it to an even thickness.
Use a meat thermometer to pull the chicken from the oil as soon as it reaches 165°F internal temperature; a few degrees past this can dry it out.
What to Serve with Your Fried Chicken Sandwich
That crunchy chicken sandwich needs the right partners on the table. These two sides bring cool creaminess and warm, cheesy pull-apart goodness to balance the crispy main dish.
- A cold, creamy Loaded Creamy Potato Salad adds a tangy, cooling contrast to the hot fried chicken.
- For a shareable starter, pull apart the warm Spinach Artichoke Pull-Apart Bread alongside your sandwich for a rich, cheesy bite.
My Breading Fell Off! What Happened?
Breading can detach if not pressed firmly enough, or if the oil isn’t hot enough. Make sure to really press the chicken into the flour mixture, shaking off only the loose excess.
Also, avoid overcrowding the pot, as this drops the oil temperature and can prevent the breading from setting properly.
Is My Oil Hot Enough (or Too Hot)?
An oil thermometer is your best friend here. If the oil is too cool (below 350°F), the breading will absorb too much oil and become soggy.
If it’s too hot (above 375°F), the outside will burn before the chicken cooks through. Adjust your heat source gradually to maintain a consistent temperature for a golden crust.
Serving, Storage & Leftovers: Enjoying Your Crispy Fried Chicken Sandwich
Maximize the enjoyment of your delicious Crispy Fried Chicken Sandwich with these tips.
Best Ways to Serve Your Crispy Creation
This sandwich is a meal in itself, but it pairs wonderfully with classic sides like crispy french fries, a fresh green salad, or creamy coleslaw.
For an extra touch, offer a side of pickles or a spicy dipping sauce.
Storing Leftovers for Optimal Freshness
Fried chicken is best enjoyed immediately. If you have leftovers, store the cooked chicken breasts separately from the buns and fresh toppings.
Place the chicken in an airtight container in the refrigerator for up to 3 days. Store buns at room temperature and fresh toppings separately.
Reheating for Continued Crispness
To revive the crispness of leftover fried chicken, avoid the microwave. Preheat your oven or an air fryer to 375°F (190°C).
Reheat the chicken for 10-15 minutes in the oven, or 5-8 minutes in an air fryer, until hot and crispy again. Then, assemble your sandwich with fresh toppings.
Crispy Fried Chicken Sandwich FAQs
Got more questions? We’ve got answers to help you master your Crispy Fried Chicken Sandwich.
Can I Use Boneless, Skinless Chicken Thighs Instead?
Absolutely! Boneless, skinless chicken thighs work beautifully for this recipe. They tend to be even more forgiving and juicy, though their shape might differ slightly. Adjust pounding and frying times as needed.
What if I Don’t Have Buttermilk?
No buttermilk? No problem! You can easily make a substitute by adding 1 tablespoon of white vinegar or lemon juice to a measuring cup, then filling the rest with regular milk until it reaches 1 cup. Let it sit for 5-10 minutes until it curdles slightly before using.
How Can I Make This Gluten-Free?
To make this Crispy Fried Chicken Sandwich gluten-free, simply substitute the all-purpose flour with a high-quality gluten-free all-purpose flour blend. Ensure your blend contains xanthan gum for proper texture.
Is It Possible to Bake or Air Fry This Chicken?
While the ultimate crispness comes from frying, you can bake or air fry for a healthier option. Preheat your oven to 400°F (200°C) or air fryer to 375°F (190°C).
Spray the breaded chicken generously with oil and bake for 20-30 minutes, flipping halfway, or air fry for 15-20 minutes, flipping occasionally, until golden and cooked through.
What Type of Oil is Best for Frying?
For frying, choose a neutral-flavored oil with a high smoke point. Excellent choices include vegetable oil, canola oil, peanut oil, or sunflower oil. Avoid olive oil, as it has a lower smoke point and can burn easily.
Ready to Impress? Share Your Crispy Fried Chicken Sandwich Masterpiece!
You now possess the secrets to crafting a truly spectacular Crispy Fried Chicken Sandwich. This recipe will be a reliable favorite, impressing everyone with its guaranteed juiciness and satisfying crunch.
Don’t just make it; master it! We’d love to see your creations. Share your sandwich photos and tell us your favorite toppings in the comments below!
Fried Chicken
Course: Main CourseCuisine: AmericanDifficulty: medium2
servings20
minutes20
minutes1200
kcal60
minutesThis recipe delivers the ultimate crispy fried chicken sandwich with a perfectly juicy interior. Say goodbye to dry chicken and hello to a new favorite!
Ingredients
2 boneless, skinless chicken breasts (about 6 ounces each)
2 cups buttermilk
1 teaspoon salt, plus more for seasoning
1/2 teaspoon black pepper, plus more for seasoning
1 cup all purpose flour
1/4 cup cornstarch
1 teaspoon paprika
1/2 teaspoon garlic powder
1/2 teaspoon onion powder
1/4 teaspoon cayenne pepper (optional, for a little kick)
2 tablespoons hot sauce (optional, for buttermilk marinade)
Vegetable oil, for frying (about 3-4 cups)
2 brioche buns or soft rolls
4 slices cheddar or Monterey Jack cheese
4 slices cooked bacon
Lettuce leaves
2 tomato slices
2 thin red onion rings
Directions
- Prepare the chicken: Place each chicken breast between two pieces of plastic wrap and pound gently with a mallet or rolling pin until they are about 1/2 to 3/4 inch thick. This ensures even cooking.
- The Juiciness Secret: In a medium bowl, combine the buttermilk, 1 teaspoon salt, 1/2 teaspoon black pepper, and optional hot sauce. Add the pounded chicken breasts to the buttermilk mixture, ensuring they are fully submerged. Cover and refrigerate for at least 30 minutes, or for best results, 2 to 4 hours. This tenderizes the chicken and locks in moisture.
- Prepare the breading: In a separate shallow dish, whisk together the flour, cornstarch, paprika, garlic powder, onion powder, and cayenne pepper (if using). Season generously with a pinch more salt and pepper.
- Dredge the chicken: Remove one chicken breast from the buttermilk, letting any excess drip off. Dredge it thoroughly in the flour mixture, pressing firmly to ensure the breading adheres well. Shake off any excess. Repeat with the second chicken breast.
- Fry the chicken: In a large, heavy bottomed pot or Dutch oven, pour enough vegetable oil to reach about 2 inches deep. Heat the oil over medium high heat until it reaches 350 degrees Fahrenheit. If you don’t have a thermometer, a small pinch of flour should sizzle immediately when dropped in.
- Carefully place one breaded chicken breast into the hot oil. Fry for about 5 to 7 minutes per side, or until the crust is golden brown and crispy and the internal temperature of the chicken reaches 165 degrees Fahrenheit. Maintain a consistent oil temperature throughout frying. Remove chicken to a wire rack set over a paper towel lined baking sheet to drain excess oil. Repeat with the second chicken breast.
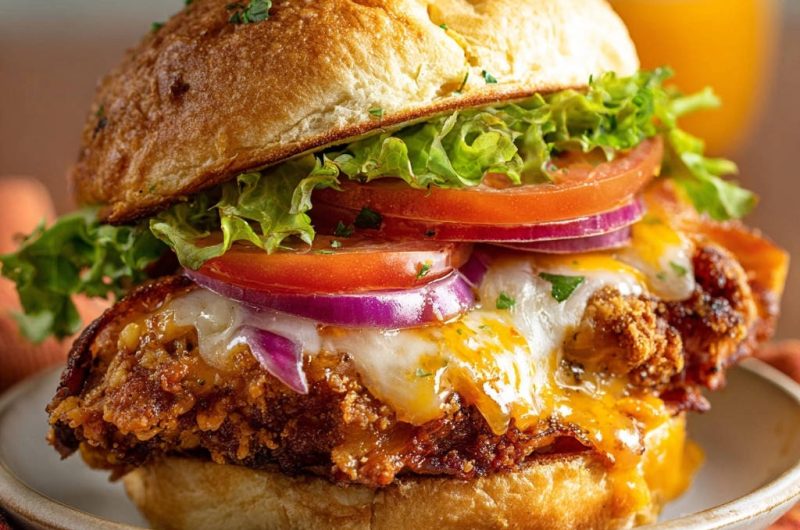
- Assemble the sandwiches: While the chicken is still hot, place 2 slices of cheese on top of each fried chicken breast to melt slightly. Lightly toast the buns. Layer the bottom bun with lettuce, then the cheesy fried chicken, followed by the cooked bacon, tomato slices, and red onion. Top with the other half of the bun. Serve immediately and enjoy that guaranteed juicy bite!
Notes
- For best results, marinate chicken for 2 to 4 hours to maximize tenderness.