Crispy Glazed Chicken Bites: The Secret to Lasting Crunch
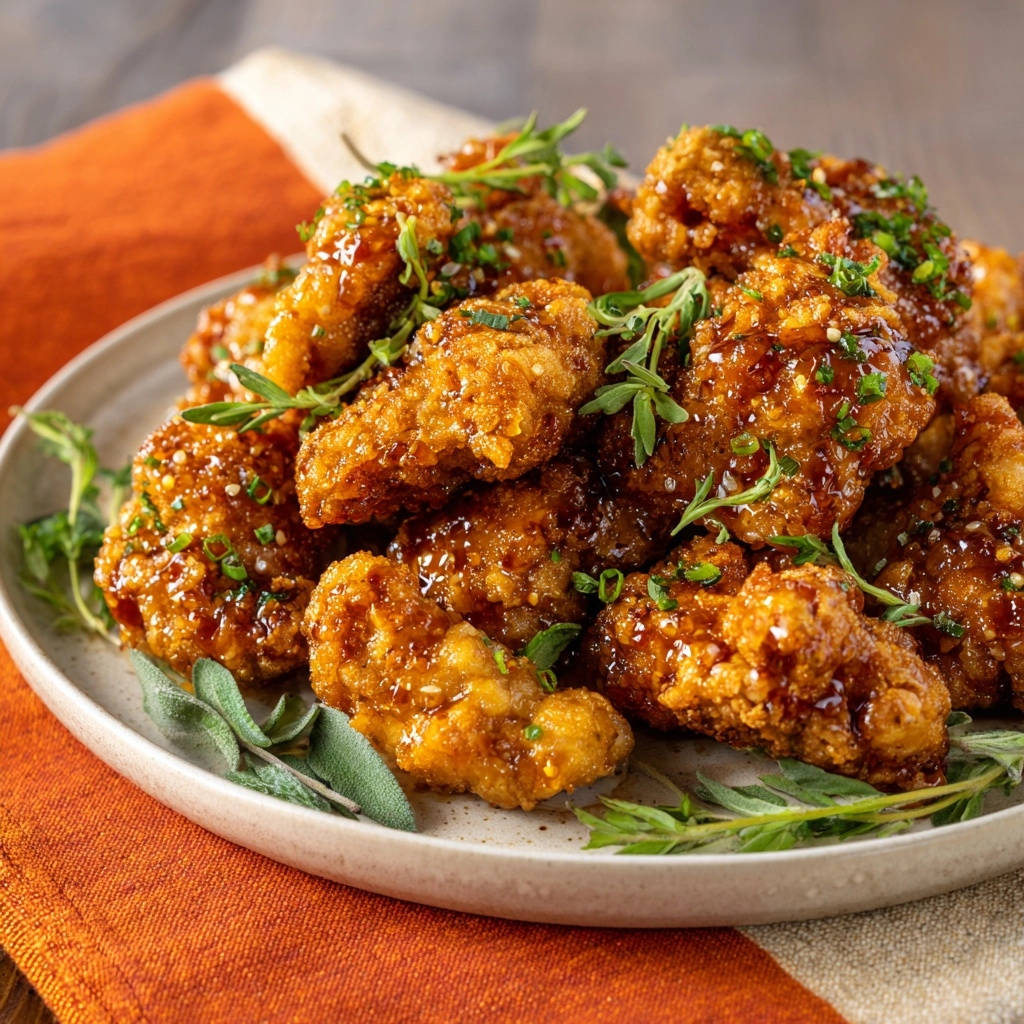
There’s nothing more frustrating than carefully preparing a batch of delicious chicken only for it to lose its satisfying crunch once the sauce hits. For years, my glazed chicken bites would inevitably turn soggy, but I finally cracked the code to truly crispy, sticky, and utterly irresistible Crispy Glazed Chicken Bites that stay crunchy from the first bite to the last.
This recipe isn’t just about flavor; it’s about a revolutionary technique that guarantees your chicken retains its perfect texture. Get ready to transform your appetizer game with these perfectly coated, deeply flavorful bites.
Beyond Basic: Why Our Crispy Glazed Chicken Bites Will Be Your New Favorite
Many glazed chicken recipes fall short when it comes to maintaining that desirable crisp exterior. My method for Crispy Glazed Chicken Bites addresses this common frustration head-on.
The secret lies in a strategic frying technique and a specific glazing approach that ensures the coating remains wonderfully crunchy, even after being bathed in the rich, sticky sauce.
This isn’t just another chicken recipe; it’s a game-changer for anyone who loves glazed chicken but hates the dreaded sogginess. You’ll achieve restaurant-quality results right in your own kitchen.
For a heartier meal, toss these with noodles and asparagus in this crispy chicken green bean stir-fry.
The Essential Elements: Building Your Glazed Chicken Bites
The Star: Chicken Selection & Preparation
For the ultimate Crispy Glazed Chicken Bites, you have a choice between boneless, skinless chicken thighs or breasts. Thighs offer more natural juiciness and flavor, while breasts provide a leaner option.
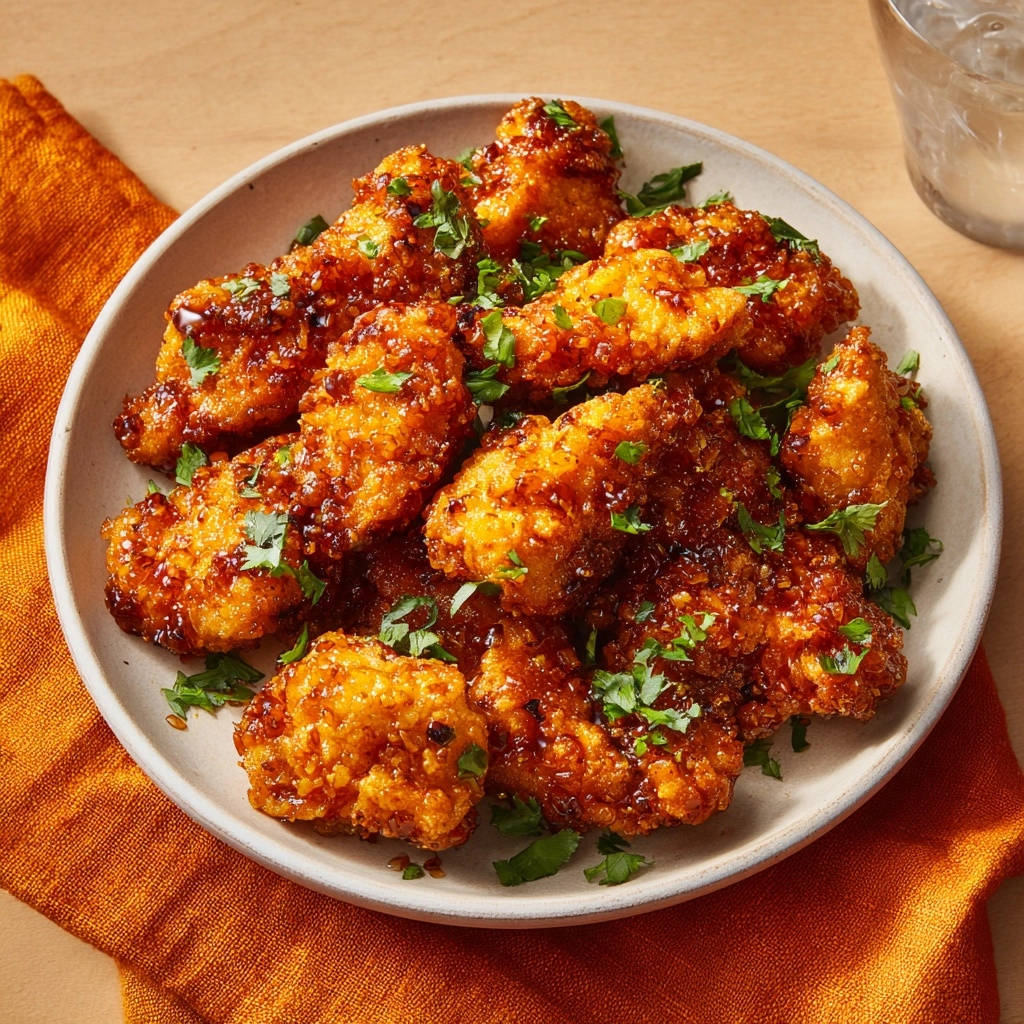
Regardless of your choice, cutting the chicken into uniform 1-inch pieces ensures even cooking and perfect bite-sized portions. Critically, patting the chicken pieces very dry with paper towels is the first step to incredible crispness; excess moisture inhibits browning and crisping.
Mastering the Crispy Coating Duo
Our unique coating uses a powerful combination of all-purpose flour and cornstarch. The flour provides the foundational structure for the coating, while the cornstarch is the secret weapon, yielding a delicate, extra-crisp texture that stands up to the glaze.
An egg wash serves as the perfect binder, helping the dry coating adhere securely to the chicken. The double dredging technique builds a robust, thick layer that creates an exceptional crunch when fried.
Crafting the Irresistible Sticky-Sweet Glaze
The glaze for these Crispy Glazed Chicken Bites balances savory and sweet notes beautifully. Soy sauce provides a deep umami base, perfectly complemented by the sweetness of honey or brown sugar.
Fresh minced ginger and garlic infuse the sauce with aromatic, pungent flavors that elevate the entire dish. A cornstarch slurry acts as a clean, efficient thickening agent, ensuring the glaze achieves that desirable consistency that clings perfectly to each chicken piece.
Flavorful Finishes: Garnish Essentials
Garnishes not only add visual appeal but also enhance the overall experience of your Crispy Glazed Chicken Bites. Sesame seeds offer a subtle nutty crunch and an elegant finish.
Freshly chopped chives introduce a mild, oniony freshness that brightens the dish. Fresh thyme sprigs add a delicate herbaceous aroma and a sophisticated touch, making the presentation truly stand out.
For the same crispy coating technique used here, try these sticky sesame chicken bites with green beans.
Tools for Triumph: Equipping Your Kitchen for Crispy Bites
Having the right tools makes preparing these Crispy Glazed Chicken Bites seamless and successful.
Heavy-Bottomed Pot or Dutch Oven: Essential for deep frying, as it retains heat consistently for even cooking.
Whisk: Perfect for combining dry ingredients and preparing the egg wash and cornstarch slurry.
Shallow Bowls: Ideal for setting up your dredging station for efficient coating of the chicken.
Wire Racks: Crucial for draining excess oil from the fried chicken and allowing air circulation to maintain crispness.
Slotted Spoon or Spider: Necessary for safely lowering chicken into hot oil and removing it without retaining excess grease.
Small Saucepan: For simmering and thickening the delicious sticky glaze.
Meat Thermometer: Absolutely vital for accurately monitoring your oil temperature, ensuring consistent crispness and proper cooking.
Your Path to Golden Perfection: The Crispy Glazed Chicken Bites Method
Step 1: Chicken Prep & Double Dredging Mastery
- Prepare the Chicken:
Begin by thoroughly patting your 1.5 pounds of chicken pieces very dry with paper towels. This crucial step removes surface moisture, which is key to achieving a truly crispy exterior and preventing oil splatters.
- Set Up Dredging Station:
In a shallow bowl, whisk together 1 cup all-purpose flour, 1/4 cup cornstarch, 1 teaspoon salt, and 1/2 teaspoon black pepper until fully combined. In a second shallow bowl, whisk 2 large eggs with 1/4 cup water to create a uniform egg wash.
- Double Dredge for Crispness:
Dip each chicken piece first into the dry flour mixture, shaking off any excess. Then, immerse it in the egg wash, letting any excess drip away. Finally, return the chicken to the flour mixture for a second coating, gently pressing to ensure an even, thick layer that will become exceptionally crisp. Place the coated chicken pieces on a wire rack as you go.
Step 2: Unlocking the Crispy Secret Frying Technique
- Heat the Oil:
Pour 4 cups of vegetable oil into a large, heavy-bottomed pot or Dutch oven. Heat it over medium-high heat until it reaches precisely 350°F (175°C), using a meat thermometer to confirm the temperature. Maintaining this specific temperature is paramount for a golden, crisp result.
- Fry in Batches:
Carefully lower a single layer of chicken pieces into the hot oil. Avoid overcrowding the pot, as this will significantly drop the oil temperature and lead to soggy chicken. Frying in small batches ensures consistent temperature and maximum crispness.
- Achieve Deep Golden Crispness:
Fry each batch for 5 to 7 minutes, or until the chicken is deeply golden brown and the coating is visibly very crisp. The chicken should be cooked through. Use a slotted spoon or spider to transfer the fried chicken to a clean wire rack set over a baking sheet to drain any excess oil. Repeat with remaining chicken, allowing the oil to return to temperature between batches.
Step 3: Simmering the Sticky-Sweet Glaze
- Combine Glaze Ingredients:
While your chicken is frying, combine 1/2 cup soy sauce, 1/2 cup honey or brown sugar, 2 tablespoons minced fresh ginger, and 2 tablespoons minced garlic in a small saucepan. This blend forms the flavorful base of your sticky sauce.
- Prepare Cornstarch Slurry:
In a separate small bowl, whisk together the remaining 1 tablespoon of cornstarch with 1/4 cup water until the mixture is completely smooth and lump-free. This slurry is what will thicken your glaze.
- Thicken the Glaze:
Bring the soy sauce mixture to a gentle simmer over medium heat. Whisk in the cornstarch slurry and continue to cook, stirring constantly, for about 2 to 3 minutes. The glaze will thicken to a consistency that beautifully coats the back of a spoon. Keep the glaze warm until ready to use.
Step 4: The Final Flourish: Glazing for Lasting Crunch
- Glaze While Hot:
As soon as all the chicken is fried and still piping hot, immediately transfer it to a large bowl. The residual heat from the chicken is essential for the glaze to adhere and for the coating to maintain its integrity.
- Toss Quickly and Gently:
Pour the warm, thickened glaze over the hot chicken. Toss quickly and gently to coat all the pieces evenly. Speed is key here to prevent the chicken from sitting in the sauce for too long, preserving its crispness. Serve your Crispy Glazed Chicken Bites immediately to enjoy them at their absolute peak of crispness and flavor.
Step 5: The Perfect Plate: Garnish and Serve
- Garnish and Enjoy:
Sprinkle the finished Crispy Glazed Chicken Bites generously with 1 tablespoon of sesame seeds and 1 tablespoon of chopped fresh chives. For an extra touch of elegance and aroma, add a few fresh thyme sprigs. Serve immediately to savor the ultimate combination of sticky sweetness and satisfying crunch.
Chef’s Wisdom: Elevating and Troubleshooting Your Crispy Glazed Chicken Bites
Achieve Unbeatable Crispness Every Time
Maintaining a consistent oil temperature of 350°F (175°C) is paramount; use a reliable thermometer and adjust heat as needed. Frying in small, manageable batches prevents the oil from cooling down too much, which can result in greasy, less crispy chicken.
Ensure each piece of chicken is thoroughly patted dry before dredging. This initial moisture removal significantly contributes to the crispness of your final product.
Glaze Genius: Tips for the Perfect Coating
Always keep your glaze warm until you are ready to toss the chicken. A warm glaze will coat the hot chicken more evenly and prevent it from immediately cooling down the chicken’s crispy exterior.
Toss the chicken bites with the glaze quickly and gently. Over-tossing or allowing the chicken to sit in the glaze for too long will inevitably lead to a loss of crispness.
Common Challenges & Quick Fixes
Problem: Chicken isn’t crispy enough.
Ensure your oil temperature is consistently at 350°F (175°C) and avoid overcrowding the pot, which lowers the oil temperature. Make sure to pat the chicken very dry and apply a generous, even double coating for maximum crunch.
Problem: Glaze is too thin/thick.
If the glaze is too thin, continue simmering and stirring for another minute or two, allowing more water to evaporate. If it’s too thick, whisk in a tablespoon of warm water at a time until the desired consistency is reached.
Problem: Chicken sticks together.
This often happens from overcrowding the pot during frying or not allowing enough space on the wire rack for proper drainage. Fry in smaller batches and ensure adequate air circulation on the rack after frying.
Problem: Oil temperature drops too quickly.
Fry in smaller batches to prevent a significant temperature drop. Allow the oil to return to 350°F (175°C) between each batch before adding more chicken.
Customize Your Crispy Glazed Chicken Bites: Variations & Perfect Pairings
Flavor Twists & Dietary Adaptations
For a spicy kick, add a teaspoon of sriracha or a pinch of red chili flakes to the glaze mixture. You can experiment with different sweeteners like maple syrup for a distinct flavor profile.
For gluten-free dietary needs, substitute the all-purpose flour with rice flour or a gluten-free all-purpose blend for the coating. Vegetarians can adapt this recipe by using extra-firm tofu or tempeh, pressed and cut into bites, instead of chicken.
What to Serve With Your Bites
These Crispy Glazed Chicken Bites are incredibly versatile and pair well with a variety of sides. Steamed white or brown rice is a classic choice, soaking up the delicious glaze.
For a complete meal, serve them alongside blanched or steamed vegetables like broccoli, green beans, or asparagus. A simple side salad with a light vinaigrette also provides a refreshing contrast to the richness of the chicken.
More Ways to Enjoy Crunchy Chicken
If you like the sticky glaze and crispy texture of these chicken bites, here are two other recipes that play with similar sweet-heat combos.
- For a lighter option that still brings the crunch, try this Sweet and Spicy Chicken Salad with its juicy pieces and tangy dressing.
- For even more finger-licking heat and a deeper savory kick, these Spicy Sticky Gochujang Chicken Wings share the same caramelized finish.
Storage & Shelf-Life: Keeping Your Crispy Glazed Chicken Bites Delicious
Storing Leftovers Safely
To store any leftover Crispy Glazed Chicken Bites, allow them to cool completely to room temperature. Transfer them to an airtight container and refrigerate promptly.
They will remain fresh and safe to eat for up to 3-4 days when stored correctly in the refrigerator.
Reheating for Best Results
While freshly made is always best, you can reheat leftover Crispy Glazed Chicken Bites to retain some crispness. The best methods are typically the oven or an air fryer.
Preheat your oven to 375°F (190°C) or air fryer to 350°F (175°C) and spread the chicken in a single layer. Reheat for 8-12 minutes in the oven or 5-8 minutes in the air fryer, or until heated through and lightly re-crisped. Be aware that they may not be as intensely crispy as when first made.
Your Crispy Glazed Chicken Bites Questions Answered
Can I use chicken breast instead of thighs for Crispy Glazed Chicken Bites?
Yes, absolutely! While chicken thighs tend to be juicier, chicken breasts work wonderfully too. Just be mindful that chicken breast can dry out more quickly, so adjust your frying time slightly if needed to ensure they remain tender.
How do I prevent my Crispy Glazed Chicken Bites from becoming soggy after glazing?
The key is a combination of factors: double-dredging for a thick, robust coating, frying at the correct high temperature (350°F) until very crisp, and most importantly, tossing the chicken with the glaze immediately after frying while it’s still hot, and doing so quickly and gently. This minimizes the time the sauce has to soften the crust.
Can I bake or air fry these chicken bites instead of deep frying?
You can, but the crispness won’t be quite the same as deep-frying. For baking, spray coated chicken with oil and bake at 400°F (200°C) until golden. For air frying, spray with oil and air fry at 375°F (190°C) shaking halfway through. Adjust cooking times as necessary until golden and cooked through.
What’s the best way to ensure the chicken is cooked through without overcooking the exterior?
Consistent oil temperature (350°F) is crucial. Fry in batches to prevent temperature drops. The chicken will cook through within the 5-7 minute frying time. You can also use a meat thermometer to check internal temperature, aiming for 165°F (74°C).
Can I prepare the glaze in advance?
Yes, the glaze can be made up to 2-3 days in advance. Store it in an airtight container in the refrigerator. When ready to use, gently reheat it in a small saucepan over low heat, whisking until it returns to its pourable, thickened consistency.
Ready to Impress? Share Your Crispy Glazed Chicken Bites Masterpiece!
You now possess the secret to truly spectacular Crispy Glazed Chicken Bites-bites that promise enduring crunch and irresistible flavor. This recipe is a testament to how simple techniques can elevate a dish from good to unforgettable.
Go forth, create, and share your golden, sticky, and wonderfully crunchy chicken bites with loved ones. We can’t wait to see your culinary masterpieces!
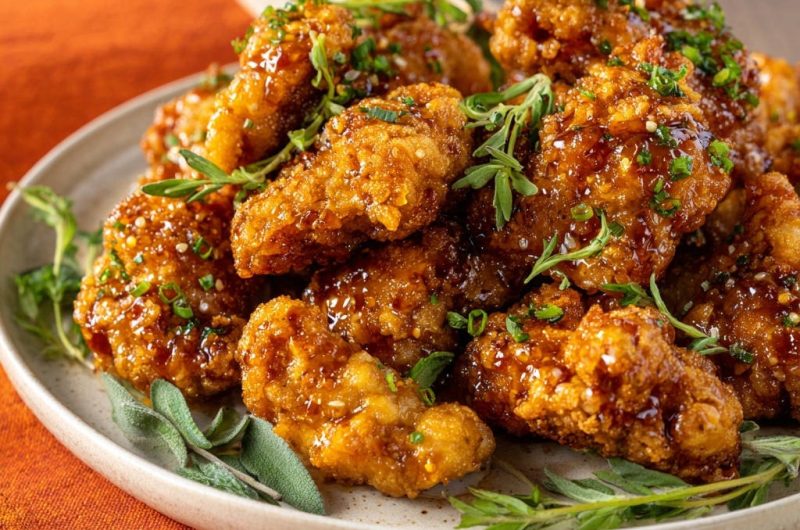
Crispy Glazed Chicken
Course: Main CourseCuisine: AsianDifficulty: medium4
servings25
minutes25
minutes850
kcal50
minutesMaster the secret to crispy, glazed chicken bites that stay wonderfully crunchy, even when coated in sauce. This game-changing recipe ensures perfect texture every time.
Ingredients
1.5 pounds boneless, skinless chicken thighs or breasts, cut into 1 inch pieces
1 cup all-purpose flour
1/2 cup cornstarch, divided
1 teaspoon salt
1/2 teaspoon black pepper
2 large eggs
1/4 cup water
4 cups vegetable oil, for frying
For the Glaze:
1/2 cup soy sauce
1/2 cup honey or brown sugar
2 tablespoons minced fresh ginger
2 tablespoons minced garlic
1 tablespoon cornstarch
1/4 cup water
Garnish:
1 tablespoon sesame seeds
1 tablespoon chopped fresh chives
Fresh thyme sprigs
Directions
- Prepare the chicken: Pat the chicken pieces very dry with paper towels. In a shallow bowl, whisk together the all-purpose flour, 1/4 cup of the cornstarch, salt, and pepper. In another shallow bowl, whisk the eggs with 1/4 cup water to create an egg wash.
- Dredge the chicken: Dip each chicken piece first into the flour mixture, shaking off excess. Then dip into the egg wash, allowing excess to drip off. Finally, return to the flour mixture for a second coating, pressing gently to ensure an even, thick layer. Set the coated chicken pieces on a wire rack while you prepare the oil.
- The Crispy Secret Frying Method: Heat the vegetable oil in a large, heavy-bottomed pot or Dutch oven over medium-high heat until it reaches 350°F (175°C). Do not overcrowd the pot; fry in batches to maintain oil temperature. Carefully lower a single layer of chicken pieces into the hot oil. Fry for 5 to 7 minutes, or until the chicken is deeply golden brown and cooked through, and the coating is visibly very crisp. The key here is ensuring a very crispy exterior before removing. Use a slotted spoon or spider to transfer the fried chicken to a clean wire rack set over a baking sheet to drain. Repeat with remaining chicken.
- Make the glaze: While the chicken is frying, combine the soy sauce, honey or brown sugar, minced ginger, and minced garlic in a small saucepan. In a separate small bowl, whisk together the remaining 1 tablespoon of cornstarch with 1/4 cup water until smooth.
- Cook the glaze: Bring the soy sauce mixture to a gentle simmer over medium heat. Whisk in the cornstarch slurry and continue to cook, stirring constantly, until the glaze thickens to a consistency that coats the back of a spoon, about 2 to 3 minutes. Keep the glaze warm.
- Glazing for Lasting Crispness: As soon as all the chicken is fried and still hot, transfer it to a large bowl. Pour the warm, thickened glaze over the chicken. Toss quickly and gently to coat all the pieces evenly. Serve immediately to enjoy maximum crispness.
- Garnish with sesame seeds, chopped chives, and fresh thyme sprigs.
Notes
- For best results, serve immediately. Do not overcrowd the pot when frying.