No-Bake Peanut Butter Fudge Pie: Perfectly Sliceable Decadence
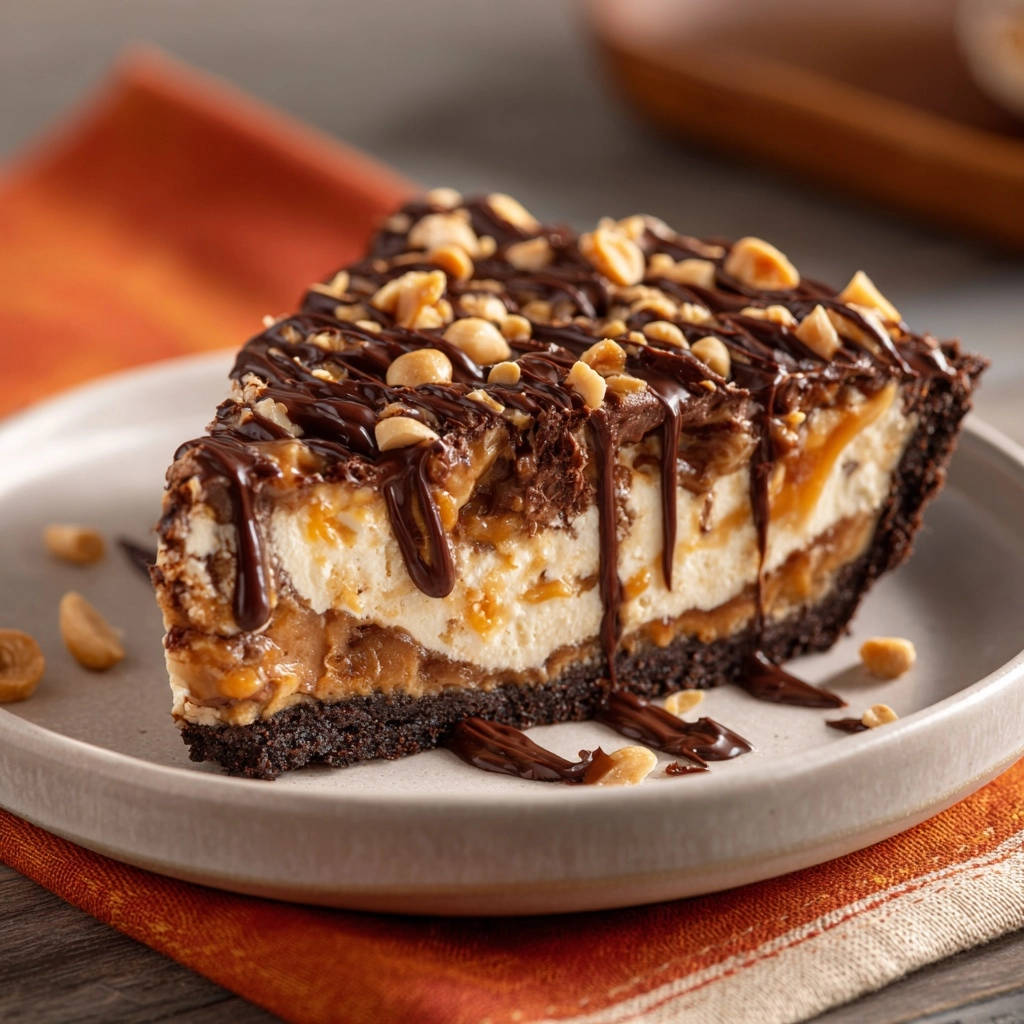
Anyone who’s ever attempted a no-bake dessert knows the heartbreak of a beautiful pie turning into a crumbly, gooey mess when you try to slice it. But after countless tests, I’ve perfected the ultimate No-Bake Peanut Butter Fudge Pie that promises a perfectly firm, clean slice every single time, without compromising on its rich, decadent flavor. This recipe is your ticket to effortless dessert mastery and pure, unadulterated bliss.
Beyond Basic: What Makes This No-Bake Pie So Special?
This isn’t just another no-bake pie recipe; it’s a meticulously crafted experience designed for maximum enjoyment and minimal stress. We’ve taken the classic flavor combination of peanut butter and chocolate and elevated it into a truly show-stopping dessert.
The Secret to Perfectly Clean Slices, Every Time
The magic behind this pie’s impressive sliceability lies in one critical step: extended chilling. Unlike many recipes that suggest just an hour or two, this pie needs dedicated refrigerator time for all its luscious layers to firm up completely.
This ensures each slice holds its shape beautifully, showcasing the distinct layers without any crumbling or oozing. You’ll achieve that picture-perfect piece every single time.
Layers of Flavor: A Symphony for Your Taste Buds
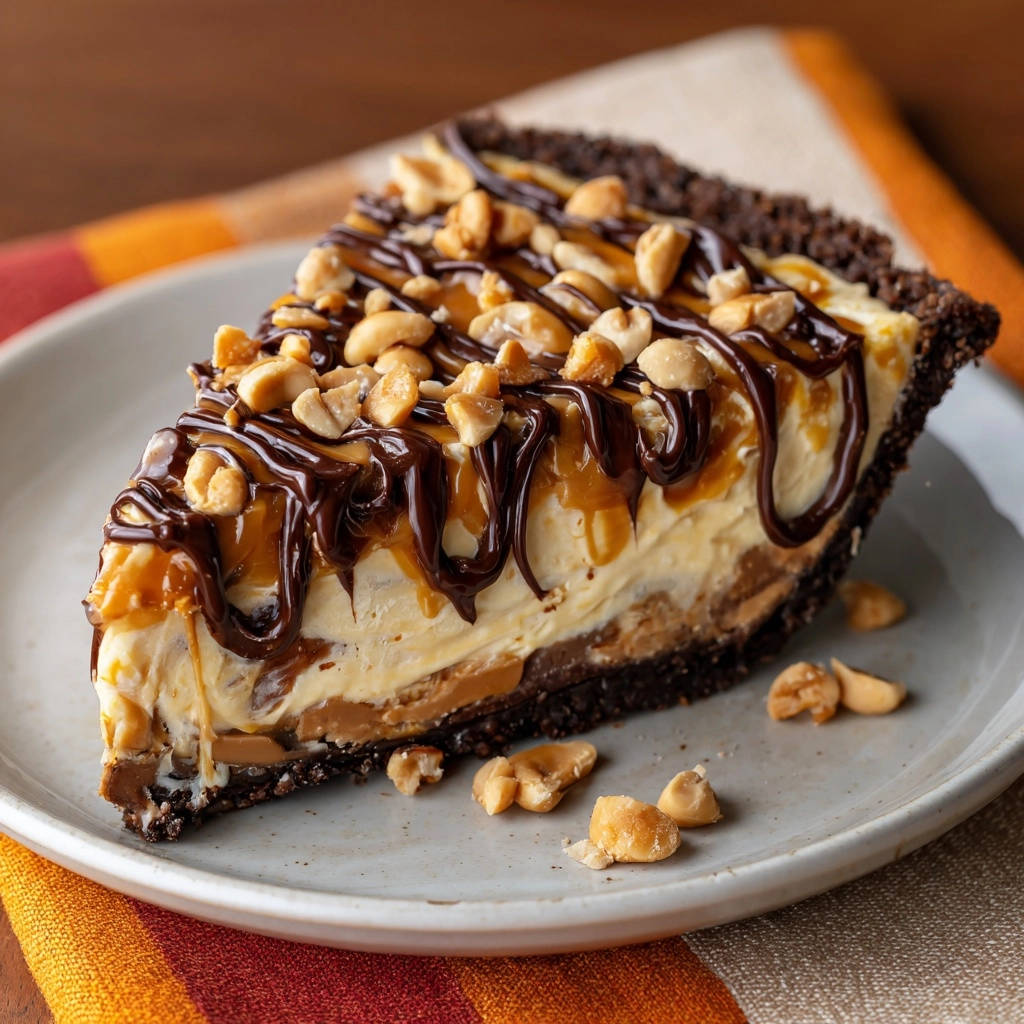
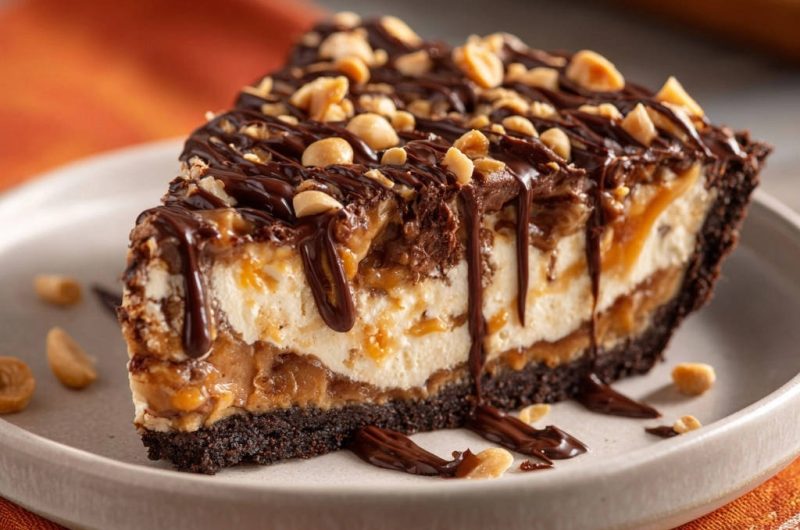
Prepare your palate for a delightful journey. This pie boasts a crisp chocolate cookie crust, followed by a velvety peanut butter cream layer that’s incredibly rich.
Next comes a light, airy vanilla cream, perfectly balanced before being crowned with smooth caramel, a luscious chocolate ganache, and a sprinkle of crunchy roasted peanuts. Each forkful delivers a harmonious blend of sweet, salty, and decadent textures.
No Oven Required: Quick & Easy Dessert Genius
Forget turning on the oven, especially on a hot day! This No-Bake Peanut Butter Fudge Pie is incredibly simple to assemble, making it ideal for novice bakers and seasoned pros alike.
If you enjoy working with peanut butter and chocolate, try this creamy peanut butter swirl fudge for another easy treat.
Its ease of preparation makes it a go-to for impromptu gatherings or when you just crave something sweet without the fuss. Enjoy a gourmet-quality dessert with minimal effort.
Assembling Your Arsenal: Ingredients for a Heavenly Pie
Crafting this dream pie starts with understanding the role each ingredient plays. Quality matters here, especially for the creamy layers.
Crust Essentials: Building a Solid Foundation
For the base, you’ll need 1 1/2 cups of chocolate sandwich cookie crumbs, which is roughly 25-30 cookies. Pair this with 1/2 cup (1 stick) of unsalted butter, melted.
The cookie crumbs provide a rich, deep chocolate flavor, while the melted butter binds them together. This creates a sturdy yet tender foundation that complements the creamy fillings.
The Creamy Heart: Peanut Butter & Vanilla Layers
You’ll need two 8-ounce packages (16 ounces total) of cream cheese, softened, for the incredible velvety texture of both cream layers. Alongside this, prepare 1 cup of creamy peanut butter for that unmistakable nutty flavor.
For sweetness and structure, gather 1 1/2 cups of powdered sugar. Finally, 1 1/2 cups of heavy cream, divided, will be whipped to add lightness and volume to the fillings, making them truly melt-in-your-mouth soft.
A touch of 1 teaspoon vanilla extract enhances the overall sweetness and provides a lovely aromatic note to the vanilla cream layer.
Decadent Toppings: Ganache, Caramel & Crunch
To crown your creation, you’ll need 1 cup of semi-sweet chocolate chips for a rich, pourable ganache. A 1/2 cup of store-bought caramel sauce provides an extra layer of sweet indulgence.
Lastly, 1/4 cup of unsalted roasted peanuts, chopped (plus extra for garnish), adds a delightful textural contrast and nutty finish. These elements bring balance and visual appeal to every slice of this exquisite No-Bake Peanut Butter Fudge Pie.
Essential Tools for Your No-Bake Masterpiece
9-inch Pie Plate: The ideal vessel for shaping and chilling your pie.
Electric Mixer: Essential for whipping creams and blending fillings smoothly.
Microwave-Safe Bowl: For easily melting the chocolate ganache ingredients.
Chilled Mixing Bowls: A simple trick for achieving perfectly stiff whipped cream.
Crafting Each Layer: Your Step-by-Step Pie Journey
- The Cookie Crust Foundation:
In a medium bowl, combine the chocolate cookie crumbs and melted butter until they are well mixed. Use the back of a spoon or your knuckles to press the mixture firmly and evenly into the bottom and up the sides of a 9-inch pie plate. This firm pressing is crucial for a stable crust that won’t crumble when sliced.
Place the formed crust in the refrigerator to chill for at least 30 minutes while you prepare the fillings. This initial chill helps the butter solidify and sets the crust in place.
- Whipping Up the Peanut Butter Dream:
In a large bowl, beat 8 ounces of softened cream cheese with the 1 cup of creamy peanut butter until the mixture is completely smooth and free of lumps. Gradually add 1 cup of the powdered sugar, mixing until it’s fully incorporated and the mixture is light and fluffy.
In a separate, thoroughly chilled bowl, whip 3/4 cup of the heavy cream until stiff peaks form. The cold bowl and cream are key to achieving a stable, airy whipped cream. Gently fold this whipped cream into the peanut butter cream cheese mixture until just combined, being careful not to overmix and deflate the airiness.
Spread this luscious peanut butter filling evenly over the chilled cookie crust. Return the pie to the refrigerator to chill for another 30 minutes, allowing this layer to begin setting before the next is added.
- The Vanilla Cream Cloud:
In another large bowl, beat the remaining 8 ounces of softened cream cheese with the remaining 1/2 cup of powdered sugar and the vanilla extract until the mixture is smooth and creamy. Ensure all the powdered sugar is dissolved for a silky texture.
Whip the remaining 3/4 cup of heavy cream in a separate chilled bowl until stiff peaks form, just as you did before. Gently fold this freshly whipped cream into the vanilla cream cheese mixture until it’s just combined, maintaining its light consistency.
Carefully spread this delicate vanilla cream filling evenly over the set peanut butter layer. Use an offset spatula for a smooth, professional finish.
- The Decadent Ganache & Caramel Finish:
In a microwave-safe bowl, combine the semi-sweet chocolate chips with 2 tablespoons of heavy cream. Microwave in short 30-second intervals, stirring thoroughly between each, until the chocolate is completely melted and the mixture is smooth and glossy. Let it cool slightly, as pouring hot ganache will melt the cream layers beneath.
Pour the 1/2 cup of store-bought caramel sauce evenly over the vanilla cream layer, spreading it gently if needed. Then, elegantly drizzle the slightly cooled chocolate ganache over the caramel in a decorative pattern, creating an appealing marbled effect.
Finally, sprinkle generously with the 1/4 cup of chopped roasted peanuts. This not only adds a crucial crunch but also makes your No-Bake Peanut Butter Fudge Pie visually irresistible.
- The Critical Chilling: Unlocking Sliceable Perfection:
This is arguably the most crucial step for achieving a perfectly firm, easy-to-slice pie. Once assembled, cover the pie loosely with plastic wrap to prevent condensation from forming on the surface.
Refrigerate your masterpiece for a minimum of 4-6 hours, or ideally, overnight. This extended chilling time allows all the layers to properly set, firm up, and marry their flavors, ensuring a clean and beautiful slice every single time you serve it.
Chef’s Secrets: Elevating Your No-Bake Pie Experience
Even though this is a no-bake recipe, a few expert tips can take your pie from great to absolutely unforgettable. These small adjustments make a big difference in texture and presentation.
Chill Your Tools: For the fluffiest and most stable whipped cream, place your mixing bowl and whisk attachment in the freezer for 10-15 minutes before whipping the heavy cream. This extra chill helps the cream achieve stiff peaks more quickly and effectively.
Softened Cream Cheese is Key: Ensure your cream cheese is at true room temperature (softened for at least 30-60 minutes) before you start beating it. Cold cream cheese will result in a lumpy texture that’s impossible to smooth out, affecting the overall creaminess of your fillings.
Don’t Over-Whip: Be careful not to over-whip your heavy cream beyond stiff peaks. If you continue whipping past this point, the cream can quickly turn granular or even separate, leading to a less desirable texture in your pie layers. Stop as soon as it holds its shape.
Cool the Ganache: Always allow the chocolate ganache to cool slightly before drizzling it over the vanilla cream layer. If the ganache is too warm, it can melt and disturb the perfectly set cream layers beneath, compromising the pie’s structure and appearance.
Garnish with Flair: Elevate your presentation! Add extra chopped peanuts, a swirl of extra chocolate syrup, or even a dollop of fresh whipped cream on each individual slice. This thoughtful touch makes your pie look even more impressive and indulgent.
Common Questions & Quick Fixes
Even with simple recipes, a few common issues can arise. Here are solutions to ensure your pie is always a success.
Why is My Pie Not Setting Firmly?
The most common culprit for a pie that’s not setting firmly is insufficient chilling time. This pie absolutely needs that extended 4-6 hours, or ideally overnight, in the refrigerator for all the layers to properly firm up and become sliceable.
Ensure your refrigerator is set to a proper cold temperature. A warm fridge can impede the setting process. Patience is truly a virtue with this dessert!
My Ganache is Too Thick/Thin
If your ganache appears too thick after melting, add a tiny bit more heavy cream (start with 1/2 teaspoon at a time) and stir until you reach the desired pourable consistency. If it’s too thin, try letting it cool slightly longer to thicken naturally, or carefully melt in a few more semi-sweet chocolate chips to absorb excess liquid.
Crust Crumbles Easily When Slicing
The key to a non-crumbling crust is firm compaction. Ensure you pressed the cookie crumb mixture very firmly into the pie plate using the bottom of a glass or your knuckles. A well-compacted crust with enough melted butter will hold its shape better.
Additionally, make sure the crust had adequate initial chilling time before the fillings were added. This helps the butter solidify and binds the crumbs securely.
Serving, Storing & Savoring Your Pie
Knowing how to best serve and store your No-Bake Peanut Butter Fudge Pie ensures every bite is as perfect as the first.
Optimal Serving Temperature
This pie is best served chilled, straight from the refrigerator. Its firm texture and cool creaminess are delightful and contribute to the overall decadent experience. Allow it to sit out for only a few minutes before slicing if you prefer a slightly softer consistency, but do not let it warm up significantly.
Make-Ahead Magic: Prepare for Effortless Entertaining
This No-Bake Peanut Butter Fudge Pie is an excellent make-ahead dessert! Because it requires extended chilling, it’s perfect to assemble the day before your event or gathering. This frees up your time on the day of, allowing you to focus on other preparations or simply enjoy your guests.
Storage Solutions to Keep it Fresh
Store any leftover pie covered loosely with plastic wrap or in an airtight container in the refrigerator. It will stay fresh and delicious for up to 3-4 days, maintaining its texture and flavor beautifully.
While this pie won’t freeze perfectly due to the high cream content, you can try freezing individual slices for a quick treat. Just allow them to thaw completely in the refrigerator for several hours before serving to regain their best texture.
Your No-Bake Peanut Butter Fudge Pie FAQs Answered
Can I Use Different Cookies for the Crust?
Absolutely! While chocolate sandwich cookies provide a classic and beloved flavor profile, you can definitely experiment with other types of cookies for the crust. Graham crackers, vanilla wafers, or even shortbread cookies can create a unique flavor and texture. Just be sure to adjust the amount of melted butter as needed to achieve a firm, cohesive consistency for your chosen cookie.
Is There a Dairy-Free Alternative for This Pie?
Creating a fully dairy-free version of this pie would require significant substitutions for the cream cheese and heavy cream, which are central to its rich and creamy texture. You could explore using vegan cream cheese alternatives and chilled, whipped coconut cream for the creamy layers. While the flavor and texture would differ from the original, it is possible to adapt the concept.
For the chocolate ganache, ensure you use dairy-free chocolate chips and substitute the heavy cream with a plant-based milk or cream alternative, like full-fat coconut milk from a can.
How Long Does This Pie Last?
When properly covered and stored in the refrigerator, your No-Bake Peanut Butter Fudge Pie will stay fresh and delicious for a good 3 to 4 days. The key is to keep it well-chilled and protected from air, which can dry out the crust or fillings. The firmer the pie is from proper chilling, the better it will hold up over time.
Ready to Impress? Share Your No-Bake Pie Masterpiece!
Now that you’re equipped with the secrets to crafting the ultimate No-Bake Peanut Butter Fudge Pie, it’s time to unleash your inner dessert maestro. This recipe isn’t just about a delicious treat; it’s about the joy of creating something truly impressive with minimal fuss.
We’d love to see your perfectly sliced creations and hear about your experience! Share your photos and thoughts in the comments below, or tag us on social media. Happy baking (without the baking!) and even happier eating!
Peanut Butter Fudge Pie
Course: DessertCuisine: AmericanDifficulty: medium8
servings45
minutes550
kcal720
minutesThis no-bake pie solves the common problem of messy slices with a simple chilling secret. Layers of rich peanut butter, vanilla cream, caramel, and chocolate ganache sit atop a chocolate cookie crust, ensuring a perfectly firm and beautiful dessert every time.
Ingredients
1 1/2 cups chocolate sandwich cookie crumbs (about 25-30 cookies)
1/2 cup (1 stick) unsalted butter, melted
8 ounces cream cheese, softened
1 cup creamy peanut butter
1 cup powdered sugar
1 1/2 cups heavy cream, divided
1 teaspoon vanilla extract
1/2 cup store-bought caramel sauce
1 cup semi-sweet chocolate chips
1/4 cup unsalted roasted peanuts, chopped (plus extra for garnish)
Directions
- For the crust: In a medium bowl, combine the chocolate cookie crumbs and melted butter until well mixed. Press the mixture firmly into the bottom and up the sides of a 9-inch pie plate. Place the crust in the refrigerator to chill for at least 30 minutes while you prepare the fillings.
- For the peanut butter layer: In a large bowl, beat the softened cream cheese with the creamy peanut butter until smooth. Gradually add 1 cup of the powdered sugar, mixing until fully incorporated.
- In a separate chilled bowl, whip 3/4 cup of the heavy cream until stiff peaks form. Gently fold the whipped cream into the peanut butter cream cheese mixture until just combined. Spread this peanut butter filling evenly over the chilled cookie crust. Return the pie to the refrigerator to chill for another 30 minutes.
- For the vanilla cream layer: In another large bowl, beat the remaining 8 ounces of softened cream cheese with the remaining 1/2 cup of powdered sugar and vanilla extract until smooth.
- In a separate chilled bowl, whip the remaining 3/4 cup of heavy cream until stiff peaks form. Gently fold the whipped cream into the vanilla cream cheese mixture until just combined. Carefully spread this vanilla cream filling over the peanut butter layer.
- For the chocolate ganache: In a microwave-safe bowl, combine the semi-sweet chocolate chips with 2 tablespoons of heavy cream. Microwave in 30-second intervals, stirring between each, until the chocolate is melted and smooth. Let cool slightly.
- Pour the caramel sauce evenly over the vanilla cream layer. Drizzle the cooled chocolate ganache over the caramel. Sprinkle generously with the chopped roasted peanuts.
- This is the key step for a perfectly firm pie: Cover the pie loosely with plastic wrap and refrigerate for a minimum of 4-6 hours, or ideally, overnight. This extended chilling time allows all the layers to properly set and firm up, ensuring a clean, beautiful slice every time. Enjoy your perfectly set, decadent pie!
Notes
- Extended chilling (4-6 hours or overnight) is crucial for a firm, clean slice.