Crispy Grilled Rice Balls: No-Stick Perfection!
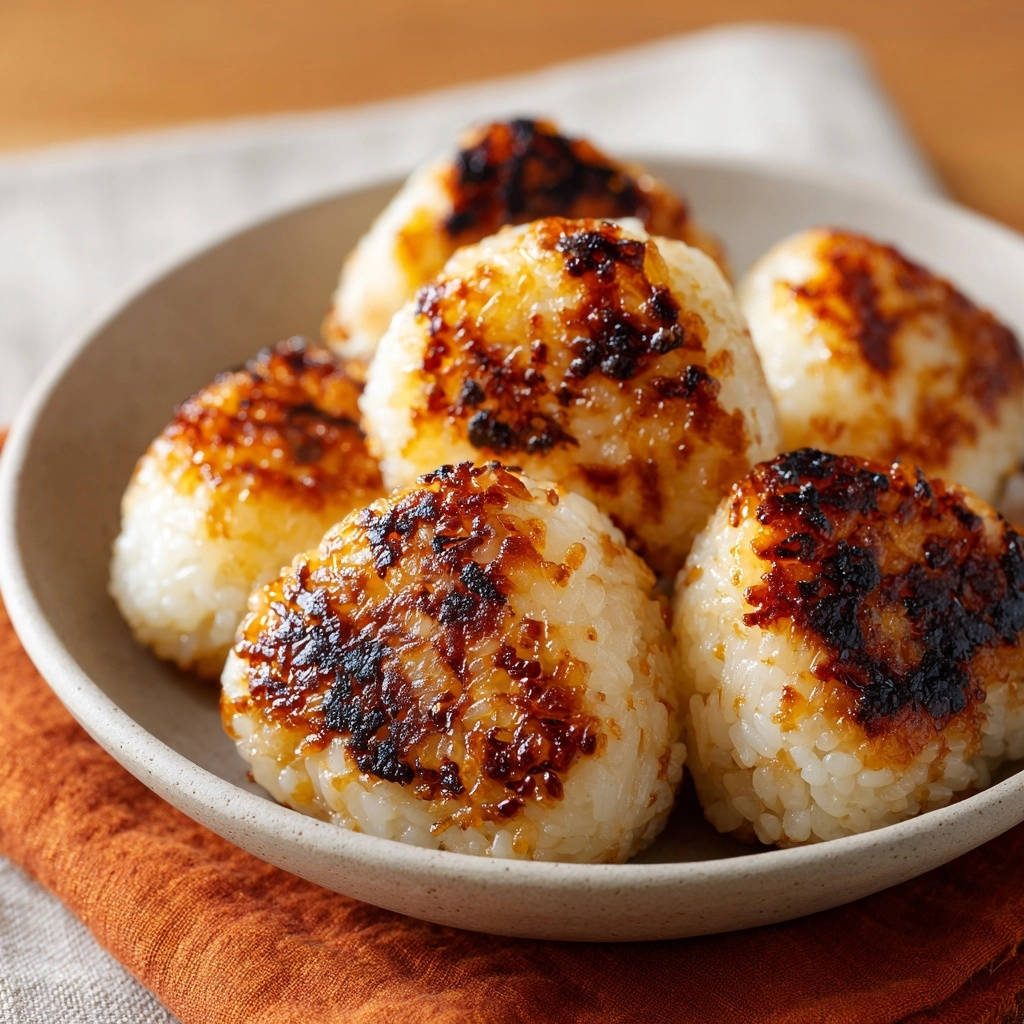
There’s nothing quite like that craving for perfectly crispy, savory rice balls. For years, I struggled with them sticking stubbornly to the pan, falling apart just as they were meant to turn golden. But I’ve finally mastered the one simple trick that transforms homemade Crispy Grilled Rice Balls from a frustrating endeavor into a consistently triumphant, no-stick success every single time.
Why These Crispy Grilled Rice Balls Will Become Your Go-To Snack
These aren’t just any rice balls; they’re designed for culinary confidence and maximum enjoyment. This recipe is your secret weapon for flawless results.
The “No-Stick” Magic You’ve Been Waiting For
The core of this recipe lies in a specific technique that ensures your rice balls develop an incredible crust without welding themselves to the pan. You’ll achieve an effortless release, making the cooking process smooth and satisfying.
Effortless Crunch, Maximum Flavor
Imagine a beautifully caramelized exterior that shatters gently to reveal a soft, chewy interior. The simple combination of warm rice and savory soy sauce creates a deeply satisfying flavor profile that’s both comforting and incredibly addictive.
Versatile Bites for Any Occasion
Whether you need a quick, delicious snack, an impressive appetizer for guests, or a creative side dish to complement your main course, these Crispy Grilled Rice Balls fit the bill perfectly. Their adaptability makes them a fantastic addition to any meal plan.
Crafting Perfection: The Simple Ingredients for Your Rice Balls
The beauty of this dish lies in its simplicity, relying on just a few key ingredients to deliver big on flavor and texture.
The Foundation: Short-Grain White Rice
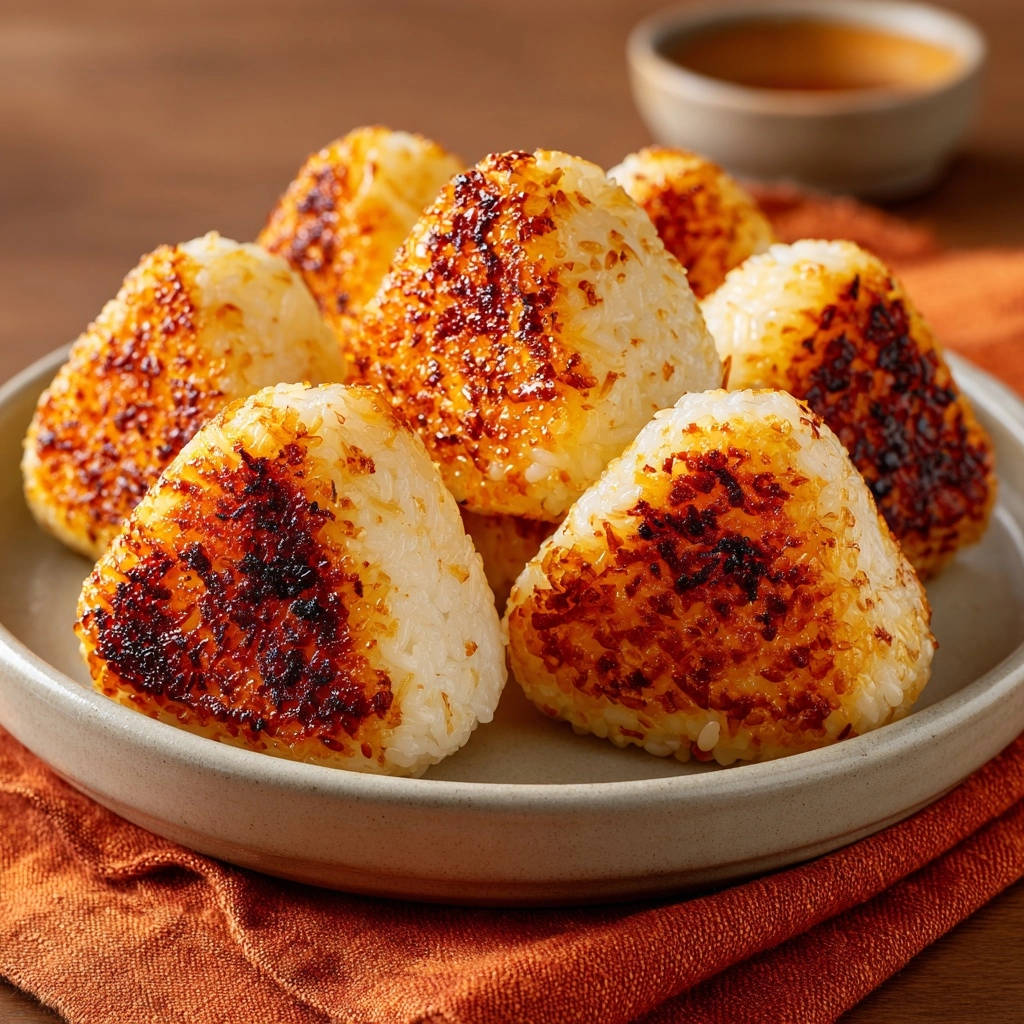
Short-grain rice, like sushi rice or Arborio, is essential for its high starch content, which allows the rice grains to stick together cohesively. Using it warm is crucial, as the starches are more pliable, ensuring your shaped balls hold together without crumbling.
Flavor & Finish: Soy Sauce and Vegetable Oil
Soy sauce provides that irresistible umami depth and aids in the beautiful caramelization of the crust. Vegetable oil is critical not just for cooking, but for creating the non-stick barrier and facilitating that irresistible crispy texture.
Optional Additions for Extra Flair
While delicious on their own, a few simple additions can elevate your rice balls even further:
Furikake: Sprinkle this Japanese rice seasoning blend into your rice before shaping for a burst of savory, salty, and sometimes sweet notes.
Toasted Sesame Seeds: A touch of toasted sesame seeds mixed in or pressed onto the exterior adds nutty flavor and textural contrast.
Finely Chopped Green Onions: Incorporating a tablespoon or two into the warm rice adds a subtle oniony freshness.
If you enjoy the crisp texture here, try this garlic ginger chicken and broccoli for another savory bite.
Essential Tools for Crispy Grilled Rice Ball Success
Having the right equipment ensures your cooking experience is smooth and your results are flawless.
Your Grilling Arsenal
-
Non-Stick Pan or Well-Seasoned Cast Iron Skillet:
A reliable non-stick surface is paramount for encouraging the rice balls to release cleanly. A well-seasoned cast iron skillet can also work wonders, providing excellent heat retention for a consistent crust.
-
Thin, Wide Spatula:
This is indispensable for carefully flipping the rice balls without breaking their delicate crust. Its width provides ample support, minimizing breakage.
-
Small Bowl of Water:
Keep a small bowl of water nearby to moisten your hands. This prevents the sticky rice from clinging to your fingers during shaping, making the process much easier.
Your Path to Golden Crispy Grilled Rice Balls: A Step-by-Step Guide
Follow these precise steps to achieve the perfect golden crust and no-stick success with your rice balls.
Step 1: The Rice Foundation – Warm and Ready
-
Prepare Your Rice:
Ensure your cooked short-grain rice is warm. This warmth is crucial as it helps the rice grains stick together effectively for shaping, preventing crumbling and ensuring a cohesive ball.
Step 2: Shaping Your Perfect Bites
-
Moisten Hands & Shape:
Lightly moisten your hands with water to prevent the sticky rice from adhering to your palms. Take approximately 1/2 cup of warm rice and gently but firmly press it into a compact triangular or round shape.
Apply just enough pressure to create a solid form without smashing the grains. Repeat this process until all the rice is shaped into uniform balls.
Step 3: The Secret to No-Stick Success – Oil and Heat!
-
Prepare the Pan:
Heat a non-stick pan or a well-seasoned cast iron skillet over medium-high heat. Add the vegetable oil, ensuring it generously coats the entire bottom of the pan.
Allow the oil to get shimmering hot, but crucially, not smoking. This hot, even layer of oil is the fundamental “one simple trick” that prevents the Crispy Grilled Rice Balls from sticking.
Step 4: The Golden Crust – Patience is Key
-
Begin Grilling & Resist Moving:
Carefully place the shaped rice balls into the hot, oiled pan. This next step is paramount for achieving that perfect crust and easy release: absolutely do not move them for the first 3 to 5 minutes.
For a perfect pairing, try our Chicken Veggie Fried Rice: Fluffy Grains Guaranteed.
Allow them to develop a solid, deep golden-brown crust on the bottom. The crust must fully form and crisp up before you attempt any movement or flipping; this creates the natural non-stick layer.
Step 5: Flipping and Flavoring for All-Around Crisp
-
Flip & Brush with Soy Sauce:
Once a deep golden-brown crust has visibly formed and they release easily from the pan, use a thin, wide spatula to carefully flip each rice ball to another side.
Immediately brush soy sauce onto the freshly grilled, crusty side of each rice ball. Continue grilling, regularly flipping, and brushing with soy sauce on all sides until each surface is beautifully browned, caramelized, and boasts a delicious crispy exterior.
Step 6: Serving Up Your Masterpiece
-
Serve Warm:
Once golden and crispy on all sides, remove the Crispy Grilled Rice Balls from the pan and serve them warm to enjoy their fresh texture and flavor. They are best enjoyed immediately to maximize their crispness.
Beyond the Basics: Chef’s Tips for Unforgettable Crispy Grilled Rice Balls
Elevate your rice ball game with these expert recommendations.
Perfecting Your Rice Texture
For the ideal rice balls, aim for cooked rice that is slightly stickier than usual, but not mushy. This ensures it binds well for shaping. If your rice is too dry, it won’t hold; too wet, it will be difficult to crisp.
Mastering the Non-Stick Release
The key to preventing sticking truly lies in the hot oil and patience. Ensure the oil is shimmering before adding the rice balls, and resist the urge to move them too soon. A proper crust takes time to form and will naturally release from the pan when ready.
Flavor Customization & Variations
Get creative with your rice! You can mix in a small amount of finely minced garlic or ginger with the rice, or a dash of sesame oil for an extra layer of flavor. A pinch of chili flakes can add a subtle kick, or a light dusting of nutritional yeast can boost the umami profile.
Troubleshooting Your Crispy Grilled Rice Balls: Common Issues Solved
Don’t worry if your first batch isn’t perfect; here’s how to tackle common challenges.
Problem: Rice Balls Sticking to the Pan
This is usually due to insufficient heat, not enough oil, or moving them too early. Ensure your pan and oil are shimmering hot, and generously coat the bottom of the pan. Most importantly, allow that initial crust to fully form for 3-5 minutes before attempting to flip.
Problem: Not Getting Crispy Enough
If your rice balls are soft rather than crispy, the heat might be too low, or you haven’t used enough oil. Ensure your heat is consistently medium-high, and don’t skimp on the oil in the pan. Grill each side until it reaches a deep golden-brown, not just light brown.
What to Serve with Crispy Grilled Rice Balls
These crunchy rice balls are rich from the grill and need something fresh and bright to balance them out. Here are two sides that work with the savory, toasty flavors.
- A cool, vinegary Spicy Sesame Wakame Salad cuts through the grilled richness with its crisp texture and tangy heat.
- For a warm vegetable option, the sweet glaze on these Sesame Glazed Green Beans and Carrots echoes the sesame notes in the rice balls without overpowering them.
Problem: Balls Falling Apart
This issue often stems from the rice not being warm enough, not using short-grain rice, or not pressing them firmly enough during shaping. Ensure your hands are moistened and you apply consistent, firm pressure to compact the rice properly.
Serving & Storing Your Delicious Crispy Grilled Rice Balls
Get the most out of your homemade creations with these serving and storage tips.
Creative Serving Ideas
These versatile Crispy Grilled Rice Balls are fantastic served with a variety of dipping sauces, like a spicy mayo, sweet chili sauce, or a light soy-ginger vinaigrette. They also make an excellent side dish for grilled chicken, beef, or fish, or can be added to a bento box for a delightful packed lunch. Consider serving them alongside a vibrant side such as crispy baked asparagus for a balanced meal.
Make-Ahead & Storage Tips
While best enjoyed fresh, leftover Crispy Grilled Rice Balls can be stored in an airtight container in the refrigerator for up to 3 days. To reheat, place them in a preheated oven at 375°F (190°C) or an air fryer at 350°F (175°C) for 8-12 minutes, flipping halfway, until crispy again. Avoid the microwave, as it will make them soggy.
Frequently Asked Questions About Crispy Grilled Rice Balls
Curious for more details? Here are answers to common queries.
Can I use different types of rice?
Short-grain white rice (like sushi rice) is highly recommended for its stickiness, which is crucial for shaping and holding together. While other rices like Jasmine can technically be used, they may not bind as well and might yield a less compact or crispy result. Long-grain rice is generally not suitable.
How do I prevent them from getting soggy?
The primary method to prevent sogginess is proper cooking and reheating. Ensure a deep, crispy crust forms during grilling. For leftovers, always reheat in an oven or air fryer to reactivate that desired crispness, avoiding microwaves which introduce steam.
Are there gluten-free alternatives for soy sauce?
Absolutely! Tamari is an excellent gluten-free alternative that tastes very similar to traditional soy sauce. For a slightly different flavor profile, you could also use coconut aminos.
Can I bake or air fry them instead of grilling?
Yes, you can. Baking at 400°F (200°C) for 20-30 minutes, flipping halfway, or air frying at 375°F (190°C) for 15-20 minutes can yield good results. While these methods use less oil and are convenient, they may not produce the same deep, direct contact crispness as pan-grilling.
Ready to Impress? Share Your Crispy Grilled Rice Balls Creation!
Now that you have the secrets to perfectly no-stick, Crispy Grilled Rice Balls, it’s your turn to shine in the kitchen! This recipe promises a delightful experience, from preparation to the last savory bite. Don’t stop there; these delicious bites pair wonderfully with a robust main dish like our pan-seared chicken rice bowl for a complete and satisfying meal.
Give this recipe a try, and let us know how your crispy creations turn out. We love seeing your culinary successes and hearing your insights!
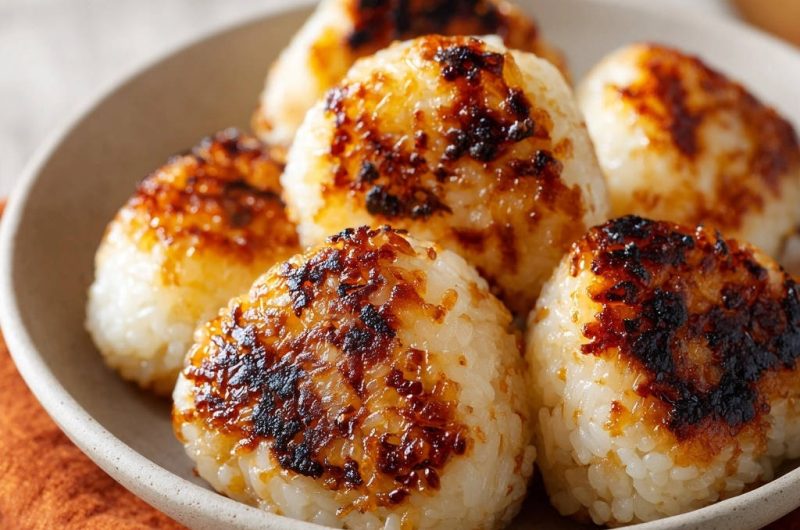
Grilled Rice Balls
Course: AppetizerCuisine: AsianDifficulty: easy8
rice balls15
minutes20
minutes120
kcal35
minutesTired of sticky grilled rice balls? Discover the simple trick to perfectly crispy, golden rice balls that release beautifully from the pan. Enjoy a delicious, flavorful snack or appetizer without the fuss!
Ingredients
4 cups cooked short-grain white rice, warm
2 tablespoons soy sauce
1 tablespoon vegetable oil
Water, for moistening hands
Directions
- Ensure your cooked short-grain rice is warm. This helps it stick together better for shaping.
- Moisten your hands lightly with water to prevent the rice from sticking to them. Take about 1/2 cup of warm rice and gently but firmly press it into a compact triangular or round shape. Repeat with the remaining rice.
- Heat a non-stick pan or a well-seasoned cast iron skillet over medium-high heat. Add the vegetable oil to coat the bottom of the pan generously. Allow the oil to get shimmering hot, but not smoking. This hot oil layer is crucial for preventing sticking.
- Carefully place the shaped rice balls in the hot, oiled pan. Do not move them for the first 3 to 5 minutes. This is the key step: let them develop a solid, golden-brown crust on the bottom. The crust needs to fully form before you attempt to move or flip them.
- Once a deep golden-brown crust has formed on one side, the rice balls should release easily from the pan. Use a thin, wide spatula to carefully flip them to another side.
- Brush soy sauce onto the grilled side of each rice ball. Continue grilling, flipping, and brushing with soy sauce on all sides until each side is nicely browned and caramelized with a delicious crispy exterior.
- Remove from the pan and serve warm.