Ultimate Cheesy Beef Sliders: Always Tender, Never Dry
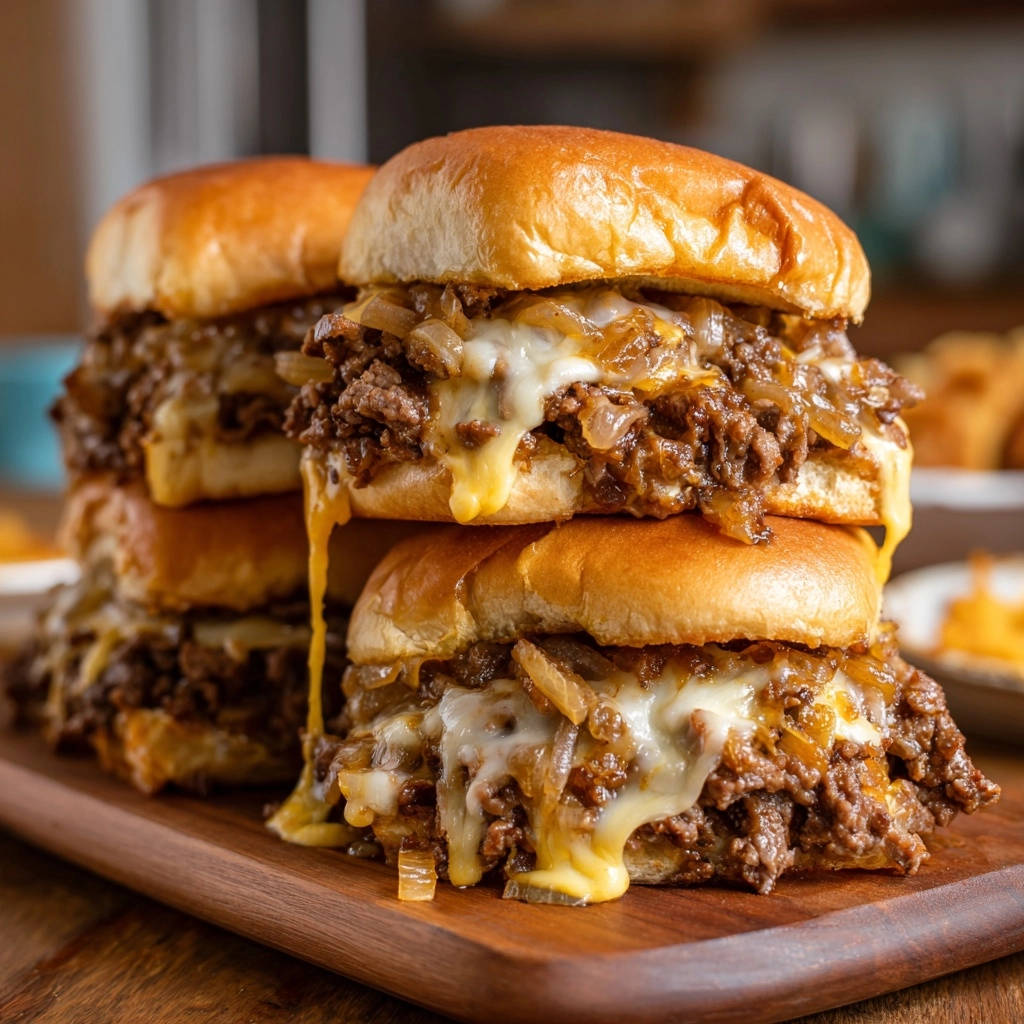
I used to dread making sliders, always ending up with dry, crumbly beef that no amount of cheese could save. But after countless kitchen experiments, I finally cracked the code to truly juicy and flavorful Ultimate Cheesy Beef Sliders.
This recipe isn’t just good; it’s a game-changer, guaranteeing tender, moist beef every single time. Get ready to impress any crowd with these perfectly proportioned, flavor-packed bites.
Why These Ultimate Cheesy Beef Sliders Are a Game-Changer
The Secret to Unforgettably Juicy Beef
The core of these sliders’ success lies in how we treat the beef. We actively prevent dryness by incorporating beef broth during the simmering stage.
This simple step allows the ground beef to absorb incredible moisture and flavor, resulting in a tender, moist filling that truly melts in your mouth.
Your Effortless Go-To for Any Occasion
These Ultimate Cheesy Beef Sliders are remarkably versatile and easy to prepare, making them an absolute game-changer for busy cooks.
They’re ideal for a casual weeknight meal, a bustling family gathering, or even as the star of your next game day feast. Their simplicity and crowd-pleasing appeal make entertaining effortless.
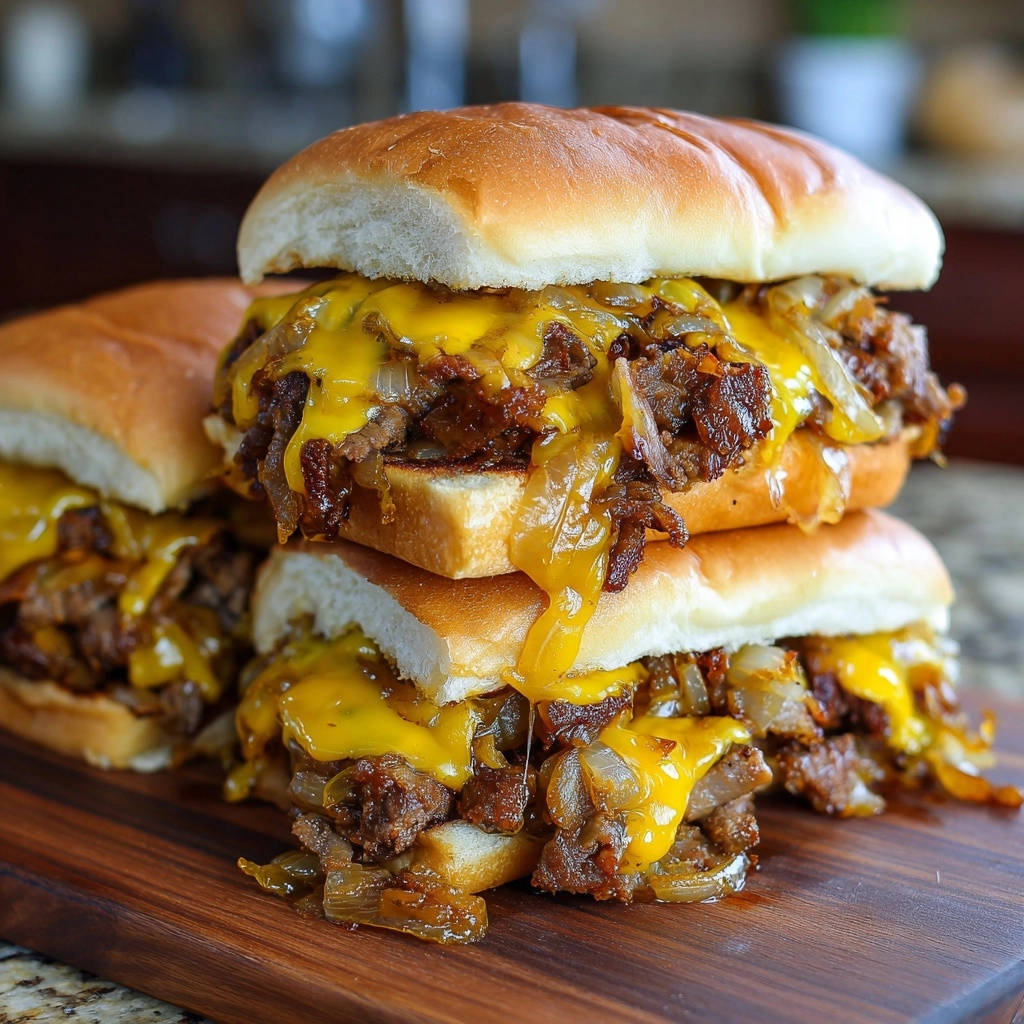
Beyond the Basic Slider: What Sets Them Apart
Unlike generic slider recipes that often result in bland, dry patties, this recipe stands out due to its thoughtful layering of flavors and textures.
The rich, deeply caramelized onions and a perfectly balanced seasoning blend elevate the beef, while the combination of cheeses ensures an unparalleled gooey melt. Every bite offers depth and satisfaction.
Building Blocks of Flavor: Essential Ingredients for Your Sliders
The Beef: Choosing for Tenderness
One pound of lean ground beef forms the hearty foundation of our sliders. Choosing lean ensures a less greasy result, allowing the beef to better absorb the added moisture from the broth.
Caramelized Onions: The Sweet & Savory Foundation
A large onion, thinly sliced and patiently caramelized, is crucial. This process transforms the onions into a sweet, deeply savory element that adds incredible depth and complexity to the beef mixture.
Cheese Power: Provolone & American for Perfect Melt
Six slices of provolone and six slices of American cheese, both halved, create the ideal cheesy blanket. Provolone offers a nice stretch and mild, nutty flavor, while American cheese is unbeatable for its smooth, quick-melting properties and classic creaminess.
Slider Buns: Hawaiian Rolls for the Win
Twelve slider buns, specifically Hawaiian rolls, are recommended for their soft, slightly sweet, and fluffy texture. Their subtle sweetness perfectly complements the savory beef and tangy cheese.
Secret Flavor Boosters: Broth & Spices
Beef broth, garlic powder, onion powder, salt, and black pepper are more than just seasonings; they’re essential flavor enhancers. The beef broth infuses moisture, while the spices build a robust, savory profile for the ground beef.
Gearing Up: Essential Tools for Slider Success
Having the right tools ready makes the slider-making process smooth and enjoyable.
Large Skillet: Essential for browning the beef and, crucially, for caramelizing the onions to their golden, sweet perfection.
9×13 Inch Baking Dish: This standard dish is perfect for assembling and baking the sliders, ensuring even cooking and a beautiful presentation.
Spatula or Wooden Spoon: Ideal for breaking apart the ground beef and stirring the ingredients in the skillet.
Sharp Knife: Necessary for thinly slicing the onion and, later, for neatly cutting the baked sliders into individual portions.
Your Path to Slider Perfection: A Step-by-Step Guide
- Prepare the Caramelized Onions:
Heat 1 tablespoon of olive oil or butter in a large skillet over medium heat. Add the thinly sliced onion and cook, stirring occasionally, until softened and deeply caramelized, about 10-15 minutes.
This slow cooking process brings out their natural sweetness, creating a fundamental layer of flavor for your Ultimate Cheesy Beef Sliders. Remove the onions from the skillet and set aside, reserving the pan for the beef.
- Brown and Drain the Ground Beef:
Add the ground beef to the same skillet. Break it apart with a spoon and cook over medium-high heat until thoroughly browned, ensuring no pink remains.
Crucially, drain off any excess grease. This prevents the sliders from becoming oily and ensures the beef can absorb the flavorful broth effectively for maximum juiciness.
- Season and Simmer the Beef Mixture:
Return the drained beef to the skillet. Stir in the beef broth, garlic powder, onion powder, salt, and black pepper. This step is key for infusing intense flavor and moisture directly into the meat.
Bring the mixture to a simmer, scraping up any browned bits from the bottom of the pan to incorporate all the savory flavor. Continue to cook for 2-3 minutes, allowing the liquid to reduce slightly and the beef to absorb the flavors, ensuring it stays wonderfully moist.
- Combine Beef and Onions:
Stir the deeply caramelized onions back into the seasoned beef mixture until well combined. This blends the sweet and savory notes, creating a harmonious and rich filling.
- Prepare the Buns and Baking Dish:
Preheat your oven to 350°F (175°C). Separate the tops and bottoms of the slider buns. Arrange the bottom halves evenly in a 9×13 inch baking dish, ensuring they fit snugly.
- Assemble the Sliders: Beef Layer:
Spoon the beef and onion mixture evenly over the bottom buns, spreading it right to the edges. Aim for an even layer so every bite is packed with delicious flavor.
- Assemble the Sliders: Cheese Layer:
Layer the halved provolone and American cheese slices over the beef mixture, ensuring good coverage for maximum melt and gooeyness. Alternate the cheeses for best distribution of flavor and texture.
- Top with Buns:
Carefully place the top halves of the slider buns over the cheese, aligning them neatly with the bottom halves. This completes the slider assembly, ready for baking.
- Bake to Perfection:
Bake for 10-15 minutes, or until the cheese is completely melted and bubbly, and the buns are lightly toasted and golden. Keep a close eye on them to prevent over-browning, ensuring perfectly tender buns.
- Slice and Serve:
Remove from the oven. For easy serving, use a sharp knife to slice into individual sliders while still in the pan. Serve immediately to enjoy them warm and wonderfully melty.
Mastering Your Sliders: Chef-Approved Tips & Tricks
Achieving Next-Level Caramelized Onions
Patience is key for truly excellent caramelized onions. Cook them over medium-low heat for the full 10-15 minutes, stirring frequently.
The goal is a deep golden-brown color, not just softness. Don’t rush this step; it develops incredible depth of flavor.
Draining Grease: Why It Matters for Juicy Beef
Draining excess grease from the browned ground beef is crucial. Too much fat can prevent the beef from fully absorbing the beef broth, leading to a less flavorful and potentially greasy slider.
Proper draining allows the broth to infuse into the meat, ensuring that tender, juicy texture we crave.
The Perfect Cheese Melt: Layering for Success
For an optimal cheese melt, ensure your cheese slices cover the beef mixture edge-to-edge. Halving the slices helps with full coverage, allowing every slider to have that irresistible gooey center.
Feel free to experiment with other good melting cheeses like mild cheddar or mozzarella for variety, though the provolone and American combo is truly special.
Bun Brilliance: Preventing Soggy Bottoms
To prevent soggy bottoms, assemble and bake your sliders relatively quickly after preparing the beef mixture. A thin brush of melted butter on the bottom buns before adding the beef can also create a slight barrier.
Another trick is a very quick toast of the bun bottoms in a separate dry skillet before assembly, though typically not necessary with Hawaiian rolls.
Seasoning Smarts: Enhancing Beef Flavor
The provided seasoning blend is a fantastic base, but feel free to adjust to your taste. A pinch of smoked paprika can add a smoky undertone, or a dash of Worcestershire sauce can deepen the savory notes.
For an even richer, deeper flavor, you could try incorporating a touch of Worcestershire sauce or a splash of liquid smoke, creating a more robust profile that pairs perfectly with the melted cheese, similar to the depth found in hearty cheesy beef shells.
Troubleshooting Your Sliders: Common Issues & Simple Solutions
“My Beef is Dry!”
Ensure you’re using beef broth and allowing it to simmer for the full 2-3 minutes so the beef can absorb the liquid. Also, avoid overcooking the beef initially; brown it until no pink remains, then drain and move to the simmering step quickly.
“The Buns Are Soggy!”
Soggy buns usually occur from sitting too long before baking or from excessive moisture in the beef. Make sure to drain your beef thoroughly after browning. Assemble and bake the sliders immediately after preparing the beef mixture to minimize moisture absorption.
“My Cheese Isn’t Melting Right!”
Check your oven temperature; an accurate oven is key. Ensure your cheese slices are at room temperature before layering, which helps with even melting. Make sure they are layered to cover the beef completely for best results.
Beyond the Baking Dish: Serving & Pairing Your Sliders
Creative Toppings & Sauces to Elevate Your Bites
Enhance your Ultimate Cheesy Beef Sliders with an array of toppings. Offer classic dill pickle slices, tangy banana peppers, or a sprinkle of fresh chopped chives for a pop of color and flavor.
For sauces, a simple burger sauce (ketchup, mayo, relish), a zesty aioli, or a smoky BBQ ranch can add an extra layer of deliciousness.
Perfect Side Dishes for a Complete Meal
These sliders pair beautifully with a variety of sides. Consider a crisp coleslaw for a refreshing crunch, a creamy potato salad for a comforting touch, or a simple green salad with a light vinaigrette.
For a vibrant addition, consider a zesty skillet street-style corn or some crispy potato chips for an easy, satisfying crunch.
Presentation Pointers: Making Them Photo-Ready
Once baked, slice the sliders while still in the pan, then carefully transfer them to a platter. Garnish with a sprinkle of fresh parsley or green onions for a vibrant touch.
Arrange them neatly, perhaps with toothpicks, for easy grabbing and a picture-perfect display, especially for parties.
Plan Ahead: Make-Ahead & Storage Tips
Can I Assemble Them Ahead of Time?
You can prepare the beef and onion mixture up to 2 days in advance and store it in an airtight container in the refrigerator. Assemble the sliders just before baking for the best results, ensuring the buns remain fresh and not soggy.
Storing Leftover Sliders: Best Practices
Store any leftover baked sliders in an airtight container in the refrigerator for up to 3-4 days. This helps maintain their freshness and prevents them from drying out.
Reheating for Fresh-Baked Taste
To reheat, arrange leftover sliders on a baking sheet and warm in a 300°F (150°C) oven for 10-15 minutes, or until heated through and cheese is re-melted. An air fryer at 300°F (150°C) for 5-7 minutes also works wonderfully for crisping the buns.
Your Top Slider Questions Answered
Can I Use Different Kinds of Beef?
While lean ground beef is recommended for its balance of flavor and lower grease, you can use ground sirloin or ground chuck. If using higher fat content beef, ensure you drain the grease very thoroughly to avoid a greasy final product.
What If I Don’t Have Hawaiian Rolls?
If Hawaiian rolls aren’t available, soft dinner rolls, brioche slider buns, or even small potato rolls make excellent substitutes. Look for buns that are soft and slightly sweet to best complement the savory filling.
Can I Make These Gluten-Free?
Absolutely! Simply substitute the standard slider buns with your favorite gluten-free slider rolls or bread. All other ingredients in this recipe are naturally gluten-free, making it an easy swap.
Are These Freezer-Friendly?
Cooked sliders can be frozen. Wrap individual sliders tightly in plastic wrap, then foil, and store in a freezer-safe bag for up to 2 months. Reheat from frozen in a 300°F (150°C) oven until warmed through and cheese is melted.
How Do I Scale This Recipe for a Larger Crowd?
This recipe easily scales up. Simply double or triple the ingredients based on your needs. For larger batches, use multiple 9×13 inch baking dishes or a larger roasting pan if available, adjusting baking time as needed for even cooking.
Time to Impress: Share Your Ultimate Cheesy Beef Sliders!
You now possess the secret to making truly unforgettable Ultimate Cheesy Beef Sliders – always tender, always juicy, and always a hit. This recipe is designed to be a reliable crowd-pleaser, delivering maximum flavor with minimal fuss.
Don’t wait! Gather your ingredients and create these incredible bites that will have everyone asking for more. We can’t wait to hear how your sliders turn out!
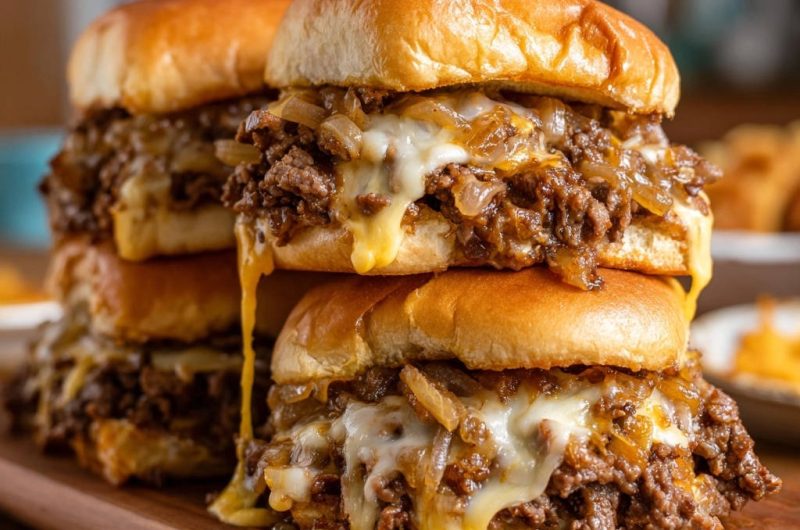
Cheesy Beef Sliders
Course: Main CourseCuisine: AmericanDifficulty: easy12
sliders15
minutes35
minutes120
kcal50
minutesDiscover the ultimate secret to incredibly juicy and flavorful beef sliders! This recipe ensures tender, moist ground beef every time, layered with caramelized onions and two types of melted cheese on soft slider buns. An absolute game-changer for a satisfying meal.
Ingredients
1 tablespoon olive oil or butter
1 large onion, thinly sliced
1 pound lean ground beef
1/2 cup beef broth
1 teaspoon garlic powder
1/2 teaspoon onion powder
1/2 teaspoon salt
1/4 teaspoon black pepper
12 slider buns, such as Hawaiian rolls
6 slices provolone cheese, halved
6 slices American cheese, halved
Directions
- Heat olive oil or butter in a large skillet over medium heat. Add the sliced onion and cook, stirring occasionally, until softened and deeply caramelized, about 10-15 minutes. Remove onions from the skillet and set aside.
- Add the ground beef to the same skillet. Break it apart with a spoon and cook over medium-high heat until thoroughly browned. Drain off any excess grease.
- Return the drained beef to the skillet. Stir in the beef broth, garlic powder, onion powder, salt, and black pepper. Bring to a simmer, scraping up any browned bits from the bottom of the pan. Continue to cook for 2-3 minutes, allowing the liquid to reduce slightly and the beef to absorb the flavors, ensuring it stays wonderfully moist.
- Stir the caramelized onions back into the seasoned beef mixture.
- Preheat your oven to 350°F (175°C). Separate the tops and bottoms of the slider buns. Arrange the bottom halves in a 9×13 inch baking dish.
- Spoon the beef and onion mixture evenly over the bottom buns.
- Layer the halved provolone and American cheese slices over the beef mixture, ensuring good coverage for maximum melt.
- Place the top halves of the slider buns over the cheese.
- Bake for 10-15 minutes, or until the cheese is completely melted and bubbly, and the buns are lightly toasted.
- Remove from the oven, slice into individual sliders, and serve immediately.