Crispy Herb Chicken Skewers: Unbeatable Crunch, Juicy Bite
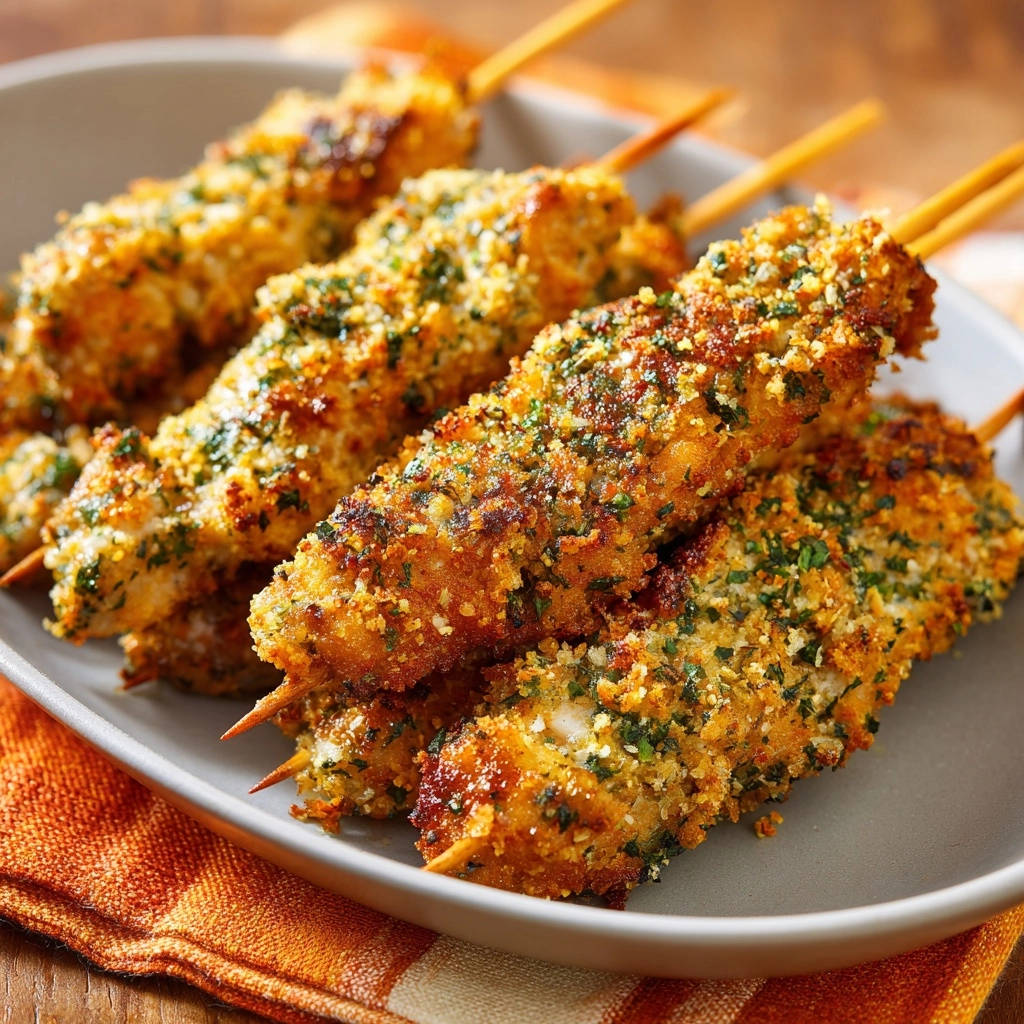
There’s nothing quite as frustrating as making breaded chicken at home, only for the coating to turn out soggy, patchy, or just lacking that satisfying crunch you crave. I’ve been there countless times, but I’ve perfected a method for these Crispy Herb Chicken Skewers that delivers every single time.
This recipe ensures each bite is incredibly flavorful, with perfectly juicy chicken inside, all encased in an unbelievably crispy, golden crust that actually stays put. Get ready for your new favorite weeknight meal or party appetizer.
Why This Recipe is a Game-Changer for Crispy Chicken
Forget everything you thought you knew about making crispy chicken at home. This approach to Crispy Herb Chicken Skewers tackles the most common pitfalls, guaranteeing a superior result.
Say Goodbye to Soggy Skewers: Our “Stay-Put” Coating Secret
The dreaded soggy bottom or flaking crust is a common issue with breaded chicken. Our secret lies in meticulous preparation: thoroughly patting the chicken dry, followed by a firm press of the Panko, and a crucial oil spray.
This method ensures the coating adheres beautifully and crisps up uniformly, giving you that satisfying crunch without any disappointments.
The Flavorful Secret: Herbs, Panko & Juicy Perfection
What sets these Crispy Herb Chicken Skewers apart is the harmonious blend of fresh parsley, aromatic garlic and onion powder, and the superior texture of Panko breadcrumbs.
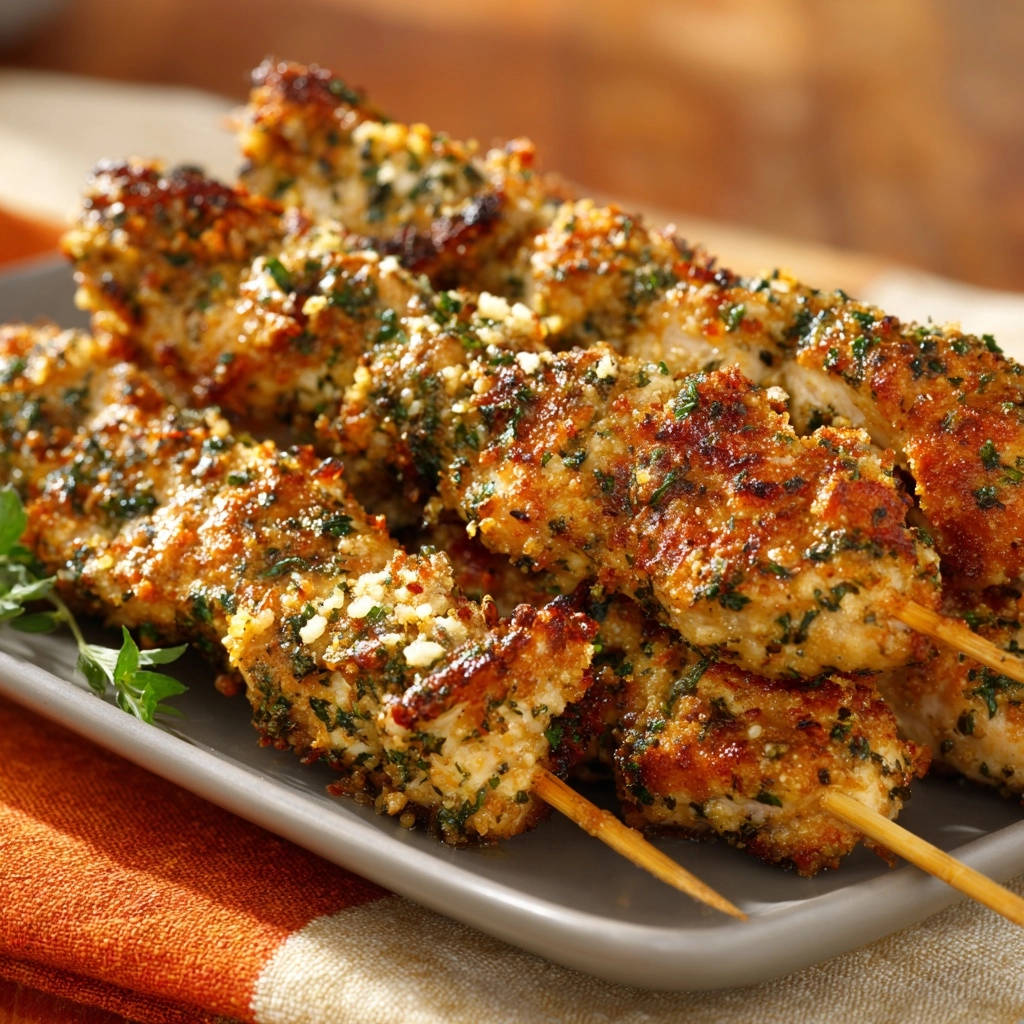
This combination creates a crust that’s not just crispy but also bursting with savory, herbaceous notes, all while locking in the chicken’s natural juices for a tender, moist interior.
Versatility on a Stick: Oven or Air Fryer Ready
Whether you’re an air fryer enthusiast or prefer the traditional oven method, this recipe has you covered. We provide reliable instructions for both, making it incredibly accessible for any home cook.
You can achieve perfectly golden and crispy results, no matter your preferred cooking appliance, ensuring these delicious skewers are always within reach.
Gathering Your Crispy Herb Chicken Skewers Essentials
The foundation of any great dish lies in its ingredients. For these Crispy Herb Chicken Skewers, quality and proper preparation are key to their standout texture and flavor.
The Star: Perfectly Prepped Chicken Breast
Start with 1.5 pounds of boneless, skinless chicken breast, cut into uniform 1-inch pieces. This ensures even cooking and ideal skewer portioning.
The most crucial step here is to thoroughly pat the chicken pieces dry with paper towels. This removes excess moisture, which is vital for the breading to adhere properly and achieve maximum crispness.
The Golden Crust: Panko & Flour Power
Panko breadcrumbs are non-negotiable for that unbeatable crunch. Their larger, flakier texture absorbs less oil and stays crisper than standard breadcrumbs.
All-purpose flour forms the initial dredge, creating a dry surface for the egg wash to cling to, which in turn helps the Panko stick effectively.
Herbaceous Notes & Seasoning Staples
Fresh parsley, finely chopped, infuses a vibrant, herbaceous aroma and flavor into the coating. Don’t skip it – fresh herbs make a real difference.
Garlic powder, onion powder, salt, and black pepper are our seasoning staples. They layer savory depth into the Panko mixture and season the chicken itself, building flavor from the inside out.
The Binder & The Oil: Eggs and Spritz
Beaten large eggs act as the perfect binder, creating a sticky surface for the Panko to adhere to the floured chicken.
Cooking oil, such as olive or avocado oil, is critical not just in the coating process but especially as a light spray. This crucial step, whether baking or air frying, ensures that deep golden-brown color and incredible crispness without deep-frying.
Tools for Success: Skewers and Racks
Wooden skewers are your vehicle for these delicious bites. Remember to soak them in water for at least 30 minutes if you’re using an oven; this prevents them from burning.
A wire rack set over a baking sheet is essential for oven baking. It allows hot air to circulate all around the skewers, promoting even crisping and preventing a soggy bottom.
Essential Tools for Your Crispy Herb Chicken Skewers Adventure
Having the right tools makes the cooking process smooth and guarantees the best results for your Crispy Herb Chicken Skewers.
Shallow Dishes: Essential for setting up an efficient three-station breading assembly line. This keeps your workflow clean and organized.
Paper Towels: Your secret weapon for patting the chicken dry, a critical step that ensures the breading sticks and crisps perfectly.
Wooden Skewers: The perfect vessel for these flavorful chicken bites. Always remember to soak them in water if baking in the oven to prevent burning.
Wire Rack & Baking Sheet: For oven users, this setup ensures air circulates around the chicken, promoting even cooking and a uniformly crispy crust.
Air Fryer (Optional): If you own one, it’s fantastic for achieving an even quicker and extra-crispy result with less oil.
Cooking Oil Spray or Brush: Absolutely vital for creating that deep golden-brown color and irresistible crispness without the need for deep-frying.
Meat Thermometer: The ultimate tool for food safety and perfect results, ensuring your chicken reaches 165°F (74°C) and stays juicy.
Step-by-Step: Crafting Your Crispy Herb Chicken Skewers Perfection
Follow these detailed steps closely to achieve truly irresistible Crispy Herb Chicken Skewers with a golden, crunchy coating and tender, juicy chicken inside.
- Step 1: Prep for Perfection – Dry & Season Your Chicken.
Pat the chicken pieces thoroughly dry with paper towels. This is a crucial step for the coating to adhere properly and achieve maximum crispness. Excess moisture is the enemy of a crispy crust.
Season the chicken pieces lightly with salt and pepper to build flavor from within, ensuring every bite is delicious.
- Step 2: The Triple Threat – Setting Up Breading Stations.
In three separate shallow dishes, prepare your breading components for an efficient assembly line. This organized approach makes coating effortless.
Dish 1: All-purpose flour. This creates a dry surface for the egg to cling to.
Dish 2: Beaten eggs. This acts as the binder for the Panko.
Dish 3: Panko breadcrumbs mixed with chopped fresh parsley, garlic powder, onion powder, ½ teaspoon salt, and ¼ teaspoon black pepper. Stir these dry ingredients very well to ensure even distribution of flavor and herbs throughout the coating.
- Step 3: Thread, Dredge, Dip, & Press – The Coating Method.
Thread 3-4 chicken pieces onto each skewer, leaving a small space between each piece and at the ends for even cooking and easier handling.
Dredge each skewered chicken first in the seasoned flour, tapping off any excess to prevent a gummy coating. A thin, even layer is what you want.
Dip it into the beaten egg, allowing any excess to drip off completely. Too much egg can make the Panko soggy.
Finally, press the skewer firmly into the seasoned Panko mixture, ensuring a thick, even coating completely covers all surfaces of the chicken. Gently pressing the breadcrumbs helps them stick securely for a truly crispy finish.
- Step 4: Ready for Heat – Arrange & Lightly Oil.
Preheat your oven to 400°F (200°C) or your air fryer to 375°F (190°C). Proper preheating is essential for immediate crisping.
Place the coated chicken skewers on a wire rack set over a baking sheet (if using an oven) or directly in your air fryer basket, ensuring not to overcrowd. Overcrowding will trap steam, preventing proper crisping and browning.
Lightly spray or brush the entire surface of each breaded skewer with cooking oil. This oil layer is absolutely vital for achieving that deep golden crispness when baking or air frying, mimicking the results of traditional frying.
- Step 5: Cook to Crisp – Oven or Air Fryer Guide.
Oven Method: Bake for 18-22 minutes, flipping the skewers halfway through, until golden brown, crispy, and the internal temperature of the chicken reaches 165°F (74°C). Flipping ensures even cooking and browning on all sides.
Air Fryer Method: Air fry for 12-16 minutes, flipping halfway through, until golden brown, crispy, and cooked through. Air fryers cook faster and often achieve a crispier exterior due to concentrated hot air.
- Step 6: The Waiting Game – Rest Before Serving.
Let the crispy chicken skewers rest for a few minutes before serving hot. This allows the juices to redistribute throughout the chicken, ensuring perfectly tender and juicy results every time.
Chef’s Secrets for the Ultimate Crispy Herb Chicken Skewers
Elevate your Crispy Herb Chicken Skewers from good to unforgettable with these expert tips and tricks.
The “Pat Dry” Mantra: Why It Matters for Crispness
Seriously, do not skip thoroughly patting your chicken dry. Any residual moisture creates steam during cooking, which prevents the breading from crisping up.
A dry surface is paramount for the flour and subsequent layers to adhere properly, forming a secure, crunchy crust.
Panko vs. Regular Breadcrumbs: The Superior Crunch
Panko breadcrumbs are a game-changer because they’re made from crustless white bread and have a flakier, airier texture. This allows them to absorb less oil than regular breadcrumbs.
The result is a lighter, much crisper coating that stays crunchy, unlike the denser, sometimes soggy texture of conventional breading.
Don’t Crowd the Cooker: Airflow is Your Friend
Whether you’re using an oven or an air fryer, proper air circulation is vital for achieving a truly crispy exterior. Overcrowding your pan or basket traps steam, making your skewers soft instead of crisp.
Cook in batches if necessary, ensuring each skewer has enough space around it for the hot air to circulate freely.
Beyond Basic: Herb & Seasoning Variations to Try
While fresh parsley, garlic, and onion powder are fantastic, feel free to get creative with your herb blend for these Crispy Herb Chicken Skewers. Consider adding a pinch of smoked paprika for a smoky depth.
Dried oregano or a touch of cayenne pepper can also introduce exciting new flavor dimensions. Even a finely chopped sprig of fresh thyme or rosemary can add a sophisticated touch.
The Golden Finish: Mastering the Oil Spray Trick
The light spray or brush of cooking oil before baking or air frying is the key to a beautiful golden-brown and extra-crispy finish without deep-frying. This fat helps conduct heat, promoting browning and crispness.
Light-flavored oils like avocado oil, olive oil, or even a simple vegetable oil spray work perfectly. Ensure an even, fine layer over all breaded surfaces.
Troubleshooting Common Crispy Chicken Skewers Hurdles
Even with a great recipe, sometimes things don’t go exactly as planned. Here are solutions to common issues you might encounter with your Crispy Herb Chicken Skewers.
Problem: Skewers Not Crispy Enough
Solution: Ensure your oven or air fryer is fully preheated before cooking. Verify you lightly sprayed or brushed all surfaces of the breaded skewers with oil.
Also, avoid overcrowding the cooking vessel; proper air circulation is critical for crispness. If still not crisp, cook for a few extra minutes, watching carefully.
Problem: Coating Falling Off
Solution: The most common culprits are insufficient drying of the chicken and not pressing the Panko firmly enough. Always pat the chicken thoroughly dry before seasoning.
When applying the Panko, press it firmly onto the chicken pieces to ensure maximum adhesion. Also, ensure excess egg drips off before the Panko step.
Problem: Chicken is Dry and Tough
Solution: This indicates overcooking. Chicken breast cooks quickly. Use a meat thermometer to ensure the chicken reaches exactly 165°F (74°C) and no more.
Additionally, don’t skip the resting step; this allows juices to redistribute, resulting in much juicier chicken.
Problem: Unevenly Cooked or Browned
Solution: Ensure consistent spacing between your skewers during cooking to allow even heat distribution. If using an oven, flip the skewers halfway through the baking time.
You might also rotate the baking sheet if you know your oven has hot spots, or shake the air fryer basket periodically.
Serving Suggestions & Perfect Pairings
These Crispy Herb Chicken Skewers are incredibly versatile and pair beautifully with a variety of sides and sauces, making them perfect for any meal.
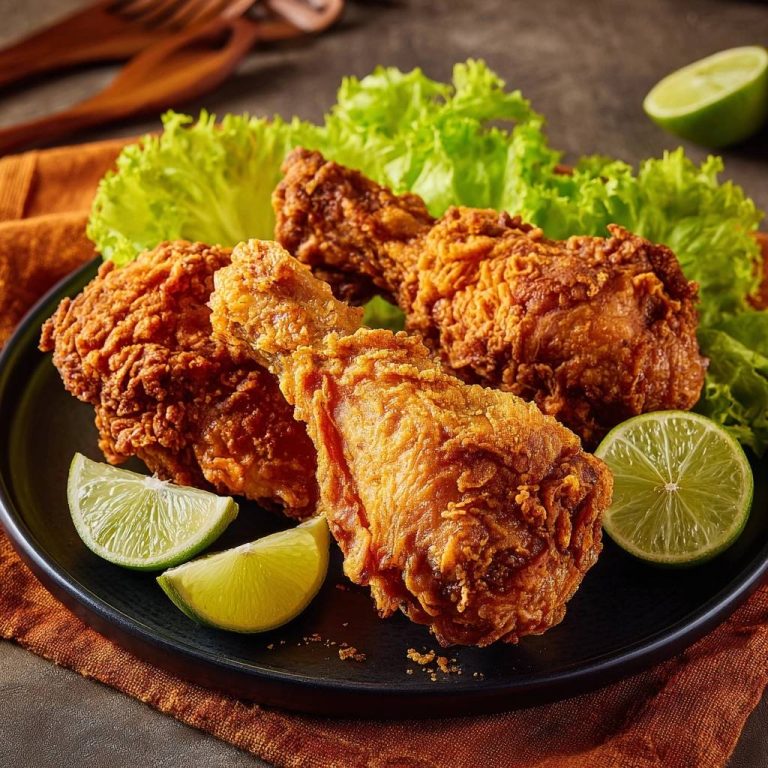
For a perfect pairing, try our Crispy Spiced Chicken Drumsticks.
Dipping Sauces to Delight
Offer a selection of dipping sauces to truly elevate these skewers. Classic honey mustard, creamy ranch, or a tangy marinara are always popular choices.
For a kick, try a spicy sriracha aioli or a sweet chili sauce. The contrast of the crispy chicken with a smooth, flavorful sauce is irresistible.
Complementary Sides for a Full Meal
Round out your meal with simple, delicious side dishes. A crisp, fresh green salad with a light vinaigrette provides a refreshing contrast.
Roasted vegetables like zucchini or bell peppers, or even a batch of our Crispy Baked Asparagus, make excellent, healthy accompaniments. For heartier options, consider rice pilaf, couscous, or a light pasta salad.
Make-Ahead & Storage Tips for Busy Cooks
Streamline your cooking process and enjoy these delicious Crispy Herb Chicken Skewers even on the busiest days with these make-ahead and storage tips.
Can You Prep Them Ahead?
Absolutely! You can cut the chicken, mix the Panko coating, and even set up your breading stations a few hours in advance. Keep the chicken refrigerated and the dry ingredients covered at room temperature.
For best crispness, I recommend breading and cooking the skewers just before serving. However, you can bread them up to an hour ahead, keeping them on the wire rack in the fridge, then lightly spray with oil just before cooking.
Reheating for Maximum Crispness
To bring back that glorious crispness, avoid the microwave! The best methods for reheating cooked skewers are in an air fryer or oven.
Air fry at 350°F (175°C) for 5-8 minutes, or bake in an oven at 375°F (190°C) for 10-15 minutes, until heated through and crispy. A quick spritz of oil before reheating helps too.
Safe Storage Guidelines
Store cooked Crispy Herb Chicken Skewers in an airtight container in the refrigerator for up to 3-4 days. Allow them to cool completely before storing to prevent condensation and sogginess.
For longer storage, freeze individual cooked skewers on a baking sheet until solid, then transfer to a freezer-safe bag for up to 2-3 months. Thaw in the refrigerator before reheating.
Frequently Asked Questions About Crispy Herb Chicken Skewers
Here are answers to some common questions you might have about making these flavorful and crispy chicken skewers.
Can I use chicken thighs instead of breast?
Yes, you can absolutely use boneless, skinless chicken thighs for this recipe. Thighs tend to be more forgiving and stay juicier due to their higher fat content, though they may require a slightly longer cooking time.
Adjust cooking times as needed and always use a meat thermometer to ensure they reach 165°F (74°C). For other fantastic chicken thigh ideas, explore recipes like our Ultimate Pulled Chicken Sandwich.
How do I make this gluten-free?
Making these skewers gluten-free is simple! Substitute the all-purpose flour with a gluten-free all-purpose flour blend.
For the Panko, use gluten-free Panko breadcrumbs, which are widely available. The rest of the ingredients are naturally gluten-free.
What if I don’t have Panko breadcrumbs?
If Panko isn’t available, you can use regular breadcrumbs, but be aware that the final texture won’t be as light and crisp. For a similar crunch, consider crushing cornflakes (unfrosted) into coarse crumbs.
Even crushed plain potato chips can offer a surprisingly delicious and crunchy alternative in a pinch!
Can I grill these skewers?
While this recipe is optimized for oven and air fryer crisping, you can grill these skewers with some adjustments. The breading is prone to sticking to grill grates and can burn easily.
If grilling, pre-grill your chicken pieces first, then lightly brush with the herb-oil mixture and quickly finish on the grill, or consider a grill pan. This specific breading method truly shines with dry heat from an oven or air fryer.
Your Kitchen Awaits: Ready to Create Crispy Herb Chicken Skewers?
You now have all the knowledge and expert tips to create truly spectacular Crispy Herb Chicken Skewers that boast an unbeatable crunch and perfectly juicy chicken every time. This recipe is a testament to how simple techniques can yield extraordinary results.
Don’t wait any longer; gather your ingredients and prepare to impress yourself and your loved ones with this incredible dish. I can’t wait to hear how much you love them!
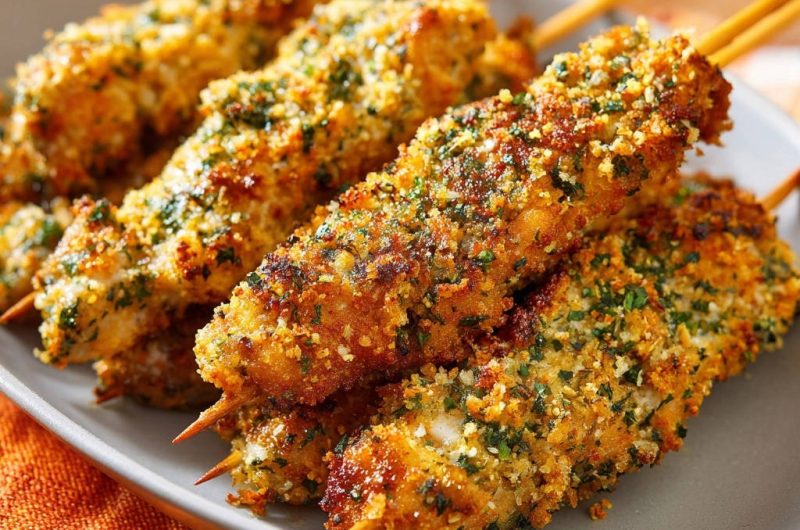
Crispy Herb Chicken Skewers
Course: Main CourseCuisine: AmericanDifficulty: easy12
skewers45
minutes18
minutes240
kcal60
minutesEver tried to make breaded chicken at home, only to have the coating turn out soggy? This game-changing method ensures your chicken skewers are incredibly flavorful, perfectly juicy inside, and boast an unbelievably crispy, golden crust that stays put.
Ingredients
1.5 pounds boneless, skinless chicken breast, cut into 1-inch pieces
1 cup Panko breadcrumbs
1/4 cup fresh parsley, finely chopped
1 teaspoon garlic powder
1/2 teaspoon onion powder
1/2 teaspoon salt, plus more for seasoning
1/4 teaspoon black pepper, plus more for seasoning
2 large eggs, beaten
1/2 cup all-purpose flour
2 tablespoons cooking oil (such as olive or avocado oil), plus more for spraying
12 wooden skewers (soaked in water for 30 minutes if using an oven)
Directions
- Prepare the chicken: Pat the chicken pieces thoroughly dry with paper towels. This is a crucial step for the coating to adhere properly. Season the chicken pieces lightly with salt and pepper.
- Set up breading stations: In three separate shallow dishes, prepare your breading components.
- Dish 1: All-purpose flour.
- Dish 2: Beaten eggs.
- Dish 3: Panko breadcrumbs mixed with chopped fresh parsley, garlic powder, onion powder, 1/2 teaspoon salt, and 1/4 teaspoon black pepper. Stir these dry ingredients very well to combine.
- Thread and coat the chicken: Thread 3-4 chicken pieces onto each skewer, leaving a small space between each piece and at the ends for even cooking. Dredge each skewered chicken first in the seasoned flour, tapping off any excess. Dip it into the beaten egg, allowing any excess to drip off. Finally, press the skewer firmly into the seasoned Panko mixture, ensuring a thick, even coating completely covers all surfaces of the chicken. Gently press the breadcrumbs onto the chicken to help them stick.
- Prepare for cooking: Preheat your oven to 400°F (200°C) or your air fryer to 375°F (190°C). Place the coated chicken skewers on a wire rack set over a baking sheet (if using an oven) or directly in your air fryer basket, ensuring not to overcrowd. Lightly spray or brush the entire surface of each breaded skewer with cooking oil. This oil layer is absolutely vital for achieving that deep golden crispness when baking or air frying.
- Cook the skewers:
- Oven Method: Bake for 18-22 minutes, flipping the skewers halfway through, until golden brown, crispy, and the internal temperature of the chicken reaches 165°F (74°C).
- Air Fryer Method: Air fry for 12-16 minutes, flipping halfway through, until golden brown, crispy, and cooked through.
- Serve: Let the crispy chicken skewers rest for a few minutes before serving hot.
Notes
- Soak wooden skewers in water for 30 minutes if using an oven.