Mastering Salted Caramel Chocolate Oat Bars: The No-Crumble Method
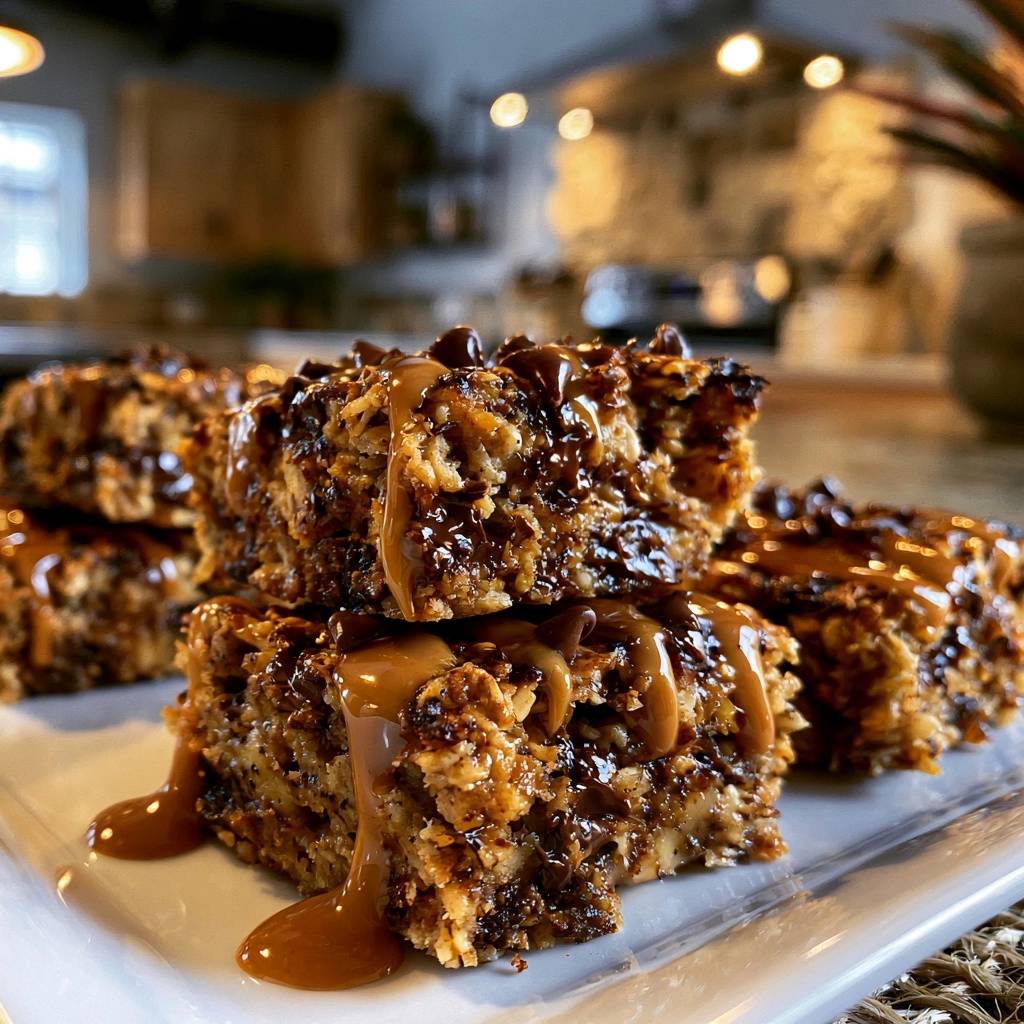
We’ve all been there. You pull a beautiful tray of oat bars out of the oven, wait five minutes, and try to slice into them, only to have the whole thing disintegrate into a pile of sweet granola. It’s heartbreaking when a delicious treat won’t hold its shape.
The secret to these Salted Caramel Chocolate Oat Bars isn’t just in the flavor, but in the structural integrity of the bake. By mastering a specific ratio of melted butter to flour and oats, we create a “binding matrix” that keeps every bite intact. This recipe focuses on a reinforced base that supports a gooey, decadent center without falling apart.
I’ve found that the real trick to a professional finish is the compression technique. If you don’t pack that bottom layer like you’re building a foundation, the caramel will seep through and weaken the crust. Use the flat bottom of a measuring cup to press the mixture into a solid, dense sheet before it ever hits the heat.
Essential Components for Salted Caramel Chocolate Oat Bars
Choosing the right ingredients is the first step toward a sturdy bar. You must use old-fashioned rolled oats rather than quick oats or instant varieties. Rolled oats provide the necessary “chew” and structural fiber that holds up against the heavy caramel and chocolate layers.
Brown sugar plays a dual role here as both a sweetener and a humectant. Because it contains molasses, it keeps the bars soft and slightly bendy rather than brittle. When combined with all-purpose flour, it creates a sticky dough that acts as the glue for the entire dessert.
For the chocolate, semi-sweet chips are the gold standard. They provide a deep cocoa flavor that isn’t masked by the sugar in the caramel. If you use milk chocolate, the bars can become cloyingly sweet, so stick to a higher cacao percentage for the best balance.
Selecting the Right Caramel Consistency
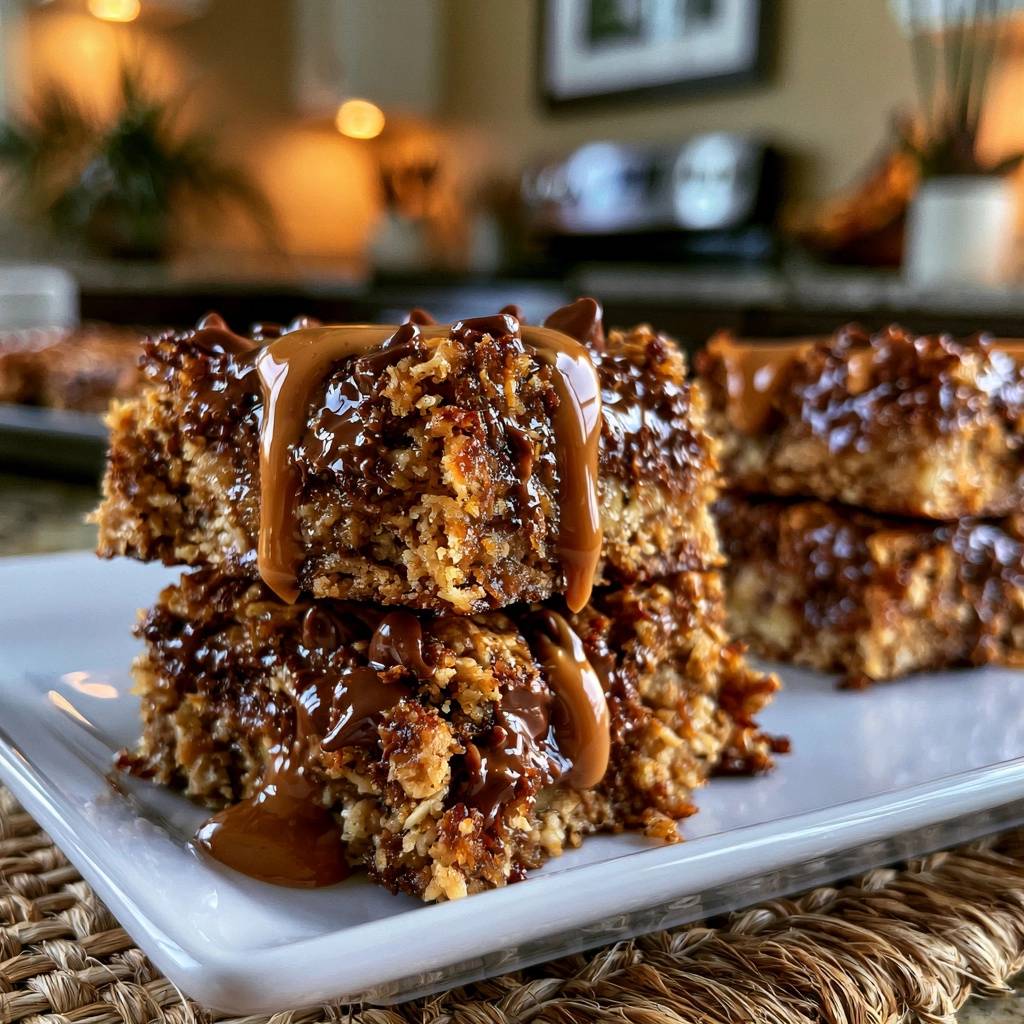
Not all caramels are created equal in the baking world. You need a thick, jarred caramel sauce or a homemade version that holds its shape at room temperature. Avoid thin, runny ice cream toppings, as they will simply soak into the oats and disappear during the second bake.
Adding a tablespoon of heavy cream to your caramel sauce is a pro move. This small addition stabilizes the sugars, ensuring the caramel stays creamy and “pully” after it cools. It prevents the layer from turning into a hard, tooth-cracking candy once the bars are refrigerated.
The Importance of Flaky Sea Salt
Salt is the most important secondary ingredient in this recipe. While table salt works inside the dough, a finishing sprinkle of flaky sea salt like Maldon is essential for the “burst” effect. These large crystals don’t dissolve immediately, providing a sharp contrast to the rich chocolate.
This sensory contrast is what makes the bars taste like they came from a high-end bakery. The salt cuts through the fat of the butter and the sweetness of the caramel, waking up your taste buds. It transforms a simple snack into a sophisticated dessert with very little effort.
The Science of Structural Oat Bar Integrity
The reason most oat bars crumble is a lack of “glue” or improper hydration of the dry ingredients. In this recipe, the melted butter coats every oat grain and flour particle. As the bars bake, the flour and sugar melt together to form a solid lattice that traps the oats in place.
Baking soda also plays a scientific role beyond just leavening. It raises the pH of the dough, which speeds up the Maillard reaction. This is why the edges of these bars get that deep, toasted brown color and a slight “snap” that contrasts with the soft center.
Why Compression Prevents Crumbling
Physics is your best friend when it comes to clean slicing. Air pockets are the enemy of a solid bar. When you press the bottom two-thirds of the mixture into the pan, you are removing those gaps and creating a load-bearing foundation.
I always tell people to press harder than they think they need to. Using a flat-bottomed tool ensures even pressure across the entire surface. This dense base prevents the heavy caramel and chocolate from sinking to the bottom, which would otherwise make the crust soggy and weak.
Step-by-Step: Building the Perfect Layered Bar
The process starts with a ten-minute par-bake of the crust. This is a non-negotiable step. If you add the wet caramel to raw dough, the moisture will prevent the bottom layer from ever fully crisping up, leading to a “soggy bottom” disaster.
Once that base is slightly set and fragrant, you can begin the layering process. The heat from the par-baked crust will immediately start to soften the chocolate chips. This helps the layers bond together as they go back into the oven for the final bake.
Distributing the Chocolate and Caramel Layers
When you sprinkle the chocolate chips, try to leave a tiny margin around the very edges of the pan. This prevents the chocolate and caramel from burning against the metal. Drizzle the caramel in a slow, even zig-zag pattern to ensure every single bite gets a bit of gold.
Reserving a portion of the chocolate chips for the very top is purely for visual appeal. It creates those beautiful, glossy pools of chocolate that sit on top of the oat crumbles. It makes the bars look textured and artisanal rather than flat and uniform.
The Final Bake and Visual Finishing
Keep a close eye on the oven during the last five minutes. You are looking for the edges to turn a deep, golden brown while the center still looks slightly soft. The bars will continue to firm up significantly as they cool on the counter.
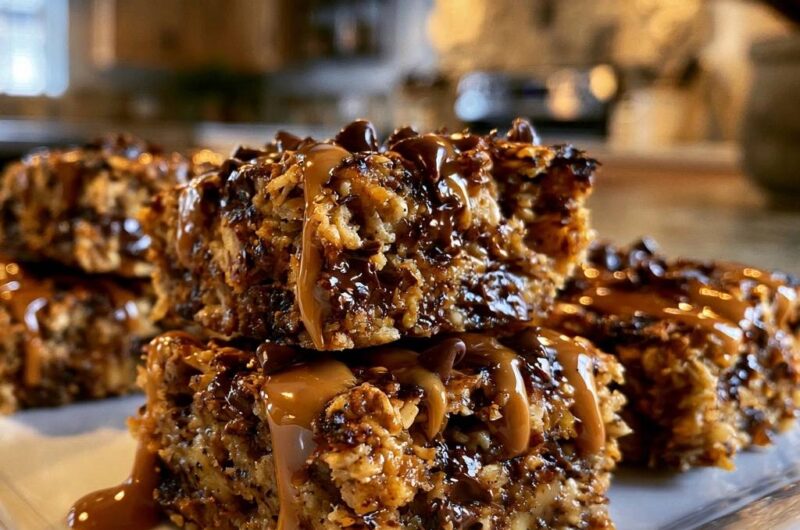
For that professional “bakery case” look, add your final caramel drizzle while the bars are still warm. This allows the fresh caramel to settle into the nooks and crannies of the oat topping. Finish with the sea salt immediately so the crystals stick to the wet caramel.
Temperature Control for Clean Slicing
This is the most difficult part of the recipe: the wait. Thermodynamics dictates that the fats and sugars in these bars need to return to a solid state to hold their shape. If you cut them while warm, the caramel will flow out and the crust will shatter.
As the bars cool, the butter solidifies and the caramel sets into a flexible adhesive. This process creates the “chew” that people love in a high-quality oat bar. Patience here is the difference between a perfect square and a crumbly mess.
The Refrigeration Mandate
I highly recommend chilling the entire pan in the refrigerator for at least two hours before slicing. This isn’t just a suggestion; it’s a requirement for the “no-crumble” promise. Cold temperatures make the caramel much easier to handle and the chocolate firm.
Once chilled, the bars become incredibly sturdy. You can lift the entire block out of the pan using the parchment paper overhang. This gives you a clear, flat surface to work on, which is essential for getting those straight, clean edges.
Using the Warmed Knife Technique
To get those perfectly clean, sharp edges you see in photos, use a heavy chef’s knife. Dip the blade into a tall glass of hot water, wipe it completely dry, and then make one long, decisive cut. The heat from the blade will glide through the caramel like butter.
Make sure to wipe the knife clean and re-warm it between every single slice. If you don’t, the sticky caramel from the previous cut will drag through the next one, tearing the delicate oat topping. It takes an extra minute, but the results are worth it.
Troubleshooting Common Baking Obstacles
If you find that your caramel has leaked to the edges and stuck to the pan, don’t panic. This usually happens if the parchment paper didn’t quite cover the corners. Simply run a thin knife around the edge while the bars are still slightly warm to loosen the sugar.
Sometimes the oat mixture might feel a bit dry or sandy before it goes into the pan. This can happen if your flour was packed too tightly in the measuring cup. If it doesn’t clump when you squeeze a handful, stir in an extra teaspoon of melted butter until it feels like wet sand.
If your chocolate looks dull or “bloomed” after cooling, it’s usually just a temperature fluctuation. The final caramel drizzle and sea salt usually cover any visual imperfections. The taste will still be incredible, so don’t worry about minor cosmetic issues.
Make-Ahead Strategies and Storage Logistics
These bars are actually better the second day. As they sit, the moisture from the caramel and chocolate redistributes into the oats, making them even chewier. This makes them a fantastic option for parties or bake sales where you need to prep in advance.
Store the sliced bars in an airtight container at room temperature for up to five days. If your kitchen is particularly warm, keep them in the fridge to prevent the caramel from getting too soft. They also freeze beautifully if wrapped tightly in parchment and then foil.
When you’re ready to eat a frozen bar, let it thaw at room temperature for about 20 minutes. This restores the perfect texture. They are sturdy enough to be packed in lunchboxes, provided they aren’t sitting in direct sunlight where the chocolate might melt.
Expert Tips for Recipe Success
Can I use gluten-free flour for these bars?
Yes, you can substitute the all-purpose flour with a 1:1 gluten-free baking blend. Ensure your blend contains xanthan gum, which is necessary to provide the “stretch” and binding power that gluten usually offers. Also, double-check that your oats are certified gluten-free.
How do I prevent the caramel from disappearing into the crust?
The secret is the par-baking step and the thickness of the sauce. By baking the base for 10 minutes first, you create a sealed surface that the caramel sits on top of. Also, ensure you are using a thick, spoonable caramel rather than a thin syrup.
Can I add nuts or other textures to this recipe?
Absolutely. Toasted pecans or walnuts are a classic addition that pairs perfectly with salted caramel. I recommend folding 1/2 cup of chopped nuts into the oat mixture before pressing it into the pan to ensure they are evenly distributed and held in place by the binders.
Why did my bars still crumble even after cooling?
This usually happens if the base wasn’t compressed firmly enough or if the bars were sliced before they were fully chilled. Ensure you use a flat tool to pack the dough into the pan and don’t skip the two-hour refrigeration period. The cold is what truly sets the structure.
Can I use dark chocolate instead of semi-sweet?
Yes, dark chocolate works wonderfully if you prefer a less sweet treat. Use a 60% or 70% cacao chip. The bitterness of the dark chocolate provides an even sharper contrast to the sweet caramel, which many people find even more delicious than the original version.
Customizing Your Salted Caramel Chocolate Oat Bars
Once you’ve mastered the base recipe, you can start experimenting with different flavor profiles. For a “Turtle” inspired bar, add a layer of toasted pecans on top of the caramel before adding the final oat crumbles. The crunch of the nuts adds a great textural dimension.
If you’re a fan of coffee, try adding a teaspoon of instant espresso powder to the melted butter. This doesn’t make the bars taste like coffee, but it deepens the flavor of the chocolate significantly. It creates a “Mocha” undertone that feels very sophisticated.
You can also swap the semi-sweet chips for white chocolate and add dried cranberries for a tart, creamy variation. No matter what mix-ins you choose, keep the ratios of oats, flour, and butter the same to ensure the bars stay together when sliced.
How do I store these for the long term?
To keep these bars fresh for up to three months, wrap individual squares tightly in plastic wrap and place them in a heavy-duty freezer bag. This prevents freezer burn and allows you to grab a single treat whenever the craving hits. Thaw at room temperature for 15-20 minutes before eating.
What is the best way to reheat them?
If you prefer a warm, gooey dessert, pop a single bar in the microwave for about 10 to 15 seconds. This will soften the caramel and melt the chocolate without making the whole bar fall apart. It’s especially delicious served with a scoop of vanilla bean ice cream on top.
Can I double this recipe for a larger crowd?
Yes, this recipe scales perfectly for a 9×13 inch pan. Simply double all the ingredients and increase the initial par-bake time by about 3 to 5 minutes. The final bake may also take a few extra minutes, so look for those signature golden brown edges as your cue to pull them out.
Why is my caramel layer too hard to bite?
This happens if the caramel sauce was overcooked or if it didn’t have enough fat (like heavy cream) added to it. If you are making homemade caramel, ensure you don’t take it to the “hard ball” stage. Using a high-quality store-bought caramel usually prevents this issue entirely.
Salted Caramel Chocolate Oat Bars
Course: DessertCuisine: AmericanDifficulty: easy12
bars15
minutes25
minutes40
Minutes310
kcalAmerican
Ingredients
2 cups rolled oats (old fashioned)
1 cup all-purpose flour
3/4 cup brown sugar, packed
1/2 teaspoon baking soda
1/4 teaspoon salt
3/4 cup unsalted butter, melted
1 1/2 cups semi-sweet chocolate chips (divided)
3/4 cup thick caramel sauce (divided)
1 tablespoon heavy cream
1/2 teaspoon sea salt (flaky preferred)
Directions
- Preheat your oven to 350°F (175°C) and line an 8×8 inch baking pan with parchment paper, leaving an overhang on the sides for easy removal.
- In a large bowl, combine the oats, flour, brown sugar, baking soda, and salt. Pour in the melted butter and stir until the mixture is thoroughly moistened and clumps together.
- The secret to the (Stops Bars Crumbling!) hook is the compression step. Press exactly two-thirds of the oat mixture into the bottom of the prepared pan. Use the bottom of a flat measuring cup to pack it down very firmly. This creates a dense, structural base.
- Bake the base for 10 minutes. Remove from the oven.
- Sprinkle 1 cup of the chocolate chips evenly over the hot crust. In a small bowl, whisk 1/2 cup of the caramel sauce with the heavy cream until smooth, then drizzle this over the chocolate chips.
- Crumble the remaining oat mixture over the top, followed by the remaining 1/2 cup of chocolate chips. Press down lightly with your fingers so the toppings adhere to the caramel layer.
- Bake for another 15 minutes until the edges are deep golden brown and the chocolate is glossy.
- Visual Finish: While the bars are still warm, drizzle the remaining 1/4 cup of caramel sauce in thick ribbons across the top and sprinkle with sea salt.
- Crucial Step: Do not slice these while warm. To ensure they never crumble, let the bars cool completely at room temperature, then refrigerate for at least two hours. This allows the caramel and butter to “set” the internal structure. Lift the entire block out using the parchment paper and slice with a sharp, warmed knife for perfect, clean squares.
Notes
- Do not slice these while warm. Refrigeration for at least two hours is the crucial step to ensure the bars do not crumble and provide clean, perfect squares.