Crispy Lemon Chicken Milanese
Why This Crispy Lemon Chicken Milanese Shines
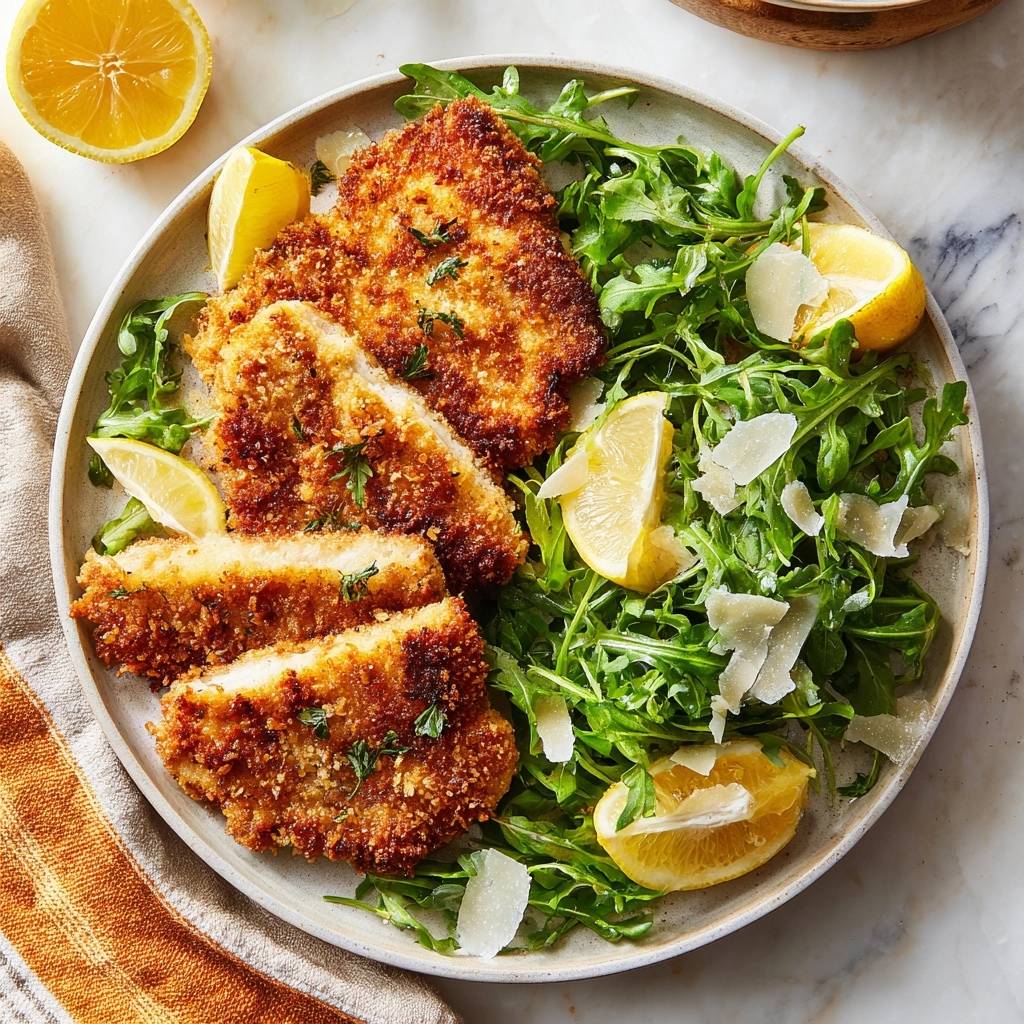
Imagine biting into breaded chicken that shatters with every crunch, never turning into that disappointing mush. You’ve probably dealt with soggy cutlets before, right? This Crispy Lemon Chicken Milanese fixes it all with a triple-coating method and a quick chill that locks in the crispiness while the inside stays juicy.
Therefore, it delivers that perfect contrast: golden, airy exterior over peppery arugula, zesty lemon squeezing bright tang, and parmesan melting into umami bliss. In addition, the fresh parsley in the panko adds an herby pop that elevates the whole plate. Oh man, the first time I nailed this, the texture had everyone reaching for seconds.
For the same crispy coating technique, try these golden parmesan chicken skewers that stay juicy every time.
Here’s the expertise kicker: the 15-minute fridge chill sets the coating so it doesn’t absorb oil during frying. That simple step beats every other breaded chicken recipe hands down.
Key Ingredients for Perfect Crispy Lemon Chicken Milanese
You’ll need 4 boneless chicken cutlets (about 1 lb total), pounded to 1/4-inch thickness. These stay juicy because thin pounding cooks them fast without drying out. Next, 1 cup all-purpose flour, 2 large eggs beaten, and 1 1/2 cups panko breadcrumbs mixed with 1/4 cup finely chopped fresh parsley. Panko’s jagged bits trap air for superior crunch over regular breadcrumbs, and parsley brings fresh flavor right into the coating.
Salt and black pepper season to taste, plus vegetable oil for frying since it handles high heat without smoking. For the salad, grab 5 cups arugula, 1/4 cup grated parmesan, 2 lemons cut into wedges, 2 tbsp olive oil, and 1 tbsp lemon juice. Fresh lemons cut through the richness way better than bottled stuff. However, if you’re gluten-free, swap in gluten-free panko and flour.
Pro tip: grate parmesan fresh; it melts smoother than pre-shredded. Here’s your quick shopping list: chicken cutlets, flour, eggs, panko, parsley, salt, pepper, vegetable oil, arugula, parmesan, lemons, olive oil.
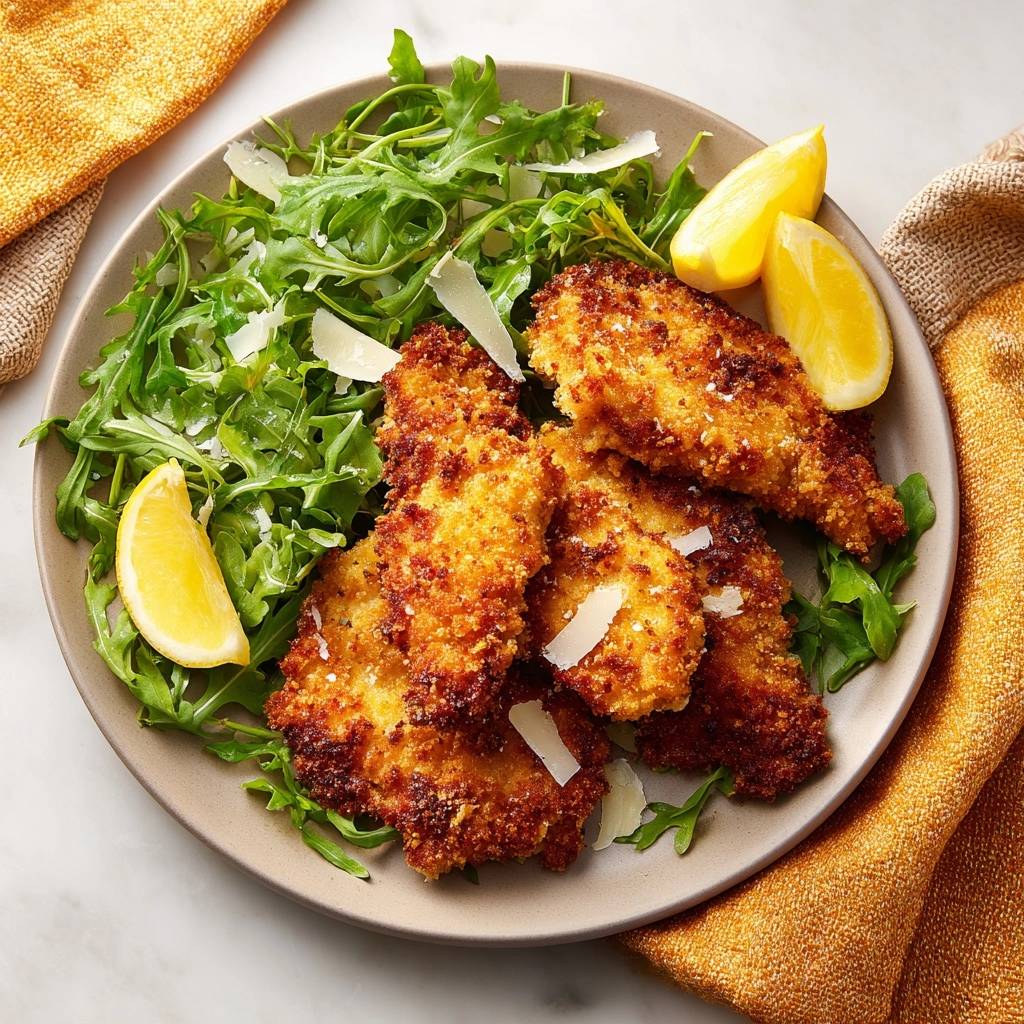
Protein Base: Pounding Chicken Cutlets Thin
Pound cutlets to exactly 1/4-inch thickness for even cooking. Use a meat mallet or rolling pin inside a zip-top bag to avoid mess. Boneless works best since it tenderizes quickly without tough bits. Therefore, this keeps the chicken juicy under the crisp coat.
Triple-Coat Essentials: Flour, Egg, Panko
Flour (1 cup) builds the sticky base for adhesion. Eggs (2 beaten) seal in moisture, so dip and let excess drip. Mix 1 1/2 cups panko with parsley, then press firmly; no excess means the layers bond tight. In addition, this triple method crushes single-dredge sogginess.
Salad Components: Arugula, Lemon, Parmesan
Arugula’s peppery bite balances the fried richness perfectly. Toss 5 cups with 2 tbsp olive oil, 1 tbsp lemon juice, salt, and pepper. Top with 1/4 cup grated parmesan for umami, and serve with lemon wedges to brighten every bite.
Science of Crispy Lemon Chicken Milanese Coating
The magic starts with flour’s starch gelatinizing to grab the egg proteins, which bind everything. Panko’s rough edges trap air pockets that expand in hot oil for shatter-crisp texture. Refrigeration firms the gluten, stopping moisture from migrating out and soaking up oil.
At 350F frying, the Maillard reaction browns it golden without grease. Therefore, this beats double-dredging because the chill creates a moisture barrier. Here’s what seals the deal:
- Pat dry first: kills surface steam.
- Firm press: locks layers.
- Chill uncovered: dries exterior for crisp pop.
Moisture Control Prevents Soggy Breading
Pat cutlets bone-dry to nix surface water that turns to steam in oil. Chilling then firms the coating, blocking moisture escape. Without this, breading absorbs oil and wilts fast.
Oil Temperature for Golden Crisp Finish
Heat to shimmering 350F for even Maillard browning. Test by dropping in panko; it should sizzle instantly. Too low means greasy; too high burns the outside first.
Step-by-Step: Triple-Coat Crispy Lemon Chicken Milanese
This takes 30-40 minutes total. Pace yourself through phases, and fry in batches to keep oil hot. Safety first: use tongs and a splatter screen.
Phase 1: Prep and Season Cutlets
Pat 4 cutlets completely dry with paper towels. Season both sides generously with salt and pepper. Dryness ensures the coating sticks; skip it and you’ll get slip-off breading.
Phase 2: Assemble Dredging Station
Set up three shallow bowls: flour, beaten eggs, panko-parsley mix. Use one hand for dry (flour/panko), one for wet (egg) to avoid clumping. Quick and clean every time.
Phase 3: Bread and Chill Cutlets
Dredge in flour (shake excess), dip in egg (drip off), press into panko both sides. Place on a wire rack over a baking sheet. Refrigerate uncovered 15 minutes; air circulates to set the crust perfectly.
Phase 4: Fry to Perfection
Heat 1/2 inch vegetable oil to 350F shimmering in a skillet. Fry 3-4 minutes per side till golden, working in batches. Drain on paper towels; you’ll hear that satisfying sizzle fade to crisp.
Phase 5: Quick Arugula Salad Assembly
Toss arugula with olive oil, lemon juice, salt, pepper, and parmesan. Plate chicken over greens, add lemon wedges. Squeeze for zing that cuts the fry.
Avoiding Mistakes in Crispy Lemon Chicken Milanese
Common traps kill crispness, but here’s your checklist: always pat dry, chill 15 minutes minimum, fry at 350F, and don’t overcrowd the pan. Room-temp breading falls off because it hasn’t set. Use a thermometer if you doubt the oil heat.
Therefore, single-layer on the rack during chill promotes even drying. Pro tip: if coating looks patchy, press harder next time.
Overcoming Soggy Breading Issues
Sogginess comes from wet chicken or excess egg. Pat extra dry and drip well; the triple-coat plus chill cures it. No shortcuts here.
Frying Temperature Pitfalls
Oil below 325F soaks in grease; above 375F burns fast. Look for steady bubbles around edges for doneness. Adjust heat between batches.
Flavor Twists on Crispy Lemon Chicken Milanese
Swap parsley for basil or thyme in panko for herbal shifts. Add lemon zest or garlic powder to the crumbs for citrus-garlic punch. Spice it with chili flakes if you like heat.
For the salad, toss in cherry tomatoes or shaved fennel. Low-carb? Use almond flour instead of wheat. However, keep the lemon and crisp core intact. These tweaks take 2 minutes max.
Ideal Pairings for Crispy Lemon Chicken Milanese
Balance the fry with light sides. Roasted potatoes add starch comfort. Couscous tabbouleh brings fresh herbs.
Grilled zucchini or asparagus keeps it summery. Sparkling cranberry juice refreshes the palate. Berry sorbet ends on a tart high note.
Make-Ahead Guide for Crispy Lemon Chicken Milanese
Bread and chill cutlets up to 24 hours ahead; fry fresh for peak crunch. Freeze breaded (unfried) up to 1 month, thaw in fridge overnight before frying. Prep salad components separately; toss right before serving.
Reheat leftovers in a 400F oven 5-7 minutes on a wire rack. Therefore, it crisps right back up without sogginess. Don’t microwave; it steams the coating.
Troubleshooting Crispy Lemon Chicken Milanese
Why did my coating fall off? Excess moisture or no chill caused it. Pat drier, drip egg well, and fridge for full 15 minutes next time. Firm panko press seals it.
Can I bake instead of fry? Yes, preheat to 425F, place on a wire rack over a sheet, spray lightly with oil. Bake 20 minutes, flipping halfway. Still gets crisp, less oil.
Can I sub chicken breasts? Pound them thinner to 1/4-inch first. Slice in half if thick. They work but cutlets are more tender.
Vegan version? Use thin tofu slabs, aquafaba for egg, gluten-free panko. Fry same way; arugula salad stays vegan.
Kid-friendly tweaks? Milder salad with spinach instead of arugula, less lemon. Cut chicken smaller for bites.
FAQ
How do I store leftovers of Crispy Lemon Chicken Milanese?
Store fried chicken in an airtight container in the fridge for up to 3 days. Keep salad separate to avoid wilting. It doesn’t freeze well fried because breading gets soggy; freeze breaded raw up to 1 month, thaw fully before frying. Reheat in 400F oven on a rack for 5-7 minutes to restore crunch.
Why is my breading soggy and how do I fix it?
Sogginess usually hits from skipping the pat-dry step or rushing the chill, letting steam escape during frying. Always pat super dry, shake off excess flour/egg, press panko firm, and chill 15 minutes uncovered on a rack. Fry at exact 350F; low heat absorbs oil. This triple method plus chill prevents 99% of mush.
What can I substitute in Crispy Lemon Chicken Milanese?
No panko? Regular breadcrumbs work but crunch less; gluten-free panko is ideal. Out of eggs? Try buttermilk or aquafaba for binding. Chicken breasts instead of cutlets? Pound to 1/4-inch thin. Arugula swap: baby spinach or mixed greens. Vegetable oil out? Avocado oil holds heat similarly. Measurements stay the same for balance.
Can I make Crispy Lemon Chicken Milanese ahead for a party?
Bread and chill up to 24 hours ahead, or freeze breaded up to 1 month. Fry fresh in batches right before serving for max crisp. Prep salad dressing separately; toss 10 minutes prior. Holds warm in 200F oven on a rack up to 20 minutes without losing texture.
How do I know when the oil is hot enough for frying?
Heat 1/2 inch oil to shimmering over medium-high; ideal is 350F if you have a thermometer. Test by dropping a pinch of panko; it should bubble vigorously and brown in 30 seconds. Steady sizzle around cutlets means perfect; adjust burner as needed between batches to maintain heat.
Is Crispy Lemon Chicken Milanese kid-friendly?
Absolutely, with tweaks. Use milder greens like spinach over arugula, ease up on lemon juice, and cut chicken into nuggets. The crunch appeals to kids; pair with ketchup or ranch for dipping. Full recipe serves 4; scale down portions easily.
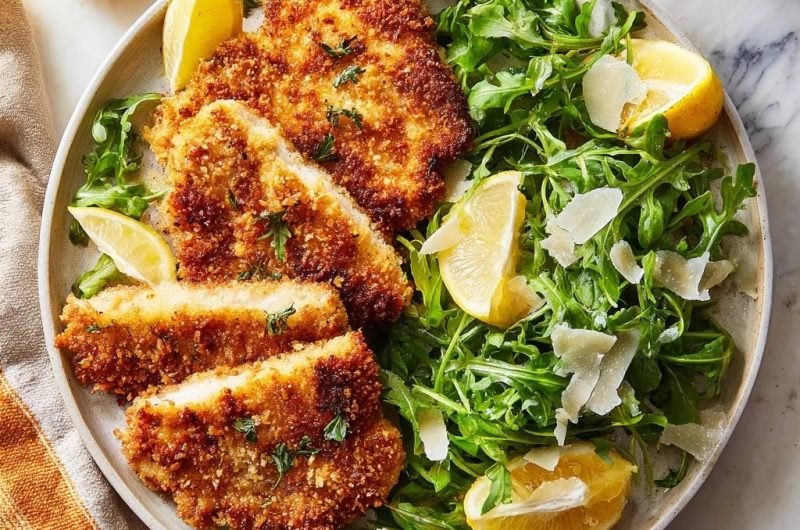
Chicken Milanese
Course: Main CourseCuisine: Italian-AmericanDifficulty: easy4
servings25
minutes15
minutes650
kcal40
MinutesTired of breaded chicken that turns mushy? This triple-coating method with a quick chill locks in the crunch while keeping chicken juicy. Served over arugula with fresh lemon and parmesan.
Ingredients
4 boneless chicken cutlets (about 1 lb total), pounded to 1/4-inch thickness
1 cup all-purpose flour
2 large eggs, beaten
1 1/2 cups panko breadcrumbs
1/4 cup fresh parsley, finely chopped
Salt and black pepper, to taste
Vegetable oil, for frying
5 cups arugula
1/4 cup grated parmesan cheese
2 lemons, cut into wedges
2 tbsp olive oil
1 tbsp lemon juice
Directions
- Pat chicken cutlets completely dry with paper towels. Season both sides with salt and pepper. This removes excess moisture, the key to preventing soggy breading.
- Set up your triple-coating station: flour in one shallow bowl, beaten eggs in another, and panko mixed with chopped parsley in a third.
- Dredge each cutlet in flour, shaking off excess. Dip in egg, letting excess drip off. Press firmly into panko mixture, coating evenly on both sides. The firm press and no-excess rule creates a tight seal that stays put.
- Place breaded cutlets on a wire rack over a baking sheet. Refrigerate uncovered for 15 minutes. This chill sets the coating, ensuring it bonds and crisps up perfectly without absorbing oil.
- Heat 1/2 inch vegetable oil in a large skillet over medium-high heat until shimmering (about 350F). Fry cutlets in batches, 3-4 minutes per side, until golden and crisp. Drain on paper towels. The chicken is done when it reaches 165°F (74°C) in the thickest part.
- Toss arugula with olive oil, lemon juice, salt, and pepper. Top with parmesan.
- Serve chicken over arugula, with lemon wedges for squeezing. The acid cuts the richness for bright flavor. Enjoy the shatteringly crisp bite!
Notes
- Key to crispiness: Pat chicken completely dry, shake off excess flour and egg, press firmly into panko, and chill uncovered for 15 minutes before frying.