Dreamy No-Bake Vanilla Cream Pie: Perfectly Set, Never Runny
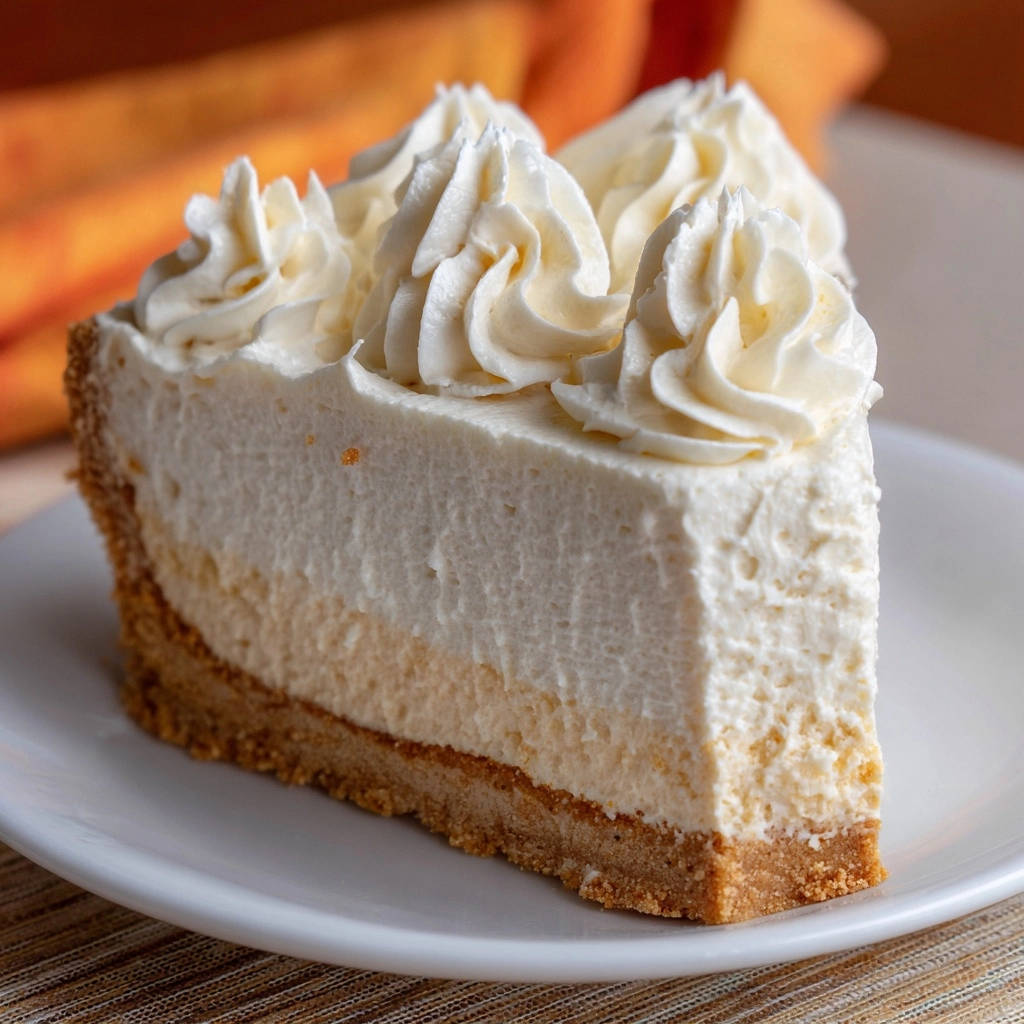
There’s nothing quite as disappointing as a no-bake pie that refuses to hold its shape, leaving you with a delicious but soupy mess. I’ve been there, facing that runny disappointment, but I’ve finally perfected the method for a Dreamy No-Bake Vanilla Cream Pie that delivers beautifully firm, yet irresistibly creamy slices every single time. This recipe is your secret weapon for achieving that elegant, sliceable dessert without ever turning on your oven.
Why This Dreamy No-Bake Vanilla Cream Pie Will Become Your Go-To Dessert
Effortless Elegance: No Oven Required
This Dreamy No-Bake Vanilla Cream Pie offers the ultimate convenience, especially perfect for warm weather or when your oven is occupied. You get a sophisticated dessert with minimal fuss, making it ideal for entertaining or a quick family treat.
The Secret to a Perfectly Set, Sliceable Filling
The innovation in this recipe lies in its careful use of gelatin and a crucial extended chilling period. This ensures your vanilla cream pie sets beautifully firm, allowing for clean, picture-perfect slices without any runny issues.
Simple Ingredients, Sublime Flavor
Using readily available pantry staples, this recipe transforms basic ingredients into a rich, classic vanilla flavor profile. It’s the kind of comforting taste that appeals to everyone, young and old.
A Crowd-Pleaser for Any Occasion
Whether you’re hosting a summer barbecue, a casual family dinner, or a festive celebration, this no-bake pie is a guaranteed hit. Its light, creamy texture and familiar flavor make it universally loved.
Gather Your Essentials: Ingredients for Dreamy No-Bake Vanilla Cream Pie Perfection
Quality ingredients are the foundation of any great dessert. Here’s a closer look at what you’ll need and why each component matters for your perfect no-bake pie.
For the Golden Graham Crust
Graham Cracker Crumbs: The Flavorful Base
Graham cracker crumbs provide a subtly sweet, buttery, and classic base that complements the creamy vanilla filling perfectly. You’ll need about 10-12 full graham cracker sheets to yield the required 1 ½ cups of crumbs.
Sugar and Melted Butter: Binding and Richness
Granulated sugar adds just the right touch of sweetness to the crust, balancing the crackers. Melted unsalted butter acts as the crucial binding agent, ensuring your crust holds together firmly and offers a rich, satisfying texture.
For the Luxurious Vanilla Cream Filling
Cream Cheese: The Silky Foundation
Using full-fat cream cheese is non-negotiable for achieving the truly luxurious, silky-smooth texture of this vanilla cream pie. Ensure it’s fully softened to room temperature for effortless blending, preventing lumps.
Powdered Sugar & Vanilla Extract: Sweetness and Aroma
Powdered sugar dissolves seamlessly, contributing to the filling’s smooth consistency without any grittiness. High-quality vanilla extract is paramount, infusing the pie with its signature warm and inviting aroma and flavor.
Heavy Cream: Achieving Airy Fluffiness
Very cold heavy cream is absolutely essential for whipping into light, stable soft peaks. This whipped cream provides the critical airy fluffiness that makes the Dreamy No-Bake Vanilla Cream Pie so delightful.
Unflavored Gelatin: The Game-Changer for a Firm Set
This is the hero ingredient that ensures your no-bake pie sets beautifully without being rubbery. Gelatin provides the structural integrity needed for a perfectly sliceable pie, eliminating the dreaded runny mess.
This same gelatin technique is key for achieving firm, fluffy slices in a peanut butter cream pie.
For the Cloud-Like Whipped Topping
Heavy Cream, Powdered Sugar, & Vanilla: The Perfect Finish
These three ingredients combine to create a light, pipeable whipped topping that crowns your pie with elegance. The powdered sugar adds sweetness, while vanilla extract enhances the overall flavor profile.
Crafting Your Dreamy No-Bake Vanilla Cream Pie: A Step-by-Step Guide
Foundation First: Preparing Your Perfect Pie Crust
Combine and Press: In a medium bowl, combine the graham cracker crumbs and granulated sugar. Pour in the melted butter and mix thoroughly until the crumbs are evenly moistened. Press this mixture firmly into the bottom and up the sides of a 9-inch pie plate. Use the bottom of a glass or measuring cup to compact it tightly.
Chill Time: Refrigerate the crust for at least 15 minutes while you prepare the filling. This initial chill helps the butter solidify, creating a sturdy base that prevents sogginess and helps the crust hold its shape.
The Gelatin Masterclass: Ensuring a Flawless Set
Bloom the Gelatin: In a small microwave-safe bowl, sprinkle the unflavored gelatin powder evenly over ¼ cup of cold water. Let it sit undisturbed for 5 minutes; it will absorb the water and become thick and jelly-like, a process known as “blooming.” This step is crucial for proper activation.
Dissolve Completely: After blooming, microwave the gelatin mixture for 10-15 seconds, or until it is completely clear and dissolved. Stir well to ensure no granules remain. Let it cool slightly, but do not allow it to set before moving to the next step.
Building the Creamy Base: Smooth Cream Cheese Filling
Cream the Cream Cheese: In a large mixing bowl, use an electric mixer to beat the softened full-fat cream cheese until it is completely smooth and creamy, a process that takes about 2-3 minutes. This aeration is key for a light filling.
Add Sweetness and Vanilla: Gradually add the powdered sugar to the cream cheese, beating until fully incorporated and the mixture is smooth. Finally, beat in the vanilla extract until it’s well combined, infusing the base with its signature flavor.
Whipping Wonders: Achieving Light and Airy Cream
Whip Cold Cream: In a separate, thoroughly chilled bowl, whip the 1 cup of very cold heavy cream until soft peaks form. It’s important not to overbeat it at this stage, as you want light, fluffy cream that still has some give.
The Grand Assembly & Crucial Chill: Setting Your Pie for Success
Incorporate Gelatin: With the electric mixer on low speed, gradually pour the slightly cooled, dissolved gelatin into the cream cheese mixture. Beat until just combined; ensure it’s evenly distributed without overmixing.
Fold in Whipped Cream: Gently fold the whipped cream into the cream cheese-gelatin mixture until no streaks remain. A light hand is essential here; overmixing will deflate the whipped cream and result in a dense, rather than airy, filling.
Pour and Chill: Pour the luscious filling into your chilled pie crust, spreading it evenly with a spatula. Cover the pie loosely with plastic wrap and refrigerate for at least 4-6 hours, or preferably overnight. This extended chilling time is absolutely crucial for the filling to set completely and firmly, ensuring beautiful, clean slices of your Dreamy No-Bake Vanilla Cream Pie.
The Perfect Finish: Whipped Topping & Slicing Secrets
Prepare Topping: Once your pie is fully set, in a chilled bowl, whip the remaining 1 cup of very cold heavy cream with ¼ cup powdered sugar and 1 teaspoon vanilla extract until stiff peaks form. This creates a stable, pipeable topping.
Decorate and Serve: Pipe or spread the whipped cream over the top of the pie. For clean, elegant slices, run a sharp knife under hot water, wipe it dry, and make each cut. Repeat for every slice. Serve your Dreamy No-Bake Vanilla Cream Pie chilled for the best texture and flavor.
Chef’s Secrets: Elevate Your Dreamy No-Bake Vanilla Cream Pie
Achieving bakery-quality results at home is all about the details. These pro tips will ensure your no-bake pie is nothing short of perfect.
The Magic of Chilled Ingredients
Keep Cream and Bowls Cold: For the best whipped cream results, ensure your heavy cream, mixing bowl, and whisk attachment are thoroughly chilled. Even placing the bowl and whisk in the freezer for 15-20 minutes before whipping can make a significant difference. Cold conditions allow the fat globules in the cream to emulsify properly, yielding stable, fluffy peaks that hold their shape.
Don’t Rush the Chill: The Ultimate Setting Secret
Embrace the Overnight Chill: While 4-6 hours might seem sufficient for the filling to set, an overnight chill (8+ hours) is truly the “secret weapon” for a no-bake pie that holds its shape beautifully and slices cleanly every time. This extended period allows the gelatin to fully firm up and the flavors to meld, creating a truly perfect pie.
Gelatin: Dissolve Completely, Cool Slightly
Ensure Gelatin is Fully Dissolved: After blooming, ensure the gelatin is completely clear and dissolved in the microwave. Any undissolved granules can lead to a gritty texture in your filling. Also, let the dissolved gelatin cool for a few minutes before adding it to the cream cheese mixture; if it’s too hot, it could curdle the dairy and negatively impact the texture of your creamy vanilla pie.
The Art of Gentle Folding (No Overmixing!)
Fold with Care: Once the whipped cream is incorporated into the cream cheese mixture, fold gently until just combined and no streaks of cream cheese are visible. Overmixing will deflate the whipped cream, resulting in a dense, less airy filling. A light hand keeps the “dreamy” texture intact, crucial for this luscious dessert.
Mastering the Clean Slice
Warm Knife for Perfect Slices: For bakery-worthy, clean slices of your Dreamy No-Bake Vanilla Cream Pie, run your sharp knife under hot water for a few seconds, then wipe it completely dry before making each cut. The warm blade glides through the filling cleanly, preventing sticking and tearing, ensuring a beautiful presentation every time.
Troubleshooting Your Dreamy No-Bake Vanilla Cream Pie
Even seasoned bakers encounter hiccups. Here are solutions to common no-bake pie challenges:
Problem: My Pie Filling is Still Runny
Solution: The most common culprits are insufficient chilling time or improperly dissolved gelatin. Ensure your pie chills for at least 8 hours, preferably overnight, allowing the gelatin ample time to set. For gelatin, double-check that it bloomed fully and was completely clear after microwaving; undissolved granules prevent proper setting.
Problem: The Whipped Topping is Flat or Won’t Stiffen
Solution: This usually happens if the heavy cream wasn’t cold enough or if the bowl/beaters weren’t chilled. Ensure all equipment and the cream are very cold before whipping. Also, make sure you’re using full-fat heavy cream (36% butterfat or higher), not half-and-half or light cream, as these lack the fat content needed for stiff peaks.
Problem: My Graham Cracker Crust is Crumbly
Solution: The crust wasn’t compacted enough or didn’t chill long enough. Use the bottom of a flat glass or measuring cup to firmly press the mixture into the pie plate, especially up the sides. An adequate chilling time (at least 15 minutes, or even 30) helps the butter solidify and bind the crumbs, preventing a crumbly crust.
Essential Tools for Your No-Bake Pie Success
Having the right tools makes the process of creating your Dreamy No-Bake Vanilla Cream Pie much smoother and more enjoyable.
9-inch Pie Plate
This is the standard size for this recipe, ensuring the perfect thickness for your crust and filling layers. A glass or ceramic pie plate works beautifully for even chilling.
Electric Mixer (Handheld or Stand)
An electric mixer is indispensable for this recipe. It’s crucial for efficiently whipping the heavy cream to fluffy peaks and beating the cream cheese until it’s perfectly smooth and creamy, eliminating any lumps.
Large Mixing Bowls (Chilled if Possible)
You’ll need at least two large mixing bowls – one for the cream cheese mixture and one for whipping the cream. Chilling the bowl used for whipping cream beforehand is a simple trick that significantly aids in achieving stiff peaks.
Small Microwave-Safe Bowl
This small bowl is specifically for blooming and dissolving the gelatin. Its size makes it ideal for precisely heating the small amount of liquid required for the gelatin without scorching.
Frequently Asked Questions About Dreamy No-Bake Vanilla Cream Pie
Can I Use a Different Type of Crust?
Absolutely! While graham cracker is classic, you can experiment with crushed vanilla wafers, chocolate cookies, or even a pre-made shortbread crust for a different flavor profile. Just ensure the amount of butter is adjusted to achieve the right consistency for pressing, typically about 1/4 to 1/2 cup of melted butter per 1 ½ cups of crumbs.
How Long Does Dreamy No-Bake Vanilla Cream Pie Last?
This pie is best enjoyed within 3-4 days when stored properly covered in the refrigerator. After that, the crust may soften and the filling’s texture might slightly change, though it will still be safe to eat. Always keep it chilled for optimal freshness and food safety.
Can I Make This Pie Ahead of Time?
Yes, it’s an excellent make-ahead dessert! The filling requires a minimum of 4-6 hours to set, but overnight chilling is highly recommended for the best results. You can prepare the entire pie a full day in advance and add the fresh whipped topping just before serving to keep it looking pristine.
Can I Freeze This Pie?
While you can freeze this pie, the texture of the cream cheese filling might become slightly less smooth upon thawing, potentially becoming a bit grainy. If freezing, do so before adding the whipped topping. Wrap tightly in plastic wrap and then foil for up to one month. Thaw the pie in the refrigerator overnight before serving.
Are There Any Dairy-Free or Gluten-Free Alternatives?
For a gluten-free version, simply use gluten-free graham crackers or a gluten-free cookie crust, adjusting butter as needed. Dairy-free cream cheese alternatives and chilled full-fat coconut cream (the solid part only) can substitute dairy components. Be aware that the texture and setting may vary slightly with these substitutions, and you might need to adjust the gelatin slightly or use a specific vegan gel substitute. For more extensive guidance on making similar treats accessible, explore our Guide to Vegan Baking Substitutions.
Serving Suggestions for Your Dreamy No-Bake Vanilla Cream Pie
Elevate your slice of vanilla cream pie with these simple yet impactful serving ideas:
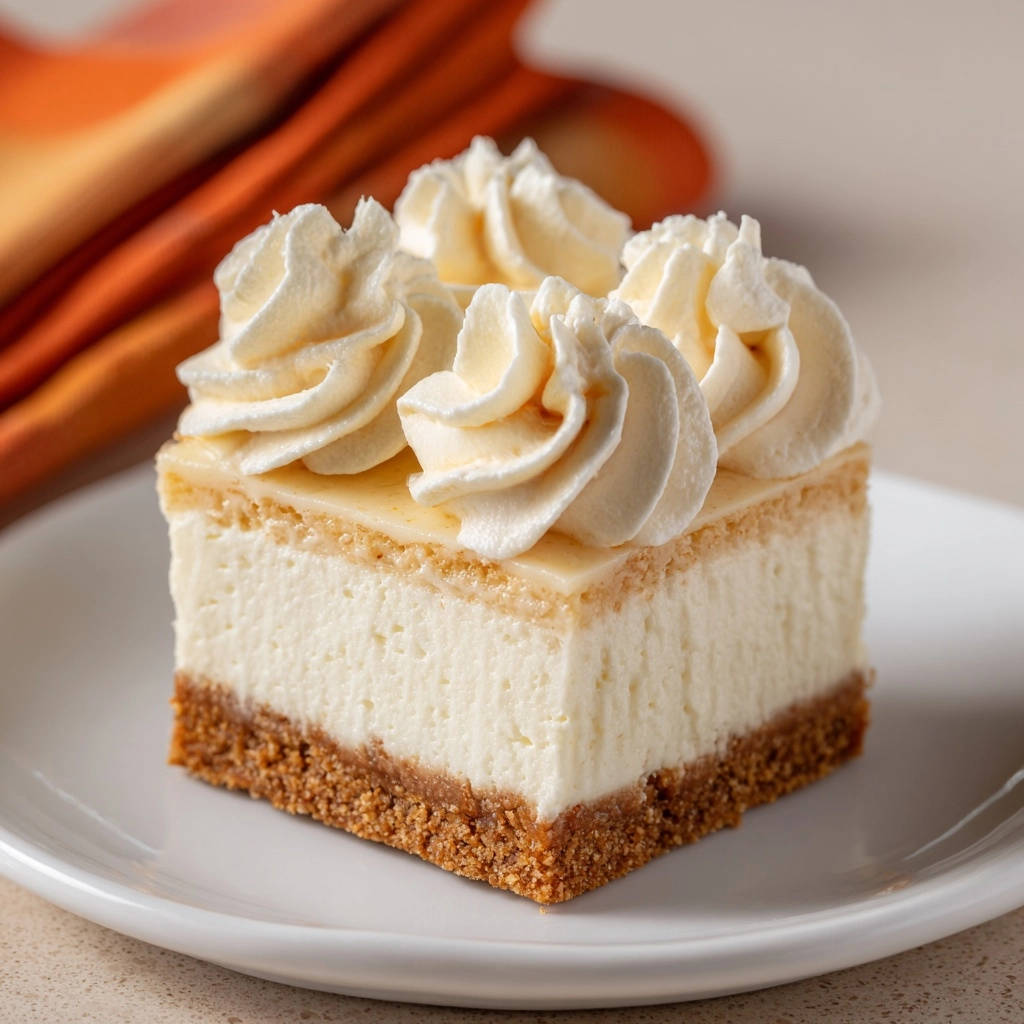
Fresh Berries and Fruit Coulis
Brighten each slice with a handful of fresh, vibrant berries like raspberries, sliced strawberries, or blueberries. A drizzle of homemade berry coulis adds a lovely tart contrast and beautiful color.
Chocolate Shavings or Cocoa Powder
For a touch of decadence, sprinkle dark chocolate shavings or a dusting of unsweetened cocoa powder over the whipped topping. A curl of white chocolate also adds visual appeal and a complementary sweetness.
Toasted Coconut or Chopped Nuts
Add a delightful textural crunch with lightly toasted coconut flakes, or finely chopped pecans or walnuts. Scatter them over the top just before serving for an extra layer of flavor and interest.
Coffee or syrup Pairing
Serve alongside a freshly brewed cup of coffee or a shot of espresso to complement its rich flavor. For an adult treat, a small glass of a cream syrup or dessert grape juice can also be a wonderful pairing.
Store Your No-Bake Dream: Keeping Your Pie Fresh
Proper storage is key to maintaining the perfect texture and flavor of your Dreamy No-Bake Vanilla Cream Pie.
Refrigerator Storage
Always store leftover pie in an airtight container or covered loosely with plastic wrap in the refrigerator. This prevents it from absorbing odors from other foods and keeps the filling firm and delicious.
Do Not Store at Room Temperature
Due to the dairy and gelatin content, this pie should not be left at room temperature for more than 2 hours. It’s best served chilled directly from the refrigerator to maintain its integrity and for food safety.
Share Your Culinary Creation!
There you have it – the ultimate guide to creating a truly Dreamy No-Bake Vanilla Cream Pie that will impress everyone who tries a slice. Say goodbye to runny fillings and hello to perfectly set, irresistibly creamy dessert bliss. We hope this recipe becomes a cherished favorite in your kitchen, bringing smiles with every bite.
Did you make this recipe? We’d love to see your masterpiece! Share your photos on social media and tag us, or leave a comment below with your feedback and any creative twists you added. Your success stories inspire us to keep sharing delicious, reliable recipes!
Looking for more no-bake delights? Explore our collection of easy no-bake dessert recipes for your next sweet adventure, offering a variety of simple yet satisfying treats.
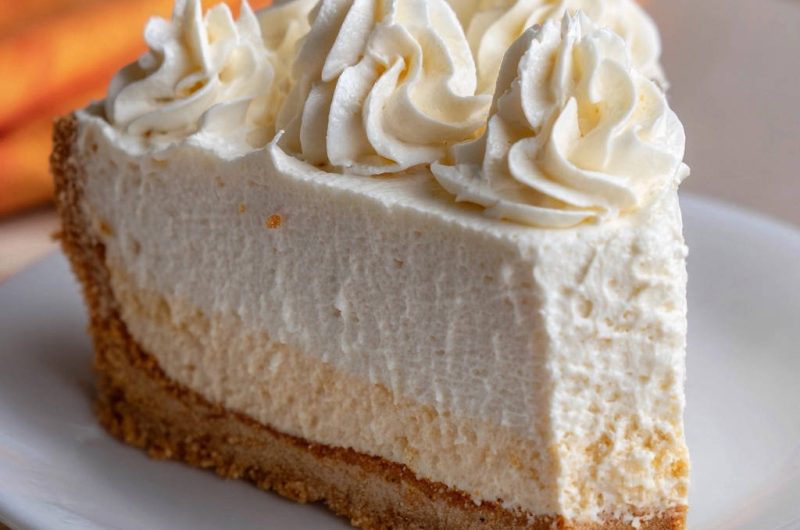
Vanilla Cream Pie
Course: DessertCuisine: AmericanDifficulty: easy8
servings30
minutes450
kcal240
minutesNever struggle with a runny no-bake pie again! This recipe guarantees a perfectly firm yet creamy vanilla cream pie every time, without any oven time. It’s your secret weapon for a beautiful, ready-to-serve dessert.
Ingredients
For the Crust:
1 ½ cups graham cracker crumbs (about 10-12 full sheets)
¼ cup granulated sugar
½ cup unsalted butter, melted
For the Filling:
8 ounces full-fat cream cheese, softened
1 cup powdered sugar
2 teaspoons vanilla extract
1 cup heavy cream, very cold
1 ½ teaspoons unflavored gelatin powder
¼ cup cold water
For the Whipped Topping:
1 cup heavy cream, very cold
¼ cup powdered sugar
1 teaspoon vanilla extract
Directions
- Prepare the Crust: In a medium bowl, combine graham cracker crumbs and granulated sugar. Pour in the melted butter and mix until well combined and moist. Press the crumb mixture firmly into the bottom and up the sides of a 9-inch pie plate. Use the bottom of a glass or a measuring cup to compact it tightly. Chill the crust in the refrigerator for at least 15 minutes while you prepare the filling.
- Prepare the Gelatin for a Perfect Set: In a small microwave-safe bowl, sprinkle the unflavored gelatin powder evenly over ¼ cup cold water. Let it sit undisturbed for 5 minutes to “bloom” (it will become thick and jelly-like). After blooming, microwave the gelatin mixture for 10-15 seconds, or until it is completely clear and dissolved. Stir well to ensure no granules remain. Let it cool slightly, but do not allow it to set.
- Make the Cream Cheese Base: In a large mixing bowl, using an electric mixer, beat the softened cream cheese until it is smooth and creamy, about 2-3 minutes. Gradually add the powdered sugar, beating until fully incorporated and smooth. Beat in the vanilla extract.
- Whip the Cream: In a separate, chilled bowl, whip the 1 cup of very cold heavy cream until soft peaks form. Be careful not to overbeat it.
- Combine Filling and Chill to Set: Gradually pour the slightly cooled, dissolved gelatin into the cream cheese mixture while continuously beating on low speed. Mix until just combined. Gently fold the whipped cream into the cream cheese mixture until no streaks remain. Do not overmix; this keeps the filling light and airy. Pour the filling into the chilled pie crust, spreading it evenly. Cover the pie loosely with plastic wrap and refrigerate for at least 4-6 hours, or preferably overnight. This extended chilling time is absolutely crucial for the filling to set completely and firmly, ensuring beautiful, clean slices.
- Prepare Whipped Topping and Serve: Once the pie is fully set, in a chilled bowl, whip the remaining 1 cup of very cold heavy cream with ¼ cup powdered sugar and 1 teaspoon vanilla extract until stiff peaks form. Pipe or spread the whipped cream over the top of the pie. Slice with a sharp, warm knife (run under hot water and wipe dry) for clean cuts, and serve chilled.
Notes
- Extended chilling (4-6 hours or overnight) is crucial for a firm set. Use a warm knife for clean slices.