Raspberry Thumbprint Cookies with No Jam Overflow
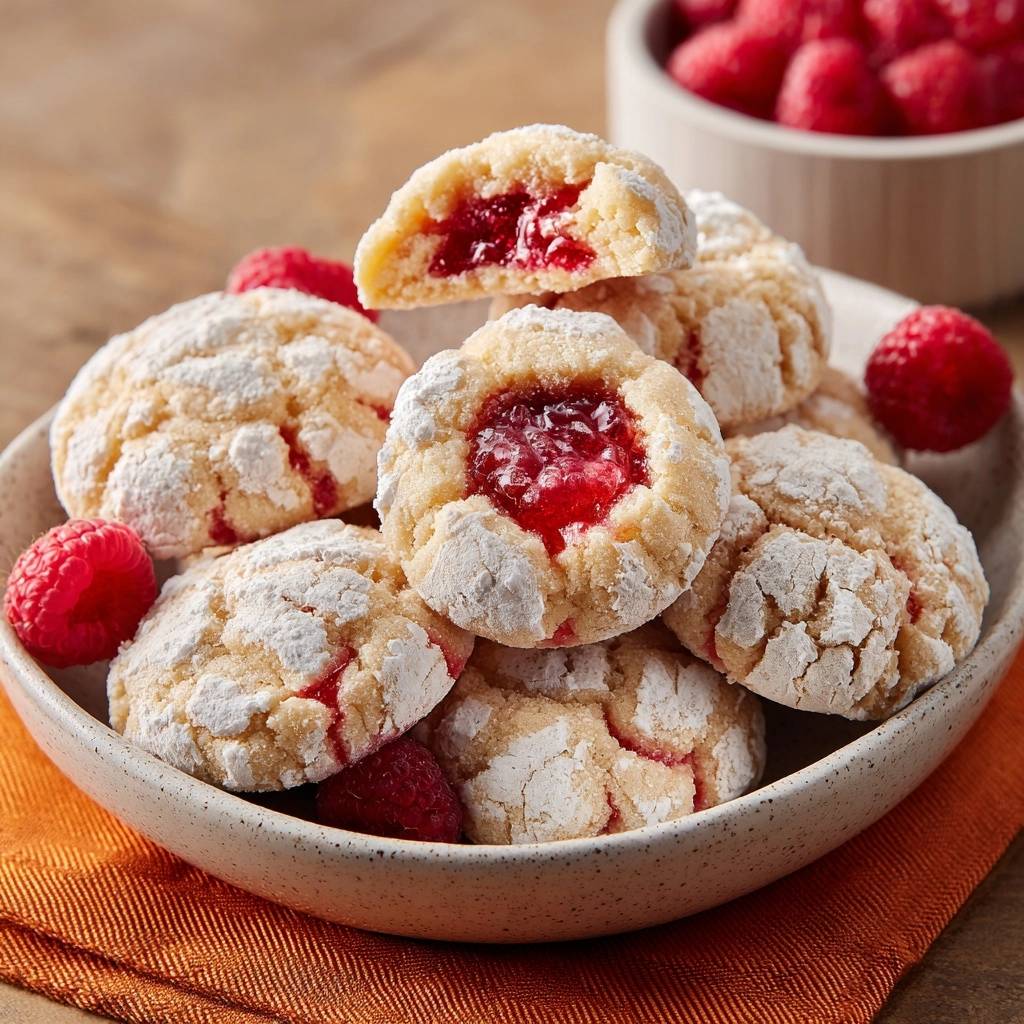
Ever pulled raspberry thumbprint cookies from the oven only to find jam bubbling everywhere and ruining those pretty centers? You know the drill: sticky messes that sink or leak, leaving you with sad, uneven treats. This raspberry thumbprint cookies recipe flips the script by baking the indents first, so they set perfectly before you add the jam.
That’s why this method delivers flawless raspberry jam cookies every time. No more overflow disasters. Instead, you get glossy jam pools nestled in buttery shortbread that hold their shape through cooling and serving.
The secret lies in that hot re-indent right after baking. While the centers stay soft, the edges firm up just enough via the Maillard reaction to lock everything in place. You’ll see the difference immediately, and it makes all the difference for holiday baking or any cookie swap.
Why Pre-Bake Method Perfects Raspberry Thumbprint Cookies
Traditional raspberry thumbprint cookies bake with jam inside, causing it to bubble and overflow as the dough spreads. However, this pre-bake technique sets the shape first. The dough firms without filling, creating stable wells for jam later.
Therefore, you avoid sinking jam or messy edges. In addition, the cookies gain a glossy jam shine that looks professional. Compared to classic shortbread, these raspberry jam cookies offer cleaner presentation and better texture contrast.
Physics plays a big role here. The dough’s structure solidifies before heat melts the jam, preventing leaks. You’ll love how this works for raspberry thumbprint cookies every batch.
Science of Dough Setting Before Filling
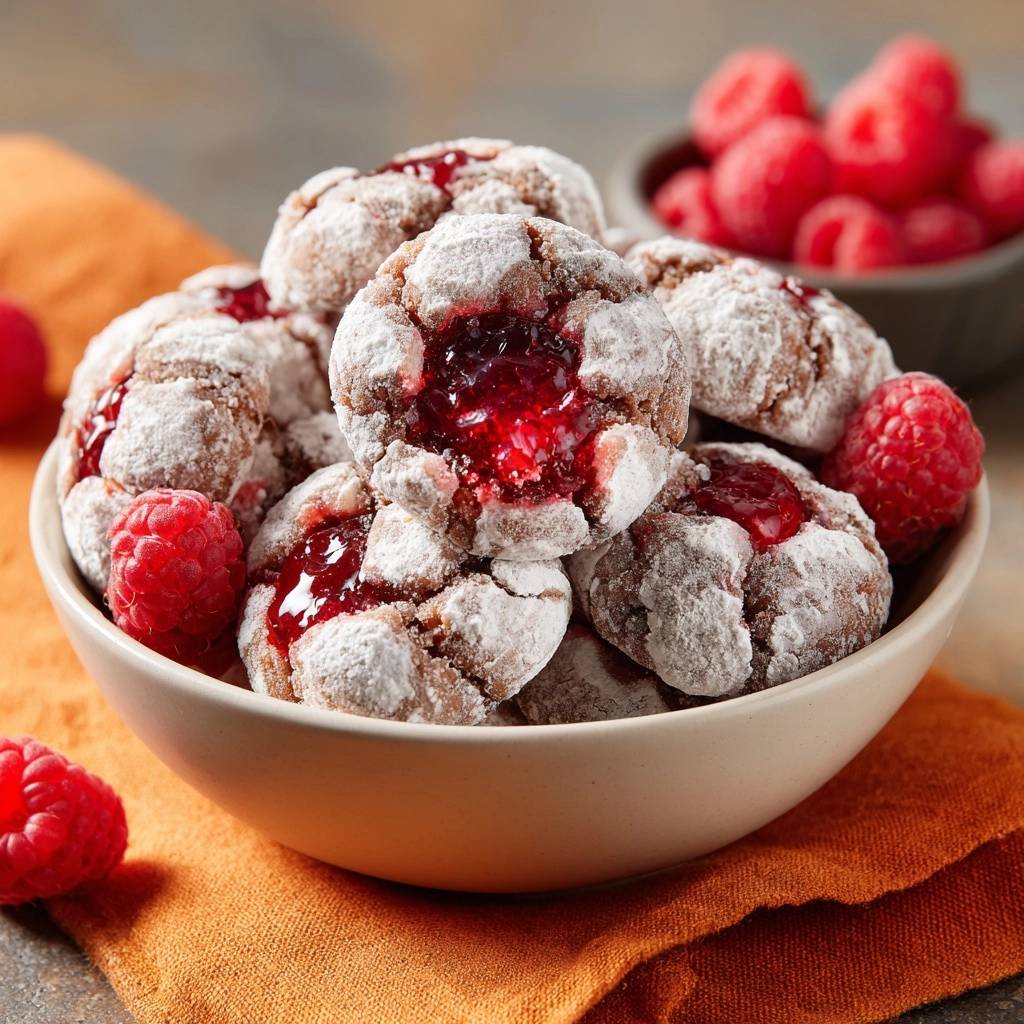
During baking at 350°F, edges undergo the Maillard reaction for golden structure while centers remain soft. Chilling beforehand relaxes gluten, so dough holds indents without cracking. Therefore, gently re-indenting while hot deepens wells perfectly without crumbling.
Texture Contrast: Buttery Crumble Meets Tart Jam
These raspberry thumbprint cookies deliver a melt-in-your-mouth shortbread crumb from butter and powdered sugar. Then, tart raspberry jam cuts through with bright, jammy fruitiness. The combo creates irresistible contrast in every bite.
Key Ingredients for Flawless Raspberry Thumbprint Cookies
Start with 1 cup (226g) softened unsalted butter for the ideal fat ratio that ensures tenderness in raspberry thumbprint cookies. Powdered sugar, 1/2 cup (60g) plus extra for rolling, keeps the crumb smooth without graininess thanks to its cornstarch. Vanilla extract, 1 teaspoon, adds pure warmth that ties flavors together.
Next, 2 cups (250g) all-purpose flour and 1/4 teaspoon salt provide structure without toughness. Raspberry jam, 1/2 cup, needs the right viscosity to pool without running. Fresh raspberries for serving boost antioxidants and fresh appeal in these raspberry jam cookies.
Therefore, quality matters: unsalted butter controls saltiness, and pure vanilla elevates taste. No buttermilk or odd add-ins here; these pantry staples shine.
Butter and Sugar Duo for Tender Crumb
Softened butter creams airy with powdered sugar in 2 minutes, turning pale and fluffy. Powdered sugar’s cornstarch absorbs moisture for ultra-smooth raspberry thumbprint cookies. Skip granulated to avoid grit.
Choosing Best Raspberry Jam Consistency
Pick thick raspberry jam for raspberry thumbprint cookies; test by spooning: it should hold shape without runny drips. Seedless glides smoothly, but seeded adds pop. Lemon curd works too for citrus twist.
Essential Tools for Raspberry Thumbprint Cookie Success
You don’t need fancy gear for raspberry thumbprint cookies. An electric mixer aerates butter perfectly. A #50 scoop (1 tablespoon) ensures uniform 1-inch balls, and parchment-lined sheets prevent sticking.
In addition, a wooden spoon end re-indents hot cookies without burns. Wire racks speed cooling to avoid sogginess. Budget beaters work fine; no pro tools required.
Mixing and Scooping Precision Tools
Use paddle attachment or beaters for creaming; it incorporates air best. #50 scoop yields 24-30 even raspberry thumbprint cookies. Thumb or spoon creates 1/2-inch deep indents consistently.
Step-by-Step: Forming Raspberry Thumbprint Cookie Dough
Beat softened butter and 1/2 cup powdered sugar until light and creamy, about 2 minutes; you’ll see it pale and fluff up. Add vanilla, then mix in flour and salt on low. Stop when soft dough forms; overmixing toughens your raspberry thumbprint cookies.
Therefore, wrap and chill 30 minutes. This firms it for easy rolling and prevents spreading. Dough should feel cool and pliable, not sticky.
Common pitfall: skipping chill leads to flat raspberry jam cookies. Pro tip: chill longer in hot kitchens for best results.
Creaming Butter for Airy Shortbread Base
Cream at medium speed; watch for volume doubling and creamy sheen after 2 minutes. Pure vanilla smells fragrant as it blends. This emulsion sets tender raspberry thumbprint cookies.
Chilling Dough to Prevent Spreading
Press dough into disc, wrap tightly in plastic. Fridge 30 minutes; freezer cuts to 15. Chilled dough rolls in sugar without sticking for perfect raspberry jam cookies.
Shaping and Baking Raspberry Thumbprint Cookies
Preheat to 350°F. Scoop 1-tablespoon balls, roll heavily in powdered sugar (double-dip for cracks), space 2 inches apart. Press thumb for 1/2-inch indent; they’ll yield 24-30 raspberry thumbprint cookies.
Bake 10-12 minutes until edges set and bottoms golden, centers soft. Right out of oven, deepen indents with wooden spoon while hot. Cool on sheet 5 minutes, then rack; they firm as they cool.
Therefore, spacing prevents merging. Rotate sheets halfway if your oven runs hot for even raspberry jam cookies.
Powdered Sugar Rolling for Snowy Finish
Roll in shallow bowl of powdered sugar; shake off excess. Heavy coat cracks beautifully post-bake on raspberry thumbprint cookies. Double-dip amps the snowy look.
Baking Timing for Set Indents
Middle rack, rotate if needed. Pull at 10-12 minutes: edges firm, no browning centers. This sets structure for jam in raspberry thumbprint cookies.
Filling and Finishing Raspberry Thumbprint Cookies
Cool cookies fully, about 20 minutes, so structure locks in jam. Spoon 1/2 teaspoon raspberry jam per indent; it pools perfectly without overflow. Dust generously with powdered sugar.
Serve with fresh raspberries on top. Store airtight up to 5 days at room temp. Pro tip: jam softens slightly over time but holds shape.
What’s Next?
Try these delicious pairings:
- Fluffy Blueberry Pancakes: Unlock Incredible Fluffiness
- Fluffy Oatmeal Pancakes: Your Secret to Ultimate Fluff!
Post-Bake Jam Spooning Technique
Filled cool cookies hold jam steady; no sinking thanks to set dough. Use small spoon for precise 1/2 teaspoon in raspberry thumbprint cookies. Avoid piping to prevent air pockets.
Avoiding Mistakes in Raspberry Thumbprint Cookies
Dough sticky? Add flour 1 tablespoon at a time. Indents flattening? Chill longer before baking raspberry thumbprint cookies. Jam leaking? Ensure full bake for set edges.
In humid spots, extra chill helps. High altitude? Drop temp 25°F and bake longer. Overmixed dough turns tough; mix minimally for tender raspberry jam cookies.
Fixing Flat or Cracked Cookie Shapes
Too close spacing or warm dough flattens raspberry thumbprint cookies. Re-indent hot prevents cracks. Check oven temp accuracy first.
Jam Filling Pitfalls and Solutions
Overfill causes minor overflow even post-bake; stick to 1/2 teaspoon. Thin jam runs; thicken with cornstarch for raspberry thumbprint cookies.
Flavor Twists on Raspberry Thumbprint Cookies
Swap raspberry jam for blackberry or apricot in thumbprint cookies. Add almond extract or lemon zest to dough. For gluten-free, use almond flour blend.
Chocolate ganache fills richly too. Vegan? Plant butter works. Scale up dough by 50% for bigger batches of raspberry jam cookies.
Berry Jam Alternatives and Zest Boosts
Mix strawberry-raspberry jam for depth. Lemon zest pairs tartly with raspberry thumbprint cookies. Apricot adds sunny contrast.
Make-Ahead Guide for Raspberry Thumbprint Cookies
Freeze dough balls 2 months; thaw, roll in sugar, bake. Baked unfilled bases freeze 3 months; fill after thawing. Filled ones fridge 3 days airtight.
Label bags with dates. For holidays, prep dough week ahead. Ship in tins; they travel well as raspberry thumbprint cookies.
Freezing Dough Balls vs. Baked Bases
Portion dough balls on tray, freeze solid, then bag. Re-roll in sugar post-thaw for fresh raspberry jam cookies. Bases thaw faster, fill same day.
Perfect Pairings for Raspberry Thumbprint Cookies
Earl Grey tea cuts richness in raspberry thumbprint cookies. Espresso amplifies chocolate twists. Pair with goat cheese on platters or vanilla ice cream for dessert.
If you enjoy using a cookie scoop for even results, try the same method with these triple chocolate chunk brownie cookies.
Box for gifts with ribbon. They shine in holiday spreads or brunch.
Raspberry Thumbprint Cookies: Your Questions Answered
Can I Use Seedless Raspberry Jam?
Yes, seedless raspberry jam works great for smooth pools in thumbprint cookies. It spoons easily without seeds disrupting texture. Seeded adds crunch if you prefer contrast.
How Long Do Raspberry Thumbprint Cookies Last?
Store airtight at room temp up to 5 days; jam stays firm. Fridge extends to 7 days but softens texture. Freeze unfilled bases 3 months; thaw and fill fresh.
Gluten-Free Raspberry Thumbprint Cookies Possible?
Absolutely; swap all-purpose flour 1:1 with gluten-free blend plus xanthan gum if needed. Chill extra to prevent spreading. Almond flour mix adds nutty tenderness.
Why Chill Dough for Thumbprint Cookies?
Chilling firms butter, relaxes gluten, and prevents spreading in raspberry thumbprint cookies. It eases rolling in sugar without sticking. Skip it, and shapes flatten during bake.
If you’re adjusting for weather and altitude here, the same careful technique works for these soft-set white chocolate cranberry orange cookies.
Scaling Recipe for Larger Batches?
Double ingredients for 48-60 raspberry thumbprint cookies; chill dough in batches. Don’t overload sheets; bake 2 racks max. Add 5 chill minutes per extra portion.
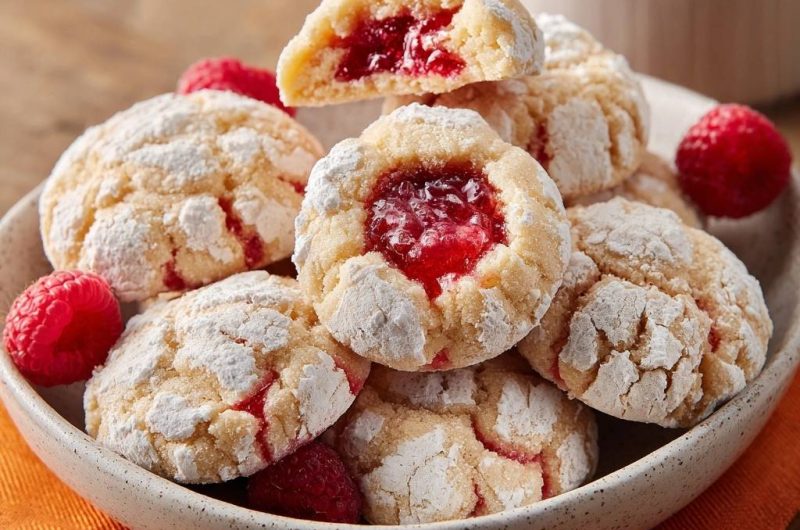
Raspberry Thumbprint Cookies
Course: DessertCuisine: AmericanDifficulty: easy24
cookies20
minutes12
minutes120
kcal60
MinutesTired of thumbprint cookies where the jam leaks out and ruins the centers? Bake the cookies first to set their shape, then fill with jam after for zero bubbling and perfect results every time.
Ingredients
1 cup unsalted butter, softened
1/2 cup powdered sugar
1 teaspoon vanilla extract
2 cups all-purpose flour
1/4 teaspoon salt
1/2 cup raspberry jam
1/2 cup powdered sugar, for rolling
Fresh raspberries, for serving
Directions
- In a large bowl, beat softened butter and 1/2 cup powdered sugar with an electric mixer until light and creamy, about 2 minutes. Beat in vanilla extract.
- Add flour and salt, mixing on low speed until a soft dough forms. Do not overmix.
- Wrap dough in plastic and chill for 30 minutes. This makes it easy to roll without sticking.
- Preheat oven to 350 degrees F. Line baking sheets with parchment paper.
- Scoop dough into 1-inch balls (about 1 tablespoon each). Roll each ball in powdered sugar to coat heavily. Place 2 inches apart on prepared sheets. Gently press thumb into center of each ball to create a 1/2-inch deep indent.
- Bake for 10-12 minutes, until edges are set and bottoms are lightly golden but centers are still soft. Cookies will firm up as they cool.
- Remove from oven. While hot, gently deepen indents using the end of a wooden spoon or your thumb. Let cool on sheet for 5 minutes, then transfer to a wire rack.
- Once cookies are fully cool (about 20 minutes), spoon 1/2 teaspoon raspberry jam into each indent. The pre-baked structure locks in the jam with no overflow or sinking.
- Dust generously with extra powdered sugar for that snowy finish. Serve with fresh raspberries. Store in airtight container up to 5 days.
Notes
- Chill dough for 30 minutes to make rolling easier. Deepen indents while cookies are hot for best jam pooling. Store in airtight container up to 5 days.