Mastering Pan-Seared Lemon Butter Salmon
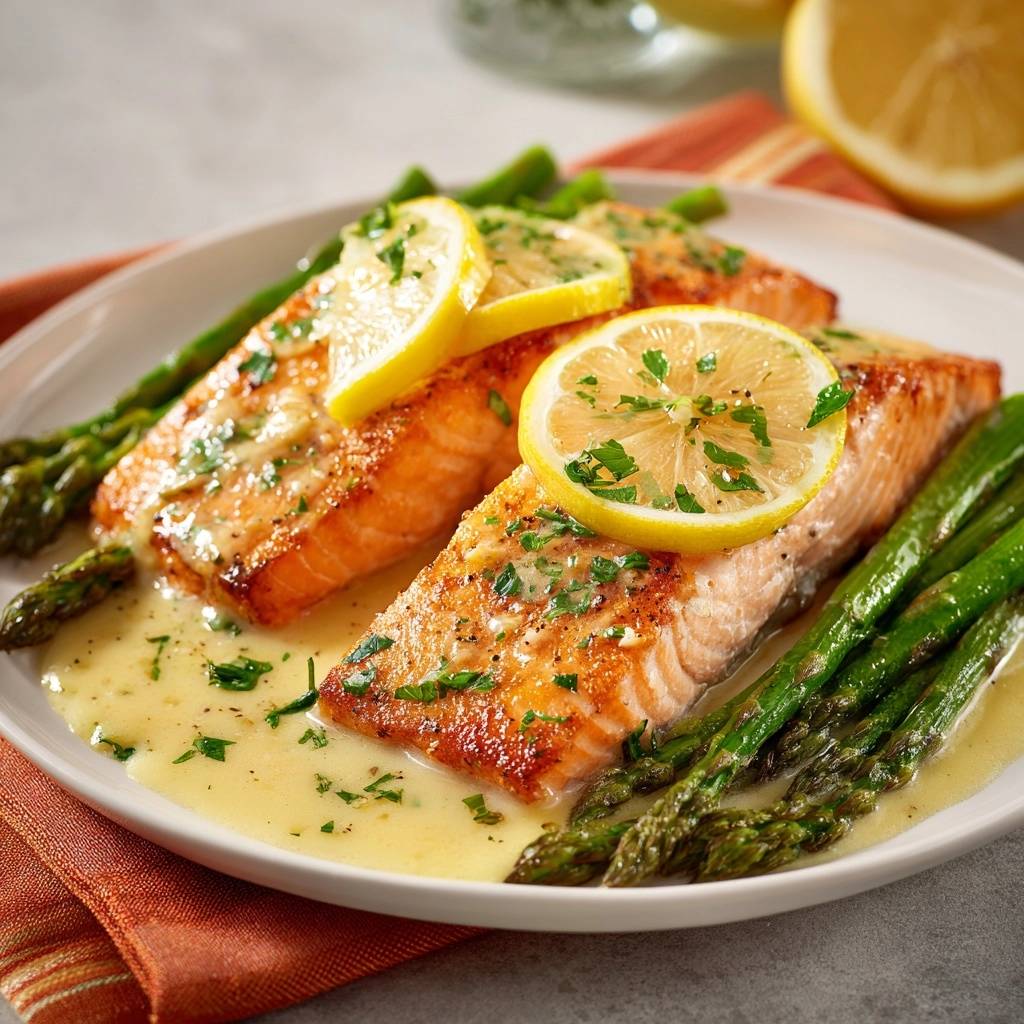
Most home cooks dread making salmon because it often turns out like a dry, rubbery brick. You’ve likely experienced that frustrating moment when the skin sticks to the pan or the white protein gunk leaks out everywhere. This recipe changes that by ditching the high-heat scramble for a controlled, gentle approach.
The secret lies in the cold-pan start and a velvety butter emulsion. Instead of shocking the fish with a screaming hot skillet, we let the temperature rise gradually to keep the fibers tender. This method ensures a glass-like crunch on the skin while the center remains buttery and soft.
Expertise in seafood comes down to moisture management. I’ve found that the most critical step isn’t the seasoning, but how dry you get that skin before it touches the oil. If there’s even a drop of water left, the fish will steam rather than sear, ruining that restaurant-quality crust you’re after.
The Science of Moisture and Heat Control
Salmon is a delicate protein with layers of fat tucked between muscle fibers. When you hit it with extreme heat immediately, those fibers contract violently. This squeeze forces out the moisture and the albumin, which is that unappealing white substance that bubbles to the surface.
By starting with a cold pan, you allow the heat to penetrate the fish slowly. This gradual climb preserves the integrity of the fats, keeping them inside the meat where they belong. You’ll notice the texture stays flaky and succulent rather than becoming tight and chewy.
Furthermore, this controlled environment prevents the fish from overcooking on the outside before the middle is done. It gives you a much wider window of perfection. You aren’t racing against a burning pan; you’re guiding the fish to a perfect 125°F internal temperature.
Why the Cold Pan Method Works
Traditional searing methods often cause the salmon fillet to curl up as soon as it hits the heat. This happens because the skin shrinks faster than the flesh. Starting cold allows the skin to relax and the fat to render out slowly, acting as its own frying medium.
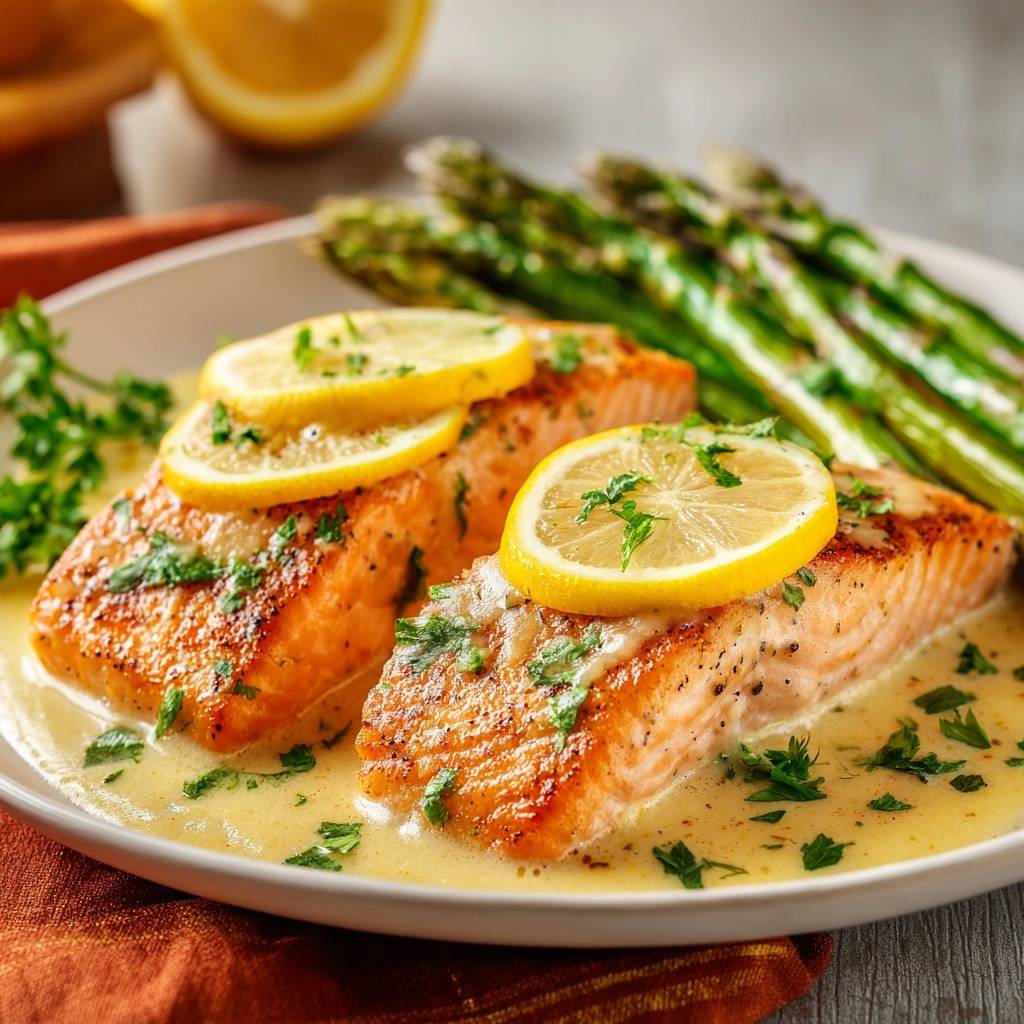
As the pan heats up, the skin fries in its own rendered oil, creating a uniform, golden-brown surface. You won’t need to fight with a spatula to keep the fish flat. The result is a consistent, potato-chip-like crunch that stays crispy even after you pour on the sauce.
The Role of Heavy Cream in Emulsification
A standard lemon butter sauce often breaks, leaving you with a greasy puddle of yellow oil. However, adding a splash of heavy cream acts as a powerful stabilizer. The proteins in the cream bind the fats and liquids together into a cohesive, opaque glaze.
This creates that luxurious, pale yellow sauce you see in high-end bistros. It clings to the salmon and the asparagus rather than running off the plate. The cream also mellows the sharp acidity of the lemon, resulting in a balanced, velvety finish.
That same buttery lemon sauce pairs beautifully with white fish in this pan-seared white fish and roasted potatoes recipe.
Essential Components for Pan-Seared Lemon Butter Salmon
Quality is everything when you’re working with so few ingredients. I recommend looking for Atlantic salmon if you want a higher fat content and a milder flavor. Sockeye is leaner and more robust, but it cooks much faster, so you’ll need to watch the clock closely.
Fresh garlic is a must here; the jarred stuff has a metallic aftertaste that ruins the delicate lemon notes. Similarly, use a heavy-bottomed non-stick skillet if possible. It provides the most even heat distribution and ensures you don’t lose that precious skin to the bottom of the pan.
If you can’t find thin asparagus, you can use thicker spears, but you’ll need to peel the bottom half of the stalks. This ensures they cook through in the short two-minute window while the salmon finishes. Fresh parsley adds the necessary hit of earthiness to cut through the rich butter.
Selecting the Right Salmon Cut
Always aim for center-cut fillets rather than the thin tail pieces. Center cuts have a uniform thickness, which means the entire piece of fish will reach the target temperature at the same time. Tail pieces taper off, leading to overcooked ends and a raw middle.
Skin-on is non-negotiable for this recipe. The skin acts as a protective barrier during the long sear, insulating the flesh from the direct heat of the pan. Even if you don’t plan on eating the skin, leaving it on during cooking results in a much juicier fillet.
Fat Ratios: Butter vs. Olive Oil
We use a combination of olive oil and unsalted butter for a specific reason. Olive oil has a higher smoke point, which prevents the butter from burning during the initial sear. The butter provides the flavor and the milk solids needed for that golden color.
Using unsalted butter is a pro move because it gives you total control. Different brands of salted butter have varying sodium levels, which can make your sauce unpredictable. By starting with unsalted, you can season the fish and the sauce precisely to your liking.
Preparation: The Secret to Golden Skin
Moisture is the absolute enemy of a good sear. If the salmon is damp, the heat of the pan will turn that water into steam. Steam cooks the fish, but it won’t let it brown. You’ll end up with grey, soggy skin every single time.
Take a paper towel and press it firmly into every nook and cranny of the fish. I often let my salmon sit uncovered in the fridge for 30 minutes before cooking. This air-drying technique tightens the skin and guarantees a superior crunch once it hits the oil.
Step-by-Step: Searing the Perfect Fillet
Cooking salmon is a sensory experience. You need to listen to the sizzle and watch the colors change. When you first place the fish in the cold pan, it will be silent. As the heat rises, you’ll hear a gentle bubbling that eventually turns into a steady, rhythmic crackle.
Don’t be tempted to crank the heat to high. Medium-high is the sweet spot. You want the heat to move through the fish like a slow tide. If you see the edges of the skin getting too dark too fast, just turn the dial down a notch. You are in control here.
Phase 1: The Initial Render
Once the pan starts sizzling, use a flexible spatula to press down on the fillets for about 30 seconds. This ensures the entire surface of the skin makes contact with the pan. Without this, the skin can bow, leaving you with a crispy ring and a soft, pale center.
Watch the side of the fillet. You will see the flesh turn from translucent pink to an opaque, pale orange. Once that color change has climbed about halfway up the side of the fish, it’s time to flip. This usually takes about 5 to 6 minutes of patient cooking.
Phase 2: Integrating the Asparagus
After the flip, the salmon only needs a couple of minutes. This is the perfect time to toss in your asparagus. The spears will land right in the rendered salmon fat and melted butter, which infuses them with incredible flavor immediately.
You’re looking for the asparagus to turn bright green with just a few charred spots. Use tongs to roll them around so they get coated in the pan juices. They should stay crisp-tender, providing a fresh snap that contrasts with the soft fish.
Phase 3: The Garlic Butter Baste
This is the “Arrosé” technique used in professional kitchens. By adding fresh butter, garlic, and lemon slices at the very end, you create a foaming bath of flavor. Tilt the pan slightly so the butter pools at the bottom with the garlic.
Use a large spoon to continuously drench the top of the salmon with this hot, aromatic butter. This finishes the cooking process gently and adds a nutty, toasted depth to the fish. The garlic should smell fragrant and sweet, never burnt or bitter.
Crafting the Opaque Lemon Butter Glaze
Once the salmon is resting, the pan is full of “fond”—those little brown bits of concentrated flavor. When you whisk in the lemon juice and heavy cream, you’re deglazing the pan and pulling all that flavor into the sauce.
Keep the heat low during this stage. If the cream boils too vigorously, it can separate and look curdled. You want a gentle simmer. Whisk constantly until the sauce thickens enough to coat the back of a spoon. It should look like liquid gold.
Troubleshooting Common Salmon Mistakes
The most common mistake is moving the fish too early. If you try to flip the salmon and it feels stuck, leave it alone! The fish will naturally release from the pan once the skin has fully caramelized and crisped up. Patience is your best friend.
Another pitfall is overcooking. Remember that salmon has “carry-over” heat. If you take it off the pan at 125°F, it will continue to rise to about 130°F while it rests. If you wait until it looks “done” in the pan, it will be dry by the time it hits the table.
Preventing the Fish from Sticking
If you aren’t using a non-stick pan, you must ensure your stainless steel is properly heated before adding the oil, even in a cold-start variation. However, for this specific recipe, the non-stick surface is a safety net that guarantees the skin stays attached to the fillet.
Always ensure your oil and butter are distributed evenly across the pan surface. If there’s a dry spot, that’s where the sticking will happen. A quick swirl of the pan before adding the fish ensures a complete non-stick barrier.
Managing Internal Temperatures
Invest in a digital meat thermometer; it’s the only way to be 100% sure. For a buttery, medium-rare center, pull the fish at 125°F. If you prefer it more firm and opaque throughout, aim for 135°F. Anything beyond 145°F will result in that dry, chalky texture we’re trying to avoid.
Resting the fish for 3 minutes is mandatory. This allows the juices to redistribute through the muscle fibers. If you cut into it immediately, all that moisture will run out onto the plate, leaving the salmon parched.
What to Serve with Salmon
That pan-seared lemon butter salmon calls for sides that soak up the sauce and add contrast. These two recipes fit the bill.
- Use a batch of Soft Buttery Garlic Herb Dinner Rolls to mop up every last drop of lemon butter from the plate.
- The creamy, cheesy texture of Cheesy Broccoli and Rice Squares balances the bright acidity of the salmon without turning mushy.
Optimal Side Dish Pairings
While the asparagus provides a great vegetable component, you’ll want something to soak up that incredible lemon cream sauce. A starch is essential for making this a complete, satisfying meal that feels like a treat.
The sauce is quite rich, so your sides should either embrace that richness or provide a sharp contrast. Think about textures—something soft to go with the flaky fish and something crunchy to match the crispy skin.
Starch Options for Sauce Absorption
Jasmine rice is a fantastic choice because the grains stay separate and act like tiny sponges for the glaze. If you want something more decadent, fondant potatoes or a simple garlic mash will work beautifully with the butter base.
For a quicker option, a piece of toasted sourdough is perfect for swiping through the extra sauce. The slight tang of the bread complements the lemon juice in the emulsion perfectly.
Refreshing Palate Cleansers
Because this dish is high in healthy fats and butter, a bright side salad can really lift the meal. A simple mix of bitter microgreens or thinly shaved fennel with a light vinaigrette works wonders.
The anise notes in fennel are a classic pairing for seafood. It cuts through the creaminess of the sauce and refreshes your palate between bites of the rich salmon.
For a perfect pairing, try our Seared Salmon with Green Herb Sauce, Kale and Crispy Chickpeas.
Expert Tips for Professional Presentation
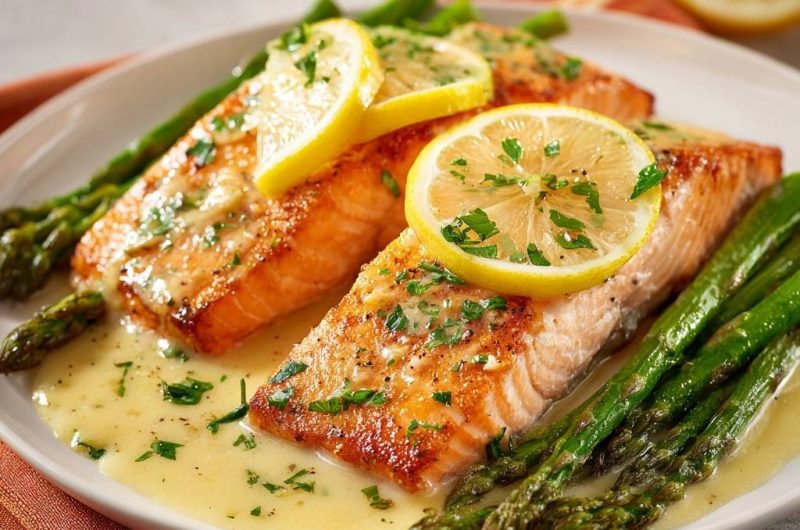
To plate this like a pro, start by pooling a generous amount of the sauce in the center of the plate. Place the asparagus spears down first to create a “bed” for the fish. This adds height and keeps the salmon skin from sitting directly in the liquid, which preserves its crunch.
Set the salmon fillet on top at a slight angle. Garnish with the seared lemon rounds and a final sprinkle of fresh parsley. The contrast between the vibrant green herbs, the charred lemons, and the pale yellow sauce makes the dish look stunning.
Frequently Asked Questions
Can I use frozen salmon for this recipe?
Yes, you can use frozen fillets, but you must thaw them completely in the refrigerator overnight. Once thawed, they tend to hold more moisture than fresh fish. You’ll need to be extra diligent about patting them dry with paper towels to ensure the skin still gets crispy.
What if I don’t have a non-stick skillet?
If you’re using stainless steel or cast iron, you can still use the cold-start method, but you must ensure the pan is exceptionally clean. Any leftover residue from previous meals will cause the fish to bond to the metal. You may also need a tiny bit more oil to create a reliable barrier.
Can I substitute the heavy cream?
Heavy cream is the best stabilizer for this sauce. However, if you need an alternative, full-fat coconut cream works well, though it will add a slight tropical flavor. I don’t recommend milk or half-and-half, as they are too thin and will likely curdle when mixed with the lemon juice.
How do I store and reheat leftovers without making the fish rubbery?
Store leftovers in an airtight container in the fridge for up to two days. To reheat, avoid the microwave at all costs! Place the salmon in a 275°F oven for about 10 to 15 minutes with a splash of water or extra butter covered in foil. This gently warms the fish without drying it out.
Why did my sauce separate and look oily?
This usually happens if the heat is too high when you add the cream or if you didn’t whisk vigorously enough. If it starts to separate, remove the pan from the heat immediately and add a teaspoon of warm water, whisking rapidly to bring the emulsion back together.
Pan-Seared Salmon
Course: Main CourseCuisine: AmericanDifficulty: easy2
servings10
minutes12
minutes540
kcal22
MinutesA foolproof method for perfectly seared salmon featuring a rich, velvety lemon butter emulsion and tender asparagus. This recipe focuses on moisture control and temperature management to avoid rubbery fish.
Ingredients
2 6-ounce salmon fillets, skin on
1 bunch thin asparagus, woody ends trimmed
4 tablespoons unsalted butter, divided
1 tablespoon olive oil
2 cloves garlic, minced
1 large lemon, half sliced into rounds and half juiced
1/4 cup heavy cream (essential for the opaque, creamy sauce shown)
1 tablespoon fresh parsley, chopped
Salt and black pepper to taste
Directions
- Pat the salmon fillets extremely dry with paper towels on all sides. This is the most important step to prevent steaming and rubbery texture. Season the flesh side generously with salt and pepper.
- Place the olive oil and 1 tablespoon of butter in a cold non-stick skillet. Place the salmon fillets skin-side down into the cold pan, then turn the heat to medium-high. Starting with a cold pan allows the fat to render slowly, preventing the protein fibers from tightening up and becoming tough.
- Press down lightly on the fillets with a spatula for the first 30 seconds to ensure even contact. Cook for 5 to 6 minutes without moving them until the skin is crispy and the heat has climbed halfway up the side of the fillet.
- Carefully flip the salmon. Add the asparagus to the open spaces of the pan. Cook for 2 minutes.
- Add 1 tablespoon of butter, the minced garlic, and the lemon slices to the pan. As the butter melts and foams, use a spoon to continuously pour the hot garlic butter over the salmon for 1 minute.
- Remove the salmon and asparagus from the pan and set aside on a plate to rest. The salmon should be at an internal temperature of 125°F for medium-rare or 135°F for medium.
- Lower the heat to medium-low. Add the remaining 2 tablespoons of butter, the lemon juice, and the heavy cream to the pan drippings. Whisk constantly for 1-2 minutes until the sauce emulsifies into a thick, creamy, pale yellow glaze.
- Stir in the fresh parsley. Pour the creamy lemon butter sauce over the salmon and asparagus immediately, ensuring the sauce pools at the base as shown in the image. Serve with the seared lemon slices on top.
Notes
- The cold-pan start is essential for rendering fat slowly and preventing the fish from becoming tough. Always pat the fish dry to ensure a golden crust rather than steaming.