Juicy Cherry Crumble Muffins: Perfectly Tender, Never Soggy!
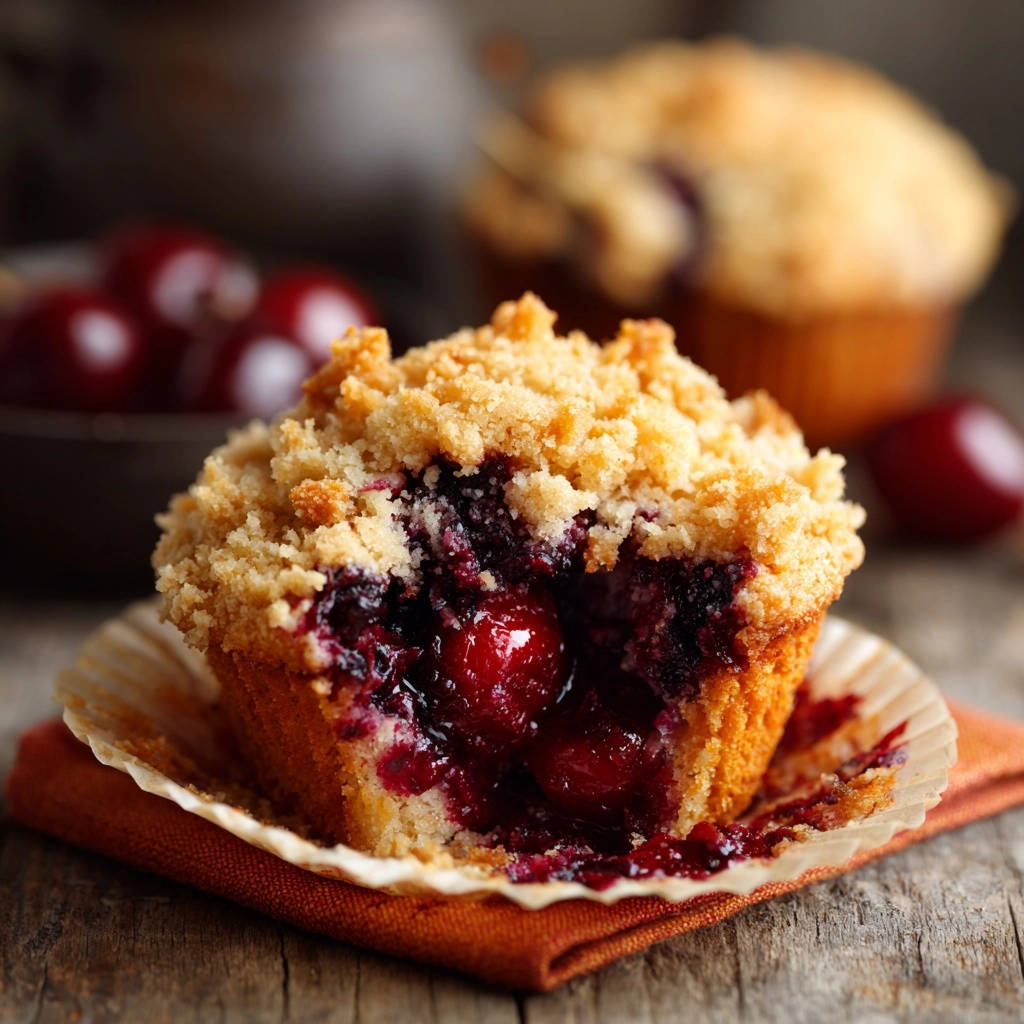
For years, I battled the dreaded soggy bottom when baking fruit muffins, especially with juicy cherries. It was frustrating to pull out a beautiful batch of tender peach cupcakes only to find the fruit had made the base dense and wet. But I finally perfected these Juicy Cherry Crumble Muffins, and now they emerge from the oven flawlessly tender with vibrant, juicy fruit and a delightful crunch, thanks to a simple, game-changing trick.
The Secret to No-Soggy-Bottom Juicy Cherry Crumble Muffins
The common pitfall with fruit-filled muffins is that as the fruit bakes, it releases moisture. This liquid can easily seep into the batter, leading to a gummy, unpleasant bottom layer.
This recipe specifically tackles this issue head-on by coating the cherries with a precise blend of cornstarch and lemon juice. The cornstarch acts as a powerful thickener, absorbing the released juices and transforming them into a luscious, jam-like consistency within the muffin.
Simultaneously, the lemon juice brightens the cherry flavor, ensuring that while the moisture is controlled, the fruit’s vibrant taste remains at the forefront. This method guarantees a consistently tender muffin crumb that never compromises on juicy fruit flavor or that satisfying, golden crumble topping.
Gathering Your Flavor Arsenal: What You’ll Need
For the Irresistible Muffin Base
All-Purpose Flour: Provides the foundational structure for your muffins. Measure it accurately by spooning into a cup and leveling.
Granulated Sugar: Adds essential sweetness and helps with browning and tenderizing the crumb.
Baking Powder: Our primary leavening agent, ensuring a light and airy texture. Ensure yours is fresh for optimal lift.
Salt: A small but mighty ingredient that balances sweetness and enhances all the flavors within the muffin batter.
Large Egg: Binds the ingredients, adds richness, and contributes to the muffin’s overall structure and moisture.
Milk: Adds moisture and helps to create a tender crumb. Any milk type works here, but whole milk yields the richest result.
Vegetable Oil: Contributes significant moisture, resulting in a delightfully tender and moist muffin texture that stays fresh longer than butter-based muffins.
Vanilla Extract: Infuses warmth and classic flavor, complementing the bright cherries perfectly.
Crafting the No-Soggy Cherry Filling
Fresh or Frozen Pitted Cherries: The star of the show! Use either, but if frozen, do not thaw them; they go directly into the mixture.
Granulated Sugar: Sweetens the cherries and helps draw out their natural juices for the cornstarch to absorb.
Cornstarch: The crucial ingredient that thickens the cherry juices, preventing them from making the muffin bottoms soggy. It creates a beautiful, jammy interior.
Lemon Juice: Brightens the cherry flavor and also aids in activating the cornstarch, ensuring proper thickening.
The Golden Crumble Topping Essentials
All-Purpose Flour: Forms the base of your crumbly topping, providing structure.
Granulated Sugar: Sweetens the crumble and contributes to its crisp texture when baked.
Cold Unsalted Butter: The key to a perfectly crumbly texture. Keeping it cold ensures distinct pieces of butter remain, creating those desirable pockets of melt-in-your-mouth goodness. Make sure it’s cut into small pieces.
Pinch of Salt: Enhances the richness of the butter and balances the sweetness of the sugar in the topping.
Essential Tools for Your Muffin-Making Journey
Having the right tools simplifies the baking process and ensures consistent results. For these Juicy Cherry Crumble Muffins, you’ll need a few basics.
12-Cup Muffin Tin: Essential for shaping your muffins. Lining it with paper liners is recommended for easy removal and cleanup.
Mixing Bowls (Small, Medium, and Large): Separate bowls are crucial for preparing the crumble, cherry filling, and muffin batter separately before combining.
Whisk: Perfect for blending dry ingredients and whisking wet ingredients until smooth.
Pastry Blender or Fingertips: For cutting cold butter into the flour for the crumble topping, creating the ideal coarse texture.
Rubber Spatula or Wooden Spoon: Ideal for gently folding the wet and dry ingredients and mixing in the delicate cherries without overmixing.
Measuring Cups and Spoons: Accuracy in baking is paramount, so ensure you have reliable sets for both dry and liquid measurements.
Wire Rack: For cooling the muffins completely, preventing condensation and preserving their crisp texture.
Your Step-by-Step Guide to Baking Perfect Muffins
Prepping for Success: Oven and Muffin Tin: Begin by preheating your oven to 375°F (190°C). This ensures the oven is at the correct temperature for immediate baking once your batter is ready, promoting a good rise. Line a 12-cup muffin tin with paper liners, or generously grease each cup if not using liners, to prevent sticking and ensure easy release.
Crafting Your Signature Crumble Topping: In a small mixing bowl, combine the 1/2 cup all-purpose flour, 1/4 cup granulated sugar, and a pinch of salt for the topping. Add the 1/4 cup cold butter, cut into small pieces. Using your fingertips or a pastry blender, quickly work the butter into the dry ingredients until the mixture resembles coarse crumbs. Avoid overworking, as this can melt the butter and lead to a less crumbly topping. Set this aside.
The Game-Changing Cherry Filling Preparation: In a separate medium bowl, combine the 1 1/2 cups pitted cherries (fresh or frozen, unthawed), 1/4 cup granulated sugar, 1 tablespoon cornstarch, and 1 tablespoon lemon juice. Gently toss everything until the cherries are evenly coated. This critical step with the cornstarch and lemon juice ensures the cherry juices thicken during baking, preventing those frustrating soggy muffin bottoms. It’s the secret to perfectly juicy, contained fruit pockets within your muffin.
Combining Dry Muffin Ingredients: In a large mixing bowl, thoroughly whisk together the 1 1/2 cups all-purpose flour, 1/2 cup granulated sugar, 1 1/2 teaspoons baking powder, and 1/4 teaspoon salt for the muffin batter. Whisking ensures all leavening and seasoning are evenly distributed, leading to a consistent rise and flavor in every muffin.
Whisking the Wet Muffin Ingredients: In yet another medium bowl, whisk together the large egg, 1/2 cup milk, 1/4 cup vegetable oil, and 1 teaspoon vanilla extract. Whisk until the mixture is uniform and the egg is fully incorporated, preparing it for smooth integration with the dry ingredients.
Gentle Blending of Wet and Dry Batters: Pour the whisked wet ingredients into the large bowl containing the dry ingredients. Using a spoon or rubber spatula, stir gently just until combined. It’s perfectly fine if a few small lumps remain; visible lumps indicate you haven’t overmixed. Overmixing develops gluten too much, which results in tough, chewy muffins instead of light, tender ones.
Folding in the Flavorsome Cherry Mixture: Carefully fold the prepared cherry mixture into the muffin batter. Be gentle to avoid mashing the cherries, ensuring they remain mostly intact. The cornstarch coating on the cherries will help their juices stay within the fruit during baking, preventing them from excessively soaking into the batter and contributing to the desired non-soggy texture. Aim for an even distribution of cherries throughout the batter.
Filling the Muffin Cups Evenly: Divide the batter evenly among the 12 prepared muffin cups, filling each approximately two-thirds full. This allows enough room for the muffins to rise without overflowing.
Sprinkling on the Crumble Generously: Take the prepared crumble topping and generously sprinkle it over the top of each muffin. Don’t be shy; a good layer of crumble provides that irresistible golden crust and textural contrast to the soft muffin.
Baking to Golden Perfection: Place the muffin tin in your preheated oven and bake for 20-25 minutes. Look for the tops to turn a beautiful golden brown. To test for doneness, insert a wooden skewer into the center of a muffin (making sure to avoid a cherry). If it comes out clean, your muffins are ready.
Cooling for Optimal Texture: Allow the muffins to cool in the muffin tin for just a few minutes after baking. This initial cooling helps them set. Then, carefully transfer them to a wire rack to cool completely. Cooling on a wire rack allows air to circulate around all sides, preventing the bottoms from becoming damp from trapped steam and ensuring a perfect texture throughout.
Beyond the Recipe: Expert Tips for Muffin Mastery
The Goldilocks Mix: Achieving Tender Muffins
The single most important rule for tender muffins is to avoid overmixing the batter. Stir only until the wet and dry ingredients are just combined, even if a few lumps remain. Overmixing develops gluten, leading to a dense, rubbery texture instead of a light, fluffy one.
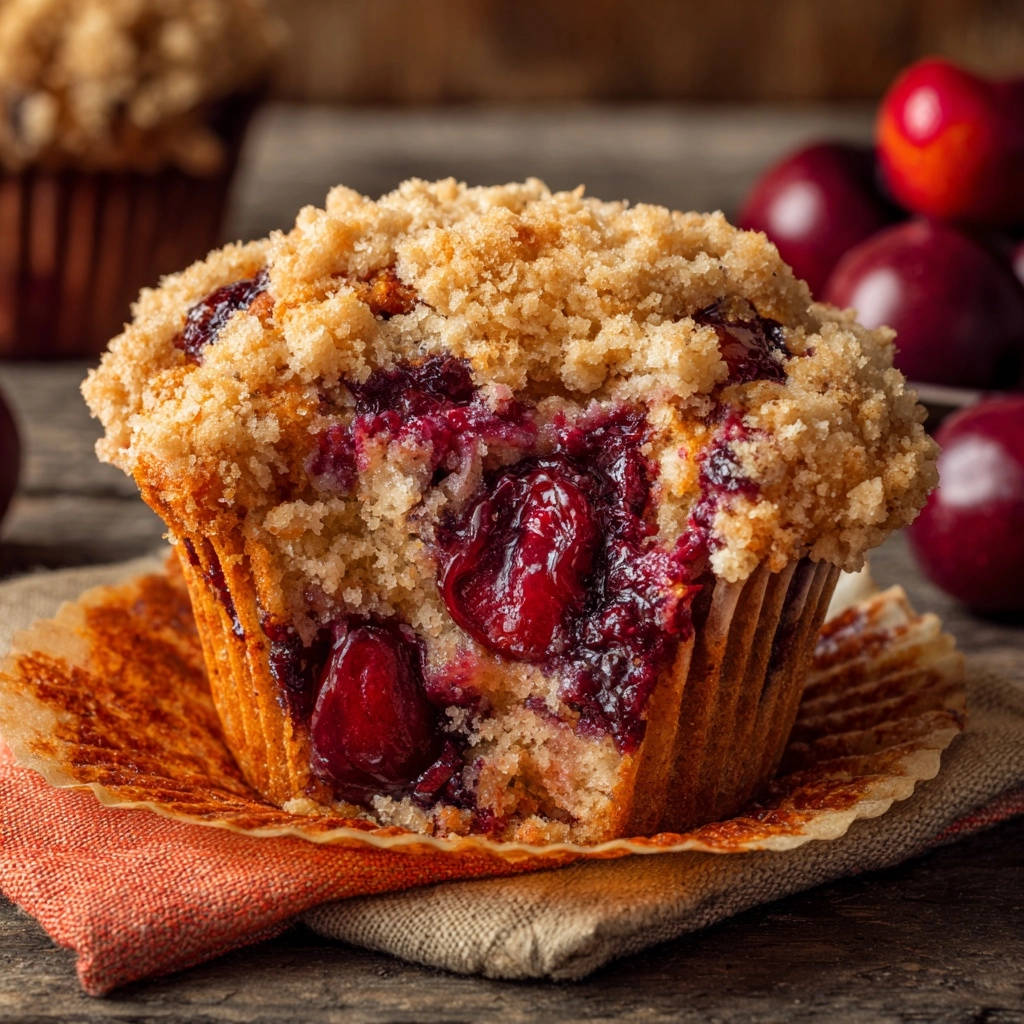
Perfectly Baked: Knowing When Your Muffins Are Done
Beyond the visual cues of golden-brown tops, a reliable test is inserting a wooden skewer into the center of a muffin. If it comes out clean (no wet batter), your muffins are done. Be careful not to overbake, as this can dry out your crumble bars and muffins.
Fruit Choice: Fresh vs. Frozen Cherries
This recipe works beautifully with both fresh and frozen pitted cherries. If using frozen cherries, there’s no need to thaw them beforehand. Simply toss them directly with the sugar, cornstarch, and lemon juice as instructed. The cornstarch will still effectively manage their moisture release during baking.
Temperature Matters: Ingredients for Consistency
For the best and most consistent results, ensure your egg and milk are at room temperature. This allows them to incorporate more smoothly into the batter, creating a more uniform mixture and contributing to a better rise and texture in your Juicy Cherry Crumble Muffins.
Common Muffin Mishaps & Quick Fixes
Why Are My Muffins Tough or Dry?
The most common culprit is overmixing the batter. When you mix too vigorously or for too long, gluten develops excessively, leading to a tough, chewy texture. Remember to mix only until the ingredients are just combined, even if there are a few small lumps.
My Muffins Sank in the Middle!
Muffins can sink if the baking powder is old and no longer active, or if the oven temperature was too low causing them to rise quickly then collapse. Ensure your leavening agents are fresh, and always preheat your oven fully before baking.
The Crumble Topping Disappeared!
If your crumble topping seems to vanish, it might be due to the butter in the crumble not being cold enough, or the ratio of butter to dry ingredients being off. Keep your butter very cold and work quickly when cutting it into the flour for distinct, stable crumbs.
Soggy Bottoms (Still)?
If you’re still experiencing soggy bottoms despite the cornstarch trick, double-check that your cherries were thoroughly coated with the cornstarch mixture. Ensure an even distribution of the coating, and avoid adding excessively wet fresh cherries. Also, ensure you’re using the correct amount of cornstarch.
Serving Suggestions and Storage Savvy
Enjoying Your Muffins: Best Serving Practices
Juicy Cherry Crumble Muffins are divine warm from the oven, allowing the juicy cherry filling to truly shine. They’re perfect for a delightful breakfast, a satisfying afternoon snack with a cup of tea or coffee, or as a sweet treat for brunch. Consider serving them with a dollop of whipped cream or a dusting of powdered sugar for an extra special touch.
Keeping Them Fresh: Storage Guidelines
To maintain their freshness and tender texture, store your cooled muffins in an airtight container at room temperature for up to 2-3 days. For longer storage, they can be refrigerated for up to a week. Allow them to come to room temperature or gently warm them before serving for the best experience.
Make-Ahead Magic: Prepping for Easier Baking
You can prepare elements of these Juicy Cherry Crumble Muffins in advance to streamline your baking process. The dry ingredients for the muffin base can be whisked together and stored. The crumble topping can also be made and refrigerated for up to 3 days or frozen for longer. This makes fresh-baked muffins a quick reality anytime!
Your Cherry Crumble Muffin Questions Answered
Can I use other fruits instead of cherries?
Absolutely! This method works well with other high-moisture fruits. Blueberries, raspberries, or sliced peaches would be delicious substitutions. Just remember to still toss them with cornstarch and lemon juice to manage their moisture, similar to how we prepare our classic cherry cheesecake recipe.
Is it possible to make these gluten-free?
Yes, you can often adapt this recipe to be gluten-free. Substitute the all-purpose flour in both the muffin batter and the crumble topping with a good quality 1:1 gluten-free baking flour blend. Look for blends that contain xanthan gum for best results, as this helps with texture.
Can I use regular milk or a dairy alternative?
The recipe calls for “milk,” which typically refers to standard dairy milk. You can certainly use any dairy milk you prefer (whole, 2%, skim) without issue. For a dairy-free option, unsweetened almond milk or soy milk can be used as a direct 1:1 substitute without significantly altering the final texture of your Juicy Cherry Crumble Muffins.
How do I prevent the crumble from getting too dark?
If your crumble topping is browning too quickly before the muffins are fully baked, you can loosely tent the muffin tin with aluminum foil. This will shield the topping from direct heat, allowing the muffins to finish baking without the crumble becoming overly dark or burnt.
Can I freeze Juicy Cherry Crumble Muffins?
Yes, these muffins freeze beautifully! Once completely cooled, wrap individual muffins tightly in plastic wrap, then place them in a freezer-safe bag or container. They can be frozen for up to 3 months. To enjoy, thaw them at room temperature or gently reheat in the microwave or oven for a few minutes.
Ready to Bake Your Best Juicy Cherry Crumble Muffins?
There’s truly nothing quite like a freshly baked muffin, especially when it’s packed with juicy fruit and crowned with a crisp, buttery crumble. These Juicy Cherry Crumble Muffins deliver on every front: incredible flavor, perfect texture, and the guarantee of no more soggy bottoms!
I encourage you to try this recipe and experience the difference that a few simple tricks can make. Share your baking triumphs, savor every tender, fruit-filled bite, and let this become your go-to recipe for the most delightful cherry muffins you’ve ever tasted.
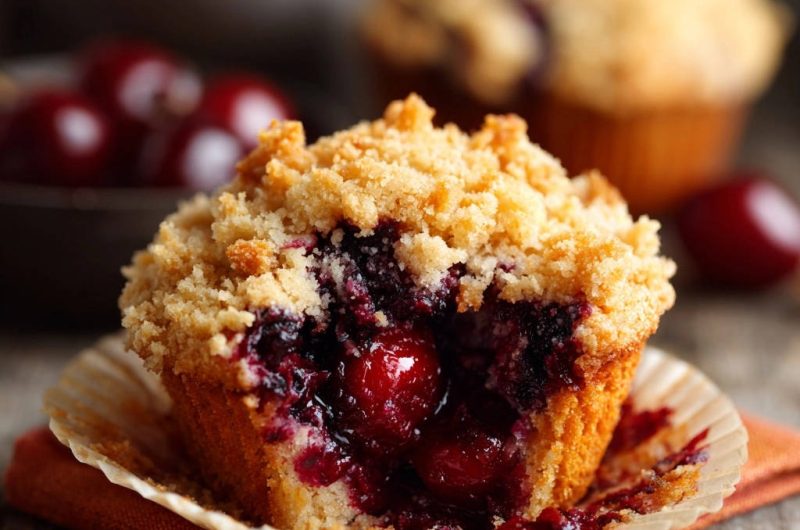
Cherry Crumble Muffins
Course: BakingCuisine: AmericanDifficulty: easy12
muffins20
minutes25
minutes120
kcal45
minutesSay goodbye to soggy muffin bottoms with these perfectly tender and juicy cherry crumble muffins! The secret is a simple cornstarch coating for the cherries, ensuring all the delicious fruit flavor without the excess moisture. Topped with a delightful crumble, these muffins are a must-try for any fruit muffin lover.
Ingredients
For the Muffins:
1 1/2 cups all-purpose flour
1/2 cup granulated sugar
1 1/2 teaspoons baking powder
1/4 teaspoon salt
1 large egg
1/2 cup milk
1/4 cup vegetable oil
1 teaspoon vanilla extract
For the Cherry Filling:
1 1/2 cups fresh or frozen pitted cherries (if using frozen, do not thaw)
1/4 cup granulated sugar
1 tablespoon cornstarch
1 tablespoon lemon juice
For the Crumble Topping:
1/2 cup all-purpose flour
1/4 cup granulated sugar
1/4 cup cold unsalted butter, cut into small pieces
Pinch of salt
Directions
- Preheat your oven to 375°F (190°C). Line a 12-cup muffin tin with paper liners or grease generously.
- First, prepare the crumble topping: In a small bowl, combine 1/2 cup all-purpose flour, 1/4 cup granulated sugar, and a pinch of salt. Add the cold butter pieces. Using your fingertips or a pastry blender, cut the butter into the dry ingredients until coarse crumbs form. Set aside.
- Next, prepare the cherry filling: In a separate medium bowl, combine the pitted cherries, 1/4 cup granulated sugar, 1 tablespoon cornstarch, and 1 tablespoon lemon juice. Toss gently until the cherries are evenly coated. This step is key to preventing soggy muffin bottoms! The cornstarch will absorb the excess moisture released by the fruit during baking.
- In a large bowl, whisk together 1 1/2 cups all-purpose flour, 1/2 cup granulated sugar, 1 1/2 teaspoons baking powder, and 1/4 teaspoon salt for the muffin batter.
- In another medium bowl, whisk together the egg, milk, vegetable oil, and vanilla extract until well combined.
- Pour the wet ingredients into the dry ingredients. Stir gently with a spoon or spatula just until combined. A few lumps are perfectly fine; overmixing will lead to tough muffins.
- Gently fold the prepared cherry mixture into the muffin batter. Be careful not to mash the cherries, and aim for even distribution. The cornstarch coating will help keep their juices from soaking into the batter excessively.
- Divide the batter evenly among the 12 prepared muffin cups, filling each about two-thirds full.
- Sprinkle a generous amount of the prepared crumble topping over the top of each muffin.
- Bake for 20-25 minutes, or until the tops are golden brown and a wooden skewer inserted into the center of a muffin comes out clean (avoiding a cherry).
- Let the muffins cool in the muffin tin for a few minutes before transferring them to a wire rack to cool completely. Enjoy your perfectly tender, no-soggy-bottom muffins!
Notes
- The key to preventing soggy muffin bottoms is coating the cherries with cornstarch and lemon juice before folding them into the batter.