Classic Cherry Cheesecake: Achieve a Flawless, Crack-Free Finish

For many home bakers, the thought of making a Classic Cherry Cheesecake conjures images of cracked tops and uneven textures. I’ve been there, pulling a seemingly perfect cheesecake from the oven only to watch dreaded fissures appear as it cooled. Years of testing and refining led me to this foolproof method, guaranteeing a perfectly smooth, creamy, and crack-free Classic Cherry Cheesecake every single time.
The Secret to a Flawless Classic Cherry Cheesecake (No Cracks!)
Understanding the “No Crack” Philosophy
Achieving a crack-free cheesecake isn’t magic; it’s a science of gentle handling and controlled temperatures. Cracks primarily form due to sudden temperature changes, uneven baking, or too much air in the batter.
Our method combats these issues by incorporating precise mixing techniques, the indispensable water bath, and a critical slow cooling process.
Why This Recipe Stands Out
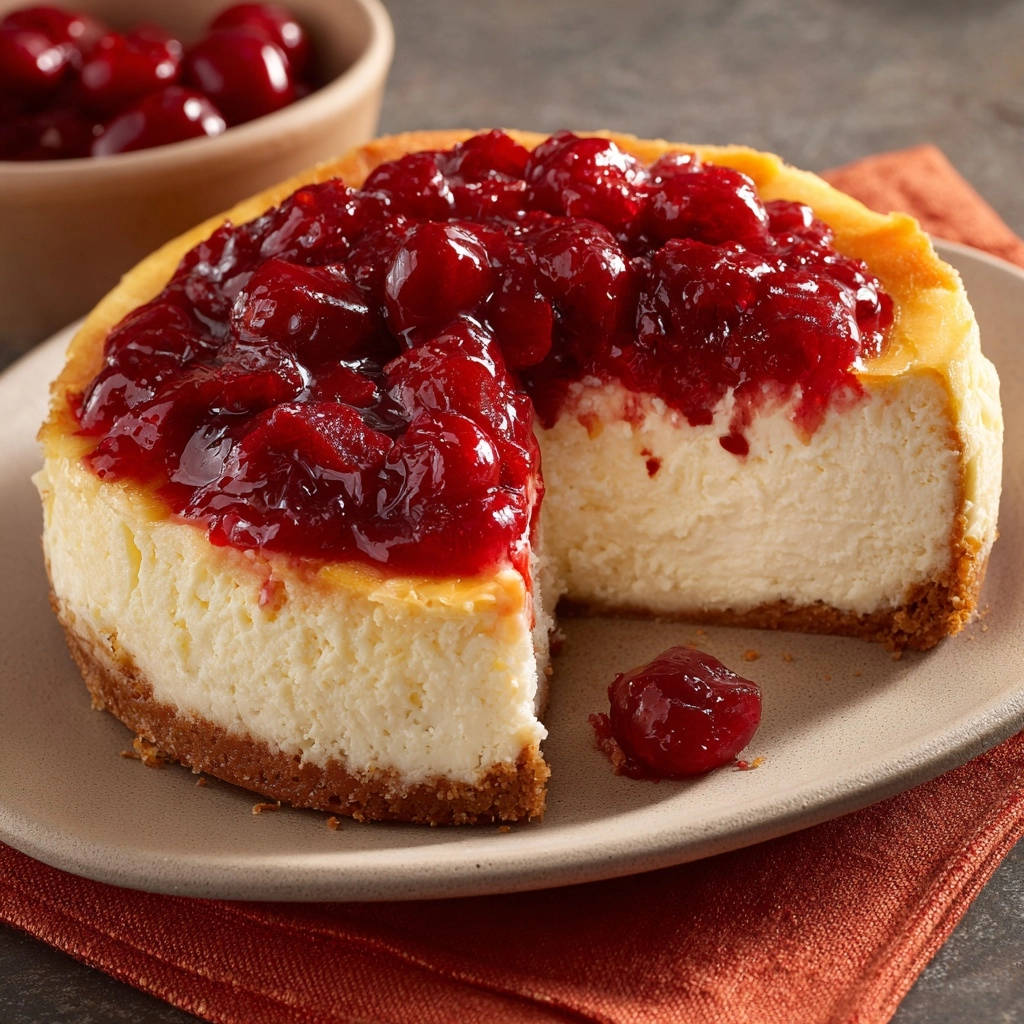
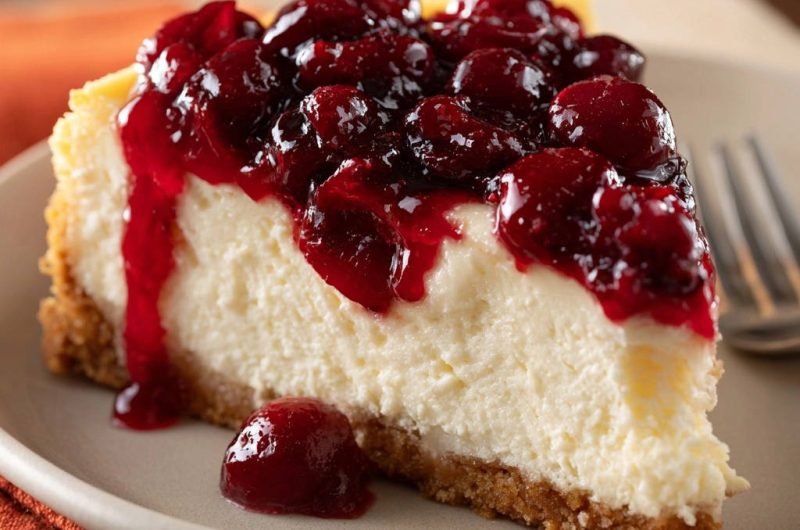
This recipe for Classic Cherry Cheesecake truly delivers on its promise. It results in an incredibly rich, dense, and velvety-smooth filling, perfectly complemented by a crisp graham cracker crust and a vibrant, sweet-tart cherry topping.
Beyond the flawless appearance, its step-by-step guidance removes the intimidation factor, empowering you to create a professional-quality dessert with ease and confidence.
Crafting Perfection: Essential Ingredients for Your Cheesecake
For the Golden Graham Cracker Crust
The foundation of any great cheesecake begins with its crust.
Graham Cracker Crumbs: Provide a classic, subtly sweet, and sandy base. Ensure they are finely crushed for a cohesive crust.
Melted Unsalted Butter: Acts as the binding agent, holding the crumbs together and adding richness. Unsalted butter allows you to control the overall saltiness.
Granulated Sugar: Enhances the crust’s sweetness and helps it crisp slightly during baking.
The Creamy Heart: Filling Essentials
The quality and temperature of these ingredients are paramount for the cheesecake’s signature creamy texture.
Cream Cheese (softened): Absolutely non-negotiable. Room temperature cream cheese blends smoothly without lumps, preventing the need for overmixing.
Granulated Sugar: Provides sweetness and contributes to the filling’s structure.
Large Eggs (room temperature): Bind the ingredients and add richness. Room temperature eggs emulsify better with the cream cheese, ensuring a uniform batter.
Sour Cream (room temperature): Adds a beautiful tanginess, richness, and moisture, contributing to the cheesecake’s luxurious mouthfeel.
Vanilla Extract: Enhances the overall flavor profile with its warm, aromatic notes.
Lemon Zest (optional): A small amount adds a bright, fresh counterpoint to the richness, elevating the flavor without tasting overtly lemony.
If you enjoy the creamy texture of this cheesecake, you’ll also love the dense richness of this creamy New York cheesecake.
The Vibrant Crown: Building Your Cherry Topping
This vibrant topping is the perfect accompaniment, adding both color and a balanced tart-sweetness.
Frozen or Fresh Cherries (pitted): Both work beautifully. Frozen cherries are convenient and provide excellent flavor.
Granulated Sugar: Balances the tartness of the cherries. Adjust to your personal preference.
Water or Cherry Juice: Provides the liquid base for the topping. Cherry juice intensifies the flavor.
Cornstarch: The thickening agent for a perfect, glossy consistency. Creating a slurry first prevents lumps.
Almond Extract (optional): A secret weapon! It remarkably enhances the cherry flavor, making it taste even more authentic and delicious.
Your Kitchen Arsenal: Tools for Cheesecake Success
Indispensable Baking Equipment
Having the right tools makes all the difference in achieving a perfect Classic Cherry Cheesecake.
9-inch Springform Pan: Essential for easy removal of the delicate cheesecake without damaging its sides. Choose one with a good seal.
Large Roasting Pan: Used for the water bath, providing the crucial moist baking environment. Ensure it’s large enough to accommodate the springform pan.
Electric Mixer (handheld or stand): Makes quick work of creaming the cheese and sugar, ensuring a smooth, lump-free batter.
Rubber Spatula: Ideal for gently folding in ingredients and scraping down the sides of the bowl, minimizing air incorporation.
Measuring Cups and Spoons: For accurate ingredient proportions, which is critical in baking.
Handy Extras for Precision
These additional tools, while not strictly essential, can greatly improve your baking experience and results.
Heavy-Duty Aluminum Foil: Crucial for wrapping the springform pan to prevent water bath seepage.
Wire Rack: For cooling the cheesecake evenly after baking, allowing air circulation underneath.
If you enjoy garnishing cheesecakes with fresh mint, you’ll love the nutty crunch of this caramel pecan crunch cheesecake.
Saucepan: For preparing the cherry topping efficiently.
Small Whisk: Perfect for creating a smooth cornstarch slurry for the topping.
Baking Brilliance: A Step-by-Step Guide to Your Cheesecake Masterpiece
- Step 1: Preheat and Prepare Pan:
Preheat your oven to 325°F (160°C). Lightly grease a 9-inch springform pan to ensure easy release. Crucially, wrap the outside of the springform pan tightly with heavy-duty aluminum foil to prevent any water from seeping in during the water bath.
- Step 2: Make the Crust:
In a medium bowl, combine the graham cracker crumbs, melted butter, and granulated sugar. Press this mixture firmly and evenly into the bottom of the prepared springform pan. Bake for 8 to 10 minutes until lightly golden, then remove from the oven and let cool slightly while you prepare the filling.
- Step 3: Cream Cheese & Sugar:
In a large mixing bowl, beat the softened cream cheese and granulated sugar together with an electric mixer on medium speed until just smooth and creamy, about 2 minutes. Be careful not to overmix; excess air incorporated now can expand during baking and lead to cracks later. Scrape down the sides of the bowl frequently.
- Step 4: Incorporate Eggs Slowly:
Add the large eggs one at a time, beating on low speed just until combined after each addition. This slow, gentle approach ensures the eggs are fully integrated without incorporating too much air, which is vital for a smooth, crack-free surface.
- Step 5: Finish the Filling:
Gently fold in the sour cream, vanilla extract, and optional lemon zest using a rubber spatula until they are just well combined. Minimal mixing from this point onward is best to maintain the delicate texture and prevent air bubbles.
- Step 6: The Water Bath for Success:
Carefully pour the cheesecake filling over the cooled crust in the springform pan. Place the foil-wrapped springform pan into a larger roasting pan. Carefully pour hot water into the roasting pan until it comes halfway up the sides of the springform pan. This water bath creates a moist, even baking environment, preventing the cheesecake from drying out and cracking.
- Step 7: Bake the Cheesecake:
Carefully transfer the roasting pan with the cheesecake to the preheated oven. Bake for 60 to 75 minutes, or until the edges are set and slightly puffed, but the center still jiggles slightly when gently shaken. An over-baked cheesecake is prone to cracking.
- Step 8: The Crucial Cooling Process (No Cracks!):
This is arguably the most important step for preventing cracks. Turn off the oven, but leave the cheesecake inside with the oven door propped open about 2 inches. Let the cheesecake cool in the oven for 1 hour. This slow, gradual cooling prevents sudden temperature changes that can cause thermal shock and cracks.
- Step 9: Final Cool and Chill:
After 1 hour, carefully remove the springform pan from the water bath and roasting pan. Remove the aluminum foil. Place the cheesecake on a wire rack to cool completely at room temperature. Once fully cooled, cover and refrigerate for at least 4 hours, or preferably overnight, before serving. Chilling helps the cheesecake set properly and prevents cracks when cutting.
- Step 10: Prepare Cherry Topping:
While the cheesecake chills, combine the pitted cherries, granulated sugar, and water or cherry juice in a saucepan over medium heat. In a small bowl, whisk cornstarch with 2 tablespoons of cold water to create a smooth slurry. Once the cherries begin to simmer, add the cornstarch slurry and stir constantly until the mixture thickens, about 2 to 3 minutes. Remove from heat and stir in the almond extract, if using. Let the cherry topping cool completely before serving; warm topping can melt the cheesecake surface.
- Step 11: Serve Your Masterpiece:
Once the Classic Cherry Cheesecake is thoroughly chilled, carefully remove the sides of the springform pan. For the cleanest slices, run a thin, warm knife under hot water before each cut. Top each slice with a generous spoonful of the cooled cherry topping and enjoy the perfect, crack-free result!
Phase 1: Preparing Your Foundation (Crust & Pan)
Phase 2: The Art of the Creamy Filling
Phase 3: The Gentle Bake & Crucial Cool Down
Phase 4: Crafting the Ruby Red Cherry Topping
Phase 5: The Grand Reveal & Serving
Mastering Your Cheesecake: Expert Tips & Tricks
Room Temperature Ingredients: A Non-Negotiable. Ensure cream cheese, eggs, and sour cream are at room temperature. This allows them to combine smoothly without overmixing, preventing lumps and ensuring a uniform, airy batter.
The Gentle Mix: Avoiding Over-Aeration. Overmixing incorporates too much air into the batter. This air expands during baking, creating bubbles, and then collapses as it cools, leading to unsightly cracks. Mix only until just combined, no more.
What to Serve with Cherry Cheesecake
A slice of cherry cheesecake is rich and creamy, so you want sides that bring contrast or a different kind of sweetness. Here are two options that work well for brunch or dessert.
- For a savory-sweet brunch spread, pair it with Cheesy Sausage Breakfast Puffs — the crisp, cheesy crust balances the tangy cherry topping.
- If you want an extra dessert option, try the S’mores French Toast Stack — its warm chocolate and marshmallow core contrasts with the cold, creamy cheesecake filling.
The Power of the Water Bath. The water bath creates a humid, stable baking environment around the cheesecake. This ensures the cheesecake cooks evenly from the edges to the center, preventing the outer edges from setting too quickly and drying out, a common cause of cracks.
The Crucial Slow Cooling Process. Sudden temperature changes are the enemy of a perfect cheesecake. Cooling slowly in the oven with the door propped open allows the cheesecake to gradually adjust to room temperature. This gradual transition prevents thermal shock, which can cause severe cracking.
Perfect Cherry Topping Consistency. Adding the cornstarch slurry to simmering cherries creates a beautifully thickened, glossy topping. Ensure it cools completely before serving to prevent it from warming the chilled cheesecake and causing a runny mess.
Chill for Perfection. Proper chilling for at least 4 hours (or overnight) is essential for the cheesecake to fully set. This setting process contributes to its dense, creamy texture and makes it much easier to cut clean, neat slices without crumbling.
Common Cheesecake Conundrums & Their Solutions
My Cheesecake Cracked! What Went Wrong?
Cracks are often due to overmixing the batter, which incorporates too much air, or baking at too high a temperature. Another common culprit is a sudden temperature change during cooling; ensure you follow the slow cooling process outlined in Step 8.
Why is My Cheesecake Soggy?
A soggy cheesecake bottom is almost always caused by water seeping into the crust from the water bath. Double-check that your springform pan is wrapped exceptionally tightly with heavy-duty aluminum foil, creating a complete seal around the base and sides.
My Cherry Topping is Too Runny/Thick
If your topping is too runny, you may need a tiny bit more cornstarch slurry, or it might need to simmer for an extra minute or two to properly thicken. If it’s too thick, you can thin it out slightly by stirring in a tablespoon or two of water or cherry juice until the desired consistency is reached.
Enjoying Your Creation: Serving, Storage, and Make-Ahead Tips
Elegant Serving Suggestions
While the cherry topping is undeniably delicious, consider enhancing your Classic Cherry Cheesecake with additional garnishes. A dollop of freshly whipped cream adds extra luxury, or a sprinkle of finely grated dark chocolate could offer a complementary bitter note.
For a touch of freshness and visual appeal, a few fresh mint leaves or a dusting of powdered sugar on the plate can elevate each slice.
Storing Your Leftover Cheesecake
To keep your Classic Cherry Cheesecake fresh, store it covered tightly in the refrigerator. An airtight container is ideal, or you can wrap individual slices in plastic wrap. It will remain delicious for up to 3-4 days.
Can I Make This Cheesecake Ahead?
Absolutely! This Classic Cherry Cheesecake is an excellent make-ahead dessert, making it perfect for entertaining. You can bake and chill the cheesecake (without the topping) up to 2 days in advance. Prepare the cherry topping on the day of serving for the freshest flavor and texture.
Your Classic Cherry Cheesecake Questions Answered
Can I Use Different Fruit for the Topping?
Yes, you certainly can! This recipe is adaptable. You can substitute cherries with other fruits like mixed berries, peaches, or blueberries. Adjust the sugar level based on the fruit’s sweetness, and ensure the cornstarch slurry method remains the same for proper thickening.
What If I Don’t Have a Springform Pan?
While a springform pan is highly recommended for its easy release, you can use a regular 9-inch round cake pan lined with parchment paper. Leave an overhang on two sides to create “slings” for lifting the cheesecake out after it cools. Be aware that cutting and serving might be a bit trickier.
Can I Freeze Classic Cherry Cheesecake?
Yes, Classic Cherry Cheesecake freezes beautifully! For best results, freeze the cheesecake whole (without the cherry topping) after it has been fully chilled. Wrap it tightly in several layers of plastic wrap, then a layer of aluminum foil. It can be frozen for up to 1-2 months. Thaw slowly in the refrigerator overnight before serving, then add your fresh cherry topping.
Is it Possible to Make a Gluten-Free Crust?
Yes, absolutely. Simply substitute regular graham cracker crumbs with certified gluten-free graham cracker crumbs. The rest of the crust recipe and the cheesecake filling and topping remain naturally gluten-free.
Your Flawless Classic Cherry Cheesecake Awaits!
You now possess all the knowledge and expert tips to create a truly flawless, crack-free Classic Cherry Cheesecake that will undoubtedly become a favorite. Forget the past struggles and embrace the joy of baking a dessert that looks as incredible as it tastes. Go ahead, gather your ingredients, and experience the satisfaction of slicing into your very own perfectly creamy, beautifully topped masterpiece. Happy baking!
Cherry Cheesecake
Course: DessertCuisine: AmericanDifficulty: medium8
servings30
minutes1
hour450
kcal90
minutesAchieve a perfectly smooth, crack-free Classic Cherry Cheesecake every time with this foolproof recipe. Learn the secrets to a creamy filling and a beautiful, unblemished top, complemented by a luscious cherry topping.
Ingredients
For the Crust:
1 1/2 cups graham cracker crumbs
1/4 cup melted unsalted butter
2 tablespoons granulated sugar
For the Cheesecake Filling:
3 (8 ounce) blocks cream cheese, softened to room temperature
1 1/4 cups granulated sugar
3 large eggs, room temperature
1/2 cup sour cream, room temperature
1 teaspoon vanilla extract
1 teaspoon lemon zest (optional, for brightness)
For the Cherry Topping:
3 cups frozen or fresh cherries, pitted
1/2 cup granulated sugar (adjust to taste)
1/4 cup water or cherry juice
1 tablespoon cornstarch
1/2 teaspoon almond extract (optional)
Directions
- Prepare for Baking: Preheat your oven to 325 degrees F (160 degrees C). Lightly grease a 9 inch springform pan. Wrap the outside of the springform pan tightly with heavy duty aluminum foil to prevent water from seeping in during the water bath. This is key for a crack free cheesecake.
- Make the Crust: In a medium bowl, combine graham cracker crumbs, melted butter, and 2 tablespoons granulated sugar. Press the mixture firmly into the bottom of the prepared springform pan. Bake for 8 to 10 minutes, then remove from oven and let cool slightly.
- Prepare the Filling (Key to No Cracks!): In a large mixing bowl, beat the softened cream cheese and 1 1/4 cups granulated sugar together with an electric mixer on medium speed until just smooth and creamy. Be careful not to overmix; excess air incorporated now can lead to cracks later. Scrape down the sides of the bowl.
- Add Eggs Slowly: Add the eggs one at a time, beating on low speed just until combined after each addition. Again, avoid overmixing.
- Finish the Filling: Gently fold in the sour cream, vanilla extract, and optional lemon zest using a spatula until well combined. The less you mix from here, the better.
- Water Bath for Success: Pour the cheesecake filling over the cooled crust in the springform pan. Place the foil wrapped springform pan into a larger roasting pan. Carefully pour hot water into the roasting pan until it comes halfway up the sides of the springform pan. This water bath creates a moist, even baking environment that prevents the cheesecake from drying out and cracking.
- Bake the Cheesecake: Carefully transfer the roasting pan with the cheesecake to the preheated oven. Bake for 60 to 75 minutes, or until the edges are set and slightly puffed, but the center still jiggles slightly when gently shaken.
- The Cooling Process (Crucial for No Cracks!): This is arguably the most important step for preventing cracks. Turn off the oven, but leave the cheesecake inside with the oven door propped open about 2 inches. Let the cheesecake cool in the oven for 1 hour. This slow, gradual cooling prevents sudden temperature changes that can cause cracks.
- Final Cool and Chill: After 1 hour, carefully remove the springform pan from the water bath and roasting pan. Remove the aluminum foil. Place the cheesecake on a wire rack to cool completely at room temperature. Once fully cooled, cover and refrigerate for at least 4 hours, or preferably overnight, before serving. Chilling helps the cheesecake set properly and prevents cracks when cutting.
- Make the Cherry Topping: While the cheesecake chills, combine cherries, 1/2 cup sugar, and water/cherry juice in a saucepan over medium heat. In a small bowl, whisk cornstarch with 2 tablespoons of cold water to create a slurry. Once the cherries begin to simmer, add the cornstarch slurry and stir constantly until the mixture thickens, about 2 to 3 minutes. Remove from heat and stir in the almond extract, if using. Let the cherry topping cool completely before serving.
- Serve: Once the cheesecake is thoroughly chilled, carefully remove the sides of the springform pan. Top each slice with a generous spoonful of the cooled cherry topping and enjoy!
Notes
- Includes crucial steps for a crack-free cheesecake, including water bath and slow oven cooling.