Layered Red Velvet Pecan Bars: The Secret to Perfectly Set Topping
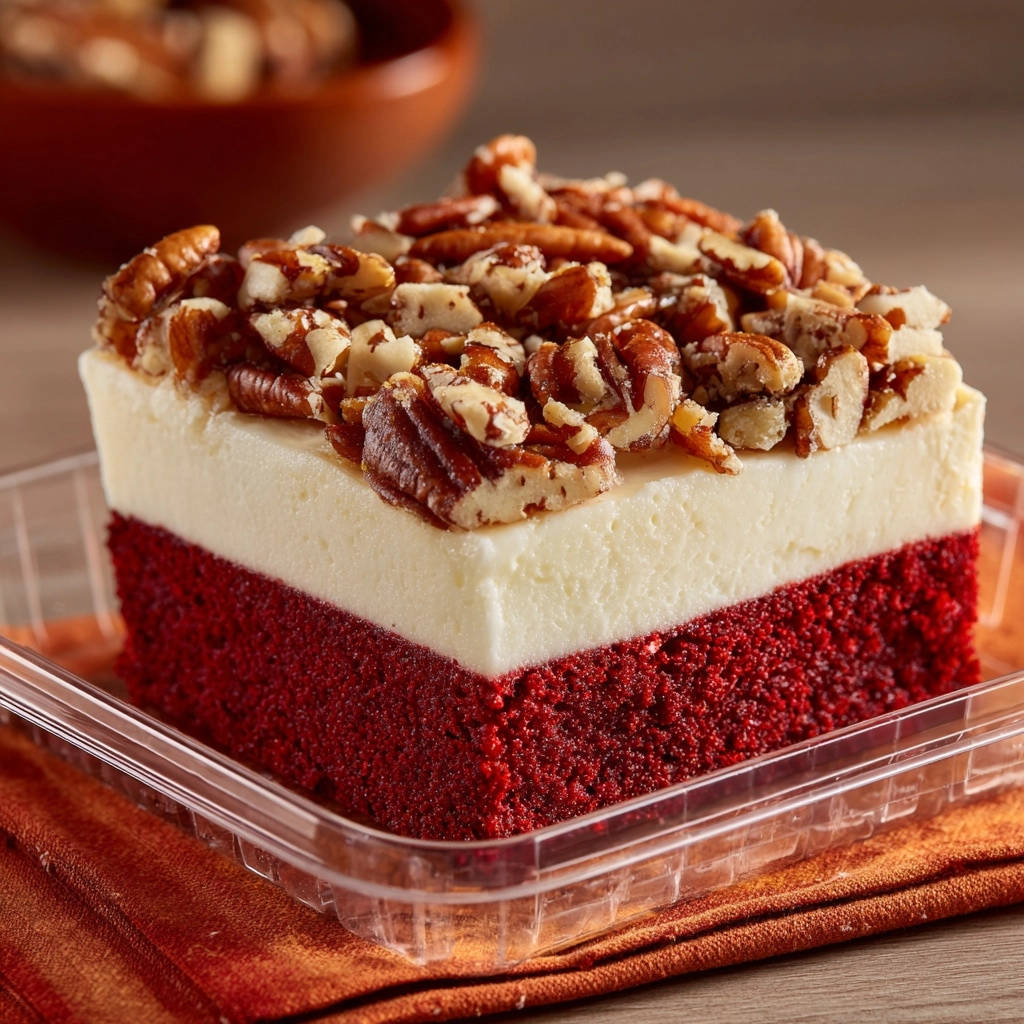
I confess, perfecting a red velvet dessert with a truly stable cream cheese topping used to be my white whale. Many recipes lead to a delicious but often slouching mess. That’s why I’m thrilled to share my ultimate recipe for Layered Red Velvet Pecan Bars, designed specifically to deliver a vibrantly beautiful, perfectly sliceable, and utterly decadent treat every single time, thanks to a few expert tricks for that flawless topping.
The Unstoppable Cream Cheese: Why These Layered Red Velvet Pecan Bars Stand Tall
These Layered Red Velvet Pecan Bars aren’t just another dessert; they’re a masterclass in stability and flavor, especially when it comes to that luscious cream cheese topping. We’ve cracked the code on common baking frustrations to ensure a delightful experience.
Unwavering Stability: Unlike many recipes, our Layered Red Velvet Pecan Bars boast a cream cheese topping that remains perfectly firm. It never slides or softens, thanks to specific preparation and extended chilling methods.
Effortless Slicing: The firm topping allows for clean, beautiful cuts. This means no more messy servings, making these red velvet cake bars perfect for any gathering or gifting.
Rich, Balanced Flavor: Enjoy the classic cocoa-kissed red velvet paired with a tangy, sweet cream cheese and the delightful crunch of pecans. Each layer complements the next for a truly irresistible experience.
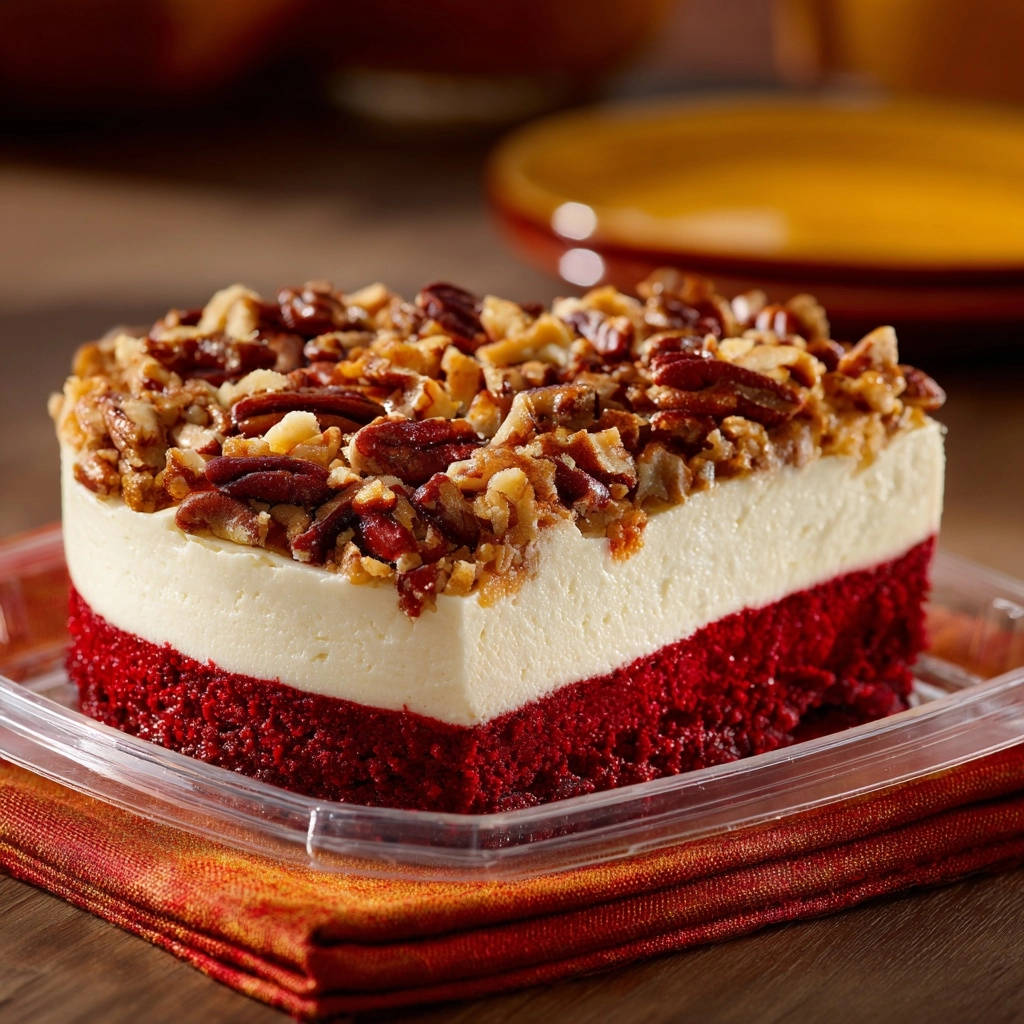
Impressive Presentation: With vibrant layers and a stable structure, these pecan dessert bars look as incredible as they taste. They’re guaranteed to be the centerpiece of any dessert table.
Essential Tools for Baking Perfection
Having the right equipment ensures a smooth baking process and a perfect outcome for your Layered Red Velvet Pecan Bars. These are the tools I rely on:
8×8 Inch Baking Pan: This size is essential for achieving the ideal thickness for your cake layer. It ensures even baking and the perfect bar portion.
Parchment Paper: Absolutely crucial for easy removal of the baked and chilled bars. Leaving an overhang on two sides makes lifting the entire cake effortless.
Large Mixing Bowls: You’ll need at least two – one for your dry ingredients and another for the wet, ensuring proper separation and combination.
Whisk: Ideal for thoroughly combining dry ingredients and gently mixing wet ones. It helps prevent lumps and ensures even distribution.
Electric Mixer (Stand or Hand-Held): A powerful mixer is non-negotiable for achieving the perfectly smooth and aerated cream cheese topping. It saves time and effort.
Wire Rack: Essential for cooling the cake completely after baking. Proper airflow prevents condensation and a soggy bottom.
Spatula: Useful for scraping down bowls, gently folding ingredients, and spreading the topping evenly over the cake layer.
The Building Blocks: Key Ingredients for Your Red Velvet Masterpiece
Every ingredient in these Layered Red Velvet Pecan Bars plays a vital role in achieving their iconic flavor, texture, and stability. Quality matters here!
For the Velvety Red Cake Layer
This base is what gives the dessert its name, combining subtle chocolate with a signature tender crumb and vibrant hue.
All-Purpose Flour: Provides the fundamental structure for the cake. Accurate measurement is key to a tender crumb.
Granulated Sugar: Sweetens the cake and contributes to its moist texture.
Unsweetened Cocoa Powder: Offers the subtle, characteristic chocolate flavor that defines red velvet. Use a good quality cocoa for best results.
Baking Soda: A leavening agent that reacts with acidic ingredients to create lift and tenderness.
Salt: Balances the sweetness and enhances all the other flavors in the cake.
Buttermilk: Its acidity is crucial for activating the baking soda, contributing to the cake’s tender texture and aiding in the vibrant red color. It also adds a unique tang.
Vegetable Oil: Provides moisture and richness, resulting in a very tender and moist cake that stays fresh longer than butter-based cakes.
Large Eggs: Bind the ingredients, add moisture, and contribute to the cake’s structure and richness.
Red Food Coloring: The iconic visual element of red velvet. Gel food coloring often provides a more intense hue with less volume.
White Vinegar: Works in tandem with buttermilk and baking soda to ensure proper leavening and enhances the red color.
Vanilla Extract: A crucial flavor enhancer that complements both the subtle cocoa and the tang of the buttermilk.
For the Signature Stable Cream Cheese Topping
This is where the magic happens, ensuring your Layered Red Velvet Pecan Bars stand tall and proud.
Cream Cheese, Softened: The creamy, tangy foundation of the topping. It is absolutely critical that it is well-softened to room temperature for a smooth, lump-free frosting that emulsifies properly.
Unsalted Butter, Softened: Adds richness and helps create the stable structure. Like the cream cheese, it must be perfectly softened to blend seamlessly and incorporate air.
Powdered Sugar: Sweetens the topping and provides its body and structure. Adding it gradually prevents lumps and ensures a smooth consistency.
Vanilla Extract: Enhances the flavor of the cream cheese, adding a warm, aromatic note.
Heavy Cream: Whipped into the frosting, it contributes to the light, fluffy texture and helps the topping hold its shape, especially during the crucial beating phase.
The Pecan Finish
More than just a garnish, pecans add essential texture and a complementary nutty flavor that elevates these bars.
Using a mix of whole and chopped pecans provides both visual appeal and varying textural elements, perfectly balancing the soft cake and creamy topping.
Your Step-by-Step Guide to Irresistible Layered Red Velvet Pecan Bars
Preparing the Perfect Red Velvet Cake Base
- Pan Preparation:
Preheat your oven to 350°F (175°C). Line an 8×8 inch baking pan with parchment paper, ensuring you leave a generous overhang on two sides. This overhang acts as a sling, making it incredibly easy to lift the entire cake out of the pan once it’s cooled and the topping is set, preventing any sticking or breakage.
- Whisking Dry Ingredients:
In a large bowl, thoroughly whisk together the all-purpose flour, granulated sugar, unsweetened cocoa powder, baking soda, and salt. Whisking ensures these dry ingredients are fully combined and evenly distributed, which is crucial for a consistent rise and crumb throughout your red velvet cake layer.
- Combining Wet Ingredients:
In a separate medium bowl, whisk together the buttermilk, vegetable oil, large eggs, red food coloring, white vinegar, and vanilla extract. Continue whisking until the mixture is completely homogenous and the red food coloring is evenly dispersed, creating a vibrant, uniform liquid.
- Gentle Mixing of Batter:
Pour the prepared wet ingredients into the dry ingredients. Mix with a whisk or spatula only until the ingredients are “just combined.” A few small lumps are perfectly fine. Overmixing the batter can overdevelop the gluten in the flour, resulting in a tough or dense cake rather than the desired tender red velvet crumb.
- Baking the Cake Layer:
Pour the red velvet cake batter evenly into your prepared 8×8 inch pan. Bake for 25-30 minutes. You’ll know it’s done when a toothpick inserted into the center comes out with moist crumbs attached, but no wet batter. This indicates a perfectly baked, tender cake.
- Cooling Completely:
Once baked, allow the cake to cool completely in the pan on a wire rack. This step is absolutely essential. Attempting to spread the cream cheese topping on a warm cake will cause it to melt, leading to a runny, sliding mess and compromising the stability of your Layered Red Velvet Pecan Bars.
Crafting the Stable Cream Cheese Topping
This is where we build the “unstoppable” quality of your Layered Red Velvet Pecan Bars’ signature topping.
- Beating Cream Cheese and Butter:
Begin by beating your well-softened cream cheese and butter together in a large mixing bowl until the mixture is incredibly smooth and creamy. This vital step isn’t just about combining; it’s about properly emulsifying the fats and whipping sufficient air into the mixture, which is the foundational secret to preventing a soft, runny topping.
Continue beating on medium-high speed for several minutes, observing as the mixture becomes visibly light, fluffy, and voluminous. This aeration is crucial for a stable, luxurious cream cheese frosting.
- Gradual Powdered Sugar Addition:
Gradually add the powdered sugar to the cream cheese mixture, one cup at a time. After each addition, beat well until the sugar is thoroughly incorporated and the mixture is smooth. Adding it slowly helps prevent lumps and avoids creating a cloud of sugar in your kitchen.
- Achieving Fluffy Peaks:
Once all the powdered sugar is incorporated, add the vanilla extract and heavy cream. Continue beating on medium-high speed for an additional 2-3 minutes. You’re aiming for a frosting that is light, fluffy, and holds stiff peaks when you lift the beaters. This continued aeration and proper incorporation of heavy cream significantly contribute to the topping’s ultimate stability and luscious texture.
Assembling and Chilling for Perfection
- Spreading the Topping:
Once your red velvet cake is completely cool, spread the prepared cream cheese topping evenly over the cake layer using a spatula or offset spatula. Ensure it’s a smooth, consistent layer from edge to edge.
- CRITICAL CHILL TIME:
This is the ultimate secret to perfectly sliceable bars: Refrigerate the entire pan for at least 2-3 hours, or until the cream cheese topping is firm and fully set. This extended chill time allows the fats in the topping to solidify, preventing any spreading or softness once you cut into the bars, ensuring beautiful, clean slices every single time. For other desserts that benefit from careful chilling to hold their shape, consider our recipe for decadent pumpkin pie truffles.
- Finishing Touches:
Once the bars are chilled and firm, use the parchment overhang to gently lift the cake from the pan and onto a cutting board. Generously sprinkle the whole and chopped pecans evenly over the set cream cheese layer. The pecans add a wonderful textural contrast and nutty flavor.
- Cutting and Serving:
For clean, neat squares, use a sharp knife and wipe it clean with a damp cloth between each cut. Cut the cake into squares of your desired size and serve immediately. Store any leftover Layered Red Velvet Pecan Bars in an airtight container in the refrigerator to maintain freshness and topping stability.
Chef’s Secrets: Elevate Your Layered Red Velvet Pecan Bars Game
Unlock even more perfection with these expert tips, ensuring your Layered Red Velvet Pecan Bars are consistently outstanding.
The Cream Cheese & Butter Softening Masterclass: Truly softened (but not melted!) cream cheese and butter are paramount for a smooth, stable frosting. If your ingredients are too cold, your frosting will be lumpy. To quickly soften, cut into small pieces and let sit at room temperature for 15-30 minutes, or microwave butter for 10-15 seconds and cream cheese for 20-30 seconds on low power, checking frequently.
Don’t Rush the Chill Factor: Reiterate the absolute importance of the extended chill time for the topping’s stability. This is the “ultimate secret” that prevents slouching and ensures perfect slices of your Layered Red Velvet Pecan Bars. Patience is truly a virtue here.
Perfecting Your Red Hue: For the most vibrant red without bitterness, I highly recommend using a high-quality gel food coloring over liquid. You’ll need less, and it provides a more intense, true red, making your Layered Red Velvet Pecan Bars visually stunning.
The Art of Gentle Mixing: When combining wet and dry ingredients for the cake batter, remember that overmixing develops gluten, which can lead to a dense or tough cake. Mix only until the ingredients are just combined; a few small lumps are perfectly acceptable and won’t affect the final texture.
Clean Cuts Every Time: For picture-perfect Layered Red Velvet Pecan Bars, use a long, sharp chef’s knife. For ultra-clean slices, run your knife under hot water, wipe it dry, and make a cut. Repeat this warming and wiping process before each new cut. This prevents the topping from sticking and dragging.
Solving Common Baking Hurdles: Troubleshooting Your Layered Red Velvet Pecan Bars
Even seasoned bakers encounter challenges. Here’s how to tackle common issues with your Layered Red Velvet Pecan Bars.
Why is My Cream Cheese Topping Runny or Slouching?
This is usually due to one of three reasons: your cream cheese and butter weren’t sufficiently softened, you didn’t beat the frosting long enough to incorporate enough air and emulsify the fats, or you didn’t chill the bars for the recommended time. Ensure ingredients are perfectly at room temperature, beat until visibly light and fluffy for several minutes, and do not shorten the chill time.
My Red Velvet Cake Layer is Dry or Dense!
A dry or dense cake is often caused by overmixing the batter, which develops too much gluten, or overbaking. Ensure you mix only until the ingredients are just combined. Use a timer for baking and test for doneness with a toothpick that comes out with moist crumbs, not liquid batter, to prevent overbaking.
Why are My Layered Red Velvet Pecan Bars Sticking to the Pan?
The most common culprit is insufficient pan preparation. Always line your pan with parchment paper, ensuring a good overhang on two sides. Also, make sure the bars are completely cooled and the cream cheese topping is firm before you attempt to lift them out using the parchment paper sling.
My Red Velvet Color Isn’t Vibrant Enough!
The vibrancy of your red velvet comes down to the type and quantity of food coloring. Liquid food coloring can dilute the batter and offers less intense color. Switch to a high-quality gel food coloring, which provides a much deeper, richer red with just a small amount. You can always add a little more if you desire a truly striking hue.
Creative Twists & Adaptations for Your Layered Red Velvet Pecan Bars
While the classic Layered Red Velvet Pecan Bars are perfect, feel free to customize them to your taste!
Nutty Alternatives and Additions
If pecans aren’t your favorite, feel free to swap them out for toasted walnuts, crunchy macadamia nuts, or slivered almonds for a different flavor profile. For an extra layer of indulgence, fold white chocolate chips or dark chocolate chunks directly into the cake batter before baking.
Flavor Enhancements
To deepen the chocolate notes in the cake, add 1/2 teaspoon of instant espresso powder to the dry ingredients. For a brighter, zesty twist, finely grate a teaspoon of orange zest into your cream cheese frosting. A delicate drizzle of melted white chocolate over the finished, chilled bars also adds an elegant touch and extra sweetness.
Gluten-Free and Dairy-Free Options
For a gluten-free version, use a 1:1 gluten-free all-purpose flour blend (ensure it contains xanthan gum). For dairy-free, substitute buttermilk with a plant-based milk + vinegar, and use vegan cream cheese and butter alternatives. Be aware that texture might vary slightly, but the core flavors of your Layered Red Velvet Pecan Bars will still shine through. For more bar inspiration, consider exploring delicious raspberry crumb bars or decadent chocolate crumb cheesecake bars on our site.
Serving, Storing & Savoring: Maximizing Your Red Velvet Pecan Bars Experience
Ensure your Layered Red Velvet Pecan Bars are enjoyed at their peak and last as long as possible with these practical tips.
Perfect Presentation Tips
For an extra flourish, garnish your Layered Red Velvet Pecan Bars with a few extra pecan halves on top of each square, a light dusting of unsweetened cocoa powder, or elegant white chocolate curls. These bars are delightful served alongside a hot cup of coffee or a scoop of vanilla bean ice cream for a truly decadent dessert experience.
Storage Savvy
Due to the cream cheese topping, these bars must be stored in the refrigerator. Place them in an airtight container to prevent drying out and to absorb any odors from the fridge. When stored correctly, your Layered Red Velvet Pecan Bars will remain fresh and delicious for up to 3-4 days.
Make-Ahead Magic
These bars are an excellent make-ahead dessert! You can prepare and chill them up to 2-3 days in advance. For longer preservation, Layered Red Velvet Pecan Bars freeze beautifully. Wrap individual bars or the entire slab tightly in plastic wrap, then again in aluminum foil. They can be frozen for up to 2 months. Thaw overnight in the refrigerator before serving for the best texture.
Your Top Questions About Layered Red Velvet Pecan Bars Answered
Can I make these Layered Red Velvet Pecan Bars ahead of time?
Absolutely! These bars are ideal for making ahead. You can prepare them fully and store them in an airtight container in the refrigerator for up to 3-4 days before serving. For detailed preparation and storage timeframes, refer to the “Make-Ahead Magic” subsection above.
How long do Layered Red Velvet Pecan Bars last?
When stored properly in an airtight container in the refrigerator, your Layered Red Velvet Pecan Bars will maintain their freshness and delicious taste for 3 to 4 days.
Can I freeze Layered Red Velvet Pecan Bars?
Yes, you can! These bars freeze exceptionally well. For best results, wrap individual bars or the entire cooled slab tightly in plastic wrap, then a layer of aluminum foil, and freeze for up to 2 months. Thaw them overnight in the refrigerator for optimal taste and texture before serving.
What can I use if I don’t have buttermilk for the cake?
No buttermilk? No problem! You can easily make a substitute at home. For 1 cup of buttermilk, combine 1 cup of regular milk (dairy or non-dairy) with 1 tablespoon of white vinegar or lemon juice. Let it sit for 5-10 minutes until it slightly curdles, then use as directed.
Is red food coloring necessary for Layered Red Velvet Pecan Bars?
While red food coloring is essential for the iconic vibrant red hue, it doesn’t significantly impact the flavor. If you prefer to omit it, your bars will still be delicious with a subtle chocolate flavor, but they will have a light brownish-red color rather than the traditional bright red.
Ready to Bake Your Best Layered Red Velvet Pecan Bars Yet?
Now that you’re armed with all the secrets to a perfectly stable cream cheese topping, it’s time to create your own show-stopping Layered Red Velvet Pecan Bars. This recipe guarantees not just incredible flavor, but also the visual appeal and clean slices that will impress everyone. Don’t be shy; dive in and experience the joy of baking a truly flawless dessert.
I can’t wait to see your stunning creations! Share your results with us on social media, or leave a comment below with your thoughts and any creative twists you tried. Happy baking!
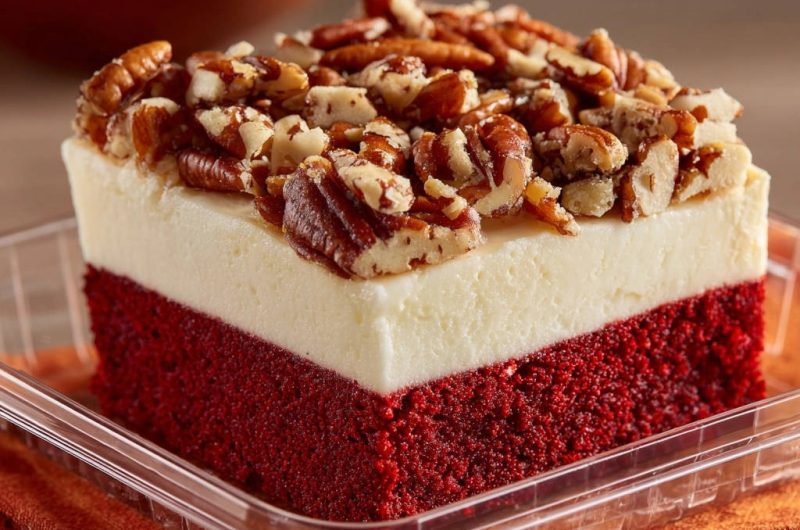
Red Velvet Pecan Bars
Course: DessertCuisine: AmericanDifficulty: medium16
bars35
minutes30
minutes450
kcal65
minutesDiscover the secret to perfectly set cream cheese topping on delicious red velvet bars. This recipe ensures a stable, luscious, and beautifully structured dessert every time, finished with a generous sprinkle of pecans.
Ingredients
1 1/2 cups all-purpose flour
1 1/2 cups granulated sugar
1 tablespoon unsweetened cocoa powder
1 teaspoon baking soda
1/2 teaspoon salt
1 cup buttermilk
1/2 cup vegetable oil
2 large eggs
1 tablespoon red food coloring
1 teaspoon white vinegar
1 teaspoon vanilla extract
16 ounces cream cheese, softened
1/2 cup unsalted butter, softened
4 cups powdered sugar
1 teaspoon vanilla extract
1/4 cup heavy cream
1 cup pecans, whole and chopped
Directions
- Preheat oven to 350F (175C). Line an 8×8 inch baking pan with parchment paper, leaving an overhang on two sides for easy removal later.
- In a large bowl, whisk together the flour, granulated sugar, cocoa powder, baking soda, and salt.
- In a separate medium bowl, whisk together the buttermilk, vegetable oil, eggs, red food coloring, white vinegar, and vanilla extract until well combined.
- Pour the wet ingredients into the dry ingredients and mix with a whisk or spatula until just combined. Be careful not to overmix the batter.
- Pour the red velvet cake batter evenly into the prepared pan and bake for 25-30 minutes, or until a toothpick inserted into the center comes out with moist crumbs.
- Allow the cake to cool completely in the pan on a wire rack. This step is essential before adding the topping.
- For the Cream Cheese Topping: In a large mixing bowl, beat the well-softened cream cheese and butter together until the mixture is incredibly smooth and creamy. This is a critical step for preventing a soft, runny topping, as it properly emulsifies the fats and whips air into the mixture. Beat on medium-high speed for several minutes until light.
- Gradually add the powdered sugar to the cream cheese mixture, one cup at a time, beating well after each addition until thoroughly smooth.
- Add the vanilla extract and heavy cream. Continue beating on medium-high speed for an additional 2-3 minutes until the frosting is light, fluffy, and holds stiff peaks. This aeration and the specific chilling method will ensure its stability.
- Once the red velvet cake is completely cool, spread the cream cheese topping evenly over the cake layer.
- Chill Time is Critical: Refrigerate the entire pan for at least 2-3 hours, or until the cream cheese topping is firm and fully set. This extended chill time is the ultimate secret to preventing any spreading or softness once you cut into the bars.
- Once the bars are chilled and firm, use the parchment overhang to lift the cake from the pan. Sprinkle the whole and chopped pecans generously over the cream cheese layer.
- Cut the cake into squares and serve. Store any leftovers in the refrigerator.
Notes
- Extended chill time for the cream cheese topping is crucial for stability.