Chocolate Crumb Cheesecake Bars: Perfectly Structured Delights
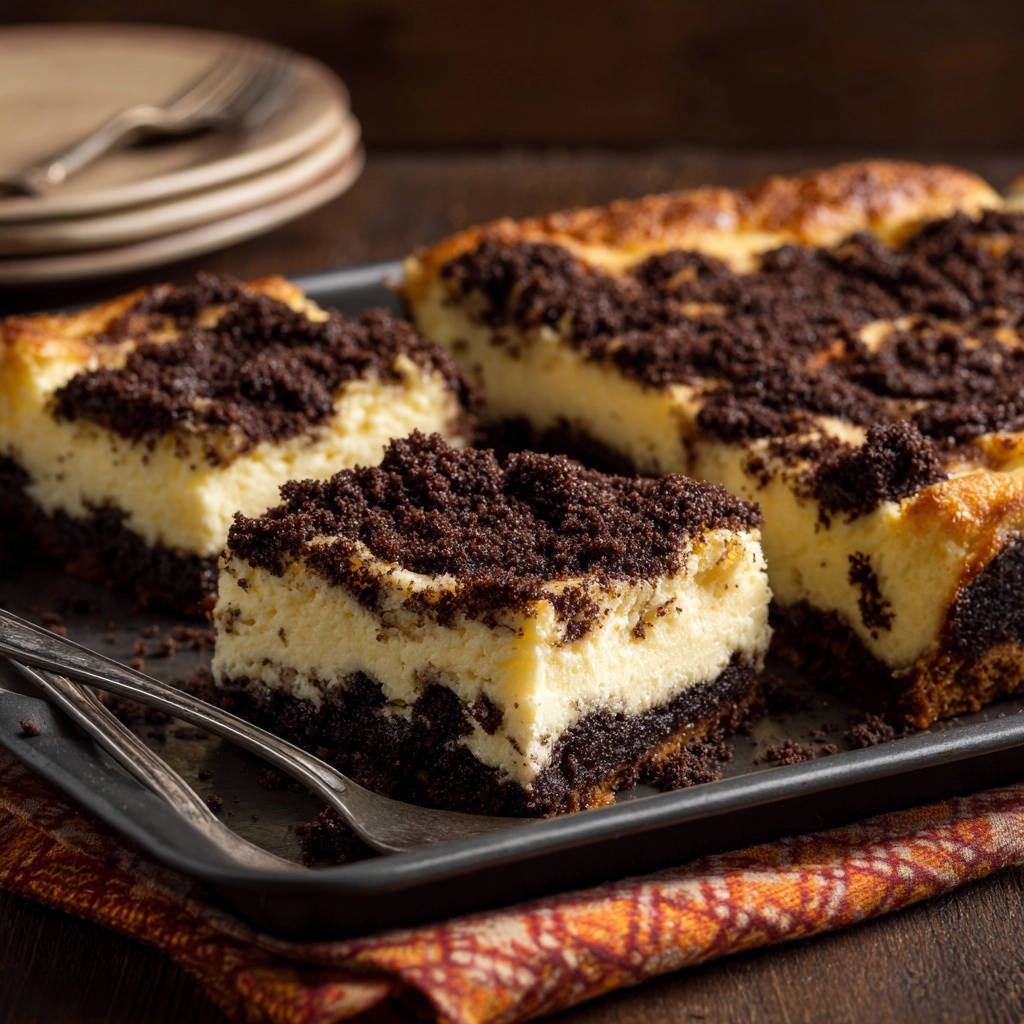
Crafting the ultimate chocolate crumb cheesecake bars used to be my personal baking Everest. I often faced the frustrating reality of a crumbly crust or a topping that just wouldn’t stay put, ruining that perfect bite.
But through dedicated experimentation, I cracked the code to making these delightful chocolate crumb cheesecake bars hold together beautifully, with every luscious layer shining through.
This recipe ensures a stable base and a creamy filling, delivering a dessert that’s not only incredibly delicious but also impeccably structured every single time.
Beyond Basic: Why Our Chocolate Crumb Cheesecake Bars Win Every Time
This isn’t just another cheesecake bar recipe; it’s a meticulously crafted guide designed to eliminate common baking frustrations.
Our method guarantees a dessert that impresses visually and delights with every perfectly layered forkful.
Conquering Common Challenges: No More Crumbly Disasters!
Have you ever spent time baking only for your cheesecake bars to fall apart when sliced? This recipe addresses that common pain point directly.
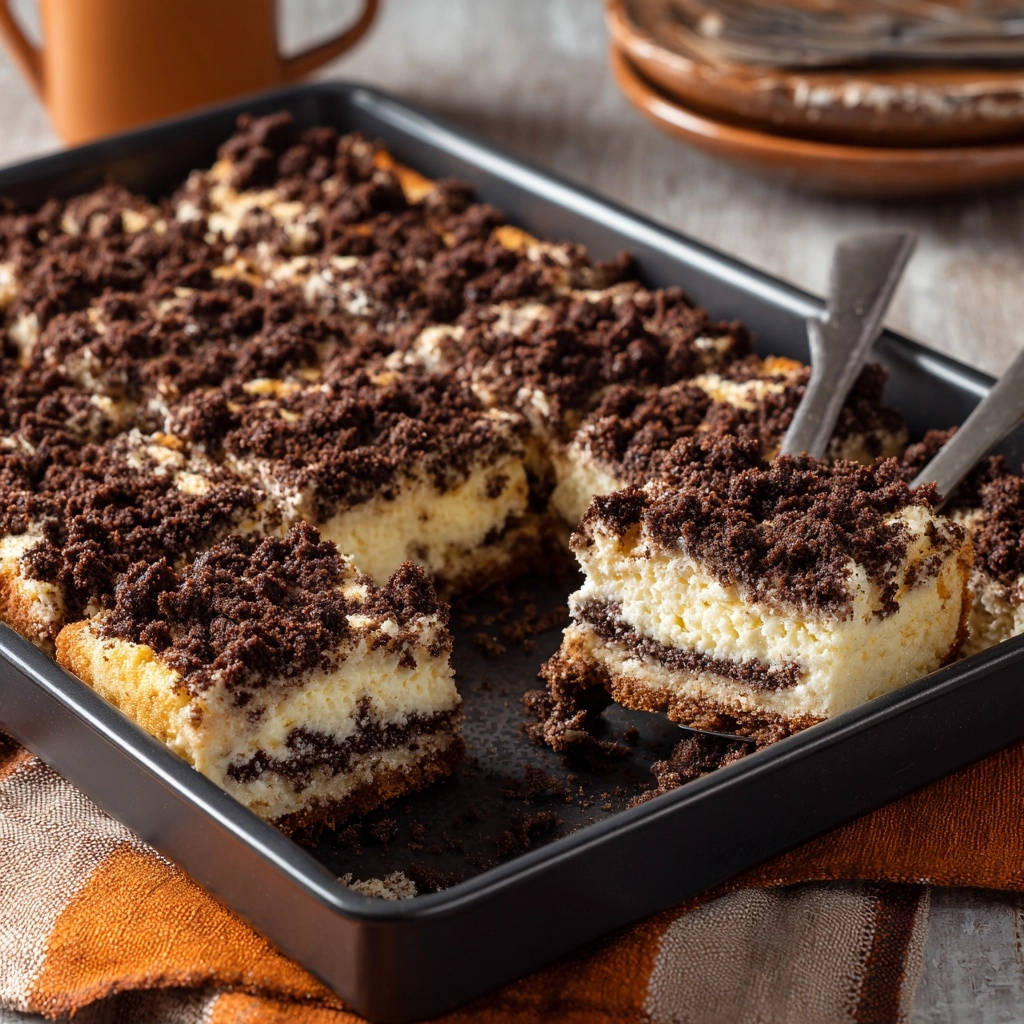
We specifically tackle issues like soggy crusts, crumbly bases, and fillings that crack or weep, ensuring your effort results in success.
Say goodbye to disappointing, structurally unsound treats; these bars are designed for stability and clean presentation.
The Secret to Structure: What Makes This Recipe Stand Out?
The integrity of these chocolate crumb cheesecake bars lies in a few critical techniques.
We emphasize firmly pressing the base and pre-baking it, which prevents sogginess and creates a stable foundation.
Another crucial step is the prolonged chilling time. This allows the cheesecake filling to fully set, ensuring clean, firm slices every time.
Careful mixing techniques, particularly with the eggs, prevent cracks and maintain a smooth, creamy texture in the finished product.
Building Blocks of Deliciousness: Ingredients for Your Bars
Understanding the role of each ingredient is key to successful baking. Quality ingredients truly elevate the final taste and texture of these bars.
For the Irresistible Chocolate Crumb Base
All-purpose flour forms the bulk of our crumb, providing structure and texture.
Unsweetened cocoa powder delivers that deep, rich chocolate flavor without added sweetness, balancing the sugar.
Granulated sugar provides sweetness and helps create the crisp, crumbly texture when baked.
A touch of salt enhances all the flavors, preventing the bars from tasting flat.
Cold unsalted butter, cut into cubes, is absolutely crucial. Its cold temperature is essential for cutting into the dry ingredients, creating distinct crumbs rather than a uniform dough, which ensures a delightfully crumbly texture after baking.
Crafting the Creamy Cheesecake Filling
Softened cream cheese is paramount for a smooth, lump-free cheesecake filling. It ensures effortless blending and a velvety texture.
Granulated sugar sweetens the filling and contributes to its overall creaminess.
Large eggs bind the filling, adding richness and helping it set properly during baking.
Vanilla extract adds a warm, aromatic note that complements the chocolate and creamy cheesecake beautifully.
Equipping Your Kitchen: Must-Have Tools for Success
Having the right tools at hand makes the baking process smoother and helps ensure a professional result.
Key Baking Gear for Perfect Bars
8×8 inch baking pan: This specific size ensures the correct thickness for your bars, leading to proper baking and setting.
Parchment paper: Lining the pan with parchment and leaving an overhang is a game-changer for easy removal and clean cutting.
Electric mixer: Essential for achieving a smooth, creamy cheesecake filling without lumps.
Pastry blender (or fork/fingertips): Necessary for cutting the cold butter into the dry ingredients, ensuring a perfectly crumbly texture.
Wire rack: Allows for even cooling of your bars, preventing condensation and sogginess.
Sharp knife: Crucial for clean, neat slices once the bars are fully chilled.
Your Path to Perfect Chocolate Crumb Cheesecake Bars: A Detailed Guide
- Prepping Your Pan & Oven: The Foundation
Preheat your oven to 350°F (175°C) to ensure it reaches the correct temperature before baking, promoting even cooking.
Lightly grease an 8×8 inch baking pan, then line it with parchment paper, allowing an overhang on two sides. This parchment paper sling makes lifting the finished bars out of the pan incredibly easy, preventing damage during removal.
- Crafting the Non-Crumbly Chocolate Base
In a large bowl, thoroughly whisk together the all-purpose flour, cocoa powder, granulated sugar, and salt.
Add the cold, cubed butter to the dry ingredients. Using a pastry blender, your fingertips, or even a fork, cut the butter into the mixture until it resembles coarse crumbs.
The key here is to leave some pea-sized pieces of butter remaining and not to overmix; this technique ensures you get distinct crumbs that will be tender and crisp, not a tough, cookie-like paste.
- Pressing & Pre-Baking for Stability
Take about two-thirds of the chocolate crumb mixture and firmly and evenly press it into the bottom of your prepared baking pan.
This firm pressing is absolutely crucial for creating a non-crumbly base that holds its shape when sliced.
Bake the crust for 10 minutes; this pre-baking step helps to set the crust and acts as a barrier, preventing it from becoming soggy once the creamy cheesecake filling is added.
- Whipping Up the Velvety Cheesecake Filling
While the crust bakes, prepare your filling. In a separate large bowl, use an electric mixer to beat the softened cream cheese until it is completely smooth and creamy.
Gradually beat in the granulated sugar until it is fully incorporated and the mixture is light and fluffy.
- Incorporating Eggs & Vanilla: The Delicate Touch
Add the large eggs one at a time, beating just until each egg is incorporated after each addition.
Finally, stir in the vanilla extract. It’s crucial not to overmix the eggs; excessive beating can incorporate too much air, which may cause the cheesecake filling to puff up too much during baking and then crack upon cooling.
- Assembling the Layers: Precision is Key
Carefully pour the smooth cheesecake filling evenly over the pre-baked chocolate crumb crust in the pan.
Then, evenly sprinkle the remaining one-third of the chocolate crumb mixture over the top of the cheesecake filling.
- Baking to Golden Perfection
Bake the bars for 30-35 minutes.
You’ll know they’re ready when the edges appear lightly golden and the center is mostly set, showing only a slight jiggle when gently shaken.
- The Crucial Chill: Why Patience Pays Off
Once baked, remove the pan from the oven and let the bars cool completely on a wire rack at room temperature.
After reaching room temperature, transfer the pan to the refrigerator and chill for at least 4 hours, or preferably overnight.
This prolonged chilling is absolutely essential for the bars to set properly; it allows for clean, firm slices and prevents the crumb and cheesecake layers from falling apart when cut.
- Slicing and Serving Your Masterpiece
Once thoroughly chilled, use the parchment paper overhang to gently lift the chocolate crumb cheesecake bars out of the pan.
Using a sharp knife, cut the large slab into desired squares or rectangles. For the neatest slices, wipe your knife clean between each cut.
Serve and enjoy your perfectly structured, non-crumbly treats!
Unlock the Secrets: Elevate Your Chocolate Crumb Cheesecake Bars
Beyond the steps, a few expert tips can truly transform your baking experience.
Mastering the Crumb: Texture and Consistency
The “not to overmix” instruction for the crumb mixture is paramount.
Overmixing develops the gluten in the flour, resulting in a tough, cookie-like crust instead of the desired tender, crumbly texture.
The small, pea-sized pieces of cold butter are essential because they melt slowly in the oven, creating pockets of steam that expand and separate the flour, leading to a wonderfully flaky and crisp crumb.
Cheesecake Filling Perfection: Avoiding Cracks
Always ensure your cream cheese is truly at room temperature and softened before you begin.
Cold cream cheese will result in lumps, no matter how long you beat it, leading to an uneven texture.
Similarly, avoid overmixing the eggs. Introduce them one at a time and mix only until just incorporated; this minimizes air incorporation, which is a common culprit for surface cracks as the cheesecake cools and contracts.
The Power of Patience: Chilling Done Right
The overnight chill is not just a suggestion; it’s a critical step for perfect chocolate crumb cheesecake bars.
This extended refrigeration time allows the fats in the cheesecake filling to solidify and the flavors to meld, resulting in a firm, sliceable bar with superior structural integrity and enhanced taste.
Sharp Knife, Clean Cuts: Presentation Matters
For bakery-worthy slices, use a long, sharp knife.
After each cut, wipe the blade clean with a warm, damp cloth or paper towel. This prevents crumb and cheesecake residue from transferring to your next slice, ensuring crisp edges and beautiful presentation.
Solving Sweet Dilemmas: Troubleshooting Your Bars
Even with the best intentions, baking can sometimes present challenges. Here’s how to troubleshoot common issues with your chocolate crumb cheesecake bars.
“My Bars Are Crumbly and Fall Apart!”
This is often due to insufficient pressing of the base. Ensure you press the crumb mixture firmly and evenly into the pan.
Another factor could be inadequate chilling time. The cheesecake needs at least 4 hours, ideally overnight, to fully set and bind all layers together.
Finally, ensure your pre-bake of the crust was sufficient to set it properly before adding the filling.
“The Cheesecake Filling Cracked on Top!”
Cracks typically result from overmixing the eggs, which incorporates too much air, or baking at too high a temperature.
Bake the bars until the edges are just set and the center has a slight wobble, then cool them gradually, avoiding sudden temperature changes like moving them directly into a cold refrigerator from a hot oven.
Using a water bath for cheesecake (though not specified for bars) is a common trick to prevent cracks, but for bars, gentle handling and proper cooling are usually sufficient.
“My Crust Is Soggy!”
A soggy crust usually means it wasn’t pre-baked long enough or at a high enough temperature to dry out sufficiently.
Make sure to press the base firmly before pre-baking for 10 minutes. Also, ensure your pan is properly lined with parchment paper, as this helps prevent the crust from absorbing moisture from the pan.
Enjoying & Preserving Your Chocolate Crumb Cheesecake Bars
Once perfected, these chocolate crumb cheesecake bars are versatile and easy to store, making them ideal for any occasion.
If you enjoy these bars, you’ll love the bright citrus glaze in this glazed blueberry lemon bundt cake.
Creative Serving Ideas for Extra Indulgence
While delicious on their own, consider elevating your bars with simple garnishes.
A sprinkle of fresh berries like raspberries or strawberries adds a bright, tart counterpoint.
For extra decadence, a dollop of freshly whipped cream, a dusting of extra cocoa powder, or delicate chocolate shavings can make them truly special.
Storing Your Decadent Delights
Store your chocolate crumb cheesecake bars in an airtight container in the refrigerator for up to 5-7 days.
For longer storage, they freeze beautifully for up to 2-3 months. Wrap individual bars tightly in plastic wrap, then aluminum foil, before placing them in a freezer-safe bag or container.
Thaw them in the refrigerator overnight before serving for the best texture.
Make-Ahead Magic: Planning for Stress-Free Desserts
These bars are an ideal make-ahead dessert! They actually benefit from an overnight chill, allowing flavors to deepen and textures to meld.
For chocolate lovers, the same make-ahead approach works beautifully with this flourless dark chocolate torte.
Preparing them a day in advance frees you up on the day of your event, reducing stress and ensuring a perfectly set dessert.
Frequently Asked Questions About Chocolate Crumb Cheesecake Bars
Can I make these bars gluten-free?
Yes, you can often substitute a good quality gluten-free all-purpose flour blend for the regular flour in the crumb mixture. Ensure your blend contains xanthan gum, or add 1/4 teaspoon per cup of flour, for best results.
How long do these Chocolate Crumb Cheesecake Bars last?
Properly stored in an airtight container in the refrigerator, these bars will stay fresh and delicious for 5 to 7 days.
Can I use different types of chocolate in the crumb?
While unsweetened cocoa powder is classic, you can experiment! A mix of cocoa powder and finely chopped dark chocolate in the crumb can add an extra layer of chocolate intensity.
What if I don’t have a pastry blender for the crumb?
No pastry blender? No problem! You can use two forks to cut the butter into the flour mixture, or even your fingertips, but work quickly to keep the butter as cold as possible.
How do I know when the bars are perfectly set?
During baking, the edges will appear lightly golden and the center will have only a slight jiggle. After chilling, they should feel firm to the touch and hold their shape beautifully when lifted.
Share Your Chocolate Crumb Cheesecake Bars Success!
Now that you’re armed with all the expert tips and a foolproof recipe, it’s time to create your own perfectly structured chocolate crumb cheesecake bars!
What to Serve with Your Cheesecake Bars
Those chocolate crumb cheesecake bars are rich, creamy, and just the right amount of structured. Here are two recipes that share that same cozy, chocolate-forward spirit.
- For a breakfast that leans into dessert territory, these Ultra-Gooey Chocolate Cinnamon Rolls bring the same deep cocoa flavor with a soft, pillowy texture that contrasts the cheesecake’s density.
- If you want a savory counterpoint, this Skillet Creamed Corn uses a thick, silky sauce that plays well against the sweetness of the cheesecake bars without competing for attention.
I can’t wait for you to experience the joy of biting into a bar that holds its form beautifully, delivering that ideal balance of crumbly chocolate and creamy cheesecake.
Try this recipe for your next gathering or simply for a delightful treat at home. Be sure to share your creations and let me know how these delightful dessert squares turned out for you!
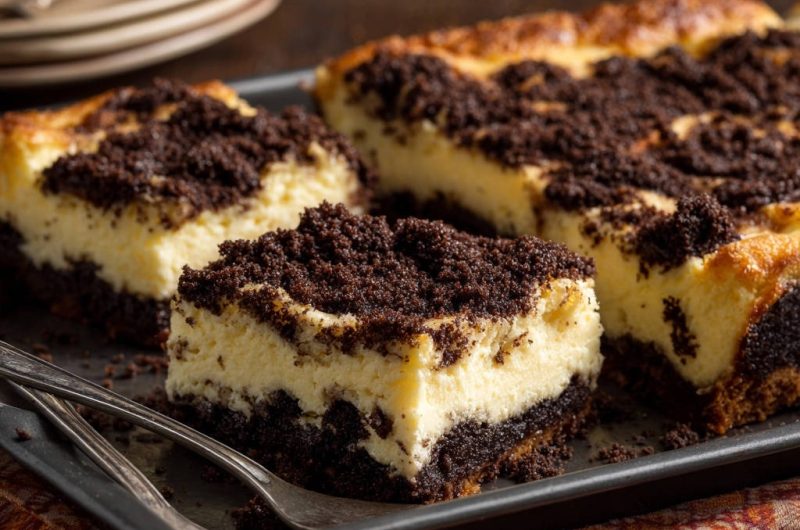
Cheesecake Bars
Course: DessertCuisine: AmericanDifficulty: medium16
bars20
minutes45
minutes90
kcal65
minutesSay goodbye to crumbly crusts and falling toppings! This recipe for Chocolate Crumb Cheesecake Bars reveals the secrets to beautifully structured layers that hold together perfectly. Enjoy a delightful dessert that’s easy to make and even easier to love.
Ingredients
For the Chocolate Crumb:
1 1/2 cups all-purpose flour
1/2 cup unsweetened cocoa powder
1 cup granulated sugar
1/4 teaspoon salt
1 cup (2 sticks) cold unsalted butter, cut into cubes
For the Cheesecake Filling:
2 packages (8 ounces each) cream cheese, softened
3/4 cup granulated sugar
2 large eggs
1 teaspoon vanilla extract
Directions
- Preheat your oven to 350°F (175°C). Lightly grease an 8×8 inch baking pan and line it with parchment paper, leaving an overhang on two sides for easy lifting.
- For the Chocolate Crumb: In a large bowl, whisk together the flour, cocoa powder, granulated sugar, and salt. Add the cold, cubed butter. Using a pastry blender, your fingertips, or a fork, cut the butter into the dry ingredients until the mixture resembles coarse crumbs, with some pea-sized pieces of butter remaining. The key here is not to overmix; you want distinct crumbs, not a paste.
- Press about two-thirds of the crumb mixture firmly and evenly into the bottom of the prepared baking pan. This firm pressing is crucial for a non-crumbly base that holds its shape when sliced. Bake for 10 minutes to set the crust and prevent sogginess later.
- While the crust bakes, prepare the cheesecake filling. In a separate large bowl, beat the softened cream cheese with an electric mixer until smooth and creamy. Gradually beat in the granulated sugar until well combined.
- Add the eggs one at a time, beating just until incorporated after each addition. Stir in the vanilla extract. Be careful not to overmix the eggs, as this can incorporate too much air and lead to cracks.
- Pour the cheesecake filling evenly over the pre-baked crust in the pan.
- Evenly sprinkle the remaining one-third of the chocolate crumb mixture over the cheesecake filling.
- Bake for 30-35 minutes, or until the edges are lightly golden and the center is mostly set with a slight jiggle.
- Remove the pan from the oven and let it cool completely on a wire rack at room temperature. Once cooled, transfer the pan to the refrigerator and chill for at least 4 hours, or preferably overnight. This prolonged chilling is absolutely essential for the bars to set properly, allowing for clean, firm slices and preventing the crumb layers from falling apart when cut.
- Once thoroughly chilled, use the parchment paper overhang to lift the bars out of the pan. Cut into squares or rectangles using a sharp knife, wiping the knife clean between cuts for the neatest slices. Serve and enjoy your perfectly structured, non-crumbly bars!
Notes
- Chilling for at least 4 hours, or preferably overnight, is essential for the bars to set properly and allow for clean, firm slices.