Mastering Skillet Creamed Corn: The Steakhouse Secret to Thick Sauce
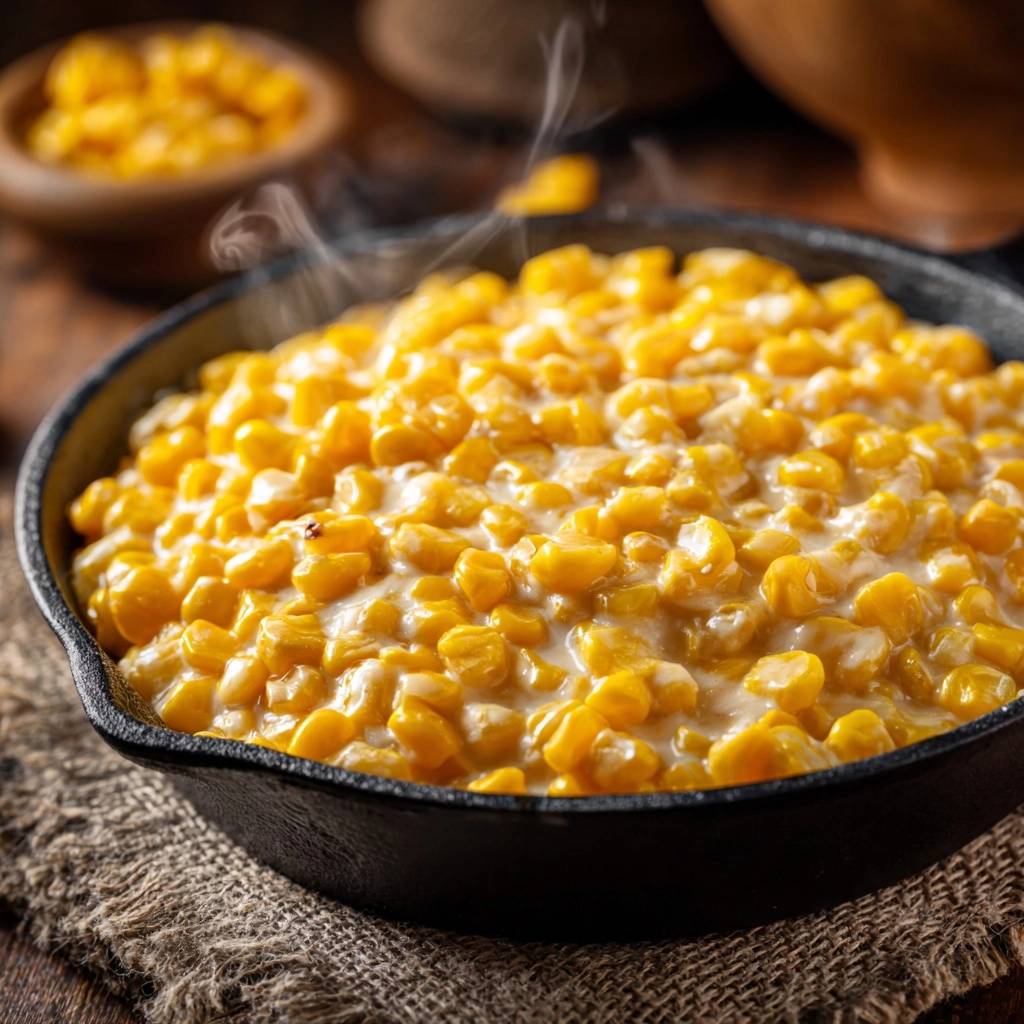
Stop settling for that runny, bland side dish that leaks all over your dinner plate. Most creamed corn recipes fail because they rely on too much liquid or canned “cream style” mush that lacks any real bite. You want a side dish that feels indulgent, with a velvety sauce that actually clings to every single kernel of corn.
This skillet method changes the game by focusing on a specific reduction technique and a cream cheese stabilizer. Instead of a soupy mess, you get a rich, steakhouse-quality result that holds its own next to a juicy steak or roasted chicken. It’s all about controlling the moisture and building a thick, luscious emulsion that stays creamy from the first bite to the last.
The secret to this perfect texture is the initial sauté. By hitting the corn with high heat in a dry skillet before adding any liquids, you cook off the excess water that usually thins out the sauce. This simple step ensures your creamed corn is never watery, providing a concentrated corn flavor and a professional finish every time.
Why Most Skillet Creamed Corn Ends Up Watery
Corn is naturally full of water, and as it heats up, those cell walls break down and release moisture. If you pour cream directly onto cold corn, that released water mixes with the fat, creating a thin, broken sauce. This is the primary reason most homemade versions feel more like a soup than a cohesive side dish.
Using a skillet rather than a deep pot is a strategic choice for moisture management. The wide surface area of a skillet allows for faster evaporation, which is essential for thickening the sauce through reduction. In a deep pot, the steam gets trapped, which effectively boils the corn in its own juices and prevents the sauce from tightening up properly.
Frozen corn is particularly prone to this issue because the freezing process creates ice crystals that turn into extra liquid upon thawing. If you don’t give that moisture a chance to escape during the first few minutes of cooking, it will inevitably dilute your heavy cream. Starting with a hot, buttery skillet is your best defense against a soggy plate.

Essential Components for a Velvety Corn Base
Quality ingredients make a massive difference when you only have a handful of items in the pan. I always recommend using unsalted butter because it allows you to control the seasoning perfectly. Since different brands of frozen corn or various seasons of fresh corn have different sodium levels, you want to be the one deciding how much salt goes into the final dish.
Heavy cream is a non-negotiable component for that signature steakhouse mouthfeel. While you might be tempted to use milk or half-and-half, they simply don’t have the fat content required to withstand the simmer without breaking. The fat in the heavy cream coats the corn kernels, creating a barrier that keeps them crisp while the sauce thickens around them.
A touch of granulated sugar might seem odd, but it’s there to bridge the gap between the savory butter and the natural sugars in the corn. It doesn’t make the dish dessert-sweet; rather, it enhances the “corn-ness” of the kernels. A tiny pinch of salt and black pepper provides the necessary contrast to all that rich dairy.
The Role of Cream Cheese as a Stabilizer
Cream cheese is the “secret weapon” in this recipe that provides structural integrity to the sauce. It contains stabilizers like carob bean gum or guar gum which help keep the emulsion of fat and water from separating. When you stir it in at the end, it acts like a glue that binds the heavy cream and the corn juices together.
Beyond the science, it adds a subtle tang that cuts through the richness of the heavy cream. It creates a “clinging” effect where the sauce stays wrapped around the corn rather than pooling at the bottom of the bowl. This ensures that every spoonful delivers a balanced ratio of kernel to cream.
Flour Slurries vs. Traditional Roux
Many traditional recipes start with a roux, which involves cooking flour and butter together before adding liquid. However, for a quick 15-minute skillet dish, a cold-slurry method is actually superior. By whisking the flour into the cold heavy cream before it hits the pan, you ensure there are absolutely no lumps in your sauce.
The same trick of letting steam escape helps solve the soggy potato problem in a loaded hashbrown casserole.
This method also allows the flour to hydrate fully before it begins to thicken. Since we are only simmering the corn for a few minutes, a slurry prevents that gritty, raw flour taste that can happen if a roux isn’t cooked long enough. It’s a faster, more reliable way to achieve a glossy, smooth finish without the fuss.
Phase One: Sautéing for Maximum Flavor Extraction
Start by getting your skillet nice and hot over medium-high heat before dropping in the butter. Once the butter is foaming, toss in your corn kernels and let them sizzle. You aren’t looking for a deep brown char here, but you do want to see the corn turn a vibrant, bright yellow as it heats through.
During these first five minutes, you’ll notice steam rising rapidly from the pan. This is exactly what you want—that’s the excess moisture leaving the building. Stir the corn frequently so every kernel gets coated in butter and hits the hot surface of the skillet. If you’re using a cast-iron skillet, the heat retention will help this process happen quickly and evenly.
You’ll know you’re ready for the next step when the “hissing” sound of the steam subsides and the corn looks slightly glossy and plump. There should be no liquid pooling at the bottom of the pan. This dry-base environment is the perfect foundation for the cream mixture you’re about to add.
Phase Two: The Reduction and Thickening Process
Once the corn is prepped, turn the heat down to medium and pour in your cream and flour mixture. It will look very thin at first, almost like the corn is sitting in a pool of milk. Don’t worry; this is where the transformation happens. As the mixture heats up, the starches in the flour will begin to swell and grab onto the liquid.
You must bring the skillet to a gentle boil—look for small, consistent bubbles breaking the surface. If the sauce doesn’t reach this temperature, the flour won’t activate, and your sauce will stay thin. Keep stirring constantly during this phase to prevent the bottom from scorching, as the sugar and dairy can stick easily.
After about 5 to 8 minutes of simmering, you’ll see the bubbles get larger and “lazier.” The sauce will start to look opaque and heavy. When you pull your spatula through the center of the pan, the sauce should take a second or two to flow back into the gap. This is the sign that the reduction is working its magic.
Phase Three: Incorporating the Cream Cheese Finish
Now it’s time to add the softened cream cheese. I find it’s best to drop it in small chunks rather than one big block so it melts quickly and evenly. Use your spoon or whisk to stir vigorously, breaking up the chunks until they disappear into the sauce. You’ll see the color shift to a beautiful, pale ivory.
This is the moment to perform the “spoon trail” test. Drag your spoon across the bottom of the skillet; if it leaves a clear, wide path that stays open for a few seconds, the consistency is perfect. The sauce should look thick enough to coat the back of a spoon without dripping off immediately.
Remove the skillet from the heat the second you reach this stage. The residual heat from the cast iron will continue to thicken the sauce as you bring it to the table. If you leave it on the burner too long, the sauce can become overly thick or “pasty,” so timing is everything here.
The Science of Corn: Fresh, Frozen, or Canned?
While fresh corn cut straight off the cob is wonderful in the summer, frozen corn is actually a fantastic year-round choice for this recipe. Most frozen corn is flash-frozen within hours of being picked, which locks in the natural sugars before they turn into starch. This often makes it “fresher” than the corn sitting in the produce aisle for a week.
If the sauce gets too thick, a splash of milk works the same way it does when you’re making creamy mashed potatoes with gravy.
If you use frozen corn, make sure to thaw it and pat it dry with a paper towel before it hits the skillet. This gives you a head start on the moisture evaporation process. If you’re using canned corn, drain it thoroughly in a colander and rinse it to remove the metallic “canning liquid” taste before sautéing.
Fresh corn will require an extra minute or two of sautéing because the kernels are denser. However, fresh corn also brings “corn milk” to the party—that starchy liquid you get when you scrape the cob. If you have it, add that milk into the skillet along with the heavy cream for an even deeper flavor profile.
Flavor Variations Without Compromising Texture
Once you master the base technique, you can easily tweak the flavors. For a smoky version, add a half-teaspoon of smoked paprika or a pinch of chipotle powder during the sauté phase. The spices will bloom in the hot butter, spreading their flavor much more effectively than if you added them at the end.
If you prefer a savory, herb-forward profile, stir in some fresh chopped chives or thyme right before serving. Fresh herbs are delicate, so adding them at the very end preserves their bright color and aroma. A tiny grating of fresh nutmeg is another classic chef trick that makes the cream sauce taste more complex and expensive.
For those who like a bit of heat, a pinch of cayenne pepper or some diced jalapeños sautéed with the corn adds a great kick. Just remember to keep the ratios of liquid the same so you don’t mess with that perfect, thick consistency we worked so hard to achieve.
Troubleshooting Common Skillet Creamed Corn Issues
If your sauce ends up too thick—which can happen if you simmer it a minute too long—don’t panic. Simply stir in a tablespoon of heavy cream or even a splash of water to loosen it up. Do this off the heat so you don’t accidentally trigger more evaporation and end up back where you started.
A grainy sauce usually means the cream cheese wasn’t softened enough before it was added, or the heat was too high, causing the dairy to “clump.” To fix this, keep stirring vigorously over very low heat. Usually, the lumps will eventually smooth out as the fats fully melt and integrate into the sauce.
If the sauce separates and looks oily, it means the emulsion has broken, likely from boiling too hard for too long. You can often save a broken sauce by removing it from the heat and whisking in a tiny splash of cold cream. The cold liquid helps bring the temperature down and encourages the fats to re-emulsify.
Optimal Pairings for Rich Vegetable Sides
This creamed corn is incredibly rich, so it pairs best with main courses that have a bit of salt or acidity to balance the palate. It is the ultimate companion for a seared ribeye or a charred tri-tip. The sweetness of the corn cuts through the savory fat of the beef beautifully.
It also works wonders alongside roasted chicken or turkey. Because the sauce is so thick, it acts almost like a gravy for the meat. If you’re serving a vegetarian meal, try pairing it with a hearty grain bowl or roasted cauliflower steaks. The creamy texture provides the “heaviness” that makes a meatless meal feel truly satisfying.
For a Southern-inspired spread, serve this alongside some blackened fish or spicy grilled shrimp. The cool, creamy corn provides a much-needed relief from the spice of the seafood. No matter what you pair it with, make sure to serve it in a shallow bowl to show off that glossy, thick sauce.
What to Serve with Creamed Corn
This skillet creamed corn is rich and sweet, so you want sides that match its bold, comforting style.
- Balance the creamy corn with the crunchy crust of these Turtle Cheesecake Bars for a dessert that echoes the same caramel and nutty notes.
- Pair the corn with this Southern Style Baked Mac and Cheese for a double dose of cheesy, baked comfort that shares the same indulgent, oven-browned finish.
Storage and Reheating for Lasting Creaminess
Leftover creamed corn stays delicious in the refrigerator for about 3 to 4 days when kept in an airtight container. However, you’ll notice that it firms up significantly once it’s cold. This is because the fats in the butter, cream, and cream cheese solidify at lower temperatures.
When reheating, avoid the microwave if possible, as it can heat the dish unevenly and cause the sauce to break. Instead, place the corn back in a small skillet over low heat. Add a tablespoon of water or cream to help “loosen” the sauce as it warms up. Stir gently until it returns to its original velvety state.
I don’t recommend freezing this dish. Cream-based sauces that rely on a flour slurry often become grainy or “spongy” after being frozen and thawed. The ice crystals disrupt the starch bonds, leading to a watery mess once reheated. This dish is so fast to make that it’s always better to enjoy it fresh.
Expert Tips for High-Volume Batch Cooking
If you’re cooking for a large crowd and need to double or triple the recipe, be careful with your pan choice. Doubling the ingredients in a single skillet will drastically increase the depth of the corn, which slows down evaporation. This can lead to the very “watery” problem we are trying to avoid.
For large batches, it’s actually better to use two separate skillets simultaneously. This maintains the high surface-area-to-volume ratio needed for a quick reduction. If you must use one large vessel, choose a very wide braiser rather than a deep stockpot to ensure the steam can escape freely.
Also, remember that a larger volume of cold cream will take longer to reach a boil. Be patient and wait for those “lazy bubbles” before you decide the sauce is thick enough. If you rush the process with a large batch, the flour won’t have time to do its job, and you’ll end up with a thin sauce.
Frequently Asked Questions
Can I use a low-fat cream substitute?
I strongly advise against using low-fat milk or “light” cream substitutes. The fat content in heavy cream is structural; it provides the viscosity and stability needed to create a thick sauce. Low-fat versions are much more likely to curdle when they hit the heat and won’t achieve that signature velvety cling.
How do I prevent the sugar from burning?
The sugar should only be added once the liquid (cream) is in the pan. The liquid acts as a buffer, distributing the heat and preventing the sugar from direct contact with the hot metal of the skillet. As long as you keep the heat at a medium simmer and stir regularly, the sugar will dissolve safely into the sauce.
Is a cast-iron skillet strictly necessary?
While a cast-iron skillet is preferred for its superior heat retention and even cooking, you can use a heavy-bottomed stainless steel or non-stick skillet. The key is the width of the pan. Just avoid thin aluminum pans, which can have hot spots that might scorch the dairy or the sugar before the sauce has a chance to thicken.
What if my sauce is still too thin after 8 minutes?
If your sauce hasn’t thickened up, it’s likely because it didn’t reach a high enough temperature to activate the flour. Increase the heat slightly until you see active bubbling. If it’s still thin after that, you can whisk another teaspoon of cream cheese into the center of the pan; the extra fats and stabilizers will help tighten the sauce immediately.
Creamed Corn
Course: Side DishCuisine: AmericanDifficulty: easy6
servings5
minutes15
minutes210
kcal20
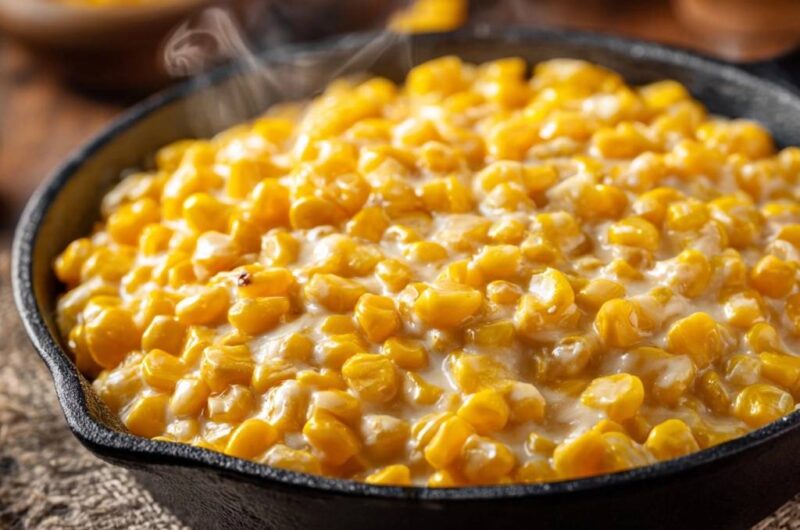
MinutesThis skillet method avoids the common pitfalls of runny creamed corn by using a flour and heavy cream slurry combined with cream cheese. The result is a thick, decadent sauce that perfectly coats every kernel of corn.
Ingredients
20 ounces whole kernel corn (fresh or frozen/thawed)
3 tablespoons unsalted butter
1 cup heavy cream
1 teaspoon granulated sugar
1/2 teaspoon salt
1/4 teaspoon black pepper
3 tablespoons cream cheese, softened
1 tablespoon all-purpose flour
Optional: Pinch of cayenne or freshly grated nutmeg
Directions
- Melt the butter in a large cast-iron skillet over medium-high heat. Add the corn kernels and sauté for 5 minutes. Stir frequently until the corn is heated through and any surface moisture has evaporated. This step is crucial to prevent a watery final sauce.
- In a small bowl, whisk the flour into the heavy cream until completely smooth. This cold-slurry method ensures a lump-free, thick consistency.
- Reduce the skillet heat to medium. Pour the cream mixture over the corn. Stir in the sugar, salt, and pepper.
- Simmer for 5 to 8 minutes, stirring constantly. The sauce must reach a gentle boil for the flour to activate its thickening power. You will see the sauce begin to reduce and coat the corn heavily.
- Add the softened cream cheese in small chunks. Stir vigorously until the cheese is fully melted and incorporated. The cream cheese acts as a stabilizer, locking in the texture so the sauce never separates or thins out on the plate.
- Remove from heat once the sauce is thick enough to leave a trail when a spoon is dragged through the skillet. Serve immediately while steaming hot.
Notes
- To prevent a watery sauce, ensure any surface moisture on the corn has evaporated during the initial sauté. The sauce must reach a gentle boil to activate the thickening power of the flour.