Mastering Cheesy Beef and Rice Stuffed Peppers
We’ve all experienced the disappointment of a soggy stuffed pepper. You cut into a beautiful shell only to find a pool of watery liquid at the bottom and a mushy, flavorless exterior that falls apart. It’s a common kitchen fail that turns a classic comfort meal into a textural mess. This recipe changes that by focusing on structural integrity and moisture control.
The secret lies in a specific two-stage cooking process that treats the pepper and the filling as two distinct components before they unite. By managing the water content of the vegetables and the starch of the rice, you create a dish with a tender-crisp bite and a savory, concentrated beef filling. It’s the ultimate version of a family favorite, refined for the perfect mouthfeel.
I’ve found that the real trick to professional-grade stuffed peppers is the “drain and fill” method. Most people stuff raw or par-boiled peppers, which traps steam inside. Instead, we pre-roast the empty shells to let that steam escape, then tip them over to dump out any residual moisture before the beef ever touches the vegetable. This ensures your Cheesy Beef and Rice Stuffed Peppers stay firm and flavorful.
The Science of the Anti-Soggy Pre-Roast
Bell peppers are roughly 90% water. When you subject them to heat, the cellular walls begin to break down, releasing that internal moisture. If you fill a raw pepper and bake it, that water has nowhere to go but into your rice, turning your filling into a gummy paste. A 400°F pre-roast acts as a vital dehydration phase.
During those first 15 minutes in the oven, the high heat coaxes the water out of the pepper’s cells and evaporates it. This process also initiates the Maillard reaction on the interior walls. You’ll notice the inside of the pepper starts to look slightly matte rather than shiny, which indicates the sugars are beginning to caramelize, adding a layer of sweetness that balances the savory beef.
Why Empty Shells Need Salt and Oil
Don’t just throw dry peppers into the oven. A tiny drizzle of olive oil acts as a heat conductor, ensuring the pepper softens evenly without the skin shriveling into a tough, papery layer. It keeps the exterior supple while the high heat works on the structure.
Salt is equally important here because of osmosis. By lightly salting the inside of the empty shell, you encourage the pepper to “sweat” out its excess water more efficiently. This ensures that by the time you add your filling, the pepper has already done its shrinking and shedding, leaving you with a sturdy vessel that holds its shape on the plate.
Essential Components for Cheesy Beef and Rice Stuffed Peppers
Quality ingredients make the difference between a bland dinner and a standout meal. For the protein, I always recommend a lean ground beef, specifically a 90/10 or 93/7 blend. While fat usually equals flavor, too much rendered fat inside a pepper shell creates a greasy pool that ruins the texture of the rice. Lean beef provides plenty of “beefy” punch without the oil slick.
The aromatics and spices are your flavor anchors. Freshly minced garlic and finely diced onions provide the foundational sweetness, while the tomato sauce acts as the glue. Using a thick marinara or a concentrated tomato sauce is better than using crushed tomatoes, as the lower water content helps maintain that “anti-soggy” promise we’re aiming for.
Selecting the Right Bell Peppers
When you’re at the grocery store, look for “four-lobed” peppers. These are the ones with four distinct bumps on the bottom, which allow them to stand upright like a cup without wobbling. Three-lobed peppers are often lopsided and will tip over in your baking dish, spilling that precious cheese.
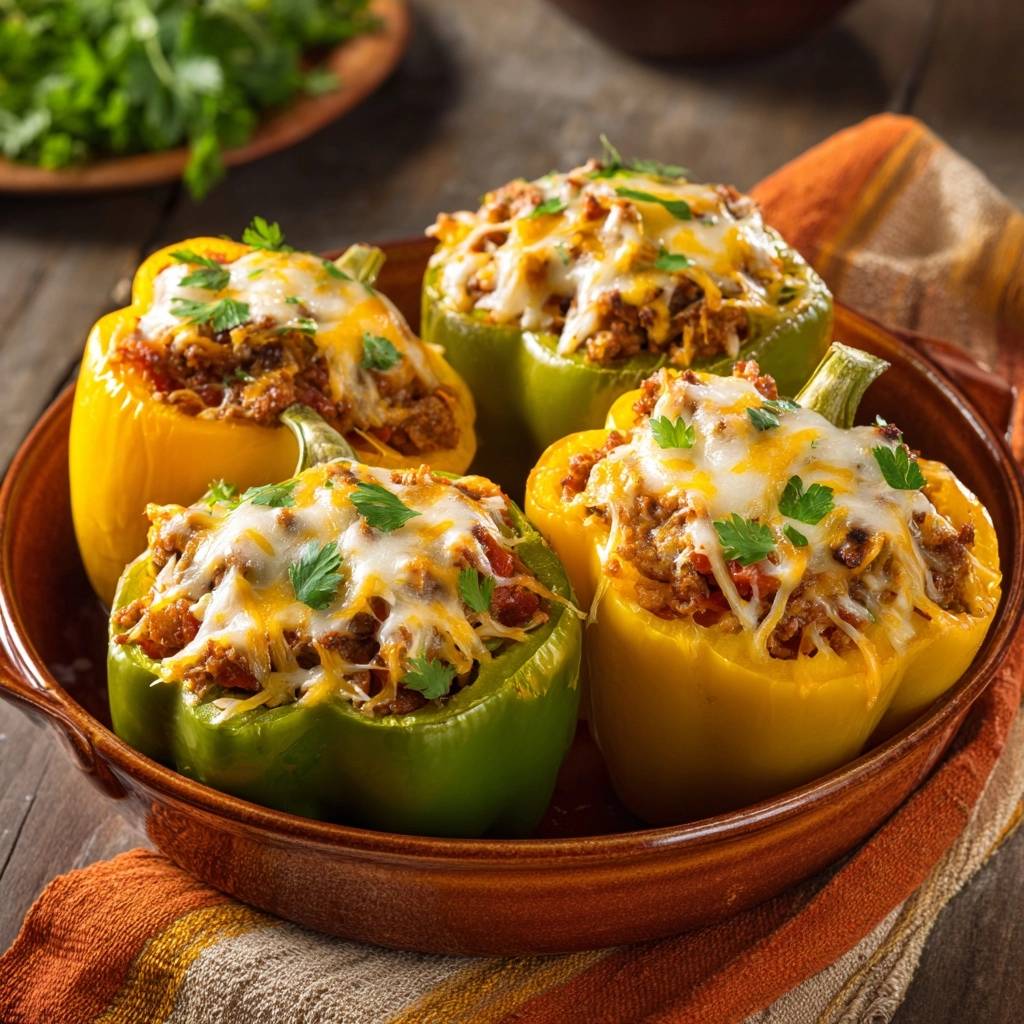
I love using a mix of yellow and green peppers. Green peppers have a slightly bitter, grassy note that cuts through the richness of the melted cheese. Yellow and orange peppers are much sweeter and milder. Using a variety not only looks beautiful but gives every person at the table a slightly different flavor profile to enjoy.
The Role of Long-Grain White Rice
Rice choice is a make-or-break decision for this dish. Long-grain white rice is the gold standard here because the grains stay distinct and fluffy even after being mixed with sauce and baked. Short-grain or arborio rice contains too much amylopectin (starch), which can turn the filling into a heavy, sticky mass.
Make sure your rice is fully cooked before it hits the skillet. If you use leftover rice that has been in the fridge for a day, it’s even better! Cold, slightly dried-out rice is excellent at absorbing the tomato sauce and beef juices without losing its individual grain structure during the final 20-minute bake.
Step-by-Step: Preparing the Savory Beef Filling
Start by browning your beef and onions over medium-high heat. You want to hear a sizzle the moment the meat hits the pan. Use your spatula to break the beef into very small crumbles; large chunks of meat create air pockets in the pepper, which can lead to uneven heating and a crumbly texture when you try to eat it.
Once the beef is browned, you must drain the fat. Even with lean beef, there will be some liquid in the pan. Tilt the skillet and spoon it out, or use a colander. This step is non-negotiable if you want a clean, savory flavor. After draining, add your garlic. You only need about 60 seconds here—just until you smell that incredible aroma—before moving to the next step.
Developing Flavor with Smoked Paprika and Oregano
Smoked paprika is my “secret weapon” for beef dishes. Unlike sweet paprika, which mostly adds color, the smoked variety adds a deep, wood-fired complexity that makes the beef taste like it was grilled. It provides a subtle heat that isn’t spicy but feels incredibly warm and satisfying.
Dried oregano brings an earthy, herbal backbone to the filling. I prefer dried over fresh in this specific application because dried oregano stands up better to the long baking time. It infuses the tomato sauce with a classic Mediterranean vibe that pairs perfectly with the sharp cheddar cheese topping.
The Moisture-Locking Simmer Technique
This is where the magic happens. Once you add the tomato sauce and cooked rice to the beef, let it simmer for about 3 to 5 minutes. You aren’t just heating it up; you are forcing the rice to absorb the liquid from the sauce. This “sets” the filling so it becomes a cohesive unit.
If you’re worried about sauce separating, the same gentle simmering method is key in these homestyle meatballs and gravy.
If you skip this simmer and just mix and stuff, the sauce will separate from the rice in the oven and leak to the bottom of the pepper. By simmering first, you lock that moisture inside the grain. The filling should look thick and glossy, not runny. If it looks too dry, add a tablespoon of water, but usually, the sauce is just enough to coat everything perfectly.
Assembling and the Final High-Heat Bake
When you pull your pre-roasted peppers out of the oven, you’ll likely see a little bit of liquid pooled at the bottom. Use tongs to carefully tip them over and pour that liquid out. Now, you have a perfectly prepared, dry vessel ready for the beef. Pack the filling in tightly, using the back of a spoon to press it down so there are no gaps.
Lower the oven temperature to 375°F for the final stretch. This slightly lower heat ensures the pepper finishes softening without burning the skin, while the filling heats through to the center. It’s all about that final balance of textures—the pepper should be tender enough to cut with a fork but firm enough to hold the beef in place.
Achieving the Perfect Cheese Melt
I use a blend of Monterey Jack and Sharp Cheddar for a reason. Monterey Jack is a superior melter; it gets gooey and stretchy, providing that classic “cheese pull.” Sharp Cheddar, however, has a higher oil content and a punchy flavor that doesn’t get lost among the beef and peppers.
For the best results, don’t just bake the cheese—broil it. After the 20-minute bake, turn your broiler on high for just 2 or 3 minutes. Watch it like a hawk! You are looking for those beautiful golden-brown toasted spots. Those spots are actually caramelized milk solids, and they provide a nutty, toasted flavor that takes the dish to a whole new level.
Avoiding Common Stuffed Pepper Mistakes
One of the most common frustrations is peppers that won’t stay upright in the pan. If your peppers are leaning, don’t panic. You can create small “donuts” out of crumpled aluminum foil to sit the peppers in, or simply wedge them tightly against each other so they support one another. A snug fit in the baking dish is actually better for heat retention.
Another mistake is using raw meat in the filling. While some old-school recipes call for this, it almost always results in a greasy, dense interior that feels more like a meatloaf than a light, fluffy rice filling. Always cook and drain your meat first. This also allows you to taste and season the filling before it goes into the oven, ensuring the salt levels are exactly where you want them.
Lastly, watch your rice texture. If you find your rice is getting too mushy, it’s likely because you added too much sauce or used a short-grain variety. If the filling feels too wet before stuffing, simmer it for an extra two minutes to cook off that excess moisture. Remember, the pepper will contribute its own steam during the final bake, so the filling should be moist but not “soupy.”
Make-Ahead Strategies and Storage Logistics
This is a fantastic meal-prep dish because the filling actually tastes better the next day. You can prepare the beef and rice mixture up to 24 hours in advance and store it in an airtight container in the fridge. When you’re ready to eat, just pre-roast your peppers, stuff them with the cold filling, and add an extra 5-10 minutes to the final baking time.
To reheat leftovers, the oven is your best friend. While the microwave is faster, it can make the pepper skin a bit rubbery. Place the peppers in a small baking dish, cover with foil to prevent the cheese from drying out, and bake at 350°F for about 15 minutes. This helps maintain the structural integrity of the pepper shell.
Freezing Instructions for Meal Prep
You can freeze these peppers, but I recommend doing it before the final bake. Follow the steps up until the stuffing and cheesing part. Wrap each stuffed (but unbaked) pepper tightly in plastic wrap, then place them in a freezer-safe bag. They will stay fresh for up to three months.
When you’re ready to cook them, let them thaw in the refrigerator overnight. Once thawed, bake them at 375°F as directed. If you try to bake them from frozen, the outside of the pepper will turn to mush before the center of the beef filling is even warm. A slow thaw is the key to preserving that “fresh-cooked” texture.
Complementary Sides for Beef and Rice Filling
Since this dish is quite rich and savory, I like to pair it with something bright and acidic. A simple cucumber and tomato salad with a lemon vinaigrette works wonders to cleanse the palate between bites. The crispness of raw veggies provides a nice contrast to the soft, roasted texture of the stuffed peppers.
If you want something heartier, roasted zucchini or a side of garlic-heavy yogurt sauce (like a simple tzatziki) is incredible. The cool yogurt cuts through the heat of the smoked paprika and the richness of the melted cheddar. It adds a creamy element that complements the beef without making the meal feel too heavy.
Troubleshooting Texture and Flavor
Can I use brown rice instead of white rice?
Yes, you can use brown rice, but keep in mind that it has a much firmer, nuttier texture. Since brown rice takes longer to cook and absorbs more liquid, ensure it is fully cooked before adding it to the beef. You may need to add an extra 1/4 cup of tomato sauce to the skillet to ensure the filling doesn’t end up too dry, as brown rice doesn’t “soften” as easily as white rice during the bake.
My peppers are still watery at the bottom; what happened?
This usually happens if the peppers weren’t drained well enough after the pre-roast or if the tomato sauce was too thin. Next time, make sure you physically tip the peppers over with tongs to pour out the liquid before stuffing. Also, ensure you simmer the filling until the rice has absorbed the visible sauce; the mixture should look like a thick porridge, not a soup.
Can I swap the ground beef for ground turkey or chicken?
Absolutely. Ground turkey and chicken are much leaner than beef, so they can sometimes dry out. To prevent this, add a tablespoon of olive oil to the pan when browning the meat, and consider adding a splash more tomato sauce or even a tablespoon of tomato paste to the filling. This adds the “fatty” mouthfeel that turkey naturally lacks.
How do I make these peppers spicy?
The easiest way to add heat is to stir 1/2 teaspoon of red pepper flakes into the beef while it browns. For a deeper, smokier heat, you can add a finely chopped chipotle pepper in adobo sauce to the filling. You could also swap the Monterey Jack cheese for Pepper Jack to give the topping a nice little kick without changing the overall flavor profile too much.
Before serving, don’t forget a generous sprinkle of fresh Italian parsley. The hit of green provides a necessary herbaceous finish that brightens the heavy flavors of the beef and cheese, making every bite feel balanced and fresh.
Stuffed Peppers
Course: Main CourseCuisine: AmericanDifficulty: medium5
servings15
minutes45
minutes385
kcal60
MinutesA foolproof recipe for stuffed peppers that ensures a firm texture and juicy filling. By pre-roasting the pepper shells and simmering the rice in sauce, this method eliminates excess moisture for a perfect result every time.
Ingredients
5 large yellow and green bell peppers
1 pound lean ground beef
2 cups cooked long-grain white rice
1 cup thick tomato sauce (or marinara)
1 tablespoon olive oil
1 small onion, finely diced
2 cloves garlic, minced
1 teaspoon dried oregano
1 teaspoon smoked paprika
1/2 teaspoon salt (plus more for seasoning shells)
1/2 teaspoon black pepper
1.5 cups shredded Monterey Jack and Sharp Cheddar cheese blend
Fresh Italian parsley for garnish
Directions
- Preheat your oven to 400°F (200°C). Slice the tops off the peppers and remove the seeds and internal ribs.
- The Anti-Soggy Secret: Place the empty peppers upright in a baking dish. Drizzle the insides with a tiny bit of olive oil and a pinch of salt. Bake them empty for 12-15 minutes. This pre-roasting step allows excess moisture to evaporate from the pepper walls and ensures the “crunch” is gone without the pepper becoming mushy later.
- While peppers pre-roast, heat olive oil in a large skillet over medium-high heat. Add the ground beef and onion. Cook, breaking the meat into small crumbles, until the beef is browned and onions are translucent. Drain any excess fat thoroughly to prevent a greasy base.
- Stir in the minced garlic, oregano, and smoked paprika. Cook for 1 minute until fragrant.
- Add the tomato sauce and cooked rice to the skillet. Stir well and simmer for 3-5 minutes. This allows the rice to absorb the sauce and “set,” locking the moisture into the grain so it does not leak out into the pepper during the final bake. Season with salt and pepper to taste.
- Remove the pre-roasted peppers from the oven. Carefully use tongs to tip them over and drain any liquid that has pooled at the bottom of the shells.
- Fill each pepper tightly with the beef and rice mixture, packing it down slightly so the filling is flush with the top.
- Top each pepper generously with the shredded cheese blend.
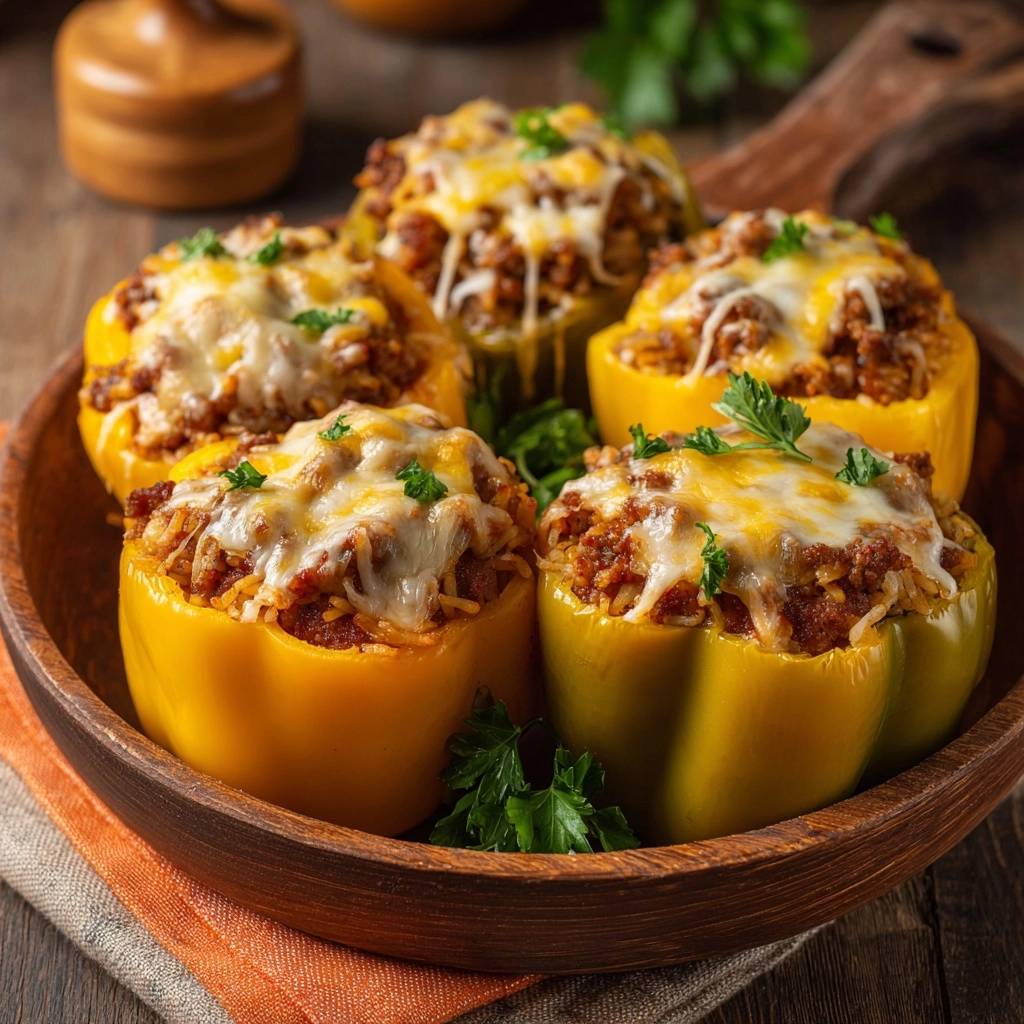
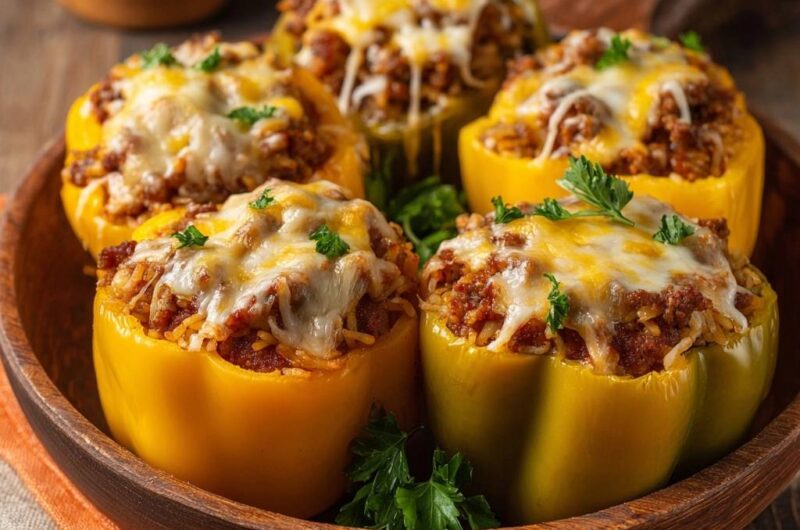
- Reduce oven heat to 375°F (190°C). Bake the stuffed peppers for 20 minutes, then finish under the broiler for 2-3 minutes until the cheese is bubbly with distinct golden-brown toasted spots as seen in the image.
- Garnish with chopped fresh parsley and serve immediately.
Notes
- The secret to avoiding a mushy texture is the 12 to 15 minute pre-roast of the empty pepper shells and draining any liquid before filling. Ensure you drain the beef fat thoroughly to prevent a greasy base.