One-Pan Honey Garlic Chicken & Veggies: Perfectly Juicy Every Time
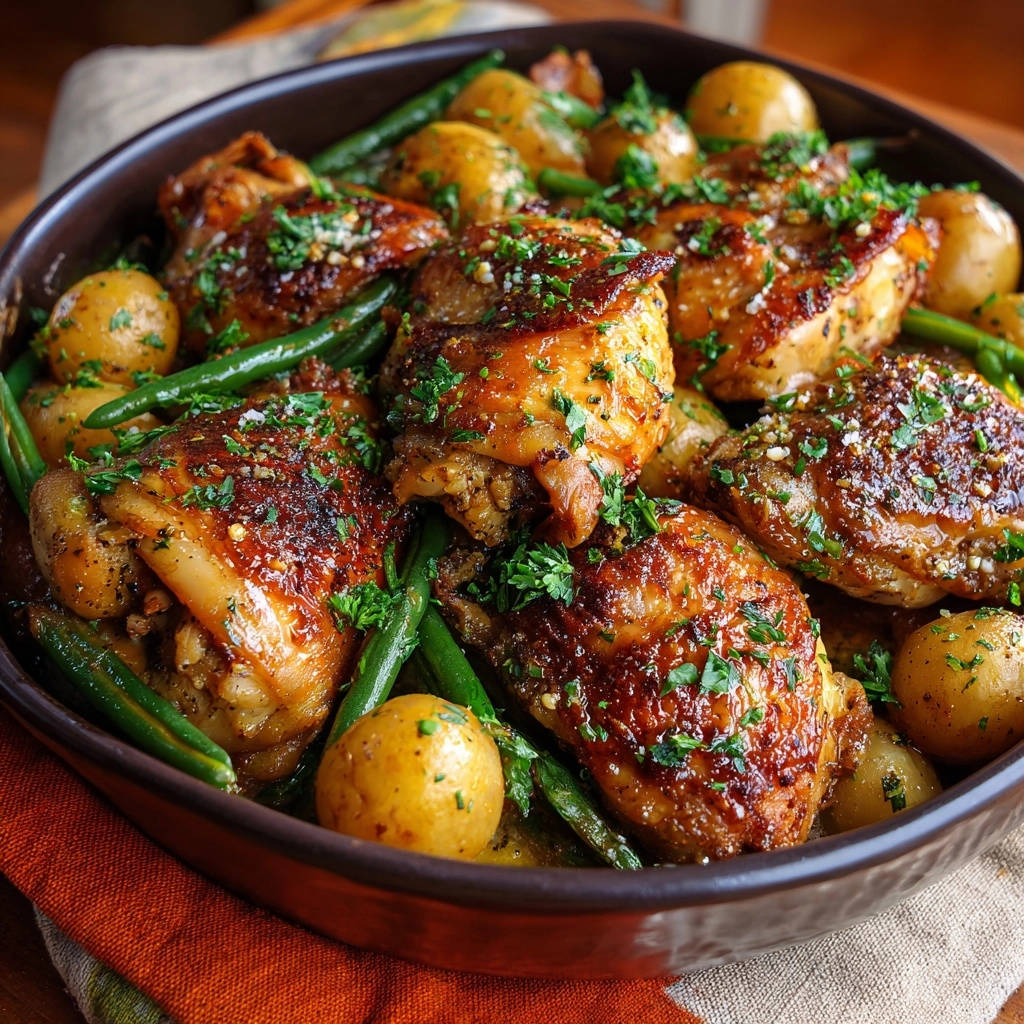
There was a time when achieving truly juicy chicken and perfectly roasted vegetables in one pan felt like a culinary myth. So many recipes promised ease but delivered dryness, leaving me frustrated. That’s why I poured my heart into perfecting this One-Pan Honey Garlic Chicken & Veggies, a recipe that genuinely guarantees moist, tender chicken and flavorful, crisp-tender vegetables, all with minimal fuss.
This isn’t just another weeknight dinner; it’s a game-changer that brings vibrant flavors and effortless elegance to your table, proving that quick meals can be incredibly satisfying and moist.
Why This One-Pan Honey Garlic Chicken & Veggies Wins Dinner
The “Never Dry” Secret: Our Steam-Infusion Technique
Many one-pan chicken dishes often result in dry meat because the chicken cooks uncovered for too long. Our secret weapon is a small amount of liquid added mid-roast, creating a steamy environment.
This steam-infusion locks in moisture, ensuring the chicken thighs remain incredibly juicy and tender throughout the entire cooking process, truly transforming the dish.
Effortless Elegance: One Pan, Maximum Flavor
The beauty of this One-Pan Honey Garlic Chicken & Veggies lies in its simplicity and efficiency. Everything cooks together, allowing the honey garlic glaze to infuse both the chicken and vegetables with incredible depth of flavor.
This method not only minimizes cleanup but also creates a cohesive, delicious meal with complex flavors that feel much more effortful than they actually are.
If you enjoy this steam-roasting method, you’ll love the same technique used in this one-pan rosemary garlic chicken.
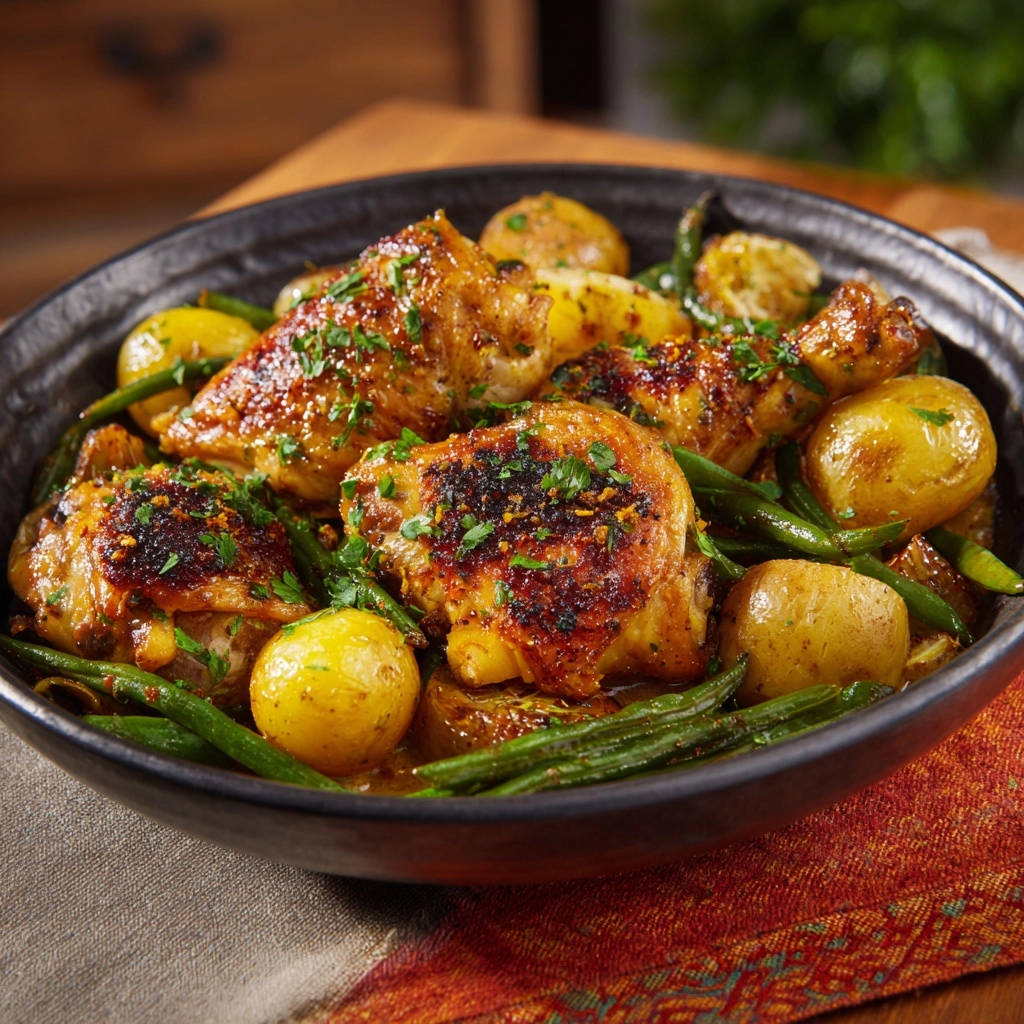
Nutrient-Packed & Family-Friendly
This recipe provides a balanced meal with lean protein from the chicken and essential nutrients from the potatoes and green beans. It’s a wholesome dish that consistently receives rave reviews from even the pickiest eaters.
The gentle sweetness and savory notes of the honey garlic sauce make it a universally loved option, perfect for any family dinner or meal prep.
Crafting Culinary Magic: The Ingredients Behind Our Dish
The Star: Bone-In, Skin-On Chicken Thighs
Bone-in, skin-on chicken thighs are chosen for their superior flavor and ability to stay moist during roasting. The bone helps conduct heat evenly, and the skin renders, becoming wonderfully crispy while protecting the meat.
This cut ensures a richer, more satisfying result than leaner chicken breasts, making for exceptionally juicy chicken thighs.
Vibrant Veggies: Potatoes & Green Beans
Baby potatoes are ideal as they roast beautifully, becoming tender on the inside and slightly caramelized on the outside. Their earthy flavor is a perfect complement to the rich glaze.
Fresh green beans add a pop of color and a crisp-tender texture, absorbing the savory pan juices wonderfully without becoming soggy.
The Flavor Bomb: Honey Garlic Glaze
Our irresistible glaze combines the deep umami of soy sauce with the sweetness of honey for a perfectly balanced flavor profile. Minced garlic adds aromatic depth, while dried oregano introduces a subtle herbaceous note.
This blend ensures every bite of this One-Pan Honey Garlic Chicken & Veggies is bursting with sweet and savory goodness.
The Secret Weapon: Chicken Broth or Water
A small amount of liquid added to the pan mid-roast is paramount. It creates the steam needed to keep the chicken supremely juicy, preventing it from drying out in the oven.
This simple addition transforms the texture and ensures that every piece of chicken is moist and tender.
Essential Tools for One-Pan Success
Your Go-To Roasting Pan
A large, sturdy baking dish or oven-safe sheet pan (approximately 13×18 inches) is crucial. It ensures all ingredients can be arranged in a single layer for even cooking and proper caramelization.
A heavy-bottomed pan also helps in heat distribution, contributing to perfectly roasted vegetables and chicken.
Measuring & Mixing Essentials
Basic kitchen tools like measuring cups, spoons, and a couple of mixing bowls are all you need. A whisk is essential for thoroughly combining the glaze ingredients.
These simple items ensure accurate measurements for consistent flavor every time.
Temperature Matters: A Meat Thermometer
For food safety and guaranteed doneness, a reliable instant-read meat thermometer is invaluable. It ensures your chicken reaches the safe internal temperature of 165°F (74°C) without overcooking.
This tool eliminates guesswork, giving you confidence in preparing perfectly cooked, juicy chicken.
Your Journey to Juicy Perfection: Step-by-Step One-Pan Honey Garlic Chicken & Veggies
- Preheat Your Oven:
Set your oven to 400°F (200°C) to ensure it’s perfectly hot and ready for even cooking.
- Craft the Flavorful Glaze:
In a small bowl, whisk together 1 tablespoon olive oil, soy sauce, honey, minced garlic, oregano, salt, and pepper.
This creates the foundation of our dish’s incredible taste, marrying sweet and savory notes.
- Prepare & Marinate the Chicken:
Pat the chicken thighs very dry with paper towels to encourage crispy skin and help the glaze adhere better.
Place them in a large bowl, add half of the glaze mixture, and toss to coat thoroughly.
Let it marinate for at least 15 minutes at room temperature, or up to 30 minutes for deeper flavor infusion.
- Season the Potatoes:
In another large bowl, toss the halved baby potatoes with the remaining 1 tablespoon of olive oil, a pinch of salt, and pepper.
This simple seasoning ensures they roast beautifully and are flavorful on their own.
- Arrange for Roasting:
Arrange the marinated chicken thighs and seasoned potatoes in a single layer in your large baking dish or oven-safe pan.
Pour any remaining glaze from the chicken bowl over the chicken pieces for extra flavor.
- First Roast Phase:
Roast in the preheated oven for 25 minutes.
This initial period allows the chicken to begin cooking and the potatoes to start softening and developing some color.
- Infuse with Moisture (The Secret Step!):
Carefully remove the pan from the oven.
Pour the chicken broth or water into the bottom of the pan around the ingredients.
Gently toss the potatoes to coat them in these newly formed pan juices, which are rich with flavor.
This liquid creates a steamy environment, crucial for exceptionally juicy chicken, preventing it from drying out.
- Add the Green Beans:
Distribute the trimmed fresh green beans evenly among the chicken and potatoes in the pan.
Adding them now ensures they cook to a crisp-tender perfection without becoming overcooked.
- Final Roast & Check Doneness:
Return the pan to the oven and continue roasting for another 20-25 minutes.
Cook until the chicken reaches an internal temperature of 165°F (74°C) when checked with a meat thermometer and the potatoes are tender.
The continuous steam ensures the chicken remains wonderfully moist throughout this final cooking phase.
- Rest Before Serving:
Once cooked, remove the dish from the oven and let it rest for 5 minutes.
This crucial step allows the muscle fibers of the chicken to relax and reabsorb the juices, guaranteeing maximum tenderness and flavor in every bite.
- Garnish & Serve:
Garnish generously with fresh chopped parsley just before serving for a burst of freshness, vibrant color, and an aromatic finish.
Chef’s Notes: Elevating Your Honey Garlic Chicken
The Power of Patting Dry
Ensure your chicken thighs are thoroughly dry before marinating. This allows the skin to crisp up better during roasting and helps the glaze adhere more effectively, leading to a richer flavor and superior texture.
Marination Magic: Don’t Rush It!
While 15 minutes is good for flavor, marinating the chicken for the full 30 minutes at room temperature (or even longer in the fridge, up to 4 hours) will deepen the honey garlic flavor significantly into the meat, creating a more impactful taste.
The Critical Rest: Why 5 Minutes Matters
Resist the urge to cut into the chicken immediately after taking it out of the oven. Resting allows the muscle fibers to relax and reabsorb the juices, guaranteeing a moist and tender result instead of them running out onto the pan.
Achieving Crispier Skin (Optional)
For extra crispy chicken skin, consider starting the roast at 425°F (220°C) for the first 15 minutes before reducing to 400°F (200°C) for the remainder of the cooking time.
Alternatively, finish under a broiler for 1-2 minutes at the very end, watching carefully to prevent burning.
Customize Your Veggies
Feel free to substitute or add other quick-cooking vegetables like broccoli florets, asparagus spears, or bell pepper strips to this One-Pan Honey Garlic Chicken & Veggies.
Add them at the same time as the green beans to ensure they cook through without becoming mushy or overcooked.
Spice it Up!
If you love a little heat, add a pinch of red pepper flakes to your honey garlic glaze mixture. It introduces a delightful kick that beautifully complements the sweetness of the honey and the savory notes of the garlic.
“Help! My Chicken Isn’t Juicy!”: Troubleshooting Common Issues
Chicken is Dry
The most common cause of dry chicken is overcooking. Always use an instant-read meat thermometer to ensure your chicken reaches exactly 165°F (74°C) and then remove it promptly.
Also, confirm you are adding the chicken broth or water mid-roast; this critical step creates the steam needed to lock in moisture.
Veggies are Undercooked/Mushy
Ensure potatoes are cut into similar-sized pieces for even cooking; larger pieces may need more time. If veggies are mushy, they might have been added too early or cooked at too low a temperature initially, preventing proper caramelization.
Arranging all ingredients in a single layer on the pan is essential for consistent roasting, allowing hot air to circulate properly.
Sauce Isn’t Thick Enough
The pan juices are typically thin and flavorful, perfect for soaking into rice or potatoes. If you prefer a slightly thicker sauce, carefully remove the chicken and veggies after resting.
Transfer the pan juices to a small saucepan, bring to a simmer, and mix 1 teaspoon of cornstarch with 1 tablespoon of cold water, then whisk into the simmering sauce until thickened. Do not over-thicken, as a little goes a long way.
Perfect Pairings: What to Serve with Your One-Pan Delight
Simple Side Salads
A light, refreshing side salad with a vinaigrette dressing perfectly balances the richness of the One-Pan Honey Garlic Chicken & Veggies.
Think mixed greens with cherry tomatoes, cucumber, and a lemon-herb dressing for a bright contrast.
Grain Bowls & Rice
Serve this flavorful dish over fluffy jasmine rice, brown rice, quinoa, or couscous. The grains will beautifully soak up all the delicious honey garlic pan juices.
This pairing creates a more substantial meal, perfect for satisfying appetites.
Light and Fresh Options
A crusty artisan bread is excellent for dipping into the savory pan juices, ensuring no flavor is left behind. For a touch of natural sweetness, a simple fruit salad can also complement the meal.
These straightforward accompaniments enhance the overall dining experience without adding complexity.
Plan Ahead: Storage and Reheating Tips
Meal Prep Like a Pro
This One-Pan Honey Garlic Chicken & Veggies recipe is fantastic for meal prepping. Once cooled, portion the chicken and vegetables into individual airtight containers for easy grab-and-go lunches or dinners.
This helps you stay organized and enjoy delicious, homemade meals throughout the week.
Safe Storage Guidelines
Leftovers can be safely stored in an airtight container in the refrigerator for up to 3-4 days. Ensure the food is cooled completely before refrigerating to maintain quality and safety.
Labeling containers with the date can help you keep track of freshness.
Best Way to Reheat
For best results, reheat the chicken and vegetables gently in the oven at 300°F (150°C) until warmed through, often about 15-20 minutes, covered with foil to prevent drying.
Alternatively, individual portions can be reheated in the microwave, adding a splash of chicken broth or water to maintain moisture, heating in 1-minute intervals until hot.
Your One-Pan Honey Garlic Chicken & Veggies Questions, Answered
Can I use boneless chicken?
Yes, you can use boneless, skinless chicken thighs or breasts, but cooking times will need to be adjusted significantly. Boneless chicken cooks faster, typically needing about 20-30 minutes total, depending on thickness.
Monitor closely with a meat thermometer to avoid overcooking and ensure it reaches 165°F (74°C). Boneless chicken may also be slightly less juicy without the bone and skin protection.
What if I don’t have fresh green beans?
If fresh green beans are unavailable, you can use frozen green beans. Do not thaw them; add them directly to the pan at the same step as you would fresh ones.
Other great vegetable alternatives include broccoli florets, asparagus, or sliced bell peppers, all added during the second roasting phase.
Is this recipe gluten-free?
The traditional soy sauce used in the glaze is not gluten-free. To make this One-Pan Honey Garlic Chicken & Veggies gluten-free, simply substitute regular soy sauce with tamari or a certified gluten-free soy sauce alternative.
Always double-check ingredient labels to ensure all components meet your dietary needs.
Can I make this spicier?
Absolutely! To add a kick, whisk a teaspoon or more of red pepper flakes into the honey garlic glaze. You can also add a dash of sriracha or a few drops of hot sauce to the glaze before mixing.
Adjust the amount to your preferred spice level, starting small and adding more if desired.
Can I prep parts of this ahead of time?
Yes, several components can be prepped ahead. You can whisk together the honey garlic glaze and store it in an airtight container in the refrigerator for up to 3 days.
The potatoes can be cut and stored in cold water in the fridge for up to 1 day, and green beans can be trimmed ahead of time. You can also marinate the chicken in the glaze in the fridge for up to 4 hours.
Ready to Experience Dinner Bliss?
There’s nothing quite like the satisfaction of serving a truly delicious and effortlessly prepared meal, and this One-Pan Honey Garlic Chicken & Veggies is exactly that. It’s my go-to for a reason, consistently delivering perfectly juicy chicken and tender, flavorful vegetables every single time.
I wholeheartedly encourage you to try this recipe tonight. Discover the joy of minimal cleanup, maximum flavor, and the confidence of knowing you’ll achieve perfectly cooked results. Enjoy every succulent bite!
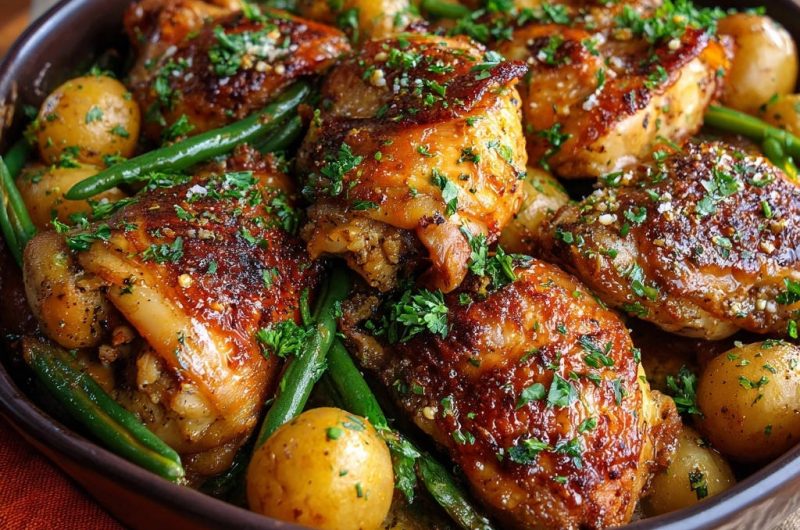
Honey Garlic Chicken
Course: Main CourseCuisine: AmericanDifficulty: medium4
servings30
minutes50
minutes550
kcal80
minutesEver been disappointed by dry, flavorless chicken? This one-pan recipe ensures perfectly juicy, tender chicken with incredible flavor, cooked right alongside your veggies. It’s an easy trick to achieve amazing results every time!
Ingredients
4 bone-in, skin-on chicken thighs
1.5 pounds baby potatoes, halved if large
12 ounces fresh green beans, trimmed
2 tablespoons olive oil, divided
2 tablespoons soy sauce
2 tablespoons honey
2 cloves garlic, minced
1 teaspoon dried oregano
1/2 teaspoon salt
1/4 teaspoon black pepper
1/4 cup low-sodium chicken broth or water
2 tablespoons fresh parsley, chopped, for garnish
Directions
- Preheat oven to 400 degrees Fahrenheit.
- In a small bowl, whisk together 1 tablespoon olive oil, soy sauce, honey, minced garlic, oregano, salt, and pepper to create your flavorful glaze.
- Pat the chicken thighs very dry with paper towels. Place them in a large bowl. Add half of the glaze mixture, tossing to coat the chicken thoroughly. Let it marinate for at least 15 minutes at room temperature, or up to 30 minutes for deeper flavor.
- In another large bowl, toss the halved potatoes with the remaining 1 tablespoon olive oil and a pinch of salt and pepper.
- Arrange the marinated chicken thighs and seasoned potatoes in a single layer in a large baking dish or oven-safe pan. Pour any remaining glaze from the chicken bowl over the chicken.
- Roast for 25 minutes.
- Remove the pan from the oven. Carefully add the chicken broth or water to the bottom of the pan. This is your secret to incredibly juicy chicken! The liquid will create a steamy environment that locks in moisture. Toss the potatoes gently to coat them in the pan juices.
- Add the trimmed green beans to the pan, distributing them among the chicken and potatoes.
- Return the pan to the oven and continue to roast for another 20-25 minutes, or until the chicken reaches an internal temperature of 165 degrees Fahrenheit and the potatoes are tender. The continuous steam from the liquid in the pan ensures the chicken stays wonderfully moist throughout this final cooking phase.
- Once cooked, remove from the oven. Let the dish rest for 5 minutes before serving. This crucial step allows the juices to redistribute, ensuring maximum juiciness in every bite.
- Garnish generously with fresh chopped parsley before serving.