Mastering Crispy Feta Fried Eggs: The Anti-Soggy Bottom Method
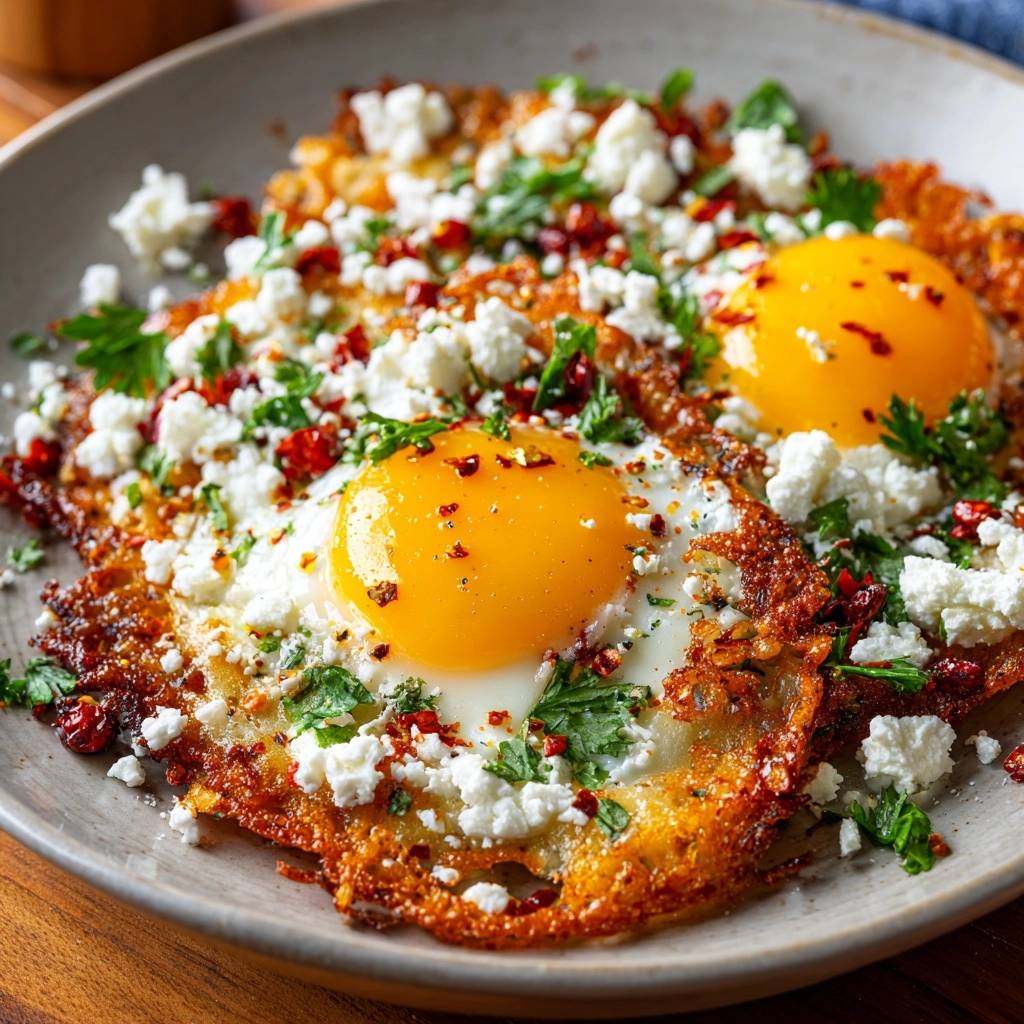
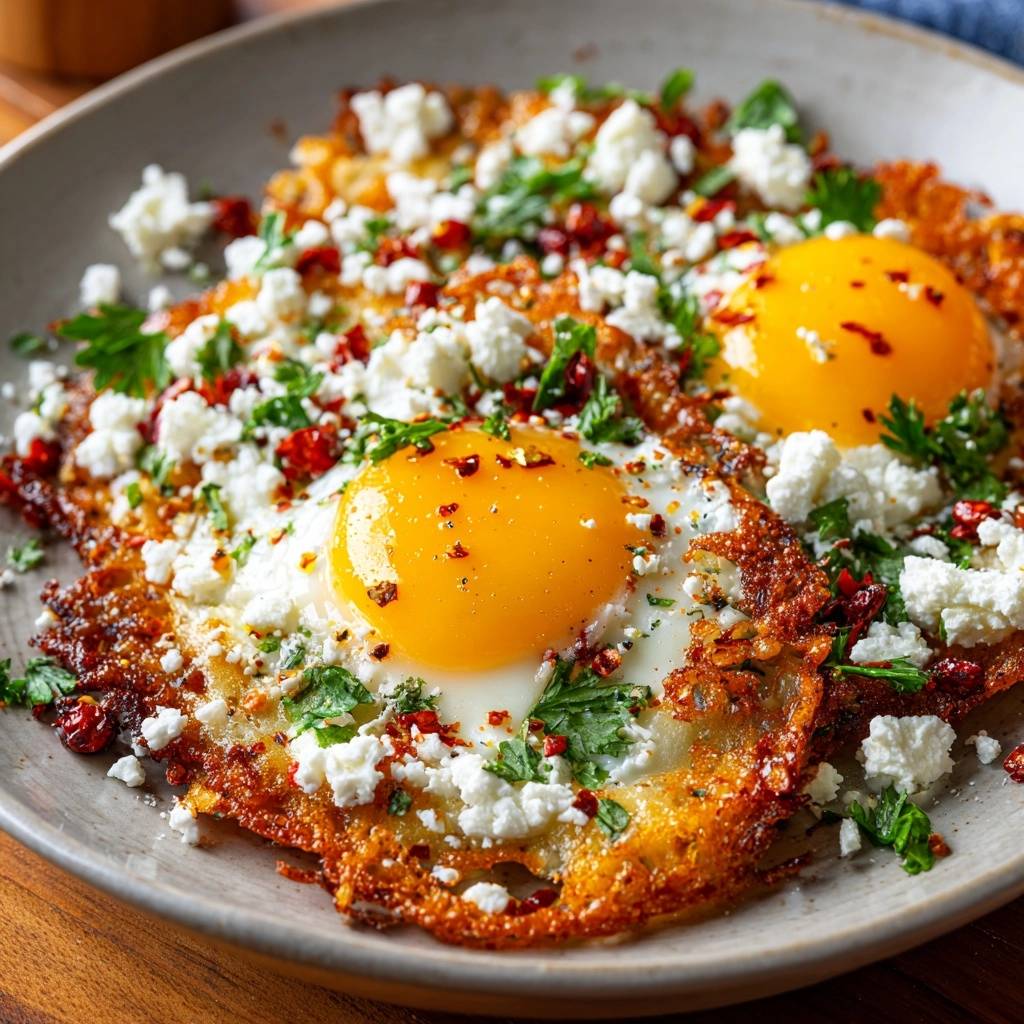
Imagine biting into a fried egg where the bottom isn’t just firm, but audibly crunchy. As your fork pierces the center, a silky, golden yolk spills out, mingling with the salty, lacy shards of toasted cheese. Most home cooks struggle with rubbery whites or a soggy base that turns their sourdough toast into a damp mess. This recipe changes that dynamic entirely by using a structural “cheese barrier” that transforms a simple breakfast into a gourmet experience.
The secret to this dish lies in the physics of the frying pan. Instead of letting the delicate egg white hit the hot oil directly, we build a foundation of crumbled feta. This creates a savory crust that protects the egg while adding a punch of Mediterranean flavor. It is the ultimate solution for anyone tired of uninspired, greasy eggs that lack character and texture.
If you love the crispy cheese edges here, try shaping your own batch of golden cheese patties for a similar savory crunch.
I’ve found that the real trick to success is all about the moisture release. You have to let the feta bubble and “weep” its liquid before the egg ever touches the pan. If you crack the egg too early, the moisture from the cheese gets trapped, and you lose that signature crunch. Wait for those edges to turn a deep, nutty brown, and you’ll be rewarded with a crust that stays rigid even under a heavy layer of avocado or salsa.
The Mechanics of the Feta Cheese Barrier
Feta is the ideal candidate for this frying technique because of its unique composition. Unlike cheddar or mozzarella, which contain high amounts of fat that melt into a greasy pool, feta has a high moisture content and a protein structure that holds up under heat. When you place it in a hot skillet, the water evaporates, and the milk solids undergo the Maillard reaction. This creates a “lace” effect, where the cheese browns into a crisp, lattice-like web.
This lacy structure acts as a thermal buffer. It slows down the heat transfer to the egg white, preventing it from becoming tough and rubbery. While the cheese is busy becoming a cracker-like base, the egg white sits on top, gently setting into a tender, cloud-like texture. Other cheeses often fail here because they either melt too quickly or don’t provide enough structural integrity to lift the egg off the surface of the pan.
Essential Components for Crispy Feta Fried Eggs
Quality ingredients are paramount when the list is this short. I always recommend using large, fresh eggs because they have a higher ratio of thick white to thin white. This ensures the egg stays centered on your feta pile rather than running all over the pan. Freshness also means the yolk membrane is stronger, so you won’t have to worry about it breaking prematurely during the steaming process.
When it comes to the cheese, reach for a block of high-quality, brine-aged feta rather than the pre-crumbled tubs. Pre-crumbled varieties are often coated in anti-caking agents like potato starch or cellulose. These additives interfere with the melting process and can prevent that beautiful lacy crust from forming. Crumbing it yourself from a block ensures you get the natural fats and moisture needed for the perfect render.
Olive oil serves as the essential heat conductor here. While the feta releases its own fat, a teaspoon of extra virgin olive oil helps distribute the heat evenly across the pan. It also adds a peppery note that complements the tanginess of the sheep or goat milk. Avoid using butter for this specific method, as the milk solids in butter will burn before the feta has a chance to reach its peak crispiness.
Selecting the Right Feta: Sheep vs. Cow Milk
The type of milk used in your feta significantly impacts the final texture. Traditional Greek feta made from sheep’s milk has a higher fat content, which results in a creamier interior even after the bottom has crisped up. It offers a rich, funky flavor that stands up well to the richness of the yolk. Cow’s milk feta, often labeled as “white cheese” or “Danish style,” tends to be milder and can sometimes produce a sharper, more brittle crunch.
The Role of Dry Spices and Fresh Herbs
Timing is everything when seasoning these eggs. I always wait until the very end to add the red pepper flakes. If you add them to the hot oil too early, the capsaicin can burn and become bitter, losing its fruity heat. Fresh parsley is equally vital; its bright, grassy notes cut right through the heavy, salty fats of the fried cheese and the rich yolk, providing a necessary visual and flavor contrast.
The Non-Stick Surface: Why Equipment Choice is Non-Negotiable
You cannot compromise on your pan choice for this recipe. A high-quality ceramic non-stick skillet or a perfectly seasoned cast iron pan is mandatory. Because we are creating a delicate lace of cheese, any sticking will cause the crust to tear when you try to plate it. The goal is for the entire egg and cheese “disc” to slide freely when you give the pan a gentle shake.
Thermal conductivity matters because you need a steady, medium heat. Thin, cheap aluminum pans often have hot spots that will burn the cheese in one area while leaving the egg raw in another. Additionally, use a thin, flexible metal or silicone spatula. You need to be able to get underneath that rigid cheese crust without cracking it, preserving the structural integrity of your “anti-soggy” base.
Phase One: Rendering the Feta Crust
The first two minutes are the most critical part of the process. Once your oil is shimmering over medium heat, drop your feta piles into the pan. Do not touch them. You will see the cheese start to soften, then bubble aggressively as the water cooks off. This is the rendering phase. You are looking for the oil to separate from the milk solids and for the very edges of the cheese to turn a dark, golden brown.
Patience is your best friend here. If you crack the eggs too soon, the weight of the egg will flatten the cheese and prevent the air pockets from forming the “lace.” Wait until the cheese looks like it is starting to fry in its own fat. This visual cue tells you that the structural base is strong enough to support the egg and provide that crunch you’re after.
Phase Two: The Steam-Set Technique for Perfect Yolks
Once the eggs are cracked onto the bubbling feta, we use the “Lid Method” to finish the job. By covering the pan for about two minutes, you trap the steam generated by the egg whites. This steam cooks the top of the whites and sets the area around the yolk without requiring you to flip the egg. Flipping would ruin the crispy bottom we just worked so hard to create.
If you love a classic runny yolk, two minutes under the lid is usually the sweet spot. If you prefer a “jammy” yolk that is slightly thickened but still soft, extend the time to three minutes. The beauty of this technique is that the bottom continues to crisp and deepen in flavor while the top stays tender and moist. It is the best of both worlds.
Troubleshooting Your Crispy Feta Fried Eggs
If you find that your cheese is burning before the egg whites are set, your heat is likely too high. Feta has a high salt content, which can cause it to brown rapidly. Next time, try a lower flame and a longer “lid-on” time. If the eggs are sticking, it usually means the cheese hasn’t finished rendering its fat yet. A fully crisped feta crust will naturally release itself from a seasoned pan once the moisture is gone.
Another common issue is a rubbery egg white. This happens if you leave the lid on too long or if the pan gets too hot. The steam should be gentle. If you see the yolks starting to turn white or opaque on top, remove the lid immediately. You want the yolk to remain bright and liquid. If the cheese isn’t lacy enough, ensure you aren’t using “fat-free” feta, which lacks the lipids necessary to fry properly.
Flavor Variations: Beyond the Standard Recipe
Once you master the base technique, you can start experimenting with different flavor profiles. For a Mediterranean twist, sprinkle a teaspoon of za’atar over the eggs and serve them with chopped sun-dried tomatoes. The earthy thyme and sesame in the za’atar pair beautifully with the tangy feta. It adds a layer of complexity that makes the dish feel like a vacation on a plate.
If you want some heat, try a Spicy Harissa variant. Swirl a small spoonful of harissa paste into the olive oil before adding the cheese. The oil will carry the chili flavor into the crust itself. Alternatively, for a fresh and herbaceous version, dollop a little nut-free pesto onto the egg whites just before putting the lid on. The steam will warm the pesto and infuse the whites with basil and garlic aromas.
Optimal Pairings for a High-Protein Breakfast
Because these eggs are quite rich and salty, they need something acidic or fresh to balance the palate. A thick slice of toasted sourdough is the classic choice, as the crunch of the bread mirrors the crunch of the cheese. I also love serving these over a bed of lightly dressed arugula. A simple squeeze of lemon juice and a drizzle of olive oil on the greens provides a sharp contrast to the heavy fats.
Avocado mash is another fantastic pairing. The creamy, mild flavor of the avocado acts as a foil to the salty feta. If you’re looking for a lower-carb option, try serving the eggs alongside grilled tomatoes or sautéed spinach. The key is to avoid adding more salt to your side dishes, as the feta provides more than enough seasoning for the entire plate.
Expert Tips for Scaling the Recipe
Cooking for a crowd requires a bit of strategy. If you try to crowd four or five eggs into a standard 10-inch skillet, the moisture from the eggs will create too much steam, and the cheese will never get crispy. You’ll end up with boiled eggs in a pool of melted cheese. To avoid this, use a large flat-top griddle or cook in batches, keeping the finished eggs warm in a low oven.
When scaling up, make sure you maintain the “piles” of cheese. Each egg needs its own dedicated island of feta to ensure the edges can crisp up properly. If the cheese piles touch, they will form one giant sheet, which is harder to flip and plate. Give each egg at least two inches of space. This allows the heat to circulate around the edges of the cheese, creating that coveted golden-brown lace every single time.
Frequently Asked Questions
Can I use a different cheese like Parmesan or Halloumi?
You can certainly use Parmesan, which creates a very hard, salty crust, but it lacks the creamy contrast that feta provides. Parmesan also browns much faster, so you have to be very careful with your heat. Halloumi is a poor substitute for this specific method because it has a very high melting point; it will soften and brown, but it won’t “lace” or spread out to form a protective barrier for the egg.
How do I prevent the eggs from being too salty?
Feta is naturally very salty because it is stored in brine. If you find it overwhelming, you can rinse the feta block under cold water and pat it dry before crumbling it. This removes the surface brine. Most importantly, do not add any extra salt to the eggs until you have tasted the finished product. Usually, the cheese provides all the sodium you need.
What is the best oil to use for high-heat frying?
Extra virgin olive oil is the best choice for flavor and performance in this 4-minute window. Avocado oil is a great alternative if you prefer a more neutral taste and a higher smoke point. I would avoid using butter, as the milk solids in the butter will likely burn at the temperature required to get the feta truly crispy, resulting in a bitter flavor.
Can I make these eggs ahead of time for meal prep?
Fried eggs are always best served immediately. If you make them ahead of time, the cheese crust will lose its crunch as it absorbs moisture from the egg and the air. However, if you must reheat them, use an air fryer at 350°F for about 2 minutes or a dry skillet over medium heat. Avoid the microwave, as it will make the cheese rubbery and the yolk hard.
Why did my feta turn bitter instead of crispy?
Bitterness is almost always a sign that the heat was too high. When the milk solids in the cheese burn rather than brown, they develop a sharp, unpleasant bitter taste. Always stick to the “Medium Heat” rule. It might take an extra minute for the cheese to crisp up, but the flavor will be nutty and savory rather than burnt.
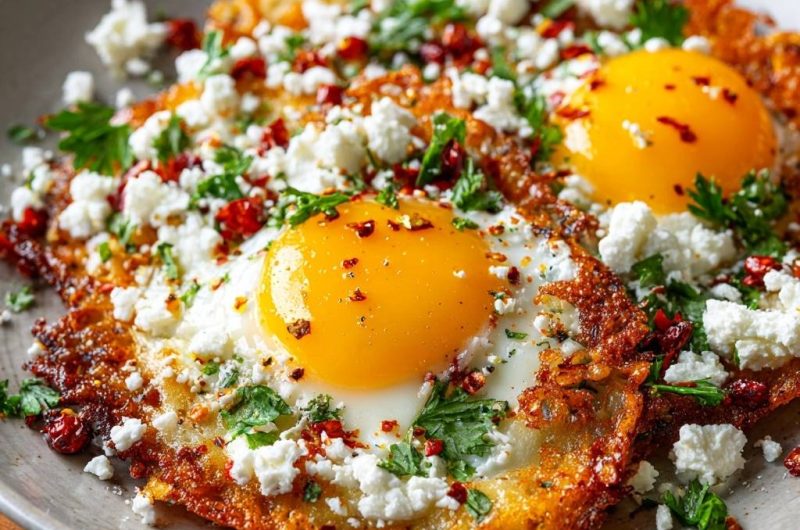
Fried Eggs
Course: BreakfastCuisine: Mediterranean-AmericanDifficulty: easy2
servings2
minutes6
minutes210
kcal8
MinutesA revolutionary breakfast technique where eggs are fried directly on melting feta cheese, creating a rigid, golden-brown crust that protects the egg white and ensures a crunchy texture.
Ingredients
2 large eggs
1/2 cup crumbled feta cheese (divided)
1 teaspoon olive oil
1/2 teaspoon red pepper flakes
1 tablespoon fresh chopped parsley
Black pepper to taste
Directions
- Heat a small non-stick skillet over medium heat and add the olive oil.
- To solve the soggy bottom problem, do not crack the eggs yet. Instead, sprinkle 1/4 cup of the crumbled feta cheese into the pan in two circular piles.
- Let the feta melt for about 1 to 2 minutes until the fat renders out, it begins to bubble, and the edges turn a deep golden brown. This creates the crispy structural base.
- Carefully crack one egg directly onto the center of each bubbling feta pile.
- Immediately sprinkle the remaining 1/4 cup of fresh feta cheese over the top of the egg whites and around the edges to match the visual texture of the dish.
- Cover the pan with a lid for 2 minutes. This traps just enough steam to set the whites perfectly while keeping the yolks runny and the cheese bottom intensely crispy.
- Remove the lid and season generously with red pepper flakes, fresh parsley, and black pepper.
- Use a thin spatula to slide the eggs onto a plate. The cheese will have formed a rigid, golden-brown lacy crust that stays crunchy even after serving.
Notes
- Use a non-stick skillet to ensure the cheese crust releases easily. Do not add extra salt as the feta provides significant saltiness.