Mastering Dark Chocolate Cherry Brownies: The Anti-Soggy Method
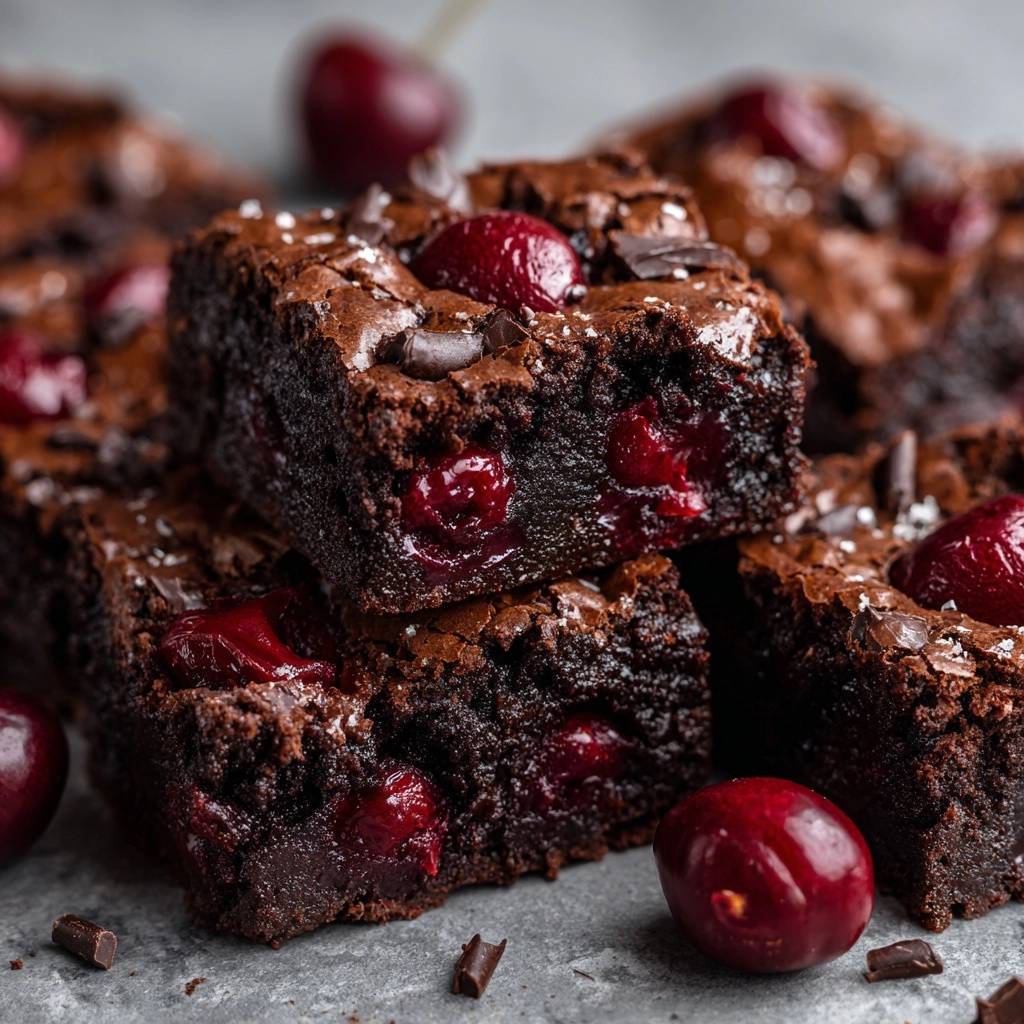
Have you ever bitten into a fruit-filled brownie only to find a mushy, purple-stained mess instead of a fudgy crumb? It’s a common heartbreak in the baking world because fresh stone fruits like cherries are essentially little water balloons. When they hit the heat of the oven, they burst, releasing juices that thin out your batter and ruin that coveted dense texture.
This recipe solves that structural nightmare by using a specialized “Anti-Soggy” technique. We aren’t just tossing fruit into a bowl; we’re chemically prepping the cherries to stay put. By combining a high-fat, low-moisture chocolate base with a strategic starch barrier, you get a brownie that’s intensely rich, crackly on top, and studded with jammy pockets of fruit that don’t bleed.
If you love that intense chocolate flavor, give these fudgy chocolate brownies with whipped cream and ganache a try once the pan is cool.
The secret to this professional-grade result lies in the maceration process. Most bakers skip the step of pre-treating their fruit, but drawing out the initial surface moisture is what keeps the crumb intact. I’ve found that taking ten minutes to let the cherries “weep” before they hit the batter makes the difference between a soggy cake and a world-class fudge brownie.
The Chemistry of Moisture in Fruit-Based Baking
Baking is a delicate balance of hydration and structure. When you add fresh cherries to a standard brownie mix, you’re introducing a massive amount of uncontrolled liquid. As the oven temperature rises, the heat breaks down the pectin and cellular walls of the fruit, causing the juice to migrate into the surrounding starch and sugar.
This migration is why many cherry brownies feel underbaked or “gummy” even after an hour in the oven. To combat this, we build a high-fat foundation using a full cup of melted butter. This fat coats the flour particles, creating a protective shield that resists the incoming fruit juice, ensuring the brownie stays fudgy rather than becoming bread-like.
Why Fresh Cherries Destabilize Standard Batters
Standard brownie recipes, especially box mixes, rely on a specific ratio of liquid to dry ingredients to achieve that chewy pull. Fresh cherries undergo an osmotic process where the sugar in the batter actually pulls water out of the fruit. This creates “juice pockets” that steam the batter from the inside out, destroying the structural integrity of the crumb.
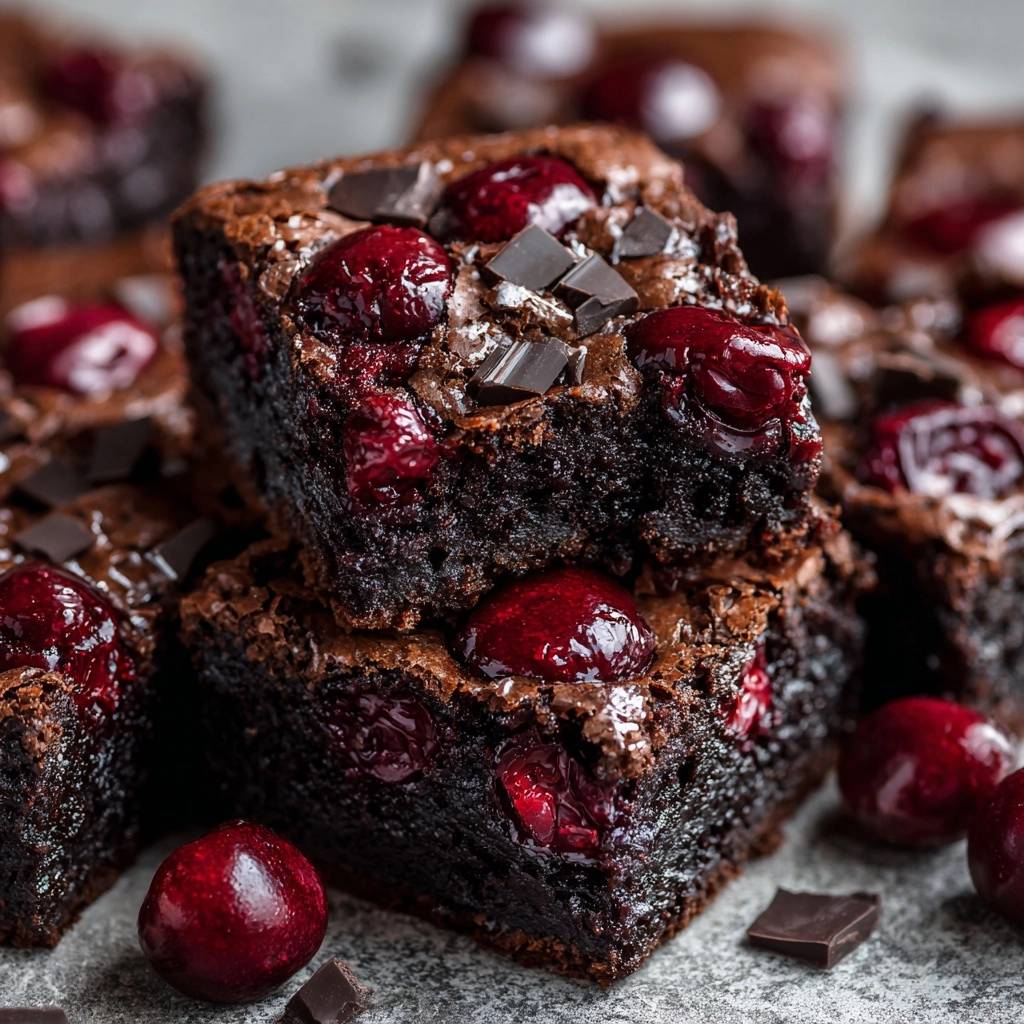
If you don’t account for this extra hydration, the center of your pan will likely collapse or remain raw while the edges burn. This recipe uses a minimal amount of baking powder specifically to prevent the brownies from puffing up too much. A tighter, denser crumb is much better at supporting the weight and moisture of the halved cherries.
The Role of Cornstarch as a Moisture Barrier
Cornstarch is our secret weapon in the fight against sogginess. After we drain the excess juice from the macerated cherries, we toss them in a tablespoon of cornstarch. This creates a fine, powdery coating that acts as a physical barrier between the fruit and the chocolate batter.
During the baking process, this starch layer gelatinizes as it absorbs any remaining juice the cherry tries to release. Instead of the juice thinning the batter, it turns into a thick, jam-like consistency right inside the fruit. This keeps the chocolate surrounding the cherry perfectly fudgy and prevents those unappealing purple streaks from spreading through your pan.
Essential Components for Dark Chocolate Cherry Brownies
Quality ingredients are non-negotiable when you’re working with dark chocolate. I always recommend using a cocoa powder with at least 20-22% cocoa butter content. This ensures a rich mouthfeel that stands up to the tartness of the fruit. If your cocoa is too lean, the brownies will taste dusty rather than decadent.
Temperature also plays a massive role in your success. Make sure your eggs are at room temperature before you start whisking. Cold eggs can cause the melted butter to seize or clump, which prevents a smooth emulsion. A well-emulsified batter is what gives you that signature shiny, paper-thin crust on top.
Selecting the Right Dark Chocolate and Cocoa
For this recipe, I prefer a high-quality unsweetened natural cocoa powder because its acidity reacts beautifully with the tiny bit of baking powder we use. However, if you want an even darker, “Oreo-like” color, you can use Dutch-processed cocoa. Just know that Dutch-processed cocoa is less acidic and will result in a milder chocolate flavor.
When it comes to the chocolate chunks, put down the bag of stabilized chocolate chips. Those chips contain stabilizers meant to help them keep their shape, which means they won’t melt into the batter. Instead, hand-chop a 70% dark chocolate bar. The irregular shards create luxurious “pools” of melted chocolate that weave through the cherries.
The Importance of High-Fat European Style Butter
Butter is the primary source of flavor and texture here. Using a European-style butter, which typically has a higher butterfat percentage (around 82-85%), results in a much richer brownie. Since we are melting the butter, the water content matters; cheaper butters have more water, which can contribute to a cakey texture we want to avoid.
When you whisk the melted butter with the sugar, you’re doing more than just mixing. You’re starting to dissolve the sugar crystals into the fat. This specific interaction, followed by the vigorous addition of eggs, is the only way to achieve that “meringue” style crackle on the surface of the finished bake.
Phase One: Preparing the Fruit for Integration
Start by pitting and halving your cherries. In a small bowl, toss them with one tablespoon of granulated sugar and let them sit for exactly ten minutes. You’ll notice a pool of dark red liquid forming at the bottom of the bowl. This is the “excess” moisture that would have otherwise ended up in your brownie batter.
Drain that liquid thoroughly—don’t be tempted to keep it! Once drained, sprinkle the cornstarch over the damp cherries and toss until they look white and chalky. This step is the most critical part of the “Anti-Soggy” promise. It ensures that every cherry is “sealed” before it enters the chocolate environment.
Phase Two: Building the Aerated Chocolate Base
In your large mixing bowl, combine the melted butter and sugar. You need to whisk this vigorously for about two minutes. You’ll see the mixture change from a gritty, oily yellow to a pale, slightly fluffy tan. This aeration is what creates the lift in a recipe that uses very little chemical leavening.
Add your room-temperature eggs one at a time. Whisk each one in completely before adding the next. By the time the fourth egg is in, the batter should look glossy and smooth, almost like a thick chocolate pudding. Stir in your vanilla extract last to keep the flavor potent and aromatic.
Phase Three: Folding and Assembly Techniques
Sifting your dry ingredients—the cocoa, flour, salt, and baking powder—directly over the wet base is a pro move. It removes any stubborn cocoa lumps and ensures the flour is aerated. Use a large rubber spatula to fold the mixture. Stop the moment you see only a few faint streaks of white flour remaining.
Gently fold in your chocolate chunks and one cup of the prepared cherries. Be careful not to overwork the batter at this stage, or you’ll develop too much gluten, making the brownies tough. Pour the thick batter into your lined pan and use the back of a spoon to level it out to the corners.
Take the remaining half-cup of cherries and press them cut-side down into the top of the batter. Placing them cut-side down prevents the juices from bubbling up and staining the top crust. It also ensures that anyone looking at the pan knows exactly what flavor explosion is waiting for them inside.
Precision Baking and the “Moist Crumb” Standard
Every oven is a little different, so start checking your brownies at the 35-minute mark. Because of the fruit, these brownies won’t behave like standard ones. The “toothpick test” is slightly different here. You aren’t looking for a clean toothpick; you want it to come out with a few moist, sticky crumbs attached.
If the toothpick comes out with wet, liquid batter, they need more time. If it comes out completely clean, you’ve overbaked them. Look for the edges of the brownie to slightly pull away from the sides of the parchment paper. That slight gap is a visual cue that the structure is set and the fats have stabilized.
Achieving Professional Slices and Texture
The hardest part of this recipe is the wait. You must let these brownies cool completely in the pan for at least two hours. While they sit, the residual heat continues to set the center, and the starches in the cherries fully firm up. If you cut them while they’re hot, the fruit will fall out and the fudge will smear.
For those perfectly sharp, bakery-style edges, I recommend a quick 30-minute chill in the refrigerator after they’ve reached room temperature. This firms up the butter and chocolate chunks, allowing your knife to glide through without dragging the batter along with it.
The Cold-Knife Technique for Sharp Edges
To get those clean, photographic slices, use a long, sharp chef’s knife. Run the blade under hot water for a few seconds, then wipe it completely dry. The heat from the blade will slightly melt the chocolate as you slice, preventing the top crust from shattering into a million pieces.
Make one clean, downward slice—don’t saw back and forth. Wipe the knife clean and re-warm it between every single cut. It sounds tedious, but this is how you get those beautiful, distinct layers of dark chocolate and bright red cherry to show up in every single square.
Troubleshooting Common Brownie Texture Issues
If your brownies turned out oily, your butter was likely too hot when you added the eggs. This “breaks” the emulsion, causing the fat to separate during baking. Next time, ensure the melted butter is just warm to the touch, not steaming, before you begin whisking in the sugar and eggs.
If the edges are hard but the middle is still wobbling, your oven might be running hot. You can save the batch by loosely tenting the pan with aluminum foil. This reflects the direct heat away from the top and edges, allowing the center to finish cooking through without burning the rest of the pan.
Fixing a Greasy or Oily Crumb
A greasy crumb usually happens when the sugar hasn’t properly bonded with the fat. If you notice oil pooling on top of your batter before it goes in the oven, try whisking in an extra tablespoon of flour. This can sometimes help “catch” the emulsion before it’s too late, though the best fix is preventing it during the creaming stage.
Another culprit for oiliness is using low-quality chocolate chips that have a high vegetable oil content. Stick to high-percentage cocoa bars for the best results. The natural cocoa butter in a bar is much more stable under high heat than the additives found in cheap baking chips.
What to Do if the Center Remains Underbaked
If you’ve pulled the brownies out and realized the center is too soft after they’ve cooled, don’t panic. You can actually place the entire pan back into a 325°F oven for 10 minutes to firm them up. This lower temperature will gently heat the center without over-browning the already-cooked edges.
Remember the principle of “carry-over cooking.” Brownies continue to cook for several minutes after they leave the oven. If the center is just a tiny bit soft but the edges are firm, they will likely reach the perfect consistency as they cool on the counter. Trust the process and the cooling time!
Flavor Variations and Ingredient Substitutions
While cherries and dark chocolate are a match made in heaven, you can use this same “Anti-Soggy” method with other fruits. Fresh raspberries or blackberries work beautifully. Just be even more gentle when tossing them in cornstarch, as berries are more fragile than halved cherries.
To deepen the chocolate flavor even further, add a teaspoon of espresso powder to your dry ingredients. You won’t taste the coffee, but it acts as a flavor enhancer that makes the dark chocolate taste more “chocolatey.” You can also swap the vanilla extract for almond extract to lean into that classic cherry-almond flavor profile.
Storage, Longevity, and Freezing Protocols
Because of the fresh fruit content, these brownies have a shorter shelf life than traditional ones. They will stay fresh in an airtight container at room temperature for about two days. After that, the moisture from the cherries will start to soften the crackly top crust.
For longer storage, keep them in the refrigerator for up to five days. The cold temperature actually makes them even fudgier, which some people prefer! Just make sure the container is truly airtight so they don’t pick up any “fridge smells” from other leftovers.
Freezing Fruit-Inclusion Brownies for Long-Term Storage
These brownies freeze surprisingly well if you protect them from air. Wrap individual squares tightly in plastic wrap, then place them all in a heavy-duty freezer bag. They will stay delicious for up to three months. The cornstarch barrier helps prevent the cherries from becoming “weepy” when they thaw.
To thaw, simply leave a brownie on the counter for about an hour. Avoid microwaving them from frozen, as this can make the fruit soggy and the chocolate oily. A slow, room-temperature thaw preserves that perfect contrast between the fudgy base and the jammy cherry centers.
Expert Tips for the Perfect Batch
Always use a parchment paper “sling.” Grease the pan, then lay a strip of parchment across the bottom with the ends hanging over the sides. This allows you to lift the entire block of brownies out of the pan at once, making it much easier to get those clean, professional cuts without scratching your baking pan.
Don’t forget the flaky sea salt finish! A generous sprinkle of Maldon or fleur de sel immediately after the brownies come out of the oven is essential. The salt cuts through the intense richness of the dark chocolate and balances the sweetness of the macerated cherries, making every bite more complex.
How should I store these brownies so they don’t get soggy?
Store these brownies in an airtight container at room temperature for up to 2 days. Because fresh cherries contain moisture, they can eventually soften the crust. For longer storage, keep them in the fridge for up to 5 days or freeze them. If freezing, wrap individual squares in plastic wrap and place them in a freezer bag for up to 3 months.
Why did my brownies turn out cakey instead of fudgy?
Cakiness usually happens for two reasons: over-measuring the flour or over-beating the eggs after adding the dry ingredients. Always use the “spoon and level” method for flour or weigh it with a scale. Also, once you add the flour and cocoa, fold gently with a spatula just until combined. Over-mixing at this stage develops gluten and traps air, leading to a cake-like texture.
Can I use frozen cherries instead of fresh ones?
Yes, you can use frozen cherries, but you must thaw and pat them extremely dry first. Frozen fruit releases significantly more liquid than fresh fruit. Follow the maceration and cornstarch steps exactly as written for fresh cherries. If you skip the starch coating with frozen fruit, the batter will almost certainly become purple and soggy.
What is the best way to pit cherries without a pitter?
If you don’t have a cherry pitter, you can use a sturdy straw or an empty glass bottle. Place the cherry on the neck of the bottle and push a straw or a chopstick through the center. The pit will pop out and fall into the bottle, keeping your counters clean. Alternatively, you can just slice them in half with a paring knife and flick the pit out with your thumb.
Can I substitute the dark chocolate for milk chocolate?
You can, but keep in mind that milk chocolate is much sweeter and has a lower cocoa content. This will result in a softer, sweeter brownie that might feel a bit “sugar-heavy” when combined with the cherries. If you use milk chocolate, I recommend reducing the granulated sugar by 1/4 cup and increasing the salt slightly to balance the flavors.
Why is my brownie top not crackly and shiny?
The shiny, crackly top comes from dissolving the sugar into the fat and eggs to create a thin layer of meringue. If your top is dull, you likely didn’t whisk the butter, sugar, and eggs long enough. You need to whisk vigorously for at least 2-3 minutes until the mixture is pale and the sugar is mostly dissolved before adding the dry ingredients.
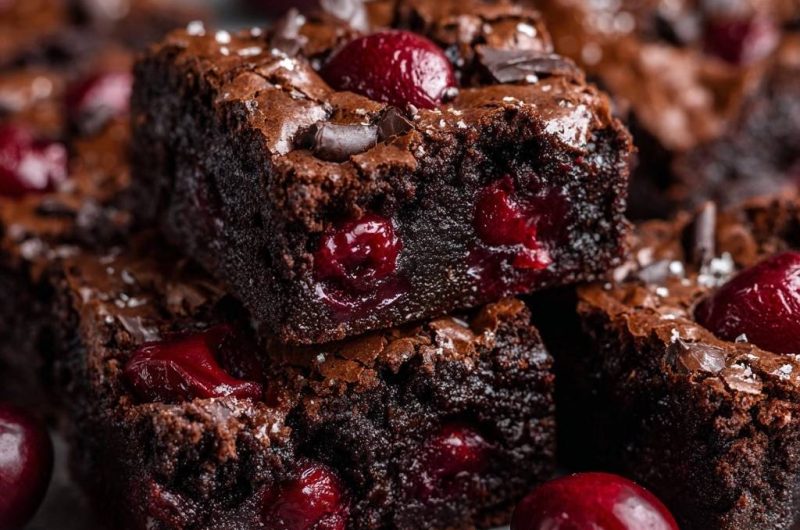
Dark Chocolate Cherry Brownies
Course: DessertCuisine: AmericanDifficulty: medium16
brownies25
minutes40
minutes320
kcal180
MinutesA rich, decadent brownie recipe that solves the problem of watery fruit in baking. By macerating and coating fresh cherries in cornstarch, you achieve a fudgy crumb with a crackly top and bursts of juicy cherry without any sogginess.
Ingredients
1 cup (225g) unsalted butter, melted and slightly cooled
2 cups (400g) granulated sugar
2 teaspoons vanilla extract
4 large eggs, room temperature
3/4 cup (75g) high-quality unsweetened cocoa powder
1 cup (125g) all-purpose flour
1/2 teaspoon salt
1/4 teaspoon baking powder (minimal lift for maximum fudge)
1 cup dark chocolate chunks or hand-chopped chocolate bars
1.5 cups fresh sweet cherries, pitted and halved
1 tablespoon cornstarch
1 tablespoon granulated sugar (for macerating)
Flaky sea salt for topping
Directions
- Prep the Fruit: In a small bowl, toss the pitted and halved cherries with 1 tablespoon of sugar. Let them sit for 10 minutes, then drain any excess liquid that has pooled at the bottom. Toss the drained cherries with 1 tablespoon of cornstarch until evenly coated. This creates a starch barrier that prevents the cherry juice from thinning the batter.
- Preheat: Preheat your oven to 350°F (175°C). Grease an 8×8 inch square baking pan and line with parchment paper, leaving an overhang on two sides.
- Cream the Base: In a large bowl, whisk the melted butter and 2 cups of sugar vigorously for 2 minutes. Add the eggs one at a time, whisking well after each addition. This aeration is what creates the shiny, crackly “meringue” top seen in the image. Stir in the vanilla.
- Incorporate Dry Ingredients: Sift the cocoa powder, flour, salt, and baking powder directly into the wet mixture. Use a spatula to fold the ingredients together until just a few streaks of flour remain.
- Fold: Gently fold in the dark chocolate chunks and 1 cup of the prepared cherries.
- Assemble: Pour the batter into the prepared pan and smooth the top. Take the remaining 1/2 cup of cherries and press them cut-side down into the surface of the batter so they remain visible after baking.
- Bake: Bake for 35-40 minutes. Because of the moisture in the fruit, these may take slightly longer than standard brownies. A toothpick inserted into the center should come out with a few moist crumbs attached (not wet batter).
- Finish: Remove from the oven and immediately sprinkle with flaky sea salt.
- The Set: Allow the brownies to cool completely in the pan for at least 2 hours. For the clean, sharp edges shown in the photo, chill the pan in the refrigerator for 30 minutes before slicing with a sharp, warm knife.
Notes
- For clean, sharp edges, chill the brownies in the refrigerator for 30 minutes before slicing. Use a warm, sharp knife for the best results.