Crispy Chicken Tenders: Master the Perfect Crunch
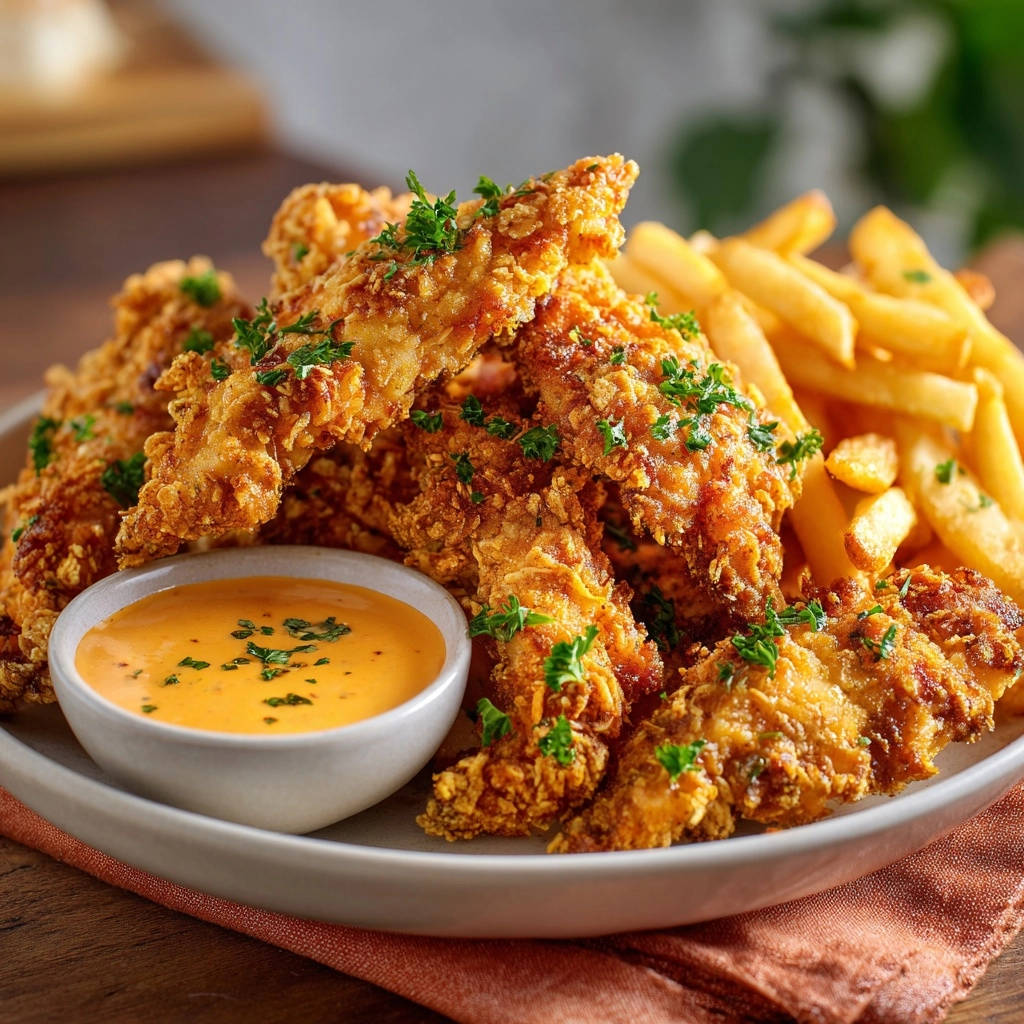
For years, I chased that elusive restaurant-quality crunch in homemade crispy chicken tenders, often ending up with soggy coatings or dry meat. It felt like a culinary Everest! But after countless trials, I finally cracked the code, discovering a simple, game-changing trick that guarantees truly crispy chicken tenders every single time, with an incredibly juicy interior.
Why This Crispy Chicken Tenders Recipe is a Game-Changer
The Unbeatable Crunch and Juicy Center, Bite After Bite
This recipe delivers on its promise: tenders that boast an audible, satisfying crunch without being greasy, paired perfectly with succulent, flavorful chicken. Our secret technique ensures the breading adheres flawlessly, creating an incredible texture that simply won’t quit.
Effortless Prep for Weeknight Wins and Family Favorites
Designed for real life, this method simplifies the breading and frying process. It’s perfect for busy weeknights, yet impressive enough for weekend gatherings, making it an instant family favorite that everyone will adore.
Your New Go-To: A Signature Dipping Sauce That Steals the Show
Beyond the amazing tenders, you’ll master a versatile, sweet, and spicy dipping sauce. It’s the ideal creamy complement, elevating every bite and turning a great meal into an unforgettable experience.
Gathering Your Ingredients for Unforgettable Bites
The Star: Premium Boneless, Skinless Chicken Breast
Opt for high-quality, fresh chicken breast. Cutting them into uniform 1-inch thick strips ensures even cooking and perfect tender-to-crust ratio. Patting them thoroughly dry is the first, vital step to achieving crispness.
Crafting the Flavorful Flour Blend and Egg Wash
Our flour blend isn’t just for coating; it’s the foundational layer of flavor, seasoned with salt, pepper, paprika, and garlic powder. The lightly beaten eggs act as the critical binder, ensuring the final coating sticks beautifully.
The Secret to Superior Crunch: Cornflakes or Panko?
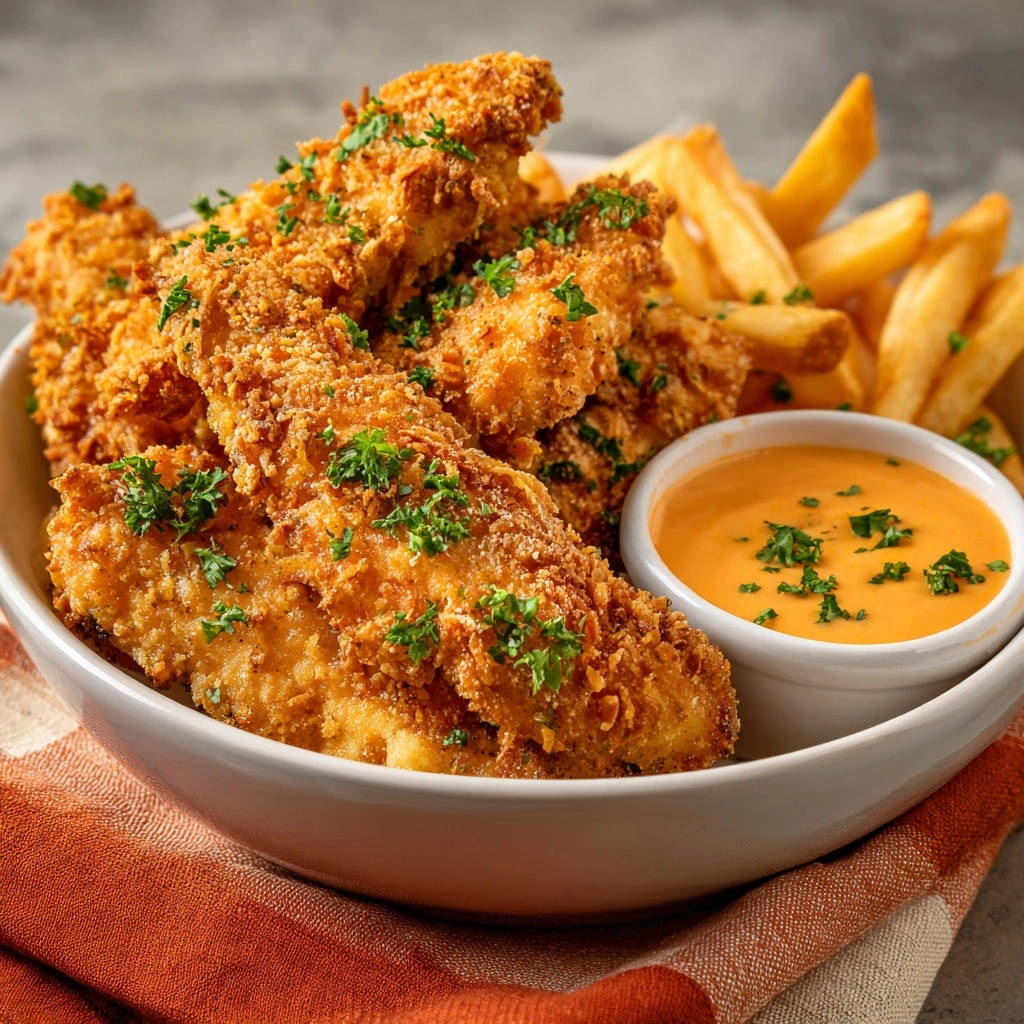
While both create fantastic crispiness, crushed cornflakes offer a craggier, more substantial crunch. Panko breadcrumbs provide a lighter, airy crispness. Experiment to find your preferred texture for these irresistible crispy chicken tenders.
Essential for Frying: Choosing the Right Oil
Vegetable oil is ideal for deep frying due to its high smoke point and neutral flavor. This ensures your chicken tenders cook through evenly, achieving that golden brown color without imparting unwanted tastes.
Whipping Up Our Signature Sweet & Spicy Dipping Sauce
The sauce is a simple yet impactful blend of mayonnaise, ketchup, hot sauce, honey, and onion powder. This balance of creamy, tangy, sweet, and spicy perfectly complements the savory chicken, making every dip a delight.
Essential Tools for Achieving Golden Perfection
Basic Prep Gear: Bowls, Tongs, and Cutting Boards
You’ll need several shallow dishes for your breading station, a sturdy cutting board for the chicken, and tongs for handling the chicken safely throughout the process. These basic tools are the foundation of efficient cooking.
The Heat Seekers: A Reliable Deep Pot and Thermometer
A heavy-bottomed pot or Dutch oven is crucial for maintaining consistent oil temperature and safely frying. An accurate kitchen thermometer (clip-on or instant-read) is non-negotiable for achieving perfectly crispy, non-greasy results.
You can use this same breading station technique for crispy chicken tenders that stay crunchy.
For Draining and Resting: The Indispensable Wire Rack
A wire rack set over a baking sheet is vital for both the pre-frying chilling step and for draining excess oil after frying. It allows air to circulate, preventing sogginess and preserving that coveted crunch.
Your Step-by-Step Guide to Irresistibly Crispy Results
- Prepare Your Chicken for Optimal Coating
Start by patting your chicken strips very dry with paper towels. This crucial step ensures the breading adheres properly, setting the foundation for ultimate crispness in your crispy chicken tenders.
- Setting Up the Breading Assembly Line
Arrange three shallow dishes: one for the seasoned flour blend, one for the lightly beaten eggs, and the third for the crushed cornflakes (or panko). This organized setup streamlines the coating process, making it efficient and mess-free.
- The Art of Perfect Coating
Dredge each chicken strip first in the flour, shaking off excess. Then dip it into the beaten egg, allowing any extra to drip off. Finally, press the chicken firmly into the crushed cornflakes, ensuring complete coverage. The firm press is key to that desirable craggy exterior.
- The Game-Changing Refrigeration Trick (Don’t Skip This!)
Place the breaded chicken tenders on a wire rack over a baking sheet and refrigerate for at least 30 minutes. This essential resting period allows the breading to hydrate and firmly adhere to the chicken, preventing it from detaching during frying and guaranteeing a remarkably crispy, non-soggy coating.
- While You Wait: Crafting the Signature Dipping Sauce
During the chicken’s resting period, whisk together all the dipping sauce ingredients in a small bowl until perfectly smooth. Taste and adjust seasonings as needed to achieve your preferred balance of sweet, spicy, and tangy, ready for your golden brown chicken.
- Achieving Ideal Oil Temperature for Frying Success
In a large, heavy-bottomed pot or Dutch oven, pour vegetable oil to a depth of 2-3 inches. Heat the oil over medium-high heat until it consistently registers between 350-375 degrees Fahrenheit. A kitchen thermometer is strongly recommended here, as precise oil temperature is vital for crispness without greasiness.
- Frying to Golden Perfection
Carefully add 3-4 chicken tenders to the hot oil, ensuring you do not overcrowd the pot. Overcrowding significantly drops the oil temperature, leading to soggy rather than crispy chicken. Fry for 4-6 minutes, flipping occasionally, until they achieve a beautiful golden brown color and an internal temperature of 165 degrees Fahrenheit.
- Draining for Ultimate Crispness
Using tongs, transfer the cooked crispy chicken tenders to a clean wire rack set over paper towels. This allows any excess oil to drain away, maintaining their crunch. Repeat the frying and draining process with the remaining chicken until all are perfectly cooked.
- Presenting Your Crispy Masterpiece
If desired, garnish your freshly fried crispy chicken tenders with fresh chopped parsley. Serve them immediately alongside your special homemade dipping sauce and a side of your choice, like golden fries, for a complete meal.
For a perfect pairing, try our Crispy Chicken Fried Chicken: Your Guide to No-Soggy Perfection.
Chef’s Secrets: Elevate Your Crispy Tender Game
Patting Dry: The Absolute First Step to Crispness
Moisture is the enemy of crispiness. Even seemingly dry chicken can hold surface moisture that prevents the breading from sticking. A thorough pat-down with paper towels is non-negotiable for a superior crust on your chicken strips.
Don’t Overcrowd the Pot: Maintain Oil Temperature
Frying too many tenders at once drastically lowers the oil temperature, leading to greasy, soggy results. Fry in batches to keep the oil consistently hot and ensure each piece cooks evenly and crisps perfectly, yielding truly golden brown chicken.
Temperature is Key: Why a Thermometer Matters
Guessing oil temperature is a recipe for disaster. A reliable kitchen thermometer ensures your oil is hot enough to crisp quickly without soaking the chicken in oil, and not so hot that it burns the exterior before the inside cooks to perfection.
Flavor Boosters: Spice Up Your Breading
Don’t be afraid to experiment with your flour seasoning! Add a pinch of cayenne for heat, onion powder for depth, or dried herbs like oregano for an Italian twist. Customize to your family’s palate, or take inspiration from dishes like crispy glazed chicken bites for new flavor profiles.
Make-Ahead Magic: Prep for Future Feasts
You can bread the chicken tenders and refrigerate them for up to 2 hours before frying. This allows for convenient meal prep and enhances crispness. For longer storage, freeze breaded tenders on a baking sheet, then transfer to a freezer bag for up to 1 month. Fry from frozen, adding a few minutes to the cooking time.
Beyond the Plate: Creative Serving Ideas
Classic Comfort: Fries, Slaw, and a Pickle
For a timeless pairing, serve your golden crispy chicken tenders with a generous side of homemade fries, a refreshing coleslaw, and a tangy pickle. This combination offers a satisfying blend of textures and flavors that never disappoints.
Elevated Entrees: Tacos, Wraps, and Salad Toppers
Transform leftover crispy chicken tenders into gourmet meals. Slice them for delicious chicken tacos or wraps, or chop them to add a delightful crunch to your favorite salad. You could even use them to create an incredible crispy fried chicken sandwich.
Party Pleasers: Appetizer Platters with Multiple Dips
Arrange your crispy chicken tenders on a large platter with an assortment of dipping sauces beyond our signature recipe, such as BBQ, honey mustard, or ranch. They make fantastic game-day snacks or party appetizers that disappear fast.
Solving Common Crispy Chicken Tender Challenges
Why Are My Tenders Soggy, Not Crispy?
Sogginess often stems from two main issues: insufficient oil temperature or overcrowding the pot. Ensure your oil is consistently between 350-375°F using a thermometer, and fry in small batches to maintain that heat.
Another culprit can be improper draining. Always transfer cooked tenders to a wire rack over paper towels, not directly onto paper towels, to allow air circulation and prevent steam buildup.
What’s Next?
Try these delicious pairings:
- Crispy Zucchini Fritters: Crunchy, No-Fail Recipe
- The Science of Crunchy Creamy Southern Style Coleslaw
My Coating Keeps Falling Off!
This is where the “Crispy Coating Secret” (refrigeration) becomes vital. Allowing the breaded chicken to rest in the fridge for at least 30 minutes hydrates the breading and helps it adhere firmly. Also, ensure you pat the chicken very dry before breading and firmly press the cornflakes onto the chicken.
The Chicken is Burnt Outside, Raw Inside
This indicates your oil is too hot. The exterior is cooking too quickly before the interior has a chance to reach a safe temperature. Use a thermometer to precisely control your oil temperature, keeping it within the recommended 350-375°F range, and adjust your heat as needed between batches.
Your Top Questions About Crispy Chicken Tenders, Answered
Can I Bake or Air Fry These Tenders Instead of Frying?
Yes, while frying yields the crispiest result, you can bake or air fry for a lighter option. For baking, preheat your oven to 400°F (200°C) and bake for 15-20 minutes, flipping halfway, until golden and cooked through. For air frying, preheat to 375°F (190°C) and air fry for 10-15 minutes, flipping halfway, until crispy.
How Do I Store Leftovers and Reheat Them?
Store cooked crispy chicken tenders in an airtight container in the refrigerator for up to 3-4 days. To reheat and retain crispness, avoid the microwave. Reheat in an oven or air fryer at 350°F (175°C) for 8-10 minutes, or until heated through and re-crisped.
Can I Use Different Cuts of Chicken?
Absolutely! While chicken breast strips are traditional for tenders, you can adapt this recipe for boneless, skinless chicken thighs cut into similar-sized pieces. Just be aware that thighs may require a minute or two longer to cook due to their slightly higher fat content.
Is There a Gluten-Free Option for the Breading?
Yes, easily! Substitute the all-purpose flour with a 1:1 gluten-free flour blend. For the crispy coating, ensure your cornflakes are certified gluten-free, or opt for gluten-free panko breadcrumbs. The method remains the same.
How Can I Make the Dipping Sauce Spicier or Milder?
To increase the heat of the special dipping sauce, simply add more hot sauce, or a pinch of cayenne pepper. For a milder version, reduce the hot sauce or omit it entirely, increasing the ketchup slightly for balance, to match your family meal preferences.
Ready to Impress? Share Your Culinary Triumph!
You’ve now unlocked the secrets to perfectly crispy, incredibly juicy chicken tenders, complete with a show-stopping dipping sauce. This recipe isn’t just about frying chicken; it’s about mastering a technique that guarantees rave reviews and satisfied smiles every time you prepare this family favorite.
So, gather your ingredients, follow our detailed guide, and prepare to delight your taste buds with these golden brown, perfectly fried chicken strips. Don’t forget to share your creations with us on social media! We love seeing your culinary triumphs and your take on our crispy chicken tenders.
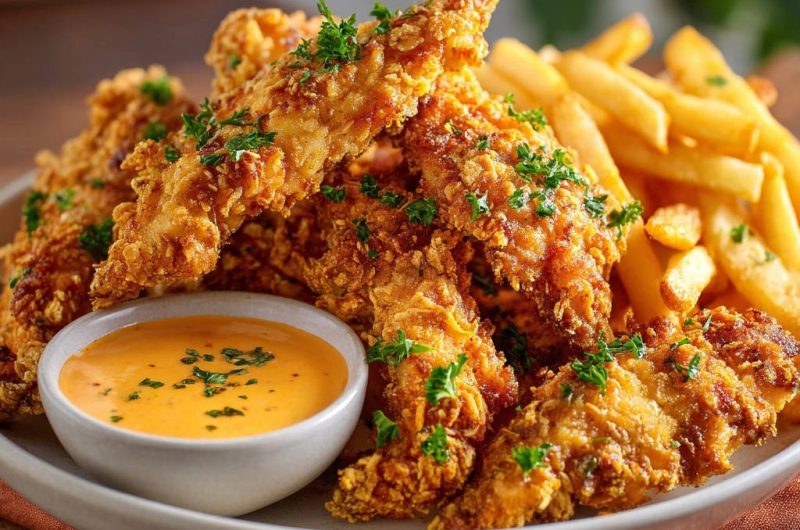
Crispy Chicken Tenders
Course: Main CourseCuisine: AmericanDifficulty: easy4
servings25
minutes25
minutes650
kcal60
minutesUnlock the secret to incredibly crispy chicken tenders that stay crunchy bite after bite, paired with a juicy interior. This recipe reveals a simple trick to achieve restaurant-quality results at home. Serve with a special homemade dipping sauce for the ultimate comfort food experience.
Ingredients
1.5 pounds boneless, skinless chicken breast, cut into 1-inch thick strips
1 cup all-purpose flour
1 teaspoon salt
0.5 teaspoon black pepper
1 teaspoon paprika
0.5 teaspoon garlic powder
2 large eggs, lightly beaten
3 cups cornflakes, finely crushed (or panko breadcrumbs for a similar texture)
4 cups vegetable oil, for frying
Fresh parsley, chopped, for garnish (optional)
For the Special Dipping Sauce:
0.5 cup mayonnaise
2 tablespoons ketchup
1 tablespoon hot sauce (such as sriracha or your favorite mild)
1 teaspoon honey (optional)
0.5 teaspoon onion powder
Directions
- Prepare the chicken: Pat the chicken strips very dry with paper towels. This helps the coating stick.
- Set up breading stations: In a shallow dish, combine the flour, salt, pepper, paprika, and garlic powder. In a second shallow dish, place the beaten eggs. In a third shallow dish, place the crushed cornflakes.
- Bread the chicken: Dredge each chicken strip first in the seasoned flour, shaking off any excess. Then dip it into the beaten egg, letting any extra drip off. Finally, press the chicken firmly into the crushed cornflakes, ensuring it is completely coated. This firm press is key to a craggy, crispy exterior.
- Activate the “Crispy Coating Secret”: Place the breaded chicken tenders on a wire rack set over a baking sheet. Refrigerate them for at least 30 minutes. This crucial resting period allows the breading to hydrate and adhere firmly to the chicken, preventing it from falling off during frying and ensuring an incredibly crispy, non-soggy coating.
- Prepare the dipping sauce: While the chicken rests, whisk together all the dipping sauce ingredients in a small bowl until smooth. Taste and adjust seasonings as needed.
- Heat the oil: In a large, heavy-bottomed pot or Dutch oven, pour in the vegetable oil to a depth of about 2-3 inches. Heat the oil over medium-high heat until it reaches 350-375 degrees Fahrenheit. A kitchen thermometer is highly recommended for accuracy, as proper oil temperature is vital for crispness without greasiness.
- Fry the chicken: Carefully add 3-4 chicken tenders to the hot oil, being careful not to overcrowd the pot. Overcrowding will drop the oil temperature and lead to soggy chicken. Fry for 4-6 minutes, flipping occasionally, until golden brown and cooked through (internal temperature of 165 degrees Fahrenheit).
- Drain and serve: Using tongs, transfer the cooked chicken tenders to a clean wire rack set over paper towels to drain any excess oil. Repeat with the remaining chicken.
- Garnish with fresh chopped parsley, if desired, and serve immediately with your special dipping sauce and a side of fries.
Notes
- The key to ultimate crispiness is refrigerating the breaded chicken and maintaining proper oil temperature during frying.