Mastering Flaky Cranberry Hand Pies with a Crisp Bottom
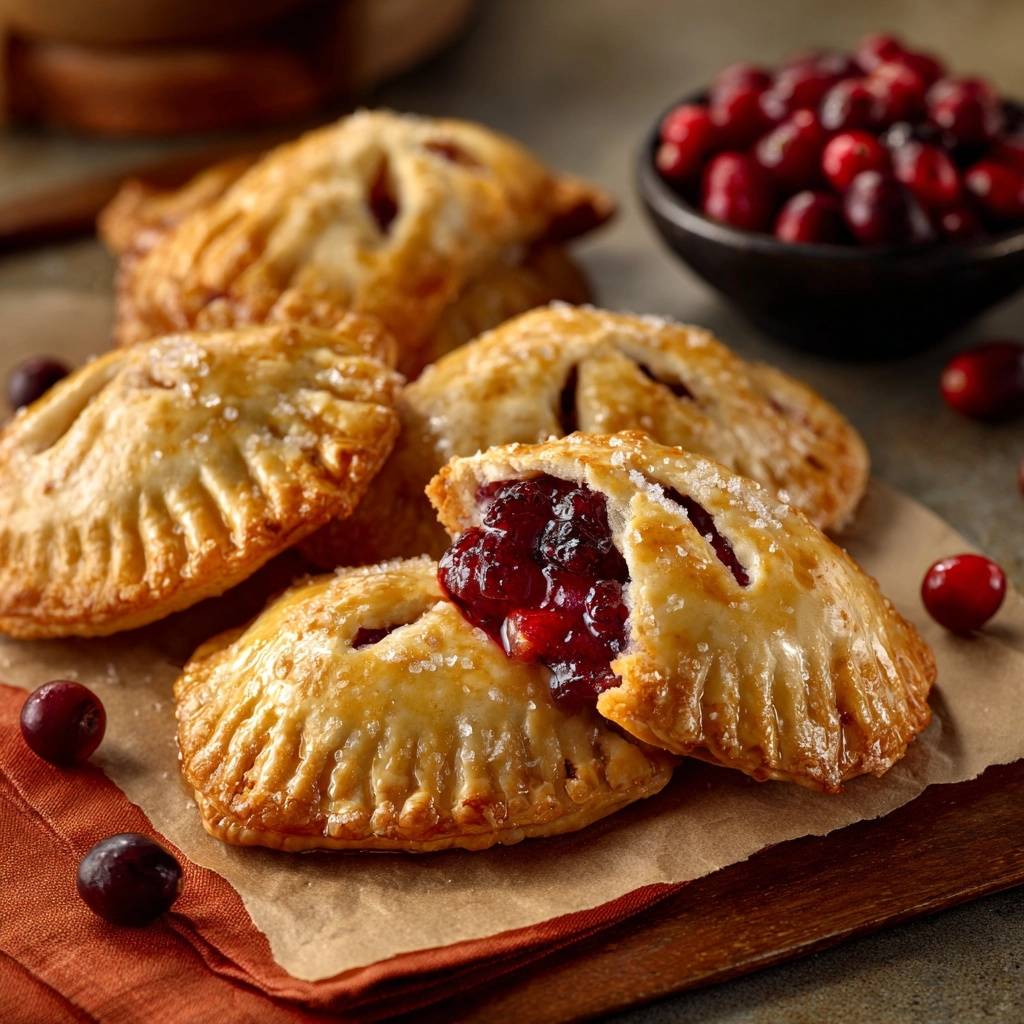
There is something incredibly satisfying about the first bite of a perfect hand pie. You should hear a distinct crackle as the buttery layers of pastry shatter, followed immediately by the bright, tart burst of thickened cranberry filling. It is a portable, handheld experience that balances rich, savory fat with high-acid fruit.
However, many home bakers struggle with the dreaded soggy bottom. Nothing ruins the experience faster than a mushy, leaking crust that falls apart before it reaches your mouth. This guide focuses on mastering the structural integrity of your pastry to ensure every pie is as crisp on the bottom as it is on the top.
The secret to success lies in moisture control and thermal management. By understanding how to stabilize the fruit and how to shock the dough with high heat, you can move beyond basic baking. We are going to ensure that your cranberry hand pies have a professional, sturdy finish every single time.
The Anatomy of a Non-Soggy Hand Pie
Hand pies are structurally different from traditional deep-dish pies because they have a much higher surface-area-to-filling ratio. This means the crust is under constant attack from the moisture inside the fruit. Without the right technique, the juice soaks into the raw dough before it has a chance to bake.
To combat this, we use an “Anti-Soggy Bottom” philosophy. This involves two main pillars: pre-reducing the fruit to remove excess water and using a high-temperature bake to set the crust instantly. When the pastry hits a hot pan, the fat within the layers expands rapidly, creating a barrier that prevents juice from seeping in.
Structural integrity also depends on the seal. If the edges aren’t locked down, the steam pressure will force the filling out the sides. A well-engineered hand pie uses its own steam to puff the pastry upward rather than blowing out the seams.
Why Cranberries Require Specific Handling
Cranberries are unique because they are packed with natural pectin, which is a thickening agent. However, they also have a very thick skin that holds a significant amount of water. If you put raw cranberries inside a pie, they will eventually burst and release all that liquid at once, flooding the crust.
By pre-cooking the filling, you force those berries to burst in the saucepan rather than in the oven. This allows you to control the viscosity of the jam before it ever touches the dough. The high acidity of the cranberry also reacts with the sugar, creating a syrupy consistency that sets firmly as it cools.
Essential Components for Flaky Cranberry Hand Pies
Quality ingredients are the foundation of a great pastry, but temperature is the most important “ingredient” of all. While refrigerated pie crusts are a fantastic time-saver, they are very sensitive to heat. You must keep the dough at roughly 40°F until the very second you are ready to cut and fill.
If the dough gets too warm, the solid bits of fat will melt into the flour. This destroys the lamination, resulting in a tough, cracker-like crust instead of flaky layers. Always work quickly and, if the kitchen is hot, pop the dough back in the fridge for ten minutes between steps.
Using a beaten egg for the wash is another essential component. The protein in the egg creates a beautiful golden sheen, while the fat helps the coarse sugar adhere to the surface. This creates a textural contrast that makes the pies feel like they came from a high-end bakery.
Selecting the Best Cranberries and Citrus
Fresh cranberries are ideal because they have a firm snap and a bright, acidic profile. If you use frozen berries, do not thaw them before cooking; just toss them straight into the pan. Frozen berries tend to release more water, so you might need an extra minute of reduction time.
Orange zest is the unsung hero of this recipe. The essential oils found in the orange peel provide a floral aroma that cuts through the heavy, buttery flavor of the crust. It brightens the entire palate and balances the deep tartness of the cooked cranberries.
The Role of Cornstarch and Sugar Ratios
Cornstarch acts as the secondary insurance policy against leaks. While the pectin in the berries does some work, the cornstarch slurry creates a clear, thick gel that binds the juices together. This ensures that when you bite into the pie, the filling stays put instead of running down your arm.
Sugar plays a chemical role here as well. It is hygroscopic, meaning it draws moisture out of the fruit cells. By macerating and cooking the berries with sugar, you ensure that the moisture is fully integrated into the syrup, leaving no “free water” to ruin your pastry base.
The Pre-Reduction Method for Filling Stability
When you start cooking your filling, you will hear the cranberries begin to pop. This is the “bursting point,” and it is your cue that the juices are being released. You want to keep stirring over medium heat until the mixture looks like a thick, glossy jam.
You are looking for a specific visual cue: when you run a spoon through the center of the pan, the trail should stay open for a second or two. If the liquid rushes back in immediately, it needs more time. This reduction is what prevents the “soupiness” that leads to failed hand pies.
Why Cooling the Filling is Non-Negotiable
This is the most common mistake in pastry baking. If you put warm filling onto cold dough, the heat will instantly melt the butter or shortening in the crust. This creates a greasy, leaden texture that will never become flaky, no matter how hot your oven is.
The filling must be completely cold to the touch. I recommend spreading the cooked cranberry mixture onto a flat plate and putting it in the fridge. This increases the surface area and cools it down in about 15 minutes. Cold filling keeps the fat in the dough solid, ensuring those beautiful, shattered layers.
Step-by-Step: Engineering the Perfect Pastry Seal
When you unroll your chilled crust, use a 4-inch cutter to get uniform circles. Uniformity isn’t just for looks; it ensures that every pie cooks at the exact same rate. If some are larger than others, the small ones will burn before the large ones are crisp.
Place exactly 1.5 tablespoons of filling in the center. It is tempting to overstuff them, but resist the urge! Overfilling is a guaranteed way to cause a blowout in the oven. Leave a clean border of at least half an inch around the edges so the dough can bond to itself.
Crimping Techniques to Prevent Leaks
The fork-crimp is the classic method for a reason. When you press the tines of the fork into the two layers of dough, you are physically fusing them together. Press down firmly enough to see the pattern, but not so hard that you cut through the pastry.
For an extra-secure seal, you can lightly dab the edge of the bottom circle with a tiny bit of water or egg wash before placing the top circle on. This acts as a “glue.” A firm, consistent crimp is your best defense against the internal pressure of the bubbling fruit.
The Science of Steam Vents
As the fruit heats up, it creates steam. If that steam has nowhere to go, it will inflate the hand pie like a balloon. This “ballooning” effect pulls the crust away from the filling, creating a large air pocket and often causing the bottom to stay soft and wet.
For a perfect pairing, try our Stable Vanilla Whipped Cream: Stays Perfect, Never Falls!.
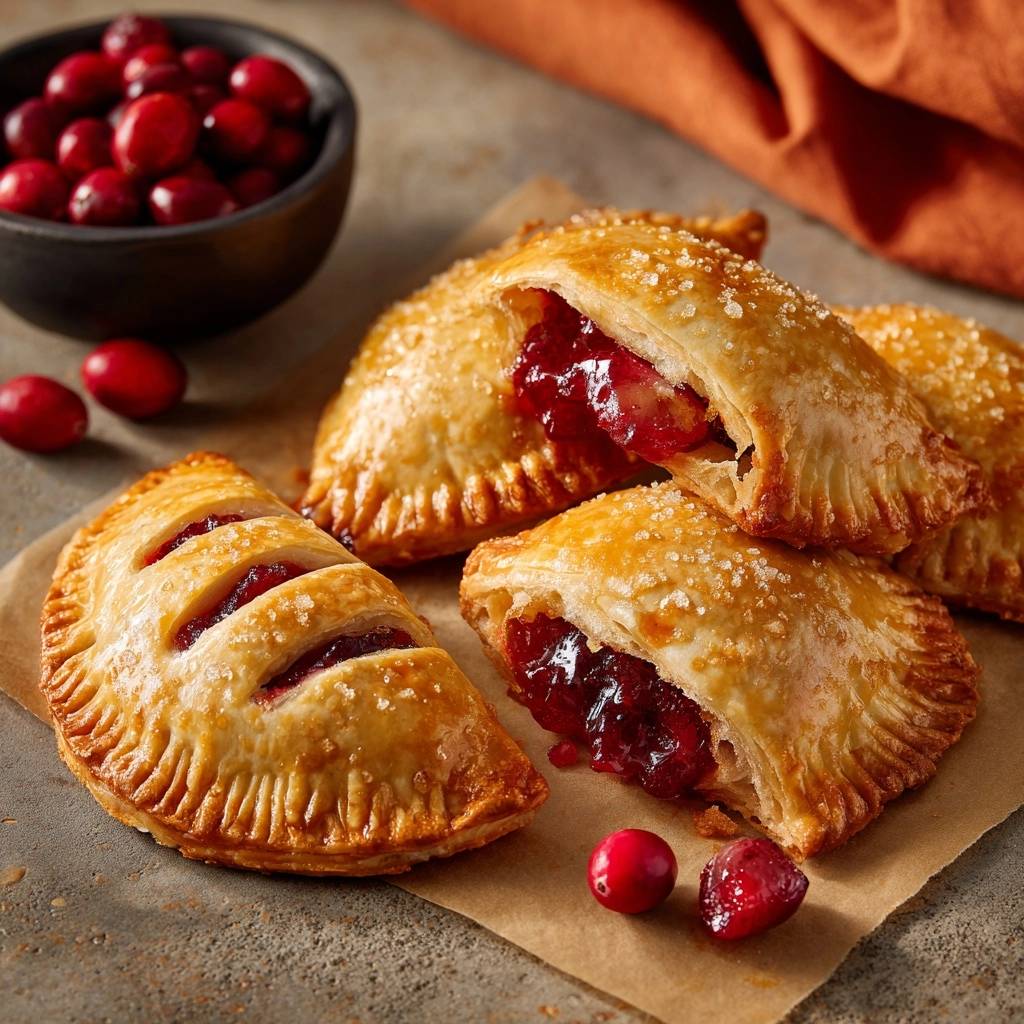
Cutting three small slits in the top allows that steam to escape gracefully. Small slits are better than one large hole because they maintain the structural strength of the top crust while still providing plenty of ventilation. It keeps the pastry sitting tight against the filling.
Thermal Strategy: The Two-Stage Baking Process
We bake these at 400°F, which is higher than many standard cookie or cake recipes. This high initial heat is vital. It causes the water in the butter layers to evaporate instantly into steam, which “lifts” the dough and creates flakiness before the filling has a chance to soak in.
Rotating the pan halfway through is a pro move. Most ovens have hot spots, usually in the back corners. By rotating the sheet, you ensure that every hand pie gets an even tan and that the bottoms are uniformly browned. A deep golden color is the sign of a fully cooked, crisp crust.
Achieving the Golden Egg Wash Sheen
The egg wash is what gives these pies their “bakery case” look. Use a pastry brush to apply a thin, even layer. Avoid letting the egg wash pool at the base of the pies, as this can burn on the parchment paper and stick to your crust.
Sprinkling coarse sparkling sugar on top isn’t just for sweetness. The large crystals don’t melt in the oven, providing a crunch that mimics the texture of the flaky pastry. It signals to anyone eating it that they are in for a treat that is both crispy and sweet.
Troubleshooting Common Hand Pie Failures
If your filling leaked out, the most likely culprit is either a weak seal or vents that were too small. Next time, ensure your fork crimps are deep and your slits are clearly cut through the dough. Also, check that your filling was thick enough before you started.
If the bottoms are pale and soft, your oven might not be providing enough bottom heat. Try moving the baking sheet to the lowest rack for the last five minutes of baking. You can also try using a heavy-gauge aluminum baking sheet, which conducts heat more efficiently than thin, dark pans.
A tough crust usually comes from overhandling. Every time you touch the dough, you develop gluten and melt the fat. Work as quickly as possible, and use a light touch. If you have to re-roll scraps, let the dough rest in the fridge for 15 minutes first to relax the gluten.
Flavor Variations and Seasonal Swaps
Once you master the cranberry base, you can experiment with flavors. Adding a teaspoon of freshly grated ginger to the cranberry reduction adds a sophisticated heat. You could also scrape the seeds of a vanilla bean into the sugar for a creamy, aromatic undertone.
If you want to change the citrus, lime zest works beautifully with cranberries for a more tropical tartness. Just remember to keep your ratios the same. The chemistry of the cornstarch and sugar is what makes the recipe work, so don’t mess with the moisture levels too much.
Make-Ahead Strategies and Storage Solutions
You can assemble these hand pies and freeze them raw. Place them on a baking sheet in the freezer until solid, then transfer to a freezer bag. When you’re ready to eat, bake them straight from frozen, adding about 5 to 8 minutes to the total baking time.
If you have leftovers, store them in an airtight container at room temperature for up to two days. For longer storage, keep them in the fridge for up to five days. However, the fridge will soften the crust, so you will need to refresh them before serving.
How to Refresh Day-Old Pastries
Never use a microwave to reheat a hand pie! It will turn the pastry into a rubbery, soggy mess. Instead, use a toaster oven or a standard oven set to 350°F. Place the pies directly on the rack or a baking sheet for 5 to 7 minutes.
This short blast of heat recrisps the fat in the crust and restores that “shatter” factor. It also warms the cranberry center back to a jammy, delicious consistency. It will taste almost as good as the moment it first came out of the oven.
Expert Tips for Professional Results
For the absolute best results, use a heavy-gauge baking sheet. These pans distribute heat evenly and prevent the bottoms from burning before the tops are golden. I also highly recommend parchment paper over silicone mats; parchment allows for better airflow and a crispier bottom crust.
Finally, the 15-minute rest on a wire rack is mandatory. While it is tempting to eat them immediately, the pectin in the filling needs time to “set” as it cools. If you cut into them too early, the filling will be runny. A little patience ensures a perfect, jammy interior that stays exactly where it belongs.
How do I store leftover hand pies?
Store your hand pies in an airtight container at room temperature for up to 2 days. If you need to keep them longer, they will last in the refrigerator for up to 5 days. To regain the flaky texture, always reheat them in an oven or toaster oven at 350°F for a few minutes rather than using a microwave.
Why did my hand pies leak in the oven?
Leaking usually happens for two reasons: the edges weren’t sealed tightly enough or the steam vents were too small. Make sure to press firmly with your fork when crimping the edges. Also, ensure your cranberry filling is completely cooled before assembly, as warm filling can melt the dough and break the seal before it even starts baking.
Can I use frozen cranberries instead of fresh?
Yes, you can use frozen cranberries without any issues. Do not thaw them before cooking; simply add them to the saucepan with the sugar and zest. You may need to simmer the filling for an extra minute or two since frozen berries release slightly more moisture than fresh ones.
Can I use a different type of flour or a gluten-free crust?
You can substitute the refrigerated crust with a homemade gluten-free pie dough. However, gluten-free dough is often more fragile and prone to breaking. If using gluten-free dough, make sure it is very well-chilled and consider making the hand pies slightly smaller to help them hold their shape.
Why is my pastry tough instead of flaky?
Tough pastry is usually the result of overworking the dough or letting it get too warm. When the fat in the crust melts before it hits the oven, you lose those distinct layers. Always handle the dough as little as possible and keep it chilled until you are ready to fill and bake.
How do I prevent the bottom of the pie from getting soggy?
The key is the pre-reduction of the filling and the high baking temperature. By cooking the cranberries into a thick jam first, you remove the excess water that would otherwise soak the dough. Baking at 400°F ensures the bottom crust sets and crisps up immediately upon contact with the hot pan.
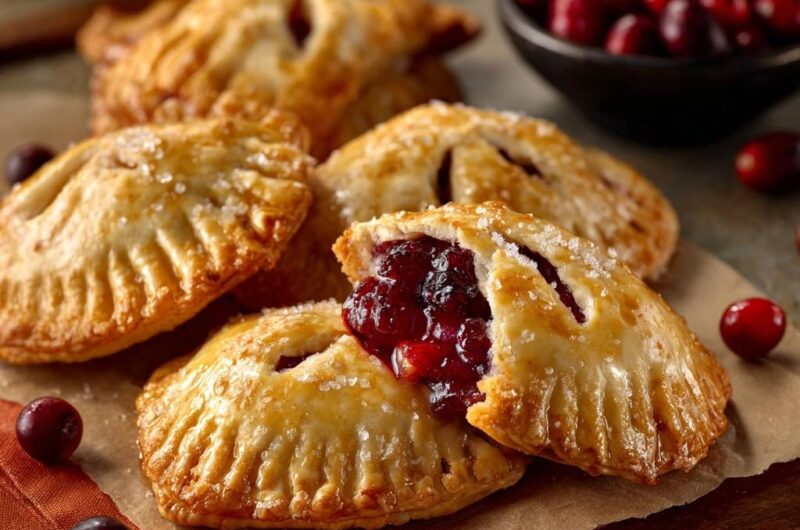
Cranberry Hand Pies
Course: DessertCuisine: AmericanDifficulty: easy8
hand pies20
minutes25
minutes285
kcal45
MinutesThese cranberry hand pies feature a shatteringly crisp crust and a thick, jam-like fruit filling. By pre-cooking the cranberries and using a high-heat baking technique, these portable treats maintain their structure and crunch without leaking or becoming mushy.
Ingredients
2 sheets refrigerated pie crust, chilled
2 cups fresh cranberries
3/4 cup granulated sugar
1 tablespoon orange zest
1 tablespoon cornstarch
1/4 teaspoon salt
1 egg, beaten (for egg wash)
2 tablespoons coarse sparkling sugar
Directions
- To prevent a soggy bottom, you must pre-cook the filling. In a small saucepan, combine cranberries, granulated sugar, orange zest, and salt. Cook over medium heat for 8 to 10 minutes until the berries burst and the liquid thickens into a jam-like consistency.
- Stir the cornstarch into 1 tablespoon of water to create a slurry, then mix it into the hot cranberries. Simmer for 1 minute and remove from heat. Let the filling cool completely. Using warm filling is the number one cause of gummy crusts.
- Preheat your oven to 400 degrees F. Line a baking sheet with parchment paper.
- Unroll the chilled pie crusts and cut out 4-inch circles using a biscuit cutter or a glass.
- Place 1.5 tablespoons of the cooled cranberry mixture onto the center of half the circles. Top with a second pastry circle.
- Use a fork to crimp the edges firmly. This seal is vital to prevent leaks. Cut three small slits in the top of each pie to allow steam to escape, which prevents the crust from becoming bloated and wet.
- Brush the tops lightly with the beaten egg wash and sprinkle generously with coarse sugar.
- Bake at 400 degrees F for 15 minutes, then rotate the pan and bake for another 10 minutes until the crust is deep golden brown. The high initial heat sets the bottom crust immediately, guaranteeing a crisp finish.
- Allow the pies to cool on a wire rack for at least 15 minutes before serving to let the filling set.
Notes
- To ensure a crisp finish, always let the filling cool completely before assembling. Using warm filling will melt the fat in the pastry and cause a gummy texture. The initial high oven temperature is crucial for setting the bottom crust immediately.