Mastering the Jalapeno Popper Stuffed Meatloaf
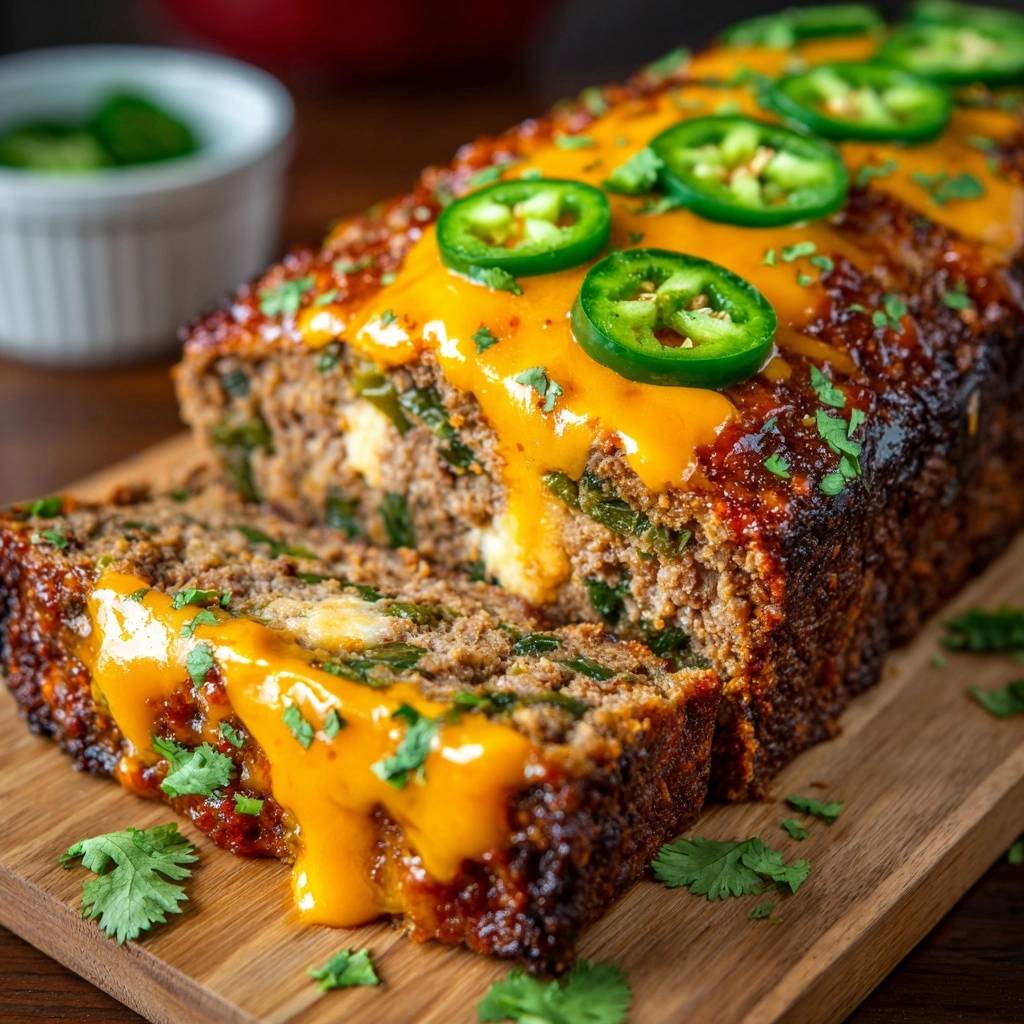
Forget everything you remember about those dry, gray slabs of meatloaf from the school cafeteria. We’re taking a classic comfort food and giving it a massive upgrade that’s part backyard BBQ and part favorite appetizer. Imagine a slice of tender, savory beef that gives way to a molten, creamy center of melted cheese and spicy peppers. It’s the kind of meal that makes everyone at the table reach for seconds before they’ve even finished their first serving.
The real magic here isn’t just the flavor; it’s the incredible texture. Most people struggle with meatloaf that either crumbles into a mess or feels like a dense brick. By stuffing the center with a jalapeno popper filling, you’re essentially hydrating the meat from the inside out. As the beef roasts, the cream cheese and cheddar melt together, creating a self-basting effect that keeps every bite succulent and rich.
If you’ve ever ended up with a dry loaf, the secret is all in the panade. I’m talking about that mixture of breadcrumbs and milk you’ll see in the recipe. This isn’t just a filler; it’s a scientific insurance policy. The milk-soaked crumbs coat the meat proteins, preventing them from bonding too tightly and squeezing out all the moisture. It’s the single most important step for a professional-grade result.
The Science of Moisture: Why This Recipe Works
When you cook ground beef, the protein fibers naturally want to shrink and tighten as they heat up. This process is what pushes the juices out, leaving you with a puddle of grease and a dry dinner. However, when we introduce a panade, we change the chemistry of the loaf. The starch in the panko breadcrumbs absorbs the milk and creates a gel-like barrier. This barrier sits between the meat fibers, physically blocking them from contracting too much.
In addition to the panade, using an 80/20 fat ratio for your ground beef is non-negotiable. While lean beef might seem healthier, it lacks the necessary fat to survive a 60-minute bake without turning into cardboard. That 20% fat content renders down during the cooking process, mingling with the cream cheese core to keep the interior incredibly soft. Therefore, the combination of the panade and the right fat percentage ensures your meatloaf stays juicy from the edges all the way to the center.
Essential Components for Jalapeno Popper Stuffed Meatloaf
Quality ingredients are the foundation of this dish. Start with fresh, high-quality ground beef that hasn’t been previously frozen if possible. For the binder, I prefer Panko breadcrumbs over the traditional fine-ground variety. Panko has a larger, flakier surface area, which helps maintain a lighter, more aerated structure in the meat rather than a heavy, dense mass. It’s a small swap that makes a huge difference in the final mouthfeel.
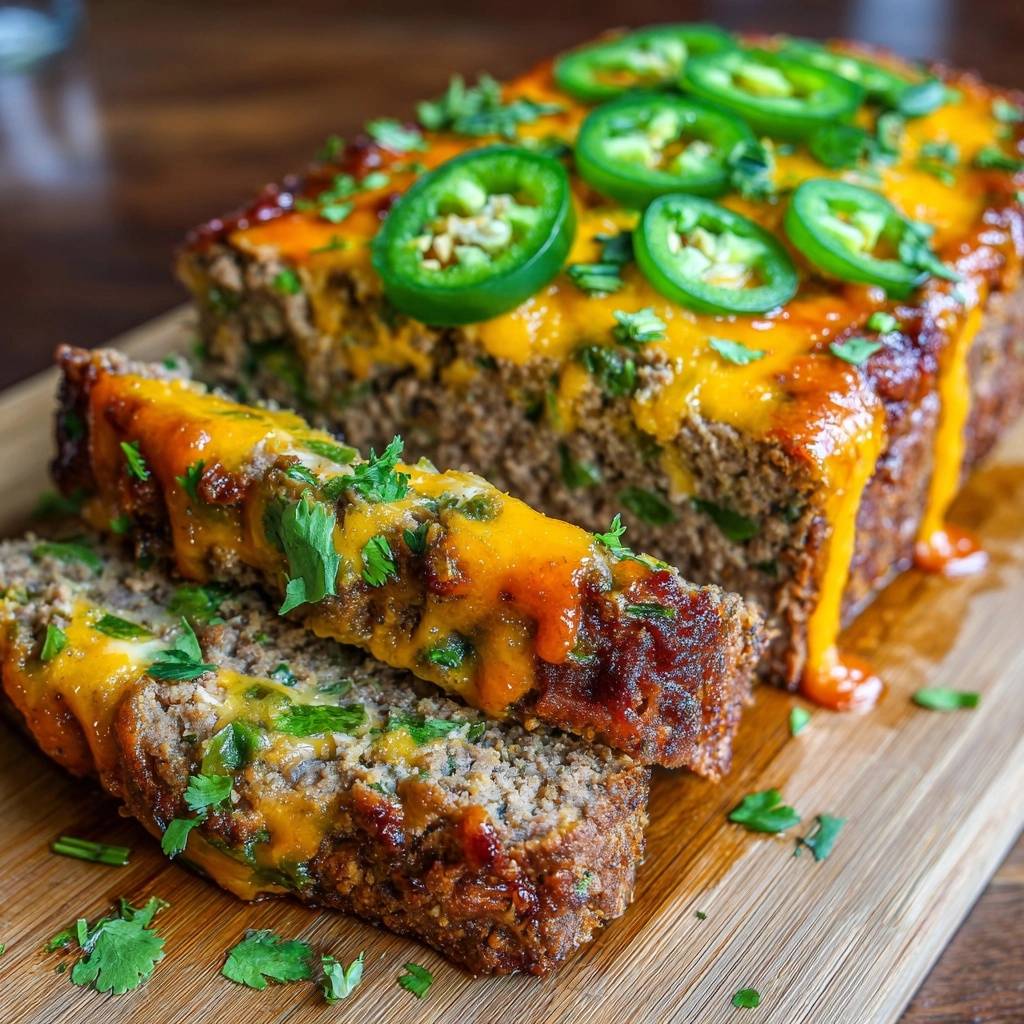
The cheese filling requires a bit of prep work too. You must use softened cream cheese to get that perfect, velvety consistency. If the cream cheese is too cold, it won’t mix properly with the cheddar, and you’ll end up with lumpy pockets in your stuffing. Speaking of cheddar, go for a sharp or extra-sharp variety. The bold tang of an aged cheddar stands up beautifully against the richness of the beef and the heat of the jalapenos.
Selecting and Preparing Fresh Jalapenos
Managing the heat level is entirely in your hands. Most of a jalapeno’s spice lives in the white ribs and the seeds, not the green flesh itself. If you want a mild flavor with just a hint of warmth, scrape those seeds out thoroughly. However, if you’re a spice lover, feel free to leave a few seeds in the mix. I highly recommend wearing gloves while chopping; the capsaicin oils can stick to your skin for hours and cause a nasty sting if you touch your eyes.
We use the peppers in two distinct ways for this recipe. The finely diced peppers are folded directly into the meat and the cheese filling to distribute flavor evenly. The sliced rounds, on the other hand, are reserved for the top. These rounds roast in the oven’s dry heat, mellowing out slightly while providing a beautiful, professional look to the finished loaf. It’s a great way to signal to your guests exactly what’s inside.
If you enjoy layering flavors with that BBQ glaze, you’ll love the same technique in these cheesy beef stuffed peppers.
The Role of Sharp Cheddar and Cream Cheese
Pairing cream cheese with sharp cheddar isn’t just about taste; it’s about structural integrity. Cream cheese is incredibly stable under heat, meaning it won’t just disappear or turn into oil while baking. It stays thick and luscious, acting as a “glue” for the jalapenos. The sharp cheddar adds the necessary saltiness and that classic “cheese pull” texture we all crave.
As the meatloaf bakes, the fats from these cheeses begin to interact with the beef juices. This creates a pressurized environment inside the loaf where the moisture has nowhere to go but back into the meat. It’s essentially a self-basting system. By the time you slice into it, the cheeses have melded into a singular, gooey filling that complements the smoky paprika and garlic in the beef perfectly.
Phase One: Preparing the Meatloaf Base
The biggest mistake you can make is over-mixing the meat. When you work ground beef too much, you develop a protein called myosin. While great for sausage, too much myosin makes meatloaf rubbery and tough. Use your hands and mix just until you can’t see any more large streaks of egg or dry spices. You want the mixture to look uniform but still appear somewhat loose and textured.
You’ll know you’ve got it right when the meat feels tacky but not like a smooth paste. Keeping those little air pockets in the meat allows the juices to settle and gives the loaf a much better “crumb” when sliced. Once the meat is ready, let it rest for just a minute while you prep your baking sheet. This brief pause helps the breadcrumbs fully hydrate before the loaf goes into the oven.
Phase Two: Engineering the Jalapeno Popper Core
Building the “well” is the most technical part of this process. Start by patting about half of your meat mixture onto the parchment-lined tray into a flat rectangle. Use your fingers to create a shallow trench down the middle, but make sure you leave at least a one-inch border of meat all the way around. This border is your “seal,” and it’s what keeps the cheese from leaking out onto the pan.
Spread your cream cheese and cheddar mixture into that trench, keeping it level. Then, take the remaining meat and gently pat it over the top. You want to pinch the top and bottom layers together firmly. Think of it like sealing a giant ravioli. If there are any cracks or thin spots, the cheese will find them and escape. Smooth out the surface with a little water on your hands to ensure a uniform shape for even cooking.
Phase Three: The Two-Stage Baking and Glazing Process
We use a two-stage glazing method to get that perfect, sticky-sweet exterior. The first layer of BBQ sauce goes on before the loaf hits the oven. This layer bakes down, caramelizing against the meat and creating a deep base of flavor. If you have a wire rack, place the meatloaf on that over your baking sheet. This allows the hot air to circulate under the loaf, which prevents the bottom from sitting in grease and getting soggy.
The second glaze happens during the final 15 minutes of cooking. This layer stays glossy and bright, providing that “wow” factor when you pull it out of the oven. This is also when we add the final topping of shredded cheddar and the jalapeno rounds. The cheese should drape over the sides like a blanket, melting into the nooks and crannies of the meat while the jalapenos soften and char slightly.
Troubleshooting Common Meatloaf Structural Issues
If your meatloaf splits across the top, don’t panic. This usually happens because steam from the cheese core needed a way to escape. You can minimize this by ensuring your top layer of meat isn’t too thin. If it does split, just cover the “wound” with your extra cheese and jalapenos. No one will ever know, and it will still taste incredible.
Another common issue is the “grease pool.” Even with 80/20 beef, you’ll have some rendered fat. Using the wire rack method mentioned earlier is the best way to solve this. If you don’t have a rack, you can carefully drain the excess fat from the corner of the pan halfway through cooking. Just be very careful with the hot liquid. Finally, if cheese leaks out, it’s usually a sign the 1-inch border wasn’t sealed tightly enough. Next time, give those edges an extra firm pinch.
Optimal Internal Temperatures and the Resting Rule
The most important tool in your kitchen for this recipe is a meat thermometer. You are looking for an internal temperature of exactly 160°F. Because we are working with ground beef, this is the safety standard, but it’s also the peak of juiciness. If you take it to 170°F or higher, the proteins will tighten up, and you’ll lose that tender texture we worked so hard to build.
Once the thermometer hits 160°F, take it out and walk away. You must let the meatloaf rest for at least 10 full minutes. During this time, the muscle fibers relax and reabsorb the juices that were bubbling during the bake. If you cut into it immediately, all that moisture—and the molten cheese core—will come rushing out onto the board. Patience here ensures every slice is perfect and the cheese stays exactly where it belongs.
Side Dishes to Balance the Heat
Since this meatloaf is rich, creamy, and has a bit of a kick, you want sides that can hold their own. A big pile of garlic mashed potatoes is the classic choice for a reason; the starch soaks up any extra BBQ glaze beautifully. If you want something a bit lighter, a crisp slaw with a vinegar-based dressing provides a sharp acidity that cuts right through the richness of the cream cheese.
Roasted root vegetables like carrots or parsnips also work well, as their natural sweetness complements the smoky paprika in the beef. For a true comfort meal, consider some buttered corn on the cob or a simple green salad with a cooling ranch dressing. The goal is to have something mild and fresh to balance out the bold, spicy flavors of the jalapeno popper filling.
Storage, Reheating, and Leftover Transformation
Leftover meatloaf is arguably even better the next day. Store any remaining slices in an airtight container in the fridge for up to four days. When you’re ready to eat, avoid the microwave if you can. Microwaves tend to make the beef rubbery. Instead, place a slice in a covered skillet with a teaspoon of water over medium-low heat. This creates a little steam that gently reheats the meat and remelts the cheese core without drying it out.
If you want to get creative, leftovers make incredible “Meatloaf Sliders.” Just sear a slice in a pan to get the edges crispy and put it on a toasted bun with a little extra BBQ sauce. You can also crumble the meat and cheese into a breakfast hash with fried potatoes and onions. The jalapeno and cream cheese flavors are already built-in, so it makes for a very flavorful morning meal with minimal effort.
Expert Troubleshooting and Preparation Tips
Can I use ground turkey instead of beef for this recipe?
You can certainly use ground turkey, but you need to be careful with the fat content. Turkey is much leaner than 80/20 beef, so it can dry out very quickly. If you go this route, I recommend adding a tablespoon of olive oil to the meat mixture and perhaps an extra splash of milk to the panade. Also, keep a very close eye on the thermometer, as turkey can go from juicy to dry in a matter of minutes.
How do I make this meatloaf ahead of time?
This is a fantastic “prep-ahead” meal. You can assemble the entire loaf, including the cheese stuffing and the first layer of glaze, up to 24 hours in advance. Wrap it tightly in plastic wrap and keep it in the refrigerator. When you’re ready to bake, let it sit on the counter for about 20 minutes to take the chill off before putting it in the oven. You may need to add 5-10 minutes to the total bake time.
Why is my meatloaf falling apart when I try to slice it?
If your loaf is crumbling, it’s usually due to one of two things: the egg-to-crumb ratio or the resting time. The eggs and the panade act as the “glue” for the meat. If you measured your breadcrumbs loosely or used very small eggs, the structure might be weak. However, the most common culprit is slicing too early. If the meat hasn’t rested, the proteins haven’t set, and the loaf will naturally fall apart under the pressure of a knife.
Can I freeze the stuffed meatloaf for later?
Yes, you can freeze this meatloaf either raw or cooked. To freeze it raw, assemble the loaf but do not add the glaze. Wrap it in a double layer of plastic wrap and then a layer of foil to prevent freezer burn. It will stay fresh for up to three months. Thaw it completely in the refrigerator before baking. If freezing cooked slices, wrap them individually so you can pull out exactly what you need for a quick lunch.
What is the best way to ensure the cheese doesn’t leak out?
The “well” method is your best friend here. Ensure that the cream cheese mixture is centered and that you have a thick wall of meat on all sides. When you place the top layer of meat on, don’t just set it there; press it firmly into the bottom layer to create a seamless bond. If you see any thin spots where the white cream cheese is peeking through the raw beef, patch it with a little extra meat before baking.
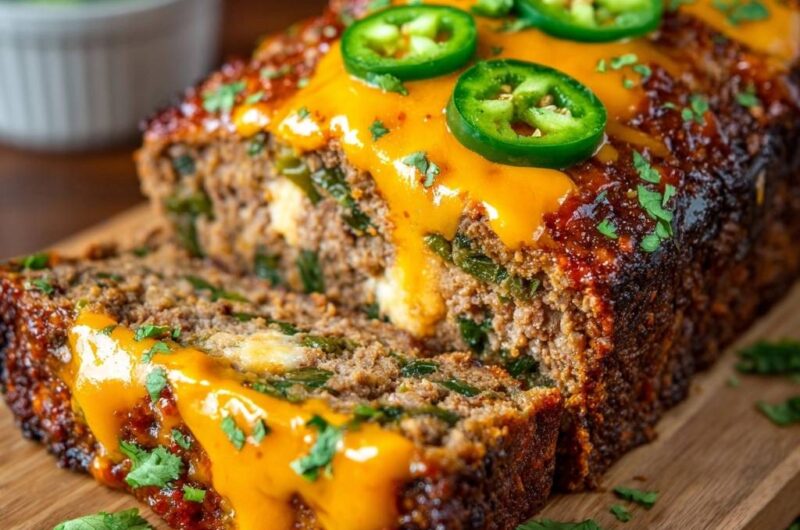
Jalapeno Popper Stuffed Meatloaf
Course: Main CourseCuisine: AmericanDifficulty: medium8
servings20
minutes1
hour410
kcal80
MinutesThis Jalapeno Popper Stuffed Meatloaf solves the problem of dry meatloaf by using a milk-soaked panko panade and a rich cream cheese and cheddar filling. Topped with BBQ sauce and extra cheese, it is a spicy and savory twist on a classic comfort food.
Ingredients
2 lbs ground beef (80/20 blend for maximum juiciness)
1 cup panko breadcrumbs
1/2 cup whole milk
2 large eggs, beaten
1/2 cup finely diced onion
5 fresh jalapenos (3 seeded and diced for the meat, 2 sliced into rounds for garnish)
1.5 cups shredded sharp cheddar cheese (divided)
4 oz cream cheese, softened
1/2 cup BBQ sauce or ketchup glaze
1 teaspoon garlic powder
1 teaspoon onion powder
1 teaspoon smoked paprika
Salt and black pepper to taste
Fresh cilantro for garnish
Directions
- Preheat your oven to 375 degrees F. Line a baking sheet with parchment paper or use a wire rack set over a pan to allow heat to circulate, which prevents the bottom from getting soggy.
- In a small bowl, combine the panko breadcrumbs and milk. Let this sit for 5 minutes. This panade is the critical step to solving dry meatloaf; it creates a moisture barrier that keeps the beef proteins from tightening up and squeezing out juices.
- In a large mixing bowl, combine the ground beef, the soaked breadcrumb mixture, eggs, diced onion, the 3 diced jalapenos, garlic powder, onion powder, smoked paprika, salt, and pepper. Mix with your hands just until combined. Do not overwork the meat, as over-mixing leads to a dense, tough texture.
- In a separate small bowl, mix the softened cream cheese with 1/2 cup of the shredded cheddar.
- On the prepared baking sheet, pat half of the meat mixture into a rectangular shape. Create a shallow well in the center and spread the cream cheese mixture inside, leaving a 1-inch border around the edges.
- Place the remaining meat mixture on top and pinch the edges firmly to seal the cheese inside. Shape into a smooth, uniform loaf to ensure even cooking.
- Brush the top and sides generously with half of the BBQ sauce. Bake for 45 minutes.
- Remove from the oven. Brush with the remaining sauce. Top the center of the loaf with the remaining 1 cup of shredded cheddar, allowing it to drape over the sides. Arrange the fresh jalapeno slices in a row along the top of the cheese.
- Bake for another 10 to 15 minutes or until the internal temperature reaches exactly 160 degrees F and the cheese is melted and bubbling down the sides as shown in the image.
- The most important step for juiciness: Let the meatloaf rest for 10 full minutes before slicing. This allows the juices to redistribute so they stay in the meat rather than running out onto the cutting board. Garnish with fresh cilantro and serve.
Notes
- Do not overwork the meat to avoid a dense texture. Always let the meatloaf rest for 10 minutes after baking to ensure the juices redistribute for a succulent slice.