Mastering the Creamy White Chicken Chili Emulsion
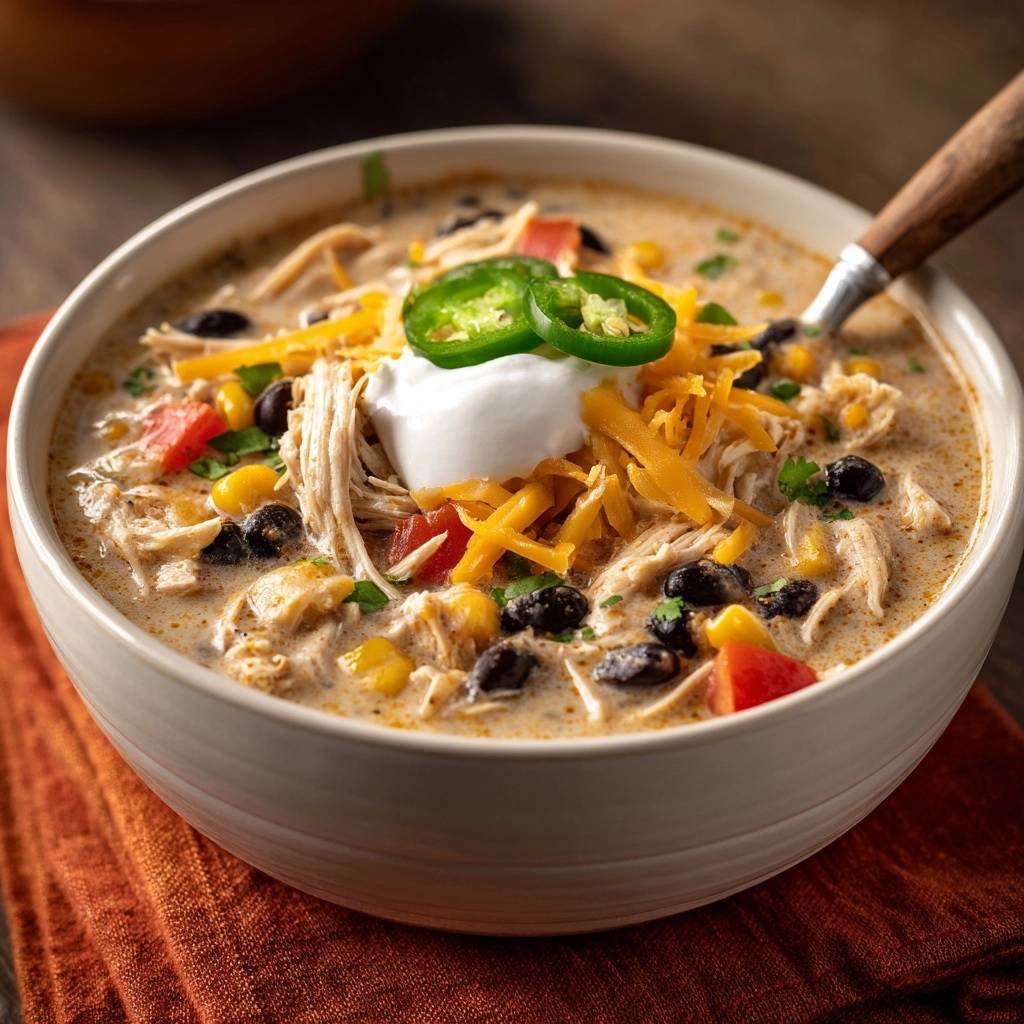
Imagine dipping your spoon into a bowl of chili that feels more like a velvet hug than a standard soup. Most white chicken chilis lean toward a thin, broth-heavy consistency, but this version is different. It boasts a rich, orange-tinted base that clings to every shred of chicken and every black bean, offering a decadent mouthfeel that usually requires hours of simmering.
The real magic here isn’t just the flavor; it’s the structural integrity of the broth. We’ve all experienced the heartbreak of a creamy soup “breaking,” where the dairy separates into grainy little clumps that ruin the presentation. By focusing on a specific tempering technique, you can achieve a professional-grade emulsion that stays perfectly smooth from the first bite to the last.
The secret to this foolproof texture lies in managing the thermal shock of your dairy. Instead of dropping cold cream cheese directly into a boiling pot, we use a bridge method to equalize temperatures. This small extra step ensures the proteins in the cheese and cream don’t seize up, resulting in a glossy, restaurant-quality finish every single time.
The Science of Stable Dairy Emulsions
When you add dairy to a hot liquid, you’re performing a delicate chemical balancing act. Cream cheese and heavy cream are emulsions of fat and water held together by proteins. If these proteins hit a boiling liquid too fast, they tighten up and squeeze out the fat, which is exactly what causes that unappetizing “curdled” look.
To keep your Creamy White Chicken Chili looking beautiful, you have to respect the “break point” of your fats. High heat is the primary enemy of a smooth soup. By understanding how temperature affects these molecules, you can manipulate the texture to be as thick and creamy as you desire without ever risking a grainy disaster.
Why High Heat Ruins Creamy Soups
Boiling water sits at 212°F, which is far too aggressive for the delicate proteins in cream cheese. When the broth is bubbling rapidly, the agitation and high heat cause the dairy proteins to denature and clump together. This creates a gritty texture that no amount of stirring can truly fix once it has happened.
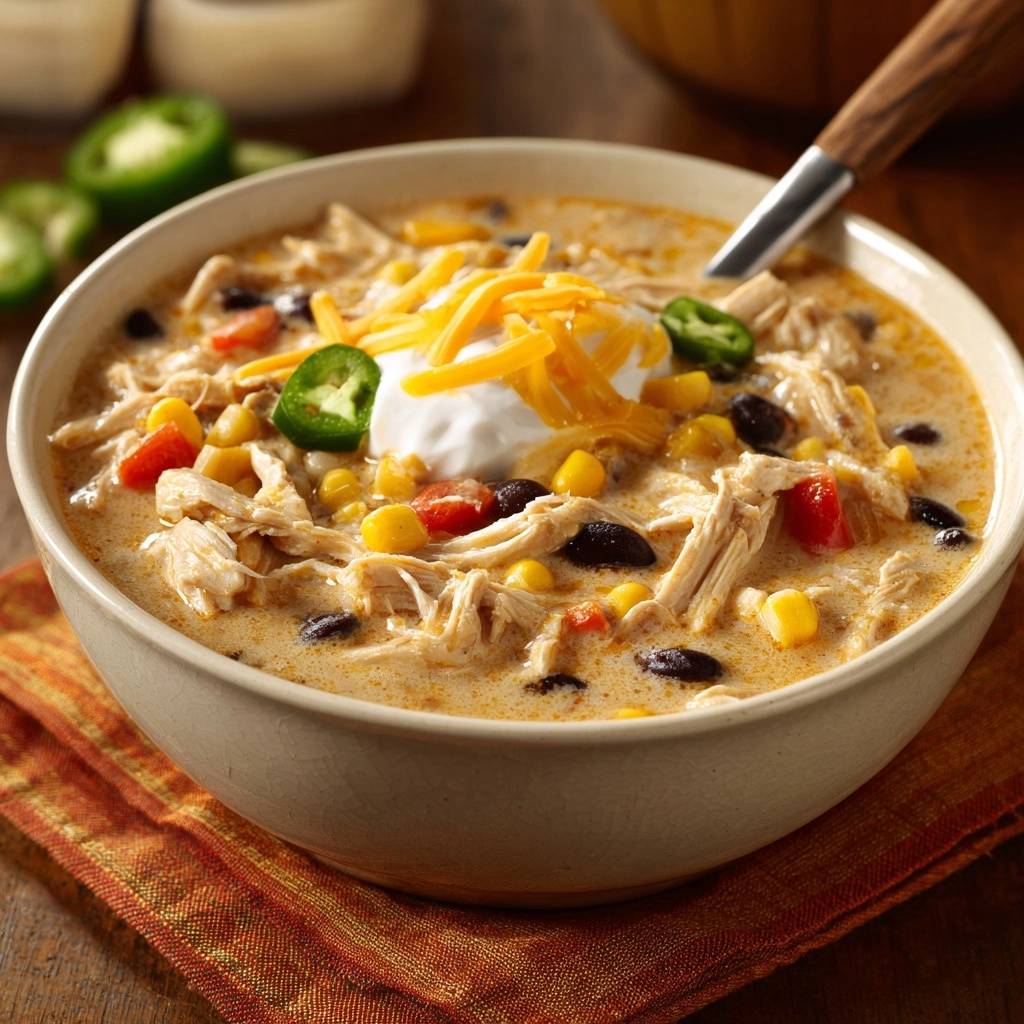
Therefore, you must lower the temperature before the dairy even touches the pot. Aim for a gentle steaming state rather than a rolling boil. This lower energy environment allows the dairy to integrate into the broth molecules slowly, creating a unified sauce rather than a separated mess.
The Role of Fat Content in Stability
Fat is actually your friend when it comes to stability. Heavy cream, which contains about 36% milkfat, is much more resistant to curdling than whole milk or half-and-half. The higher fat content acts as a buffer, protecting the proteins from the heat of the broth.
In this recipe, the cream cheese serves a dual purpose as both a thickener and a stabilizer. Because it is dense and high in fat, it provides a sturdy foundation for the emulsion. When properly tempered, it creates a thick, luscious body that holds the spices and chicken juices in perfect suspension.
Essential Components for Balanced Flavor
A great chili is more than just a pot of ingredients; it’s a collection of functional groups working together. You need acidity to cut through the richness, starch to provide body, and aromatics to build a savory foundation. Choosing the right versions of these staples makes all the difference in the final bowl.
For example, using room temperature cream cheese is non-negotiable here. If the cheese is cold, it will stay in stubborn lumps regardless of how much you whisk. Taking the time to let your ingredients sit on the counter for thirty minutes before cooking is a simple pro move that pays off in texture.
Selecting and Preparing the Chicken Base
While you can certainly use cubed chicken, shredded chicken breast is the superior choice for this specific chili. Shredded meat has a much larger surface area, which allows it to “trap” the creamy sauce in its fibers. This ensures that every single bite is saturated with flavor rather than having dry chunks of meat floating in liquid.
If you have the time, poaching your own chicken breasts in a little extra broth yields the most tender results. However, a rotisserie chicken is a fantastic time-saver. Just be sure to shred it while it’s still slightly warm, as the meat pulls apart much more easily than when it’s cold from the fridge.
The Aromatics: Onion, Garlic, and Spices
Finely dicing your onion is crucial because you want it to melt into the background of the sauce. Large chunks of onion can disrupt the velvety texture we’re aiming for. When you sauté them, you’re looking for a translucent, soft appearance that signals the natural sugars have started to release.
The signature orange hue of this chili comes from the combination of cumin and smoked paprika. While traditional white chili is often pale, the smoked paprika adds a deep, earthy undertone and a beautiful sunset color. It provides a subtle wood-fired flavor that complements the green chilies perfectly.
Texture Contrast: Beans, Corn, and Chilies
Black beans provide a striking visual contrast against the creamy, orange-tinted broth. They also offer a firm, earthy bite that balances the softness of the shredded chicken. Make sure to drain and rinse them thoroughly so the canning liquid doesn’t muddy the bright flavors of your soup.
Don’t drain the canned tomatoes and green chilies, though! That liquid is packed with acidity and salt, which is vital for cutting through the heavy cream and cheese. Without that hit of acid, the chili can end up feeling “one-note” or overly heavy on the palate.
Step-by-Step: Building the Flavor Base
The first phase of cooking is all about layering. You can’t rush the aromatics if you want a deep, complex flavor. Start by heating a splash of olive oil in a heavy-bottomed Dutch oven, which provides even heat distribution and prevents the bottom of the chili from scorching.
Once your pot is ready, drop in the onions. You should hear a gentle sizzle, not a violent pop. If the onions start to brown too quickly, turn the heat down. We want them sweet and soft, not caramelized or crispy, to maintain the color and smoothness of the final dish.
Sautéing for Maximum Fragrance
Add the minced garlic only after the onions have softened for a few minutes. Garlic burns much faster than onions, and burnt garlic introduces a bitter, acrid taste that will ruin the delicate cream base. Sauté the garlic for just about 60 seconds until you can really smell it filling the kitchen.
This “sweating” process is the foundation of your chili. By cooking the aromatics slowly, you’re creating a flavor base that will permeate the chicken broth. It’s the difference between a soup that tastes like water and one that tastes like it’s been simmering all day.
The 15-Minute Flavor Meld
After adding the broth, beans, corn, and spices, let the pot come to a gentle simmer. This 15-minute window is essential for the dried spices to hydrate and release their oils. You’ll notice the broth changing color as the paprika and cumin bloom in the hot liquid.
During this time, the starch from the beans and corn will also begin to leach into the broth. This provides a natural thickening effect before we even introduce the dairy. Keep the lid slightly ajar to allow a tiny bit of evaporation, which further concentrates the savory flavors.
The Tempering Method: Preventing Grainy Texture
This is the most important part of the entire process. Tempering is the act of gradually bringing a cold or room-temperature ingredient up to the temperature of the hot liquid. It’s a classic culinary technique used in custards and sauces to prevent curdling, and it works wonders here.
By creating a “slurry” of cream cheese and hot broth in a separate bowl, you’re stabilizing the mixture. This ensures that when the dairy finally hits the big pot, it’s already warm and fluid. It integrates instantly, leaving you with a glossy, uniform sauce that looks like it came from a high-end bistro.
Preparing the Cream Cheese Base
Start with softened, cubed cream cheese in a medium bowl. If you forgot to take it out of the fridge, you can give it a very brief 15-second zap in the microwave just to take the chill off. Use a whisk to break the cubes up slightly before you add any liquid.
Ladle about a cup of the hot broth into the bowl. Don’t dump it all at once; add it in two or three splashes. Whisk vigorously after each addition. You’ll see the cheese transform from a solid block into a thick, pale liquid. Keep whisking until every single tiny lump has disappeared.
The Slow-Pour Stabilization Technique
Now, turn the heat on your main pot down to the lowest possible setting. The bubbles should stop breaking the surface entirely. Slowly pour your tempered cheese mixture into the pot while stirring the chili with a large spoon or spatula in the other hand.
Once the cheese is in, pour in the heavy cream in a steady stream. You’ll see the broth transform into a rich, opaque orange. This constant motion during the pour prevents any “hot spots” from shocking the dairy, ensuring the emulsion stays perfectly intact and silky smooth.
Final Assembly and Heat Management
With the base established, it’s time to bring everything together. The hard work is done, and now you’re just heating the components through. At this stage, you should treat the chili with care—no more high heat and no more aggressive boiling.
If you enjoy this thick and hearty chicken stew, you’ll also love this slow cooker zesty chicken bean stew for a hands-off dinner.
The goal is to reach a perfect serving temperature without breaking the bond you just created between the fats and the broth. If you see the soup starting to simmer too hard, simply slide the pot off the heat for a minute to let it calm down.
Integrating the Shredded Chicken
Gently fold in your shredded chicken. Since the chicken is already cooked, you aren’t trying to “cook” it further; you’re just letting it absorb the flavors of the broth. Overcooking shredded chicken in a hot liquid can make the fibers tough and stringy, so two or three minutes is all you need.
As you stir, the chicken will naturally thicken the chili even more. The shreds act like a sponge, pulling in the creamy broth. If the chili looks a little too thick for your liking at this point, you can stir in an extra splash of chicken broth to loosen it up.
Maintaining the Perfect Serving Temperature
If you aren’t serving the chili immediately, keep the burner on the “warm” setting. A rolling boil is the enemy of this dish. If you have a kitchen thermometer, aim to keep the soup around 160°F to 170°F. This is hot enough to be enjoyable but well below the danger zone for dairy separation.
You’ll know the temperature is right if you see small wisps of steam rising from the surface but no large bubbles breaking through. This gentle heat keeps the chicken tender and the cream base stable while you prep your toppings and set the table.
Customizing Your Creamy White Chicken Chili
While this recipe is fantastic as written, chili is a personal journey. You can easily tweak the ingredients to suit your family’s preferences without ruining the emulsion. The key is to add flavor without introducing too much extra liquid or harsh acids that might break the cream.
Think about texture when making changes. If you want more crunch, add the corn at the very end. If you want a deeper flavor, try sautéing a finely chopped bell pepper along with the onions. Just keep the dairy-to-broth ratio roughly the same to maintain that signature creaminess.
Adjusting Heat Levels Safely
If you like a chili that bites back, you can easily ramp up the spice. Adding a pinch of cayenne pepper or extra red chili flakes during the simmering stage will build a nice heat. You can also dice up a fresh jalapeño (seeds included) and sauté it with the onions for a more direct punch.
Avoid adding large amounts of vinegar-based hot sauces directly into the pot, as the high acidity can sometimes react with the cream. Instead, serve hot sauce on the side so individuals can customize their own bowls. This keeps the main pot safe and the texture perfectly smooth.
Vegetarian and Bean Substitutions
For those who prefer a different bean profile, Great Northern beans or Cannellini beans are excellent substitutes for black beans. They have a creamier interior and a thinner skin, which blends seamlessly into the white chili aesthetic. You can even use a mix of all three for a variety of textures.
If you want to go meatless, simply swap the chicken for extra beans or a meat substitute. You can also add diced sweet potatoes or butternut squash. Just ensure the vegetables are fully tender before you start the tempering process, as they won’t soften much once the dairy is added.
The Art of the Garnish
Toppings aren’t just for looks; they provide essential flavor and texture contrasts. The richness of the cream cheese needs the sharp “pop” of a fresh jalapeño and the bright, citrusy note of fresh cilantro. Without these, the dish can feel a bit heavy after a few bites.
Think of your garnishes as the final seasoning. A squeeze of fresh lime juice right before eating can wake up all the savory spices, while a handful of shredded cheddar adds a salty, sharp finish that melts beautifully into the warm broth.
Layering Textures for Presentation
To get that “magazine-ready” look, start with a generous dollop of sour cream right in the center of the bowl. This creates a cool reservoir that you can swirl into the hot chili as you eat. Pile the shredded cheddar to one side so it stays partially visible as it begins to melt.
Place two or three thin rounds of fresh jalapeño on top of the sour cream for a pop of bright green. Finally, scatter the chopped cilantro over the whole thing. The contrast of the orange broth, white sour cream, and green herbs makes the dish look as vibrant as it tastes.
Troubleshooting Common Chili Issues
Even the best cooks run into trouble sometimes. If your chili doesn’t look quite right, don’t panic! Most issues with creamy soups can be fixed with a few quick tricks. The most important thing is to catch the problem early before the texture becomes permanently affected.
Remember that chili often thickens as it sits. If it looks perfect in the pot, it might be a little too thick by the time it hits the bowl. Always keep a little extra broth on hand to adjust the consistency at the very last second if needed.
What to Do if the Soup Separates
If you accidentally let the pot boil and the dairy starts to separate, you can often save it with an immersion blender. Take the pot off the heat and give it a few quick pulses. This mechanically forces the fats and liquids back together, though it may slightly break down some of the beans.
Another trick is to whisk a teaspoon of cornstarch into a tablespoon of cold water to create a slurry. Stir this into the simmering chili. The starch helps stabilize the proteins and can “bind” the broken emulsion back into a smooth sauce. It’s a great emergency fix to keep in your back pocket.
Fixing a Thin or Watery Consistency
If your chili feels more like a soup than a hearty chili, you don’t need to add flour. Simply take a potato masher or a large spoon and crush a small portion of the beans against the side of the pot. The natural starches inside the beans will release and thicken the broth instantly.
You can also let the chili sit off the heat for about ten minutes with the lid on. As the temperature drops slightly, the fats in the cream cheese will begin to set, naturally thickening the liquid. This “resting” period also allows the flavors to settle and deepen.
Storage and Reheating Instructions
This chili actually tastes even better the next day as the spices continue to meld. However, creamy soups require a bit of extra care when it comes to storage. Because of the high dairy content, you want to get it into the fridge as soon as it has cooled down to room temperature.
Store the chili in an airtight container for up to three or four days. You’ll notice that it becomes very thick, almost like a dip, once it’s cold. This is perfectly normal and is just a sign of all that delicious fat and protein solidifying in the fridge.
Preserving the Emulsion During Reheating
Avoid the microwave if possible. Microwaves create “hot spots” that can easily cause the dairy to break, leaving you with an oily mess. Instead, reheat the chili in a small saucepan over medium-low heat on the stove, stirring frequently to ensure even warming.
As it heats up, add a splash of chicken broth or a tablespoon of heavy cream. This “loosens” the fats and helps restore that original velvety texture. Once it’s steaming and fluid again, it’s ready to eat. Just remember: do not let it come to a boil during the reheating process!
Freezing Guidelines for Dairy-Based Soups
While you can freeze this chili, be aware that the texture of the dairy may change slightly upon thawing. It can sometimes look a bit grainy once it’s defrosted. If you plan on making a massive batch for the freezer, consider freezing the base *before* you add the cream cheese and heavy cream.
If you do freeze the finished version, thaw it overnight in the refrigerator. When you reheat it, use the stovetop method mentioned above and be prepared to whisk it vigorously or use an immersion blender to bring the emulsion back together. It will still taste delicious, even if the texture is slightly less perfect than day one.
Expert Tips for the Perfect Batch
To truly master this dish, use low-sodium chicken broth. This gives you total control over the

Chicken Chili
Course: Main CourseCuisine: AmericanDifficulty: easy6
servings15
minutes25
minutes450
kcal40
MinutesThis creamy white chicken chili features shredded chicken, black beans, and corn in a rich, orange-tinted broth. It utilizes a professional tempering method with cream cheese and heavy cream to achieve a stable, non-grainy emulsion.
Ingredients
1.5 pounds shredded cooked chicken breast
2 cans black beans, drained and rinsed (to match the visual contrast in the image)
1 cup frozen corn
1 can (10 oz) diced tomatoes with green chilies (undrained)
1 small onion, finely diced
3 cloves garlic, minced
4 cups chicken broth
1 tablespoon cumin
1 teaspoon chili powder
1/2 teaspoon smoked paprika (for the orange-tinted broth shown)
8 ounces cream cheese, softened and cubed
1/2 cup heavy cream
Toppings: Shredded sharp cheddar cheese, sour cream, fresh jalapeño slices, fresh cilantro
Directions
- In a large pot or Dutch oven, sauté the onion and garlic in a splash of olive oil over medium heat until translucent and fragrant (about 3-5 minutes).
- Stir in the chicken broth, black beans, corn, diced tomatoes with their juices, cumin, chili powder, and smoked paprika. Bring the mixture to a gentle simmer. Let it cook for 15 minutes to allow the flavors to meld and the vegetables to soften.
- The Anti-Curdle Technique: Reduce the heat to the lowest setting. It is vital that the liquid is not boiling when the dairy is introduced.
- Place the softened cream cheese cubes into a medium heat-proof bowl. Ladle approximately 1 to 1.5 cups of the hot broth from the pot into the bowl with the cream cheese. Whisk vigorously until the cheese is completely melted into the liquid and the mixture is perfectly smooth with no lumps.
- Slowly pour this tempered cheese mixture and the heavy cream into the large pot while stirring constantly. This stabilizes the proteins and prevents the “grainy” texture common in cream soups.
- Add the shredded chicken to the pot. Stir gently and cook for 2-3 minutes until the chicken is heated through. Crucial: Do not let the soup return to a boil. Maintain a very low heat to keep the emulsion stable.
- Ladle the chili into bowls. To match the visual presentation, top each bowl with a generous dollop of sour cream in the center, a pile of shredded cheddar cheese, two fresh jalapeño rounds, and a sprinkle of chopped cilantro.
Notes
- The secret to success is the Anti-Curdle Technique: never add dairy to boiling liquid. Always temper the cream cheese with hot broth in a separate bowl before adding it to the main pot.