Mastering Loaded Beef and Black Bean Quesadillas
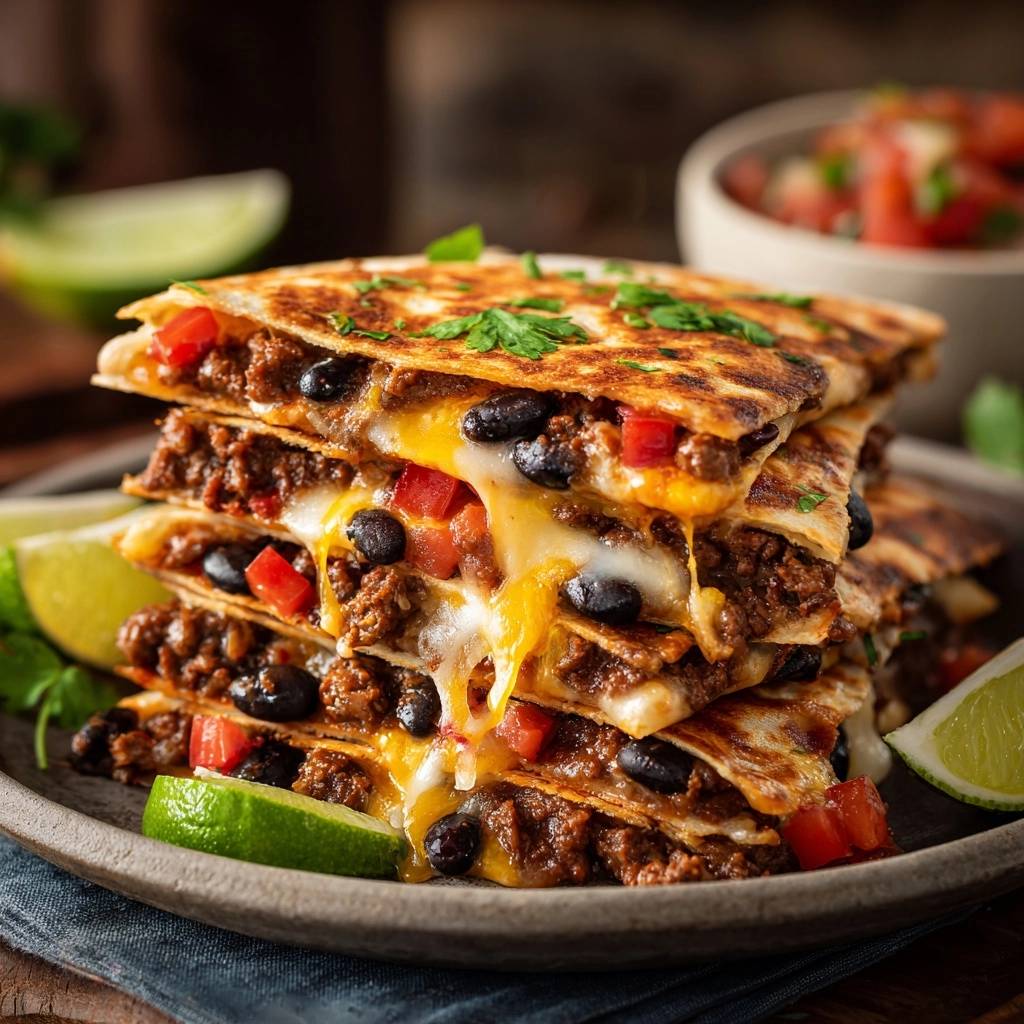
Most home cooks struggle with the same frustrating problem: a quesadilla that looks great in the pan but turns into a limp, greasy mess the second it hits the plate. You want that satisfying, audible crunch when your teeth break through the golden-brown shell, followed by a molten, cheesy center. Instead, you often get a soggy bottom caused by trapped steam and excess moisture from the filling.
The secret to a professional-grade result isn’t a special pan or a secret ingredient; it’s all about moisture management. By controlling the water content of your proteins and vegetables, you can achieve a shatter-crisp exterior that holds its shape even when loaded with heavy toppings. This recipe uses a specific “dry-pan” technique to ensure your tortilla stays rigid and toasted.
Expertise in quesadilla making comes down to one specific rule: never put wet ingredients directly against the tortilla. I always use a thin layer of cheese as a waterproof barrier between the bread and the beef. This simple structural change prevents the juices from soaking into the flour, keeping the outside incredibly crunchy while the inside stays juicy.
The Structural Anatomy of a Perfect Quesadilla
A quesadilla is more than just a toasted sandwich; it’s a feat of culinary engineering. When you pile in beans, beef, and tomatoes, you’re introducing a lot of weight and potential liquid. If that liquid escapes during the cooking process, it turns the tortilla into a gummy, doughy wrap rather than a crisp shell.
To build a better quesadilla, you have to think about the moisture barrier. We achieve this by using a “fat-first” melting strategy where the cheese acts as a sealant. By the time the beef mixture starts to release any steam, the cheese has already melted into the pores of the tortilla, creating a shield that keeps the crunch intact.
The rigid, shatter-crisp exterior is the goal here. We want the tortilla to feel almost like a cracker on the outside but remain soft and pliable on the inside. Achieving this requires a two-stage heating process that focuses on drying the tortilla before we ever introduce frying fats like butter or oil.
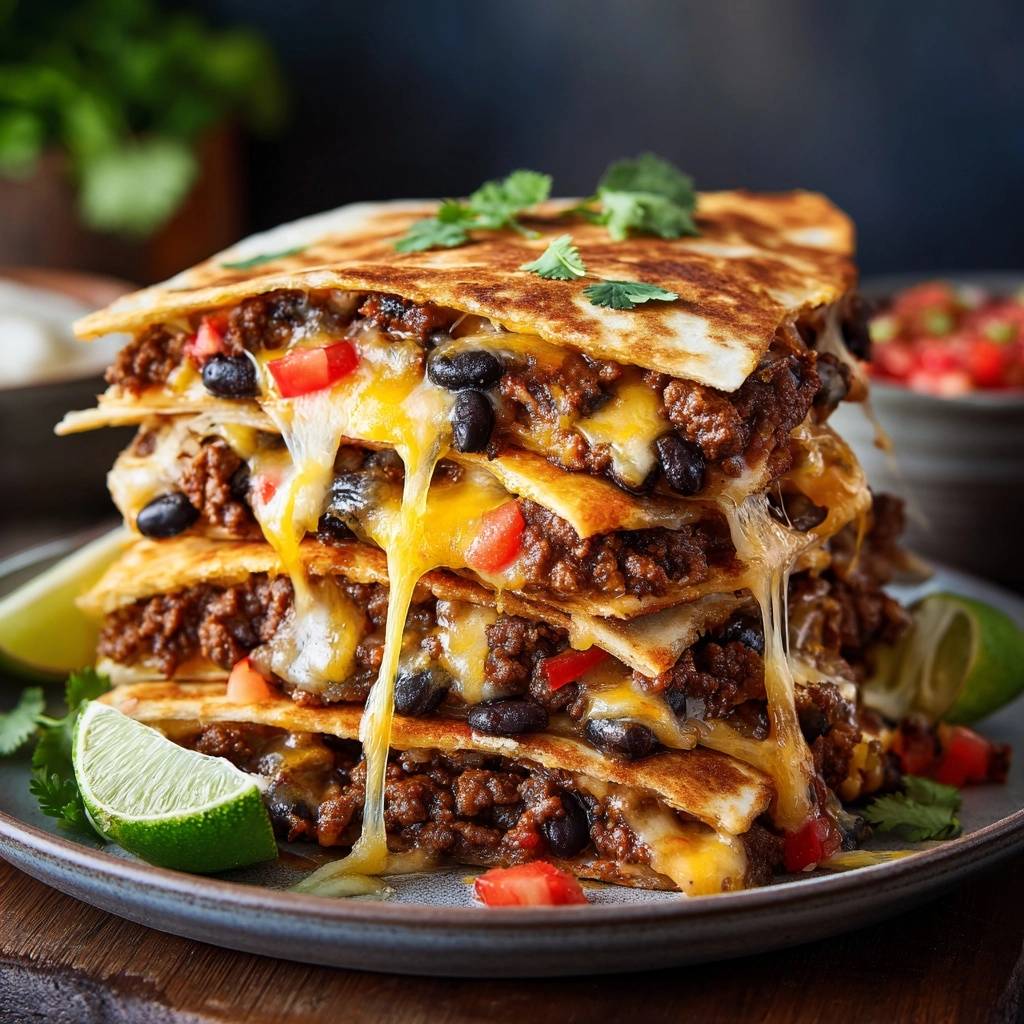
Essential Components for Loaded Beef and Black Bean Quesadillas
Quality ingredients are the foundation of a great meal, but for this dish, the texture of those ingredients is just as important as the flavor. I recommend using lean ground beef, specifically a 90/10 or 93/7 blend. Higher fat content might sound flavorful, but in a folded tortilla, that extra grease has nowhere to go except into your crust.
Black beans provide a wonderful earthy contrast to the savory beef, but they must be handled correctly. When you pull them from the can, rinse them thoroughly under cold water to remove the viscous canning liquid. Pat them dry with a paper towel until they look matte rather than shiny; this ensures they don’t leach purple liquid into your cheese.
For the tomatoes, skip the juicy beefsteak varieties. Roma tomatoes are the gold standard here because they have a much higher ratio of flesh to seeds. I always scoop out the watery pulp and seeds entirely, using only the firm outer walls. This gives you the fresh tomato flavor without the “soup” that usually ruins a good quesadilla.
The Role of Tomato Paste as a Binding Agent
Tomato paste is the unsung hero of a non-soggy filling. Unlike jarred salsa, which is mostly water and vinegar, tomato paste is a concentrated thickener. When you stir it into the browned beef, it coats every morsel of meat in a sticky, savory glaze.
This glaze acts as a “glue” that keeps the beef and beans together. Instead of loose crumbles falling out of your tortilla when you take a bite, the tomato paste holds everything in a tight, manageable matrix. It also provides a deep umami backbone that makes the beef taste much richer than standard taco seasoning alone.
Selecting the Right Cheese for Melt and Grip
A Mexican blend of Monterey Jack and Cheddar is the ideal choice for structural integrity. Monterey Jack is a high-moisture cheese with a low melting point, which provides that classic “cheese pull” and creates the waterproof seal we need. Cheddar, on the other hand, brings the sharp, salty punch that cuts through the richness of the beef.
If you enjoy the bold seasoning technique here, you’ll want to try these loaded beef black bean quesadillas for extra crispy edges.
If you have the time, grate your cheese from a block. Pre-shredded bags are coated in potato starch or cellulose to keep the shreds from sticking together in the package. That coating prevents the cheese from melting into a smooth, cohesive sheet, which can lead to a grainy texture inside your quesadilla.
Phase 1: Preparing the Concentrated Beef and Bean Filling
Start by browning your beef in a hot skillet. You aren’t just looking to cook it through; you want a hard sear. Let the meat sit undisturbed for a minute or two until a dark brown crust forms on the bottom. This Maillard reaction is where all the deep, savory flavor lives.
Once the beef is cooked, you must drain the fat thoroughly. I often tilt the pan and use a spoon to scoop out every drop of liquid grease, or even blot the meat with a paper towel. Even a single tablespoon of leftover oil in the meat will migrate to the tortilla during the final cook, resulting in a heavy, oily finish.
Simmering for Maximum Flavor Density
After draining the fat, return the pan to the heat and add your taco seasoning and tomato paste. Pour in the 1/4 cup of water, but don’t stop there. You need to simmer the mixture until that water has completely evaporated. You’ll know it’s ready when the beef looks glossy and the bottom of the pan is dry.
This step is critical for flavor density. By boiling off the water, you’re leaving behind a concentrated spice paste that clings to the meat. This “dry filling” philosophy is what separates a soggy home-cooked quesadilla from a crisp, restaurant-style version.
The Cooling Period: Preventing Steam Condensation
One of the biggest mistakes people make is taking the filling straight from the hot pan and putting it onto a cold tortilla. This creates immediate steam. When you fold that tortilla over, the steam gets trapped and turns back into water droplets, which soak into the bread.
Let your beef and bean mixture sit in a bowl for about five minutes before you start assembling. You want it to be warm, not steaming hot. This short rest allows the proteins to settle and ensures that the only thing melting your cheese is the heat from the skillet, not trapped vapor from the meat.
Phase 2: The Dry-Pan Sear and Layering Technique
Most people start by putting oil or butter in the pan, but I want you to start with a completely dry skillet. Place your tortilla in the pan over medium heat for about 30 seconds. This “sets” the starch in the tortilla and creates a slightly toasted surface that is less likely to absorb moisture later.
Once the tortilla is warm, you can begin the layering process. This two-stage method ensures the bread gets crispy without becoming a sponge for the cooking fat. We only add the butter or oil once the structure of the quesadilla is already established.
The Waterproof Cheese Barrier Method
To build the perfect seal, sprinkle a thin layer of cheese over the entire surface of the tortilla first. As this bottom layer melts, it fills the tiny nooks and crannies of the flour wrap. This is your primary defense against sogginess.
Next, pile your beef, beans, tomatoes, and cilantro onto just one half of the tortilla. Top that filling with another generous layer of cheese. When you fold the tortilla over, the top and bottom layers of cheese will fuse together, locking the filling in place like a delicious, edible suitcase.
If you like that smoky kick, these cheesy pulled beef tacos use a similar approach to build deep, rich flavor.
Phase 3: Achieving the Golden-Brown Shatter Crust
Now that the cheese has started to melt and anchor the filling, it’s time for the fat. Lift the edge of the quesadilla with a spatula and drop a small pat of butter or a drizzle of oil into the pan. Swirl it around so it gets under the tortilla. The butter will foam up and begin to fry the exterior of the bread.
Use your spatula to press down firmly on the quesadilla. This ensures even contact with the heat and helps the cheese bond with the filling. You’re looking for a deep golden-brown color with a few dark, charred spots. These “leopard spots” provide a smoky flavor that balances the richness of the beef.
Flip the quesadilla carefully. If the filling feels loose, it’s not ready to flip yet; wait for that cheese to act as a solid binder. Once flipped, add another tiny bit of fat to the pan to ensure the second side gets just as crispy as the first. The exterior should feel rigid and sound hollow when tapped with a fork.
Troubleshooting Common Quesadilla Failures
If your filling is falling out the sides (the “blowout”), you’ve likely overstuffed the tortilla. It’s tempting to go heavy on the beef, but a quesadilla needs a balanced ratio of bread to filling to stay together. Next time, leave a half-inch border around the edge to give the cheese room to expand without escaping.
If the outside is burning before the cheese in the middle melts, your heat is too high. Flour tortillas have a high sugar content and brown very quickly. If you see the edges getting too dark, slide the pan off the burner for a minute to let the residual heat finish the melting process without further browning the crust.
For a “soggy center,” the culprit is almost always the vegetables. If you didn’t remove the seeds from the tomatoes or if the beans weren’t drained well, that water has nowhere to go. Always err on the side of a drier filling; you can always add moisture back in the form of salsa or sour cream on the side.
Flavor Variations and Protein Swaps
While beef and black beans are a classic combo, you can easily adapt this recipe to what you have in the pantry. If you want to use shredded chicken, make sure it’s tossed in a thick sauce or a little extra tomato paste to keep it from being too dry or too loose. The “dry filling” rule still applies regardless of the protein.
For those who like heat, a finely diced chipotle pepper in adobo sauce added to the beef provides a smoky, spicy kick. Just be careful not to add too much of the adobo liquid, as it can compromise the crunch. Alternatively, a pinch of smoked paprika can add that same depth without any extra moisture.
If you want to add vegetables like bell peppers or onions, sauté them separately until they are completely soft and their water has evaporated. Never add raw vegetables (other than the deseeded tomatoes) directly to the filling, as they will release steam during the cooking process and ruin your hard-earned crunch.
Optimal Side Pairings and Acid Balance
Because a loaded quesadilla is very rich and fatty, you need acidity to cleanse your palate between bites. A squeeze of fresh lime juice over the top is non-negotiable. The citric acid cuts through the heavy cheese and seasoned beef, making every bite taste as fresh as the first.
I also love serving these with lime-pickled red onions. Simply soak sliced onions in lime juice and a pinch of salt for 20 minutes. They provide a bright, crunchy contrast to the soft filling. A sharp salsa verde made with tomatillos is another great option, as its natural tanginess balances the savory black beans perfectly.
What’s Next?
Try these delicious pairings:
If you usually reach for sour cream, try a cumin-spiked Greek yogurt instead. It has a similar creamy texture but offers a sharper tang that works better with the heavy spices in the beef. It’s a small swap that makes the whole meal feel a bit lighter and more balanced.
Make-Ahead Strategies and Reheating for Crispness
You can easily prep the beef and bean filling up to three days in advance. In fact, the flavors often deepen as they sit in the fridge. Just make sure to store the filling in an airtight container. When you’re ready to eat, don’t microwave the whole quesadilla; that’s a recipe for a rubbery disaster.
To reheat leftovers and restore that “shatter crust,” use a dry skillet over medium-low heat. Cover the pan with a lid for the first two minutes to ensure the center gets hot, then remove the lid and turn up the heat slightly to re-crisp the tortilla. An air fryer also works beautifully at 350°F for about 3-4 minutes.
If you’re meal prepping for the week, keep the filling and the tortillas separate until the moment you are ready to cook. Assembling them ahead of time will allow the moisture from the meat to migrate into the bread, making it impossible to get a good crunch later on.
Expert Tips for Large Batch Cooking
Cooking for a crowd can be tricky because the first quesadilla is usually cold by the time the last one is finished. To solve this, preheat your oven to 200°F and place a wire cooling rack inside a baking sheet. As each quesadilla finishes in the pan, slide it onto the wire rack in the oven.
The wire rack is the key here. It allows air to circulate under the quesadilla, preventing the bottom from “sweating” on a flat pan. This keeps the entire batch hot and crispy until you’re ready to slice and serve. It’s a simple trick that ensures everyone gets a professional-quality meal at the same time.
When it comes to slicing, use a pizza cutter instead of a knife. A rolling blade slices through the crispy tortilla and molten cheese without dragging the filling out of the shell. It gives you those clean, sharp wedges that look just as good as they taste.
Frequently Asked Questions
Can I use corn tortillas instead of flour?
You can, but the technique changes slightly. Corn tortillas are much less pliable and prone to cracking when folded. To prevent this, you should lightly fry the corn tortilla in a tiny bit of oil for 10 seconds per side to soften it before adding the filling. Also, corn tortillas are smaller, so you’ll likely make more individual “taco-style” quesadillas rather than one large folded flour version.
How do I keep the black beans from getting mushy?
The trick is to add the beans at the very end of the beef simmering process. You want to sauté them just long enough to heat them through and dry off any remaining surface moisture. If you cook them too long or stir too vigorously, the skins will break and the starch will turn into a paste. You want them to retain their individual “pop” when you bite into the quesadilla.
What is the best oil for frying quesadillas?
For the best flavor, a mix of unsalted butter and a neutral oil like avocado or grapeseed oil is ideal. Butter provides that classic diner-style browning and rich taste, while the oil raises the smoke point so the butter doesn’t burn before the cheese melts. If you want the absolute crispiest shell possible, use a thin coating of mayonnaise on the outside of the tortilla instead of butter; it sounds strange, but the egg and oil in the mayo create an incredibly even, golden crust.
Why does my cheese leak out and burn in the pan?
This usually happens because the filling is placed too close to the edges of the tortilla. As the cheese melts, it naturally spreads outward. To prevent this, leave a half-inch “perimeter gap” around the curved edge of the tortilla when you’re layering your ingredients. This gives the cheese a safety zone to melt into without escaping the shell and hitting the hot pan.
Can I add fresh greens like spinach inside?
I generally advise against adding raw greens like spinach or kale directly into the quesadilla. These greens are mostly water, and as they wilt from the heat, they will release all that liquid directly into your filling, causing immediate sogginess. If you want greens, sauté them in a separate pan first, squeeze them completely dry in a kitchen towel, and then fold them into the beef mixture before assembling.
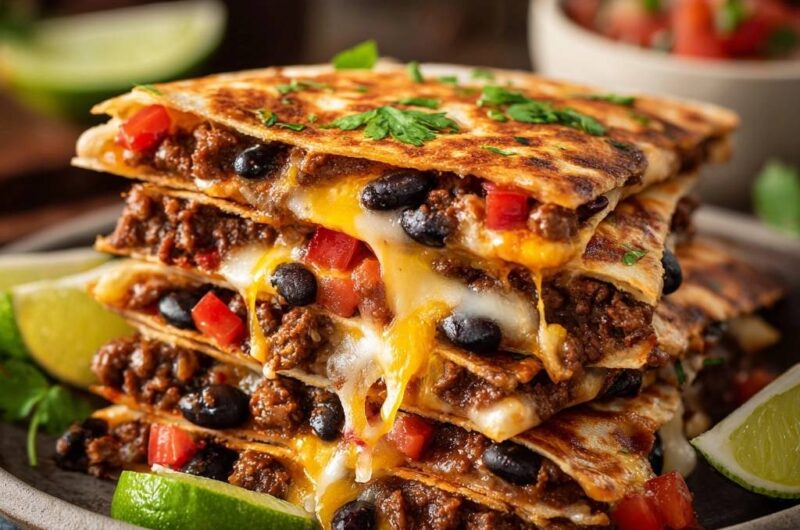
Beef and Black Bean Quesadillas
Course: Main CourseCuisine: Mexican-AmericanDifficulty: easy4
servings15
minutes20
minutes580
kcal35
MinutesA restaurant-style quesadilla featuring lean ground beef, black beans, and a blend of cheeses. This recipe focuses on moisture management and specific layering to ensure a shatter-crisp tortilla every time.
Ingredients
1 pound lean ground beef
1 can (15 oz) black beans, rinsed and very well drained
2 tablespoons tomato paste (essential for binding and preventing moisture runoff)
2 cups shredded Mexican blend cheese (Monterey Jack and Cheddar)
1/2 cup diced Roma tomatoes, seeds and pulp removed (flesh only)
1/4 cup fresh cilantro, chopped
1 tablespoon taco seasoning
1/4 cup water
4 large flour tortillas
2 tablespoons unsalted butter or vegetable oil
Lime wedges and salsa for serving
Directions
- Brown the ground beef in a skillet over medium-high heat until fully cooked. Drain the fat thoroughly. This is the first step in preventing a soggy tortilla.
- Return the beef to the pan. Stir in the taco seasoning and tomato paste. Add 1/4 cup of water and simmer for 3-5 minutes until the liquid has completely evaporated and the beef is coated in a thick, concentrated glaze.
- Fold in the well-drained black beans. Sauté for 2 minutes to ensure the beans are dry and heated through. Remove from heat and let the mixture cool for 5 minutes; adding steaming hot filling directly to a tortilla creates immediate condensation (sogginess).
- To solve the soggy bottom issue, place a dry tortilla in a large non-stick skillet over medium heat. Do not add fat to the pan yet.
- Layering is key: Sprinkle a thin layer of cheese over the entire tortilla first. This acts as a waterproof “glue.” Add the beef and bean mixture, diced tomato flesh, and cilantro to one half. Top with another heavy layer of cheese before folding the tortilla over.
- Once the bottom cheese begins to melt and anchor the filling, lift the quesadilla slightly and add 1/2 tablespoon of butter or oil to the pan. Swirl to coat and lay the quesadilla back down.
- Press down firmly with a spatula to ensure even contact. Flip once the first side is deep golden brown and charred in spots. Add a tiny bit more fat if needed for the second side.
- Cook until the exterior is rigid and the cheese is bubbling out the sides. Slice into wedges and serve immediately with fresh lime and salsa.
Notes
- To prevent sogginess, ensure the tomato seeds and pulp are removed and let the beef mixture cool slightly before filling the tortillas. Use cheese as a waterproof barrier on both sides of the filling.