Mastering Golden Crispy Vegetable Spring Rolls: The Anti-Soggy Technique
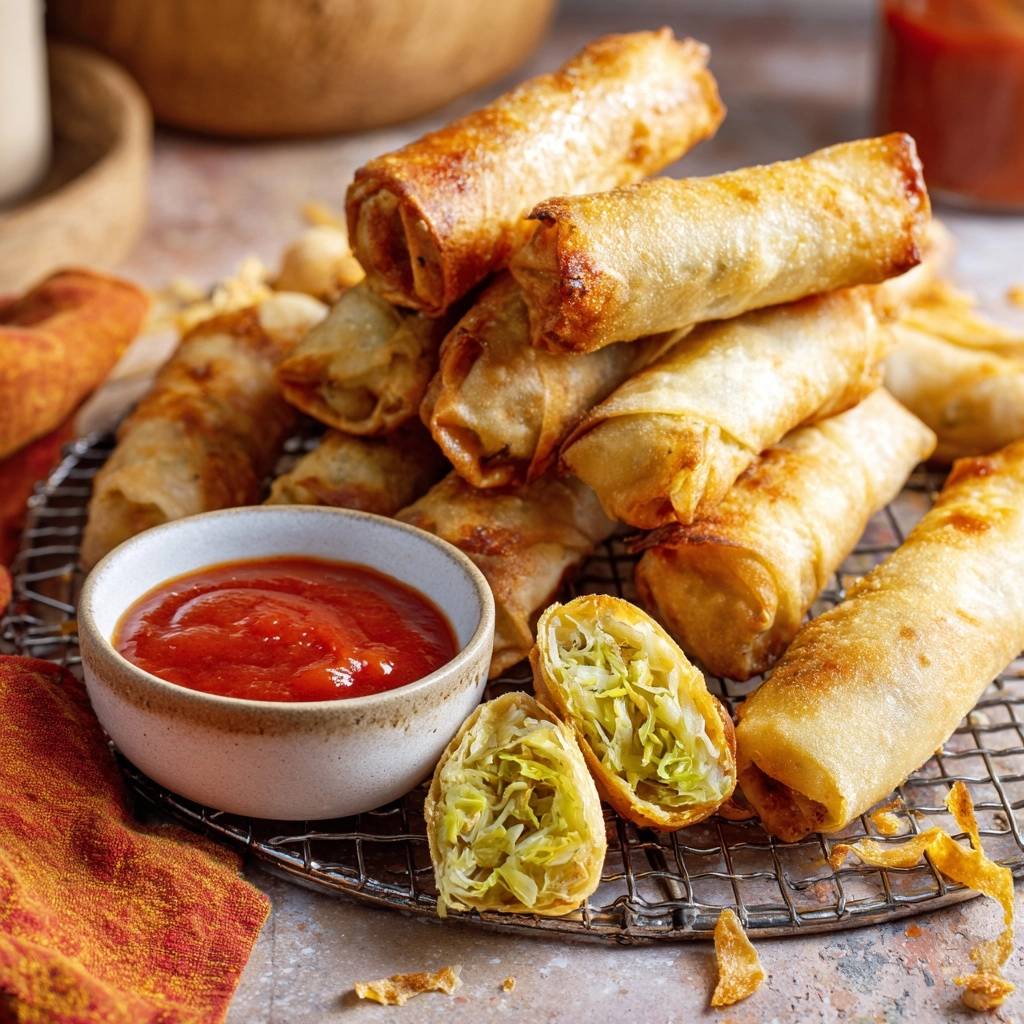
There is a specific, audible “crack” that happens when you bite into a perfect spring roll. It is a high-pitched shatter that gives way to a steaming, savory interior of tender vegetables. However, most home cooks are all too familiar with the disappointment of a greasy, limp roll that sags under its own weight and leaks oil onto the plate.
The frustration usually stems from one hidden culprit: moisture. When vegetables release their juices inside that thin pastry shell, they steam the wrapper from the inside out, turning a potential crunch into a soggy mess. Therefore, mastering this dish requires more than just a hot pan; it requires a strategic approach to moisture management.
I’ve found that the secret to a professional-grade result lies in the “Moisture-Lock” philosophy. By using a specific starch-binding technique during the sauté, we can trap those delicious juices before they ever touch the wrapper. This ensures your Golden Crispy Vegetable Spring Rolls stay shatteringly crisp for hours, even after they’ve cooled down on the serving platter.
The Anatomy of a Shatteringly Crisp Wrapper
To achieve that iconic blistered texture, you must understand the science of the wheat-based spring roll skin. Unlike thick egg roll wrappers, these are paper-thin sheets made primarily of flour and water. Because they are so thin, they dehydrate almost instantly when they hit hot oil, creating a delicate, glass-like crunch.
It is important to distinguish these from rice paper wrappers used for summer rolls. Rice paper is translucent and chewy; if you fry it, it becomes bubbly and incredibly fragile. For this specific recipe, we want the structural integrity of wheat-based “Spring Roll Pastry,” which handles high-heat frying beautifully.
Furthermore, the way you handle the wrapper determines the final texture. Air pockets are the absolute enemy of a uniform crunch. If air is trapped inside the roll, it expands during frying, creating large bubbles that can burst or fill with oil. A tight, compact roll ensures the heat transfers evenly through every layer of the pastry.
Essential Components for Golden Crispy Vegetable Spring Rolls
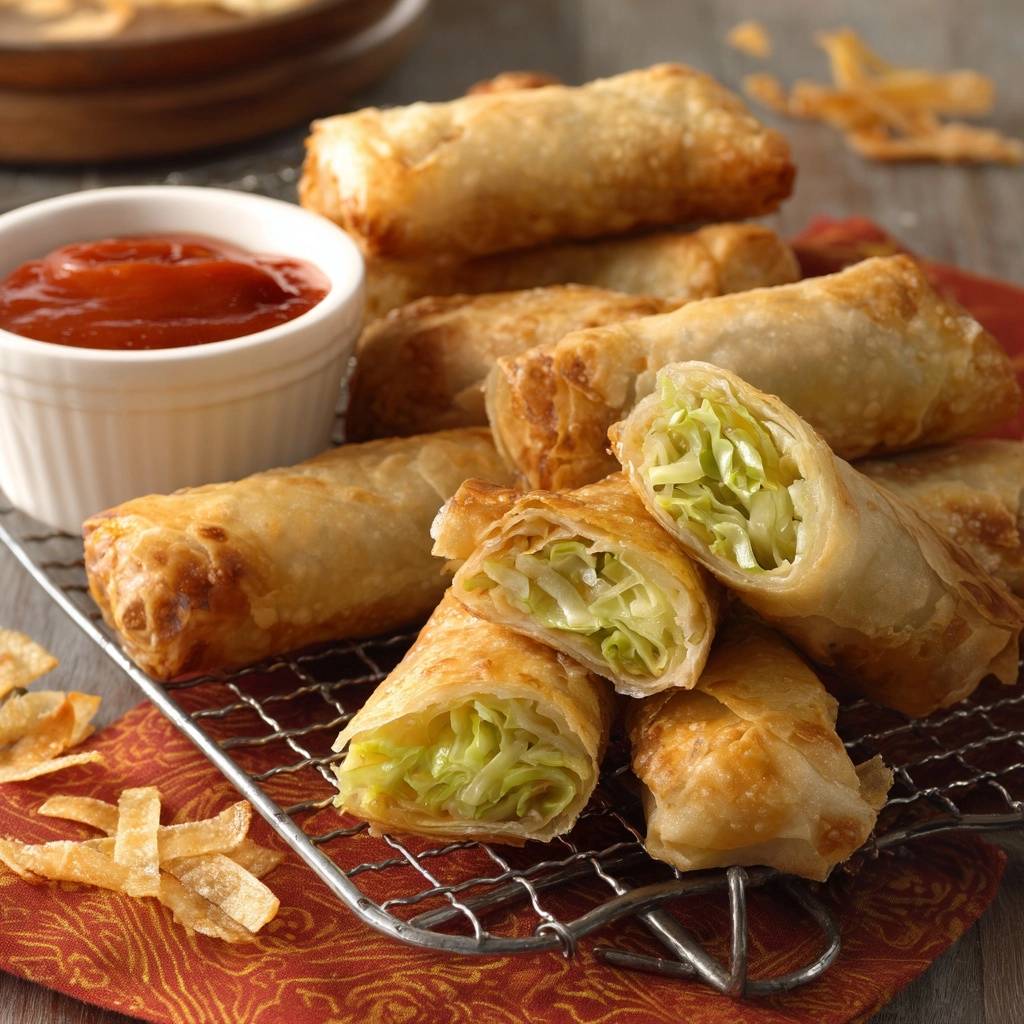
Quality ingredients are the foundation of a great roll, but preparation is what defines the final flavor. I always recommend using green cabbage over Napa cabbage for the filling. Green cabbage has a much lower water content and a sturdier rib, which means it maintains its “bite” even after being sautéed and fried.
Aromatics like fresh ginger and garlic are non-negotiable here. Because we aren’t using heavy sauces that would make the filling soggy, these two ingredients provide the punchy, fragrant backbone of the dish. When you grate the ginger finely, it distributes evenly, ensuring every bite has a warm, spicy hum.
Finally, your choice of frying medium matters immensely. You need a high-smoke point oil like peanut, canola, or grapeseed oil. These oils can reach the necessary 350°F without breaking down or smoking, which would impart a bitter, burnt flavor to your delicate wrappers.
The Role of Cornstarch as a Moisture Barrier
This is the technical “secret sauce” of the recipe. Cornstarch isn’t just for thickening gravy; in this application, it acts as a microscopic sponge. When you sprinkle cornstarch over the hot vegetables, it immediately begins to gelatinize as it contacts the residual juices in the pan.
This process creates a light, invisible gel that binds the moisture to the vegetables. Instead of the juices migrating into the pastry during the frying stage, they stay locked within the filling. This simple step is the difference between a roll that stays crisp and one that turns into a wet napkin within ten minutes.
Phase One: Preparing the High-Heat Vegetable Filling
When you start the filling, remember the “High and Fast” rule. You want to use a very hot pan to evaporate water as quickly as possible. If you cook the vegetables over low heat, they will sit in their own juices and stew, resulting in a mushy texture that lacks character.
Watch for the visual cues: the cabbage should look wilted and translucent, but it should still have a vibrant color and a slight resistance when you press it with a spatula. Once the aromatics and soy sauce are stirred in, the volume of the mixture should have reduced by nearly half.
The most critical part of this phase is the cooling process. Never, under any circumstances, wrap warm filling. The steam from the heat will immediately soften the dough, ruining your chances of a crisp exterior. Spread the mixture out on a large, flat baking sheet to maximize surface area and let it cool completely to room temperature.
Phase Two: The Art of the Waterproof Seal
Rolling a spring roll is much like folding an envelope. You start with the wrapper in a diamond shape, place the filling in the bottom third, and fold the bottom corner over it. Tuck the sides in tightly as you roll upward to ensure there is no room for oil to seep in.
While many recipes suggest a water-and-flour paste for sealing, I’ve found that a beaten egg is far superior. The proteins in the egg create a strong, waterproof bond that sets instantly when it hits the hot oil. This prevents the roll from unraveling and keeps the interior protected.
Be careful not to overfill the rolls. It is tempting to pack them full, but two tablespoons is usually the limit for a standard wrapper. Overfilling creates tension on the pastry, which can lead to structural failure and “blowouts” once the rolls are submerged in the fryer.
Phase Three: Precision Frying for Maximum Blistering
Temperature management is the hallmark of a skilled fry cook. You are aiming for 350°F (175°C), which is the “Goldilocks” zone for spring rolls. At this temperature, the exterior crisps and blisters instantly, but the heat has enough time to penetrate and warm the center without burning the shell.
Getting the oil temperature right is just as important when making these crispy roasted cabbage and carrots.
If the oil is too cold, the wrappers will act like a sponge and soak up the grease. If it’s too hot, the outside will turn dark brown before the inside is even warm. Use a kitchen thermometer to stay consistent, especially after adding a new batch of rolls to the pot.
Avoid the urge to crowd the pan. Adding too many rolls at once will cause the oil temperature to plummet. Fry in small batches of three or four, giving them enough space to bob around and brown evenly on all sides. You’ll see tiny blisters forming on the surface—that’s the sign of a perfect fry.
Troubleshooting Soggy Bottoms and Oil Seepage
The biggest mistake people make after frying is placing the hot rolls directly onto paper towels. While it seems logical to soak up the oil, the paper towel actually traps the steam escaping from the roll. This creates a “steam bath” that softens the bottom of the roll almost instantly.
Instead, use a wire cooling rack set over a baking sheet. This allows air to circulate around the entire roll, letting the steam dissipate freely while the excess oil drips away. This simple change in equipment will keep your rolls crunchy from top to bottom.
If you notice oil seepage inside the roll, it usually means your oil temperature was too low or your seal wasn’t tight enough. Ensure the oil returns to 350°F between every single batch. Consistency is the key to that clean, non-greasy mouthfeel we all crave.
Equipment: Why a Heavy-Bottomed Wok or Dutch Oven Matters
The vessel you choose for frying is just as important as the ingredients. A heavy-bottomed pot, like a cast-iron Dutch oven or a heavy carbon steel wok, has excellent heat retention. This means when you drop cold spring rolls into the oil, the temperature won’t drop as drastically as it would in a thin aluminum pot.
A wok is particularly useful because its sloped sides allow you to use less oil while still providing enough depth for deep frying. However, a Dutch oven offers more stability and safety if you are cooking on a standard stovetop. Regardless of the pot, always keep a thermometer clipped to the side.
Flavor Variations: Beyond the Standard Cabbage Mix
Once you master the moisture-lock technique, you can experiment with different fillings. For an “Earthy Mix,” try adding rehydrated wood ear mushrooms and softened glass noodles. The mushrooms add a wonderful snap, while the noodles soak up the savory seasonings beautifully.
If you want a “Protein Boost,” add very thin matchsticks of extra-firm tofu. Just make sure to sear the tofu slightly beforehand to remove excess water. For an “Herbaceous Roll,” toss a handful of fresh Thai basil or cilantro into the filling after it has cooled. This adds a bright, fresh top note to the deep-fried richness.
No matter what you add, always remember the golden rule: keep it dry. If you add high-moisture ingredients like bean sprouts, make sure they are sautéed thoroughly and bound with that essential touch of cornstarch.
Dipping Sauce Pairings to Complement the Crunch
A great spring roll needs a bright, acidic partner to cut through the fried exterior. A classic Sweet Chili Sauce is always a winner, but you can make a quick version at home using honey, red chili flakes, garlic, and rice vinegar. The acidity of the vinegar is crucial for balancing the oil.
For something more robust, try a Spicy Tomato-Chili Jam. Simmer crushed tomatoes with ginger, lime juice, and a bit of sugar until it thickens into a glossy paste. The concentrated tomato flavor provides a savory depth that pairs perfectly with the light vegetable filling.
Avoid using heavy, cream-based sauces or anything too salty. You want the dipping sauce to enhance the delicate flavors of the ginger and sesame oil inside the roll, not overwhelm them. A squeeze of fresh lime juice over the rolls just before serving can also work wonders.
Make-Ahead Strategies and Freezing Instructions
Spring rolls are the ultimate make-ahead appetizer. You can roll them up to a day in advance and keep them in the fridge, provided they are covered with a damp cloth and plastic wrap to prevent the wrappers from drying out and cracking.
For long-term storage, freezing is your best friend. Place the unfried rolls on a parchment-lined tray in a single layer, making sure they don’t touch. Once they are frozen solid, transfer them to a freezer bag. This “flash-freeze” method prevents them from sticking together in a giant clump.
When you’re ready to eat, you can fry them directly from frozen. Do not thaw them, as they will become mushy. Simply lower the oil temperature to 325°F and increase the frying time by about two minutes. This ensures the frozen center cooks through without burning the outside.
Expert Tips for Professional Presentation
If you want your platter to look like it came from a high-end bistro, use the “Bias Cut.” Slice the rolls diagonally in the center with a very sharp serrated knife. This shows off the colorful interior and makes them easier to dip. The sharp knife is key—you want to saw through the crust without crushing the roll.
When stacking the rolls on a plate, lean them against each other in a “teepee” shape or stack them in a cross-hatch pattern. This isn’t just for looks; it maintains airflow between the rolls so they stay crisp while they sit on the table. A crowded pile will trap steam and lead to sogginess.
Finally, add a few simple garnishes. Scallion curls or a sprinkle of toasted sesame seeds add a pop of color and a hint of extra flavor. It shows your guests that you’ve put thought into every detail, from the moisture-lock filling to the final presentation.
How to Reheat Leftovers Without Losing the Crunch
If you find yourself with leftovers, please step away from the microwave. Microwaves work by heating water molecules, which will turn your crispy wrapper into a chewy, rubbery mess in seconds. It is the fastest way to ruin a good spring roll.
The best way to revive the crunch is in the oven or an air fryer. Heat your oven to 375°F and place the rolls on a wire rack. Bake for about 5 minutes until you hear the oil inside start to sizzle again. This re-crisps the pastry and ensures the center is hot without making the roll greasy.
Frequently Asked Questions
Can I bake these instead of frying?
You can bake them, but the texture will be different. To get a decent result, you must brush the rolls generously with oil or use a heavy-duty oil spray. Bake at 400°F in a convection oven for about 12-15 minutes, turning halfway through. While they will be crunchy, they won’t have the same delicate, micro-blistered texture that only deep frying can provide.
Why did my spring rolls burst in the oil?
Bursting is usually caused by two things: trapped air or too much moisture. If there is an air pocket inside the roll, the air expands rapidly in the heat and tears the wrapper. Similarly, if the filling is too wet, the steam pressure builds up until the wrapper gives way. Ensure you roll them tightly and use the cornstarch moisture-lock technique to prevent this.
What is the best way to store leftover wrappers?
Wheat-based wrappers dry out incredibly fast once the package is opened. If they get brittle, they will crack when you try to roll them. Keep the stack covered with a damp (not soaking wet) paper towel while you work. If you have leftovers, wrap them tightly in plastic wrap, place them in a Ziploc bag, and freeze them for up to three months.
Can I use rice paper for this recipe?
I don’t recommend it for this specific method. Rice paper (the kind used for Vietnamese spring rolls) behaves very differently in oil. It requires a different soaking technique and a lower frying temperature to prevent it from becoming excessively bubbly and oily. For the classic “shatter-crisp” Chinese-style roll, stick to wheat-based spring roll pastry.
How do I keep the oil clean during multiple batches?
As you fry, small bits of cabbage or drops of egg wash might fall into the oil. These will burn over time, turning the oil dark and giving your rolls a bitter taste. Use a fine-mesh skimmer or a “spider” to fish out these stray bits between every batch. This keeps the oil clear and ensures every roll comes out looking perfectly golden.
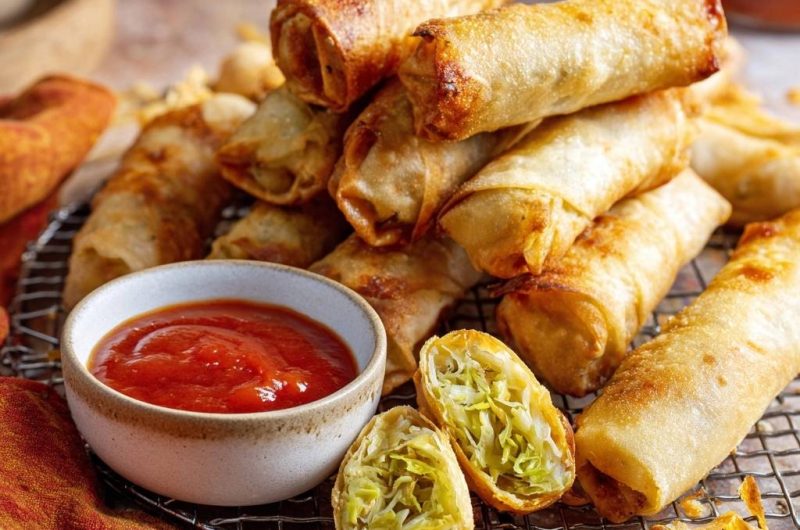
Vegetable Spring Rolls
Course: AppetizerCuisine: AsianDifficulty: medium12
rolls25
minutes15
minutes145
kcal40
MinutesA foolproof recipe for vegetable spring rolls featuring a specific cornstarch moisture-lock method and high-heat frying to ensure a shatteringly crisp texture.
Ingredients
1 package spring roll wrappers (thawed)
5 cups shredded green cabbage (tightly packed)
1/2 cup shredded carrots
2 cloves garlic, minced
1 tablespoon ginger, grated
2 tablespoons soy sauce
1 teaspoon toasted sesame oil
1 tablespoon cornstarch (for the filling)
1 egg, beaten (for sealing)
1 quart vegetable oil for frying
Sweet chili sauce or spicy tomato-chili jam for serving
Directions
- The secret to a crisp roll is removing excess water. Sauté the cabbage and carrots over high heat for 3-4 minutes until wilted and the volume has reduced significantly.
- Sprinkle the cornstarch directly over the vegetables while they are in the pan. Stir constantly for 1 minute. This acts as a moisture-lock, thickening any residual juices into a light gel so they do not soak into the wrapper during frying.
- Stir in the garlic, ginger, soy sauce, and sesame oil. Remove from heat and spread the mixture on a flat tray to cool completely. Never wrap warm filling, as the steam will immediately soften the dough.
- Place a wrapper in a diamond shape. Add 2 tablespoons of the cooled filling to the bottom third.
- Fold the bottom corner up, tuck in the sides tightly, and roll upward. Brush the top corner with the beaten egg to create a waterproof seal. Ensure the roll is tight with no air pockets.
- Heat 2 inches of oil in a heavy-bottomed pot or wok to 350°F (175°C).
- Fry the rolls in small batches for 3 to 5 minutes, turning occasionally, until the wrappers are deep golden brown and blistered.
- Place the finished rolls on a wire cooling rack rather than paper towels. This allows air to circulate around the entire roll, preventing the bottom from becoming soggy while it rests.
- Serve immediately with sweet chili sauce or a spicy red dipping sauce.
Notes
- Cool the filling completely on a flat tray before wrapping to prevent steam from softening the dough. Use a wire rack for cooling instead of paper towels to maintain crispness.