Mastering Glazed Party Meatballs: The Secret to Tender Results
We have all been there. You reach for a cocktail meatball at a party, expecting a burst of flavor, only to find it tough, rubbery, or bone-dry inside. It is a common kitchen heartbreak that usually happens because the meat proteins tightened up during cooking, squeezing out every drop of moisture. These Glazed Party Meatballs solve that problem forever by focusing on texture first and flavor second.
The secret to a truly memorable party meatball isn’t just the sticky, sweet sauce on the outside. It is the tender, melt-in-your-mouth interior that keeps people coming back to the platter. When you get the ratio of moisture to meat just right, you create a snack that feels luxurious rather than just functional. This recipe ensures every single bite is succulent, savory, and perfectly coated in a glossy, dark glaze.
The real magic happens before the heat even touches the pan. The secret is the panade—a simple mixture of starch and liquid that creates a physical barrier within the meat. By hydrating panko breadcrumbs in milk until they form a thick paste, you prevent the meat fibers from bonding too tightly. This little bit of food science is the difference between a dense “meat puck” and a light, tender morsel that guests will rave about for weeks.
The Science of the Panade: Ending Dry Meatballs
Most people think breadcrumbs are just a filler to make the meat go further, but they actually serve a vital structural purpose. When you mix dry crumbs directly into meat, they often rob the beef of its natural juices. However, when you create a panade by soaking panko in milk, the starch granules swell and form a protective gel. This gel coats the protein fibers of the ground beef, acting as a lubricant that keeps the meat tender even at high roasting temperatures.
As the meatballs bake at 400°F, the heat causes the proteins to shrink and coil. Without a panade, those proteins would squeeze out all the moisture like a wrung-out sponge. Because we have integrated that hydrated starch paste, the moisture stays trapped inside the meatball. This results in a delicate crumb that yields easily when you bite into it, rather than a springy or rubbery texture.
Using panko specifically is a pro move because its flaky, airy structure absorbs more liquid than traditional fine breadcrumbs. This creates a more effective gel that stands up to the intense heat of the oven. While many recipes rely on a slow cooker to soften tough meat over several hours, this technique allows you to achieve superior tenderness in less than twenty minutes. You get the best of both worlds: a deeply browned, flavorful exterior and a juicy, soft interior.
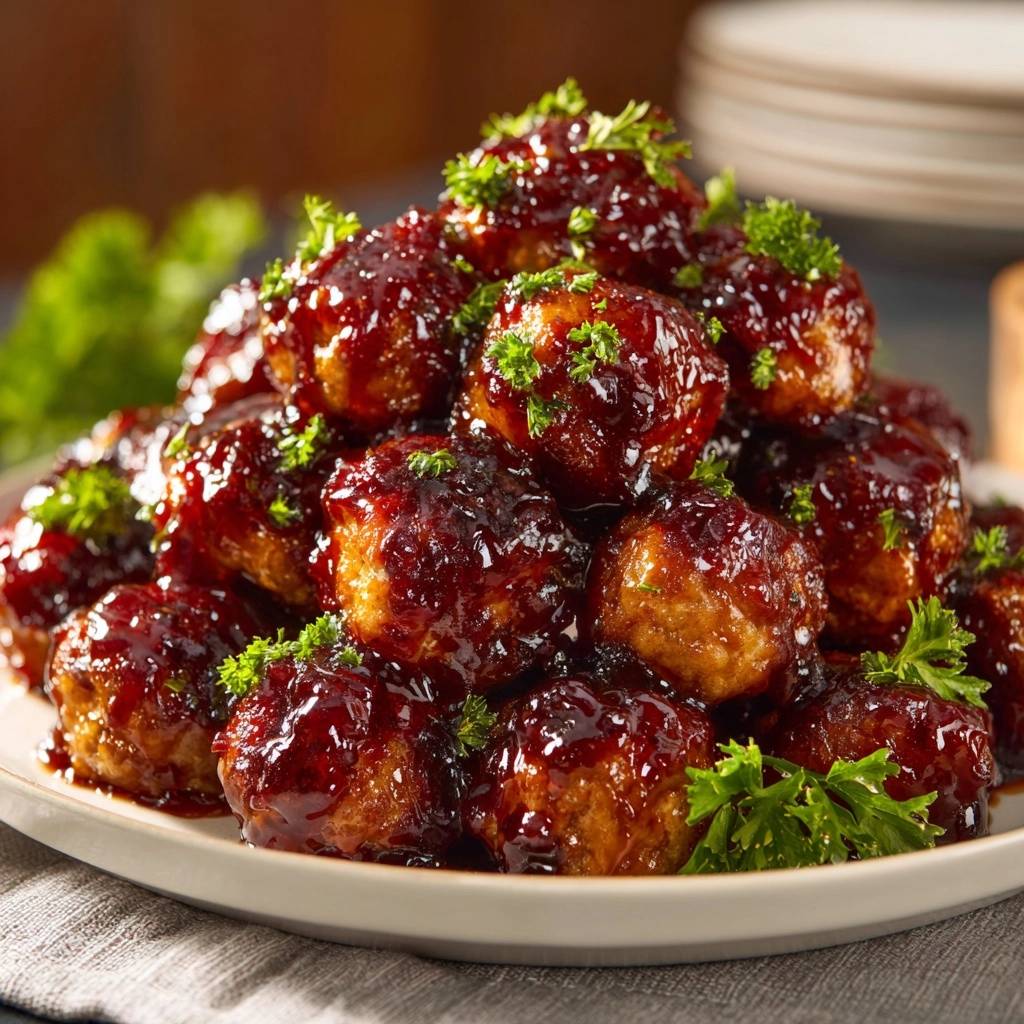
Essential Components for Glazed Party Meatballs
Quality ingredients are the foundation of this dish, starting with the meat. You should always look for an 80/20 blend of ground beef. That 20% fat content is non-negotiable because it provides the flavor and “mouthfeel” that lean meat simply cannot replicate. Since we are avoiding pork, you might consider using a high-fat ground lamb or even adding a tablespoon of beef tallow if you are using a leaner cut of beef to ensure that rich, savory depth.
The glaze relies on a classic duo: grape jelly and chili sauce. It sounds like a strange combination, but the grape jelly provides the necessary pectin and sugar to create a thick, syrupy consistency that clings to the meat. The chili sauce adds a mild heat and a vinegary tang that balances the sugar. To elevate the flavor profile, we add balsamic vinegar and Worcestershire sauce, which provide a sophisticated, umami-rich finish that cuts through the sweetness.
Don’t forget the binder and the seasoning. A single beaten egg acts as the “glue” that holds the sphere together, while the spices provide a consistent flavor throughout. Using fresh parsley is a small detail that makes a huge difference. It adds a pop of color and a grassy freshness that brightens up the heavy, savory notes of the beef and the dark glaze.
Choosing the Right Aromatics and Spices
In this specific recipe, garlic powder and onion powder are actually superior to their fresh counterparts. Fresh minced garlic can sometimes stay crunchy or turn bitter during a quick, high-heat roast. The powders distribute evenly throughout the meat mixture, ensuring every bite has a consistent savory profile without any jarring textures. Fresh parsley, however, should always be used for the finish. Its vibrant green hue and clean flavor provide the perfect contrast to the rich, mahogany-colored glaze.
Phase One: Hydration and Gentle Mixing
The first step is the most important for texture. Combine your panko and milk in a large bowl and let it sit for at least 10 minutes. You are looking for the crumbs to completely break down into a thick, hydrated paste. If you skip this wait time, the crumbs won’t have time to fully absorb the milk, and you’ll lose that tenderizing effect. It should look almost like a heavy porridge before you add the meat.
Once your panade is ready, add the beef and seasonings. This is where you must use a light touch. If you squeeze or mash the meat too hard, you will break down the proteins and end up with a dense, tough meatball. Use your fingers like a rake to gently toss the ingredients together until they are just combined. You want to see the flecks of parsley and spices evenly distributed without turning the meat into a smooth, homogenized paste.
The mixture should feel moist and slightly tacky. If it feels too loose, don’t panic; the egg and the panade will set up beautifully once they hit the heat of the oven. Keeping the meat cold until the very moment you mix it also helps maintain the fat structure, which leads to a better final texture. Once mixed, you are ready to move on to shaping these little flavor bombs.
Phase Two: Precision Shaping and High-Heat Roasting
Consistency is king when it comes to shaping. You want each meatball to be about one inch in diameter, roughly the size of a walnut. This size is perfect for a single bite and ensures that every piece cooks through at exactly the same rate. If you have a small cookie scoop, now is the time to use it. Line your baking sheet with parchment paper to prevent any sticking and to make cleanup a breeze later on.
We roast these at 400°F because high heat is essential for the Maillard reaction. This is the chemical process that creates that beautiful brown crust and deep, savory flavor on the outside of the meat. A lower temperature would just steam the meat, leaving it grey and unappealing. You want that dark, roasted exterior to provide a sturdy base for the heavy glaze we will add later.
For the ultimate professional look, flip your broiler on for the last two minutes of cooking. Keep a very close eye on the oven during this time. The broiler will give the meatballs a final blast of intense heat, creating a slightly charred, caramelized surface. This extra step adds a smoky complexity that pairs perfectly with the sweet and tangy balsamic glaze.
Phase Three: Reducing the Signature Balsamic Glaze
While the meatballs are roasting, it is time to build the sauce. In a large skillet, whisk together the grape jelly, chili sauce, and balsamic vinegar. At first, the jelly will look lumpy, but as it heats up, it will melt into a smooth, vibrant liquid. The balsamic vinegar is the “secret ingredient” here; its acidity balances the sugar in the jelly, preventing the sauce from being cloyingly sweet.
Bring the mixture to a gentle simmer. You aren’t just heating it up; you are reducing it. As the water evaporates, the sugars concentrate and the sauce thickens into a glossy, dark glaze. You will know it is ready when it coats the back of a spoon and leaves a clear trail when you run your finger through it. This viscosity is crucial because it ensures the sauce actually stays on the meatballs instead of pooling at the bottom of the dish.
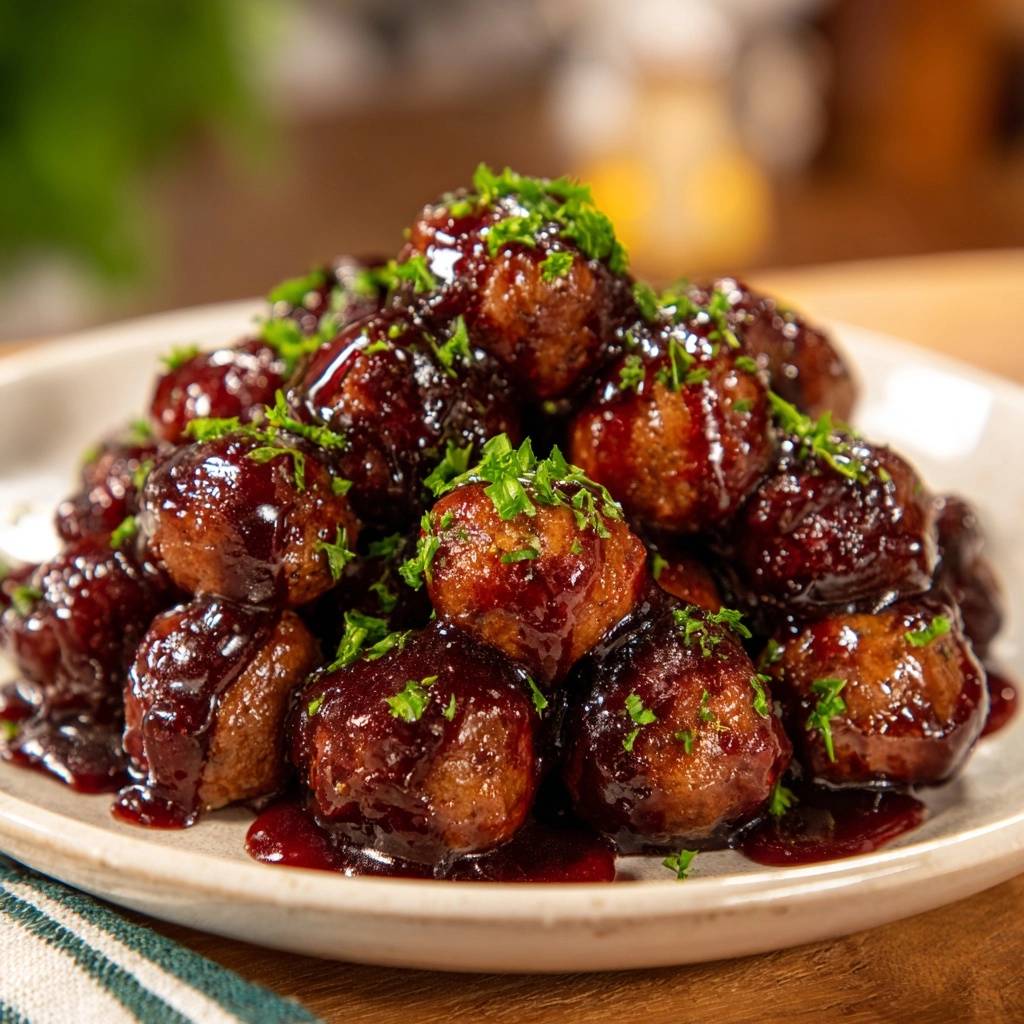
Once the meatballs come out of the oven, toss them directly into the simmering sauce while they are still hot. This allows the meat to soak up some of the glaze as it begins to cool slightly. Use a gentle folding motion to coat them thoroughly. The result should be a pile of shimmering, mahogany-colored meatballs that look as good as they taste.
Avoiding Common Meatball Mistakes
One of the most common mistakes is over-mixing the meat. If you work the mixture too much, the proteins cross-link and create a rubbery texture. Always stop mixing the second the ingredients look uniform. Another pitfall is using meat that is too lean. If you use 90/10 beef, the meatballs will likely be dry regardless of the panade. Stick to the 80/20 ratio for the best results.
If you find your mixture is too wet to roll into balls, add an extra tablespoon of panko and let it sit for another five minutes. The crumbs will soak up the excess moisture and make the “dough” easier to handle. Conversely, if the glaze becomes too thick or tacky while you are waiting for the meatballs, simply whisk in a splash of beef broth or water to loosen it back up to a pourable consistency.
Finally, never add cold meatballs to a cold sauce. If you made the meatballs ahead of time, reheat them in the oven briefly before tossing them with the hot glaze. This ensures the sauce adheres properly and stays glossy. If the temperatures are mismatched, the sauce can break or slide right off the meat, leaving you with a messy presentation.
Flavor Variations and Ingredient Swaps
While the grape jelly and chili sauce combo is a classic, you can easily pivot the flavor profile. For a “Spicy Kick” version, swap the chili sauce for a mixture of tomato paste and sriracha, or add a teaspoon of red pepper flakes to the meat mixture. If you want a “Citrus Twist,” use orange marmalade instead of grape jelly. The bitterness of the orange peel adds a wonderful sophisticated note to the beef.
For those who need a gluten-free option, the panade still works perfectly with gluten-free panko or even crushed rice crackers. The goal is simply to provide a starch that can absorb the milk. You can also experiment with the aromatics. Adding a touch of smoked paprika or a pinch of cumin to the meat can give these a more southwestern or Mediterranean vibe depending on your party theme.
If you want to make these even more decadent, you can finely grate some parmesan cheese into the meat mixture. The cheese melts during roasting, adding little pockets of salty, savory fat. Just be sure to adjust your salt levels accordingly, as parmesan and Worcestershire sauce both carry a significant amount of sodium.
Make-Ahead Strategies and Storage Logistics
These meatballs are a host’s best friend because they are incredibly easy to make in advance. You can roll and bake the meatballs up to two days before your event. Store them in an airtight container in the fridge, then simply make the glaze and toss them together on the day of the party. This saves you a massive amount of kitchen stress when guests are arriving.
If you want to prep even further ahead, these freeze beautifully. Freeze the meatballs on a tray after they have cooled from the oven, then transfer them to a freezer bag. They will stay fresh for up to three months. When you are ready to serve, thaw them in the fridge overnight and reheat them in a 350°F oven for 10 minutes before glazing. This ensures they maintain their structural integrity and don’t get mushy.
For the party itself, a slow cooker is your best tool for keeping things warm. Set it to the “warm” or “low” setting and add the glazed meatballs. If the sauce starts to look a little dry after a few hours, just add a tiny splash of water and give them a gentle stir. This keeps the glaze looking fresh and prevents the sugars from scorching on the bottom of the pot.
Optimal Side Dishes and Presentation
While these are traditionally served with toothpicks as an appetizer, they are versatile enough to anchor a full meal. Try serving them over a bed of fluffy basmati rice or creamy mashed potatoes. The extra glaze acts as a built-in gravy that is absolutely delicious when mixed with a starch. For a lighter option, they pair wonderfully with roasted root vegetables like carrots and parsnips.
For a side that soaks up every bit of that glossy sauce, try these shiny pull-apart dinner rolls.
Presentation is all about contrast. The glaze is very dark and rich, so serving them on a white or light-colored platter makes them pop. Don’t be stingy with the fresh parsley garnish. The bright green leaves provide a necessary visual break and signal to your guests that the dish is fresh and homemade. A final sprinkle of toasted sesame seeds can also add a nice crunch and a professional touch.
If you are serving these at a buffet, consider placing a small bowl of extra glaze on the side. Some people love to double-dip or drizzle a little extra sauce over their portion. Providing high-quality bamboo knots or colorful toothpicks also elevates the look from a standard potluck to a curated event. It is these small details that make the “Glazed Party Meatball” a perennial favorite.
Expert Troubleshooting and FAQ
Can I use ground turkey instead of beef?
Yes, you can use ground turkey, but you must be careful with the fat content. Turkey is much leaner than 80/20 beef, so the meatballs can become dry quickly. I recommend using ground turkey thigh meat rather than breast meat. You might also want to add an extra tablespoon of olive oil to the meat mixture to compensate for the lack of natural fat.
Why did my meatballs fall apart in the sauce?
This usually happens if the egg binder wasn’t thoroughly incorporated or if the meatballs weren’t roasted long enough to set their structure. The egg acts as a protein net that holds everything together. Ensure you use a large egg and give the meatballs the full 15-18 minutes in the oven so they are firm before they hit the liquid glaze.
How do I keep these warm for a 4-hour party?
The best method is using a slow cooker on the “warm” setting. To prevent the meatballs from drying out or the sauce from burning, add two tablespoons of water or beef broth to the bottom of the pot before adding the glazed meatballs. Keep the lid on as much as possible to trap moisture, and give them a very gentle stir every hour.
Can I make the glaze in advance?
Absolutely. You can whisk the glaze ingredients together and simmer them a day in advance. Store the glaze in a jar in the refrigerator. When you are ready to use it, heat it slowly in a saucepan over medium-low heat. If it has become too thick or “gelled” in the fridge, simply whisk in a teaspoon of water at a time until it returns to its glossy, pourable state.
My glaze is too sweet; how do I fix it?
If the grape jelly makes the sauce too sugary for your taste, you need to balance it with acid and salt. Add an extra teaspoon of balsamic vinegar or a squeeze of fresh lemon juice. You can also add a pinch more salt or a dash of hot sauce. The acidity will cut through the sugar and brighten the overall flavor profile without thinning the sauce too much.
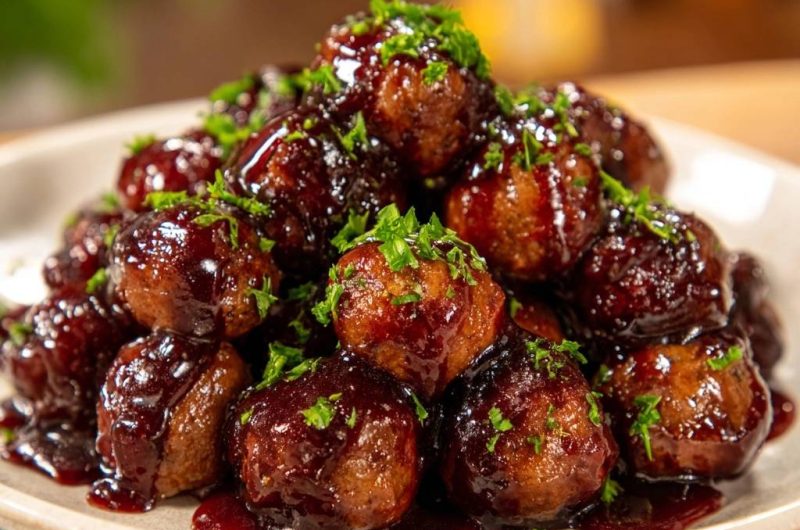
Meatballs
Course: AppetizerCuisine: AmericanDifficulty: easy30
meatballs15
minutes25
minutes240
kcal40
MinutesA foolproof recipe for tender, juicy meatballs that avoid the common pitfall of being dry or rubbery. By using a breadcrumb and milk panade, these meatballs stay moist and are finished with a classic glossy balsamic-chili glaze.
Ingredients
1 pound ground beef (80/20 blend for maximum moisture)
1/2 pound ground beef (80/20, adds fat and tenderness)
1/2 cup panko breadcrumbs
1/4 cup whole milk
1 large egg, beaten
2 tablespoons fresh parsley, finely chopped (plus extra for garnish)
1 teaspoon garlic powder
1 teaspoon onion powder
1/2 teaspoon salt
1/4 teaspoon black pepper
1 cup grape jelly
1 cup chili sauce (such as Heinz)
1 tablespoon balsamic vinegar
1 tablespoon Worcestershire sauce
Directions
- Create the Panade: In a large bowl, combine the panko breadcrumbs and milk. Let this sit for 5 to 10 minutes until it forms a thick, hydrated paste. This panade is the essential step to solving the dry meatball problem.
- Combine: Add the ground beef, egg, parsley, garlic powder, onion powder, salt, pepper, and Worcestershire sauce to the bowl with the panade.
- Mix Gently: Mix the ingredients using your hands. Do not overwork the meat; over-mixing leads to a dense, tough texture. Mix just until the ingredients are evenly distributed.
- Shape: Preheat your oven to 400°F (200°C). Line a large baking sheet with parchment paper. Roll the mixture into 1-inch balls (about the size of a walnut) and place them on the baking sheet.
- Bake: Bake for 15 to 18 minutes. To achieve the golden-brown exterior shown in the image, turn the broiler on for the last 2 minutes of cooking, watching closely to prevent burning.
- Prepare the Glaze: While the meatballs bake, combine the grape jelly, chili sauce, and balsamic vinegar in a large saucepan or skillet over medium heat. Whisk until the jelly is melted and the sauce is smooth.
- Simmer: Bring the sauce to a gentle simmer for 5 minutes until it thickens into a glossy, dark glaze. Cook until no pink remains and it reaches 160°F (71°C).
- Coat: Add the hot meatballs directly from the oven into the saucepan. Toss gently to ensure every meatball is heavily coated in the thick glaze.
- Serve: Pile the meatballs into a mound on a platter. Pour any remaining glaze from the pan over the top and garnish generously with fresh chopped parsley to match the visual presentation. Serve immediately with toothpicks.
Notes
- The secret to the texture is the panade (milk and breadcrumbs) and avoiding over-mixing the meat. Use an 80/20 beef blend for the best moisture retention.