Mastering Herb-Roasted Chicken and Root Vegetables
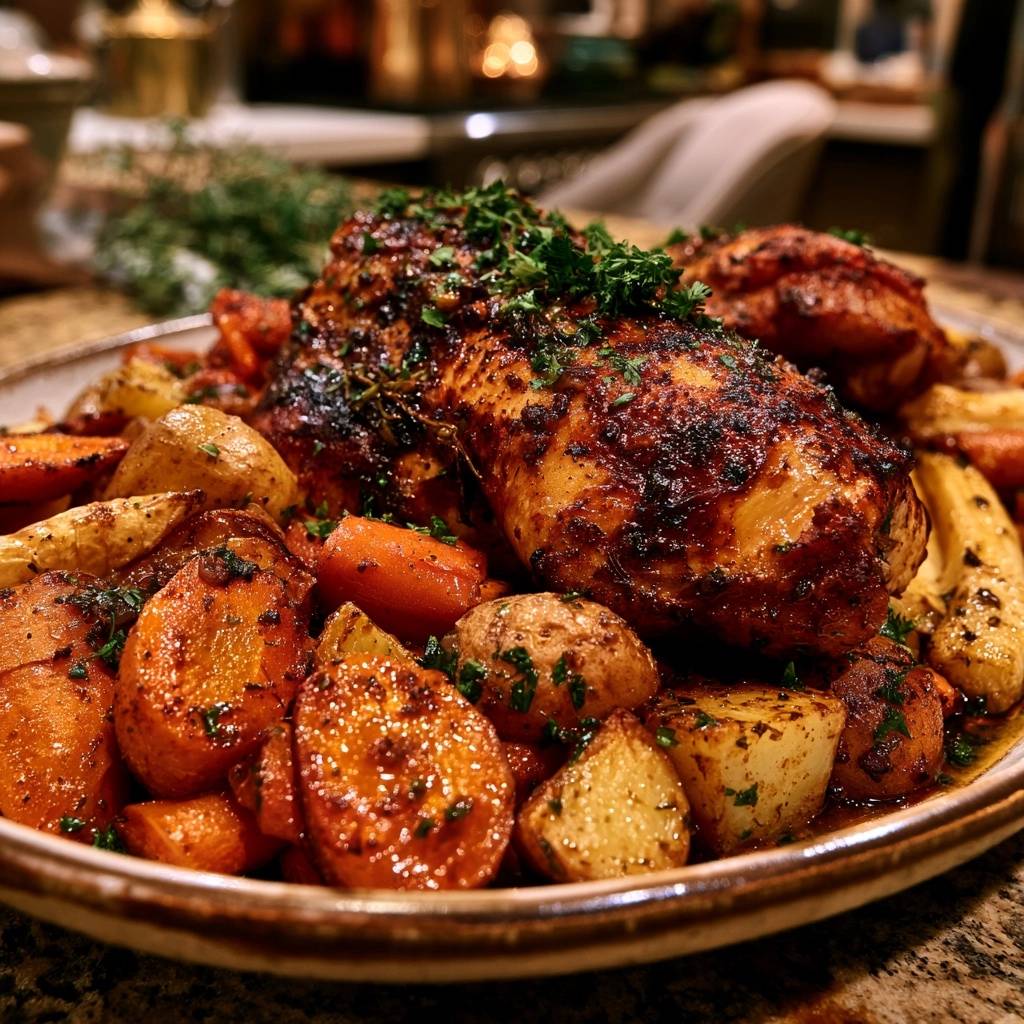
We have all been there. You pull a beautiful sheet pan out of the oven, the kitchen smells like a dream, but the reality is a letdown. The chicken breast is as dry as a desert, while the carrots are still crunching like they just came out of the garden. It is the ultimate kitchen heartbreak.
The problem lies in the physics of the pan. Most recipes treat every ingredient the same, but chicken and root vegetables have vastly different needs. This Herb-Roasted Chicken and Root Vegetables recipe changes the game by using a strategic “skyscraper” method and a late-stage glaze to ensure everything finishes at the exact same moment of perfection.
The secret to that “No More Dry Meat” promise is all about fat insulation. By tucking a compound herb butter directly under the skin, you create a moisture barrier that bastes the meat from the inside out. This technique protects the lean protein from the harsh, dry heat of the oven while the skin crisps up to a golden brown. You are going to love how the earthy rosemary and sweet balsamic come together for a meal that tastes like a high-end bistro classic.
The Science of Succulent Poultry and Caramelized Roots
Roasting is a balance of heat and time. When you cook bone-in, skin-on chicken, the bone acts as an insulator, slowing down the cooking process so the meat stays tender. The skin serves as a natural raincoat, keeping the juices where they belong—inside the chicken.
Root vegetables like potatoes and parsnips are dense and full of complex starches. They need sustained heat to break down those fibers into soft, buttery bites. By placing the chicken directly on top of the vegetables, you create a micro-environment where the rendering chicken fat, or schmaltz, drips down and “confits” the vegetables as they roast.
The final touch is the Maillard reaction. This is the chemical reaction between amino acids and reducing sugars that gives browned food its distinctive flavor. Our honey-balsamic glaze accelerates this process in the final fifteen minutes. It provides the sugars needed for a deep, dark crust without the risk of burning that comes with long-term roasting.
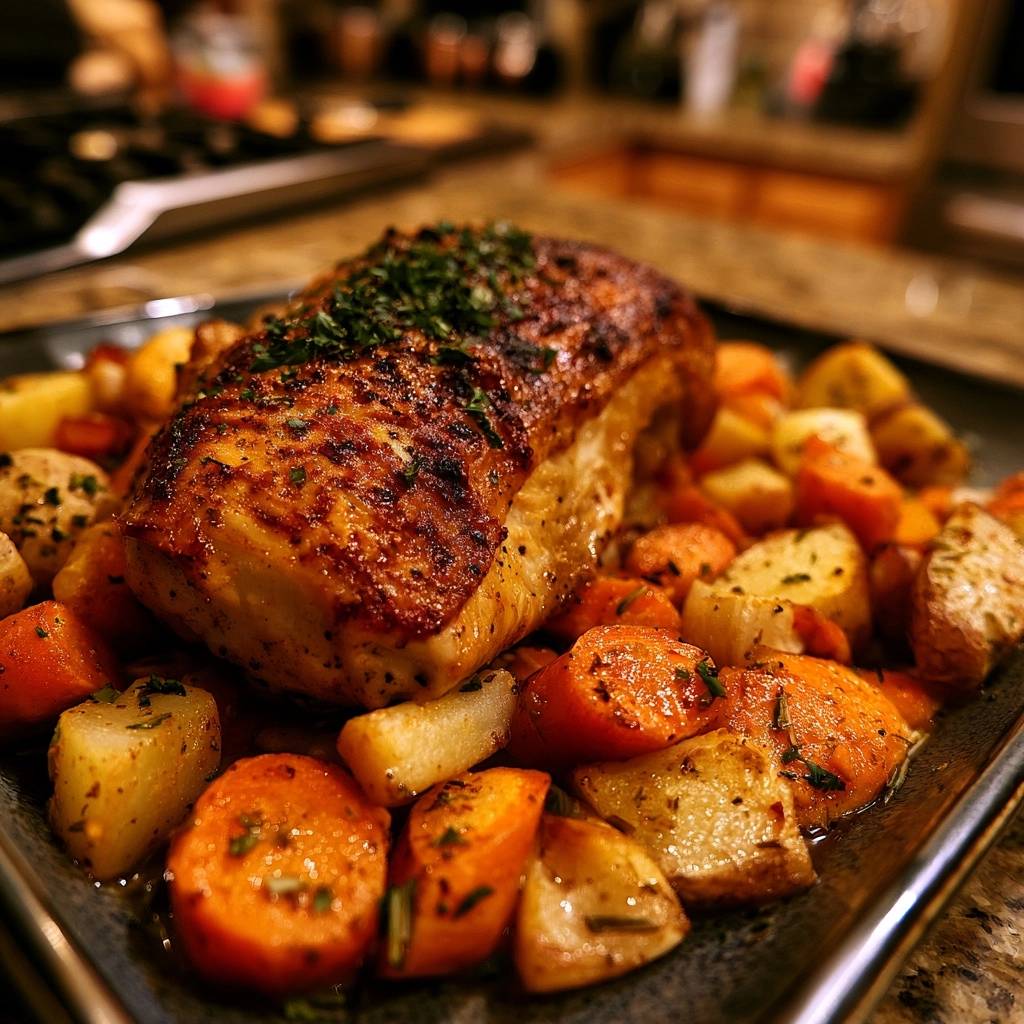
Essential Components for Herb-Roasted Chicken and Root Vegetables
Quality ingredients are the foundation of this dish. I always reach for baby gold potatoes because their thin skins and waxy texture hold up beautifully under high heat. Unlike Russets, which can turn grainy or fall apart, gold potatoes stay creamy on the inside with a crisp exterior.
Don’t sleep on the parsnips! They are the unsung heroes of the root vegetable world, offering a nutty, slightly spicy sweetness that balances the earthy carrots. When you shop, look for medium-sized parsnips; the massive ones often have a woody, tough core that is hard to chew.
Smoked paprika is my “secret weapon” here. It adds a subtle, rotisserie-style depth and a gorgeous mahogany color to the skin. It makes the chicken look like it has been spinning over a charcoal grill for hours, even though it just came out of your standard kitchen oven.
Selecting the Right Poultry Cuts
While you can use split breasts, I highly recommend bone-in, skin-on chicken thighs for the best results. Thighs have a higher fat content, which gives you a much wider margin for error. If you accidentally leave them in for five minutes too long, they will still be juicy and delicious.
If you can find air-chilled chicken, grab it. Most commercial chicken is cooled in water baths, which means the skin is saturated with moisture. Air-chilled poultry has drier skin from the start, which is the fastest way to achieve that shatteringly crisp texture we all crave.
Fresh vs. Dried Herbs in High-Heat Roasting
You might be tempted to use fresh herbs in the butter paste, but dried thyme and rosemary actually perform better at 425°F. Fresh herbs have a high water content and can burn or turn bitter in the intense heat. Dried herbs are more concentrated and can withstand the long roasting time without losing their punch.
However, fresh parsley is non-negotiable for the finish. After the chicken comes out of the oven, the bright, grassy flavor of fresh parsley cuts through the richness of the butter and the sweetness of the honey. It wakes up the whole dish and adds a pop of color that makes the plate look professional.
The Under-Skin Butter Technique Explained
This is the most important step for ensuring your chicken never tastes like cardboard. To do this correctly, start at the neck end of the chicken piece. Gently slide your finger between the skin and the meat, moving slowly to break the thin membrane without tearing the skin itself.
Once you have created a little pocket, take about half of your herb butter and mash it right onto the meat. You want a nice, even layer. As the oven heats up, this butter melts and essentially deep-fries the meat from the inside while the herbs infuse every fiber with flavor.
The remaining butter goes on the outside of the skin. This helps the skin dehydrate and brown. By treating both sides of the skin, you are creating a flavor sandwich that keeps the meat protected and the exterior perfectly seasoned. It is a total game-changer for home cooks.
Step-by-Step: Preparing Your Sheet Pan Feast
Start by making your herb paste. Your butter needs to be softened to room temperature—not melted. If it is melted, it will just run off the chicken. You want it pliable enough to mash with a fork until it looks like a thick, green-flecked frosting. Whisk your honey and balsamic in a separate bowl and set it aside for later.
When cutting your vegetables, aim for “diagonal chunks.” By slicing the carrots and parsnips on a bias, you create more surface area. More surface area means more caramelization and more places for the honey-balsamic glaze to cling to. Try to keep all the vegetable pieces roughly the same size so they cook evenly.
Toss the vegetables in olive oil until they are glistening. Don’t be shy with the salt and pepper at this stage. Root vegetables are naturally sweet and need a good hit of seasoning to bring out their savory side. Spread them out in a single layer on your largest rimmed baking sheet.
Arranging the Pan for Optimal Airflow
The arrangement of your pan is the difference between roasting and steaming. Place the chicken pieces directly on top of the vegetable bed. This “elevated” position allows the hot air to circulate 360 degrees around the chicken, which is essential for getting the skin crispy on all sides.
As the chicken roasts, the fat renders out and coats the vegetables below. This schmaltz is liquid gold. It seasons the potatoes and carrots in a way that plain olive oil never could. Make sure the vegetables aren’t piled too high; if the pan is overcrowded, the moisture from the veggies will steam the chicken skin and make it soggy.
The Two-Stage Roasting and Glazing Process
The first 35 minutes of roasting are all about the “heavy lifting.” During this time, the internal temperature of the chicken rises and the vegetables begin to soften. You will notice the kitchen starting to smell like garlic and rosemary. The vegetables will start to look slightly shrunken and the edges of the potatoes will turn golden.
At this point, the chicken isn’t quite done, but the skin is ready to take on some serious color. This is when you pull the pan out for the glazing stage. The sugars in the honey and balsamic are delicate, so we only want them in the oven for the final stretch to prevent them from turning black and bitter.
Applying the Honey-Balsamic Finish
Use a pastry brush to coat the chicken skin generously with the honey-balsamic mixture. Then, use a spatula to give the vegetables a quick toss. This ensures they get coated in the drippings and the glaze that has dripped off the chicken. It also prevents the potatoes from sticking to the bottom of the pan.
Slide the pan back into the oven for the final 10 to 15 minutes. Keep a close eye on it during this stage. You are looking for the glaze to become “tacky” and dark. The chicken skin should look like a shiny, deep amber. If it looks like it is browning too fast, you can loosely tent a piece of foil over the top.
Critical Temperatures and the Importance of Resting
I cannot stress this enough: use a meat thermometer. For the juiciest results, I actually pull my chicken out of the oven when it hits 162°F. Because of “carry-over cooking,” the internal temperature will continue to rise about 3 to 5 degrees while the meat rests, bringing it to the food-safe 165°F without overcooking it.
Once the pan is out of the oven, let it sit for at least 10 minutes. I know it is tempting to dive right in, but resting is vital. When meat cooks, the muscle fibers tighten and push the juices toward the center. If you cut it immediately, those juices will pour out onto the plate. Resting allows the fibers to relax and reabsorb that moisture.
While the meat rests, the vegetables will continue to soak up the pan juices. This is the perfect time to chop your fresh parsley. A heavy garnish of green right before serving makes the dish look vibrant and fresh, contrasting beautifully with the deep roasted tones of the chicken and roots.
Troubleshooting Common Roasting Obstacles
If you end up with soggy skin, it is almost always because the pan was too crowded. If you have a lot of vegetables, use two separate sheet pans instead of cramming everything onto one. Airflow is the best friend of a crispy chicken skin.
Are your carrots still hard? This usually happens if the chunks are too large or if they were tucked too tightly under the chicken where the heat couldn’t reach them. Next time, try cutting them into smaller 1-inch pieces and make sure they have some breathing room on the edges of the pan.
If you find your garlic is burning and tasting bitter, make sure it is thoroughly mixed into the butter paste. The fat in the butter protects the garlic from the direct heat. You can also try tucking the garlic-heavy parts of the butter deeper under the chicken skin where it is shielded from the oven’s elements.
Flavor Variations and Seasonal Swaps
This recipe is a fantastic canvas for seasonal changes. In the deep winter, try replacing the parsnips with rutabaga or turnips for a more earthy, peppery profile. If you want a Mediterranean vibe, add some lemon zest and a teaspoon of dried oregano to your butter paste.
For those who like a bit of heat, a teaspoon of Aleppo pepper or red pepper flakes mixed into the honey glaze adds a wonderful “hot honey” effect. You can also swap the baby gold potatoes for sweet potatoes if you want a dish that is even higher in fiber and vitamins.
If you are cooking for a smaller crowd, you can easily halve the recipe, but keep the roasting temperature the same. Just be sure to use a smaller pan so the juices don’t spread out too thin and burn on the bottom of the baking sheet.
Optimal Side Dishes and Serving Suggestions
Since this is a hearty one-pan meal, you don’t need much else. However, a bright, acidic side dish can really balance the richness of the herb butter and the sweetness of the glazed vegetables. A simple arugula salad with a sharp lemon vinaigrette is my favorite pairing.
The peppery bite of the arugula cuts right through the fat, making the whole meal feel lighter. You could also serve this with a side of steamed green beans or a quick sauté of kale with plenty of lemon juice. The goal is to add something fresh and crisp to the plate.
If you are serving this for a dinner party, bring the whole sheet pan to the table! There is something so rustic and inviting about a communal pan filled with glistening chicken and colorful vegetables. It makes for a great conversation starter and saves you from washing extra serving platters.
Storage, Reheating, and Meal Prep Strategy
This is one of those rare dishes that actually tastes better the next day. As the root vegetables sit in the fridge, they continue to absorb the aromatics from the thyme and rosemary. Store everything in an airtight container for up to three or four days.
When it comes to reheating, step away from the microwave! Microwaving roasted chicken is a one-way ticket to rubbery skin and dry meat. Instead, pop the leftovers into an air fryer at 350°F for about 5 minutes, or into a toaster oven. This will recrisp the skin and warm the vegetables through without drying them out.
For meal preppers, this recipe is a dream. You can prep the herb butter and chop the vegetables up to two days in advance. When you are ready to eat, just assemble the pan and slide it into the oven. It is a “set it and forget it” meal that feels much fancier than the effort required.
Expert Tips for Professional Results
Always use a heavy-gauge rimmed baking sheet. Cheap, thin pans tend to warp in a 425°F oven, which can cause your oil and juices to pool in one corner, leading to uneven cooking and potential burning. A sturdy pan distributes heat much more evenly.
Before you apply the butter, take a paper towel and pat the chicken bone-dry. Any moisture on the surface of the skin will turn into steam, which prevents browning. The drier the skin is when it goes into the oven, the crispier it will be when it comes out.
Finally, avoid using “baby carrots” from a bag. Those are actually large carrots that have been shaved down, and they lack the flavor and texture of whole, fresh carrots. Buying whole carrots with the tops still on (or just the large loose ones) will give you a much better caramelized result every single time.
How should I store leftovers?
Place the chicken and vegetables in an airtight container and keep them in the refrigerator for up to 4 days. I do not recommend freezing this dish; while the chicken freezes fine, the potatoes and carrots tend to become grainy and mushy once thawed and reheated. For the best texture, enjoy the leftovers within a few days using an oven or air fryer to reheat.
Why is my chicken skin soggy instead of crispy?
Soggy skin is usually caused by steam. This happens if you don’t pat the chicken dry with paper towels before adding the butter, or if the baking sheet is overcrowded. When vegetables are packed too tightly, they release moisture that steams the chicken. Use a large pan and ensure there is space between the pieces of chicken so the hot air can circulate freely.
Can I use chicken breasts instead of thighs?
Yes, you can use split (bone-in, skin-on) chicken breasts. However, breasts are leaner and cook faster than thighs. Start checking the internal temperature around the 30-minute mark. Because they lack the fat of the thighs, the under-skin butter technique is even more critical here to prevent the white meat from drying out in the high heat.
What can I use if I don’t have balsamic vinegar?
If you are out of balsamic, you can substitute it with apple cider vinegar mixed with a teaspoon of brown sugar. This provides the necessary acidity and sweetness to mimic the balsamic glaze. Red wine vinegar also works well, though the flavor will be slightly more punchy and less mellow than the original version.
My vegetables are browning too fast, what should I do?
If the honey-balsamic glaze or the vegetables look like they are getting too dark before the chicken reaches 165°F, simply cover the pan loosely with a piece of aluminum foil. This reflects the direct heat and allows the interior of the chicken to finish cooking without burning the exterior sugars or the smaller vegetable pieces.
Can I use fresh herbs instead of dried?
You can, but you will need to triple the amount since fresh herbs are less potent than dried. Be aware that fresh herbs are more likely to burn at 425°F. If you choose to use fresh rosemary and thyme, chop them very finely and ensure they are fully incorporated into the butter to protect them from the direct heat of the oven.
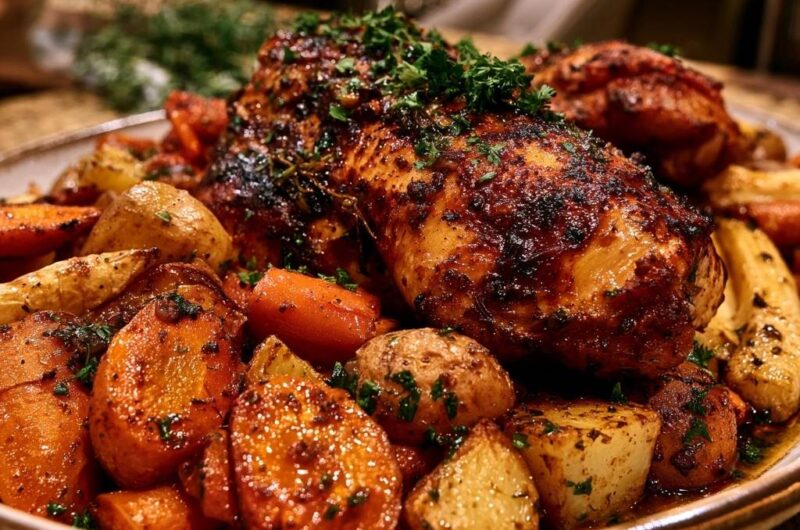
Herb-Roasted Chicken and Root Vegetables
Course: Main CourseCuisine: AmericanDifficulty: easy4
servings20
minutes50
minutes70
Minutes510
kcalAmerican
Ingredients
4 large bone-in, skin-on chicken thighs or 2 large split breasts
1 pound baby gold potatoes, halved
3 large carrots, peeled and sliced into 1-inch diagonal chunks
1 parsnip, peeled and sliced into 1-inch chunks
3 tablespoons unsalted butter, softened
2 tablespoons olive oil
1 tablespoon honey
1 tablespoon balsamic vinegar
1 tablespoon minced garlic
1 teaspoon dried thyme
1 teaspoon dried rosemary
1 teaspoon smoked paprika
1 teaspoon salt
1/2 teaspoon black pepper
1/4 cup fresh parsley, finely chopped (for garnish)
Directions
- Preheat your oven to 425°F (220°C).
- In a small bowl, mash together the softened butter, garlic, thyme, rosemary, paprika, salt, and pepper to create a thick herb paste. In a separate small ramekin, whisk the honey and balsamic vinegar together.
- Use your fingers to gently loosen the skin from the chicken meat. Spread half of the herb butter directly onto the meat under the skin. This is the secret to the “No More Dry Meat” promise; the butter bastes the meat from the inside out. Rub the remaining herb butter over the outside of the skin.
- Toss the potatoes, carrots, and parsnips in a large bowl with olive oil and a pinch of salt and pepper.
- Arrange the vegetables on a large rimmed baking sheet. Place the chicken pieces directly on top of the vegetables. This elevates the chicken, allowing hot air to circulate for crispy skin while the rendered fat flavors and softens the vegetables.
- Roast for 35 minutes. Remove the pan briefly and brush the honey-balsamic mixture over the chicken skin and toss the vegetables in the pan juices to achieve the deep, dark glaze seen in the image.
- Return to the oven for another 10-15 minutes. Use a meat thermometer to pull the chicken at exactly 165°F (74°C).
- Let the meat rest for 10 minutes before serving. This allows the juices to redistribute so they do not run out when you cut into it.
- Garnish heavily with fresh chopped parsley and serve immediately.
Notes
- The secret to juicy meat is spreading herb butter under the skin and allowing the chicken to rest for 10 minutes after cooking to redistribute juices.