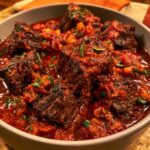
Mastering Slow-Braised Tomato Beef Short Ribs
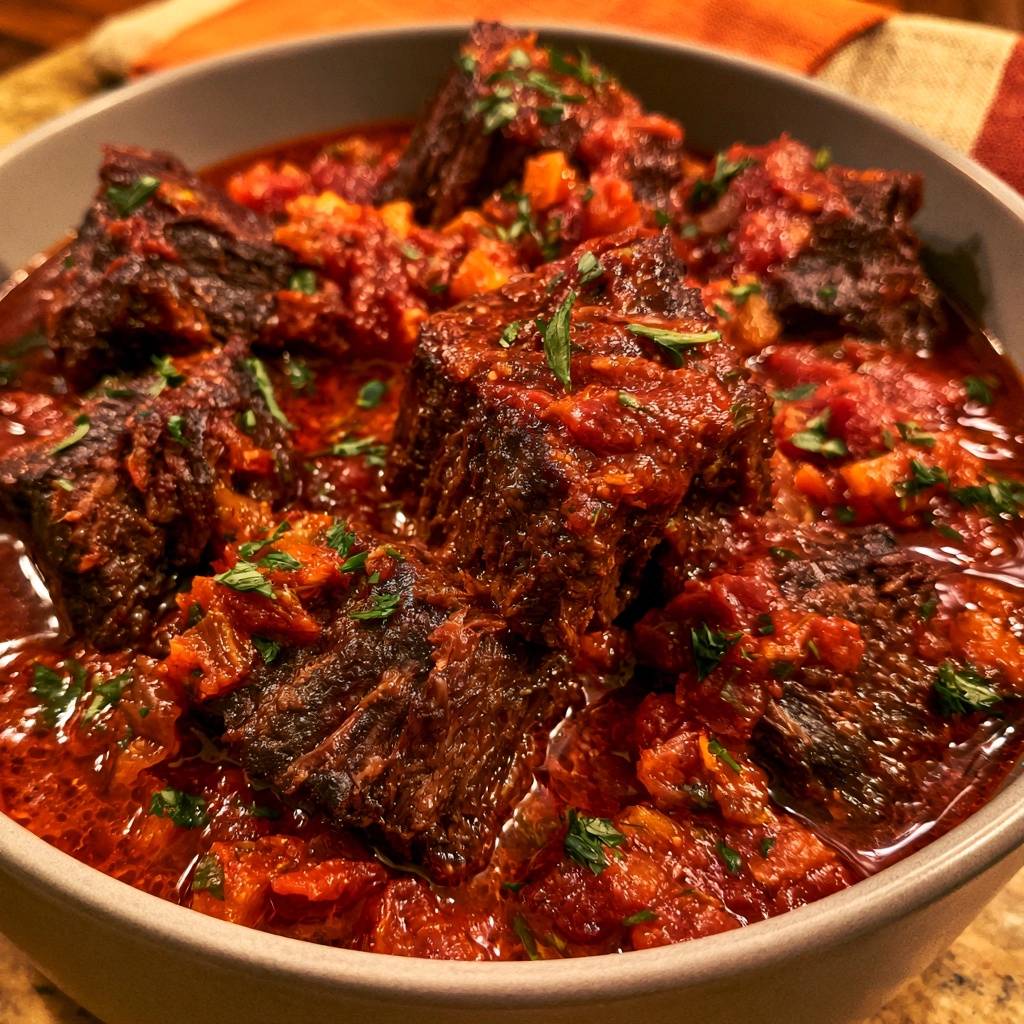
Few things in the culinary world are as disappointing as spending hours on a pot roast only to have the beef turn out chewy or stringy. You expect a fork-tender masterpiece, but instead, you get a workout for your jaw. The secret to that melt-in-your-mouth texture isn’t just about the clock; it is the acid-balance technique. By simmering the ribs in a concentrated tomato and aromatics base, the natural acidity breaks down tough connective tissues while the low-and-slow heat transforms collagen into silky richness.
This method guarantees a fall-apart result every single time because it addresses the science of the meat itself. We aren’t just boiling beef here. We are orchestrating a chemical transformation where the tough, gristly bits melt away into a luxurious, velvety sauce. When you pull that Dutch oven out of the heat, the meat should practically sigh off the bone at the mere suggestion of a fork.
The real pro move that separates a good braise from a legendary one is the moisture control. I’ve found that most home cooks make the mistake of adding too much liquid, which essentially boils the meat and strips it of flavor. You want to see those ribs peeking out of the sauce like little islands. This allows the top of the meat to caramelize slightly in the oven’s dry heat while the bottom half bathes in the acidic tomato broth. It is the ultimate double-threat for flavor and texture.
The Science of Acid-Base Braising
When you cook a tough cut like short ribs, you are fighting against collagen. Collagen is the structural protein that makes these muscles strong, but it is also what makes them incredibly tough if cooked quickly. However, when you introduce an acidic component like crushed tomatoes, you lower the pH of the cooking liquid. This acidic environment helps to weaken those stubborn protein bonds much faster than water alone could ever dream of doing.
As the temperature inside the pot hovers between 160°F and 180°F, a beautiful thing happens. The collagen begins to dissolve and turn into gelatin. This is why the sauce feels so rich and sticky on your lips. If you were to use just plain water, you’d end up with gray, flavorless fibers. The tomato base acts as a tenderizing agent and a flavor carrier, ensuring every bite is deeply seasoned from the inside out.
Why Short Ribs Require Long Cook Times
Unlike a lean sirloin or a tenderloin, short ribs are marbled with thick ribbons of intramuscular fat and silver skin. If you try to sear these and serve them medium-rare, they will be nearly impossible to chew. High-heat cooking causes these fibers to seize up and tighten like a rubber band. You need the luxury of time to let those fats render out and the silver skin to soften into something edible and delicious.
Essential Components for Rich Tomato Braising
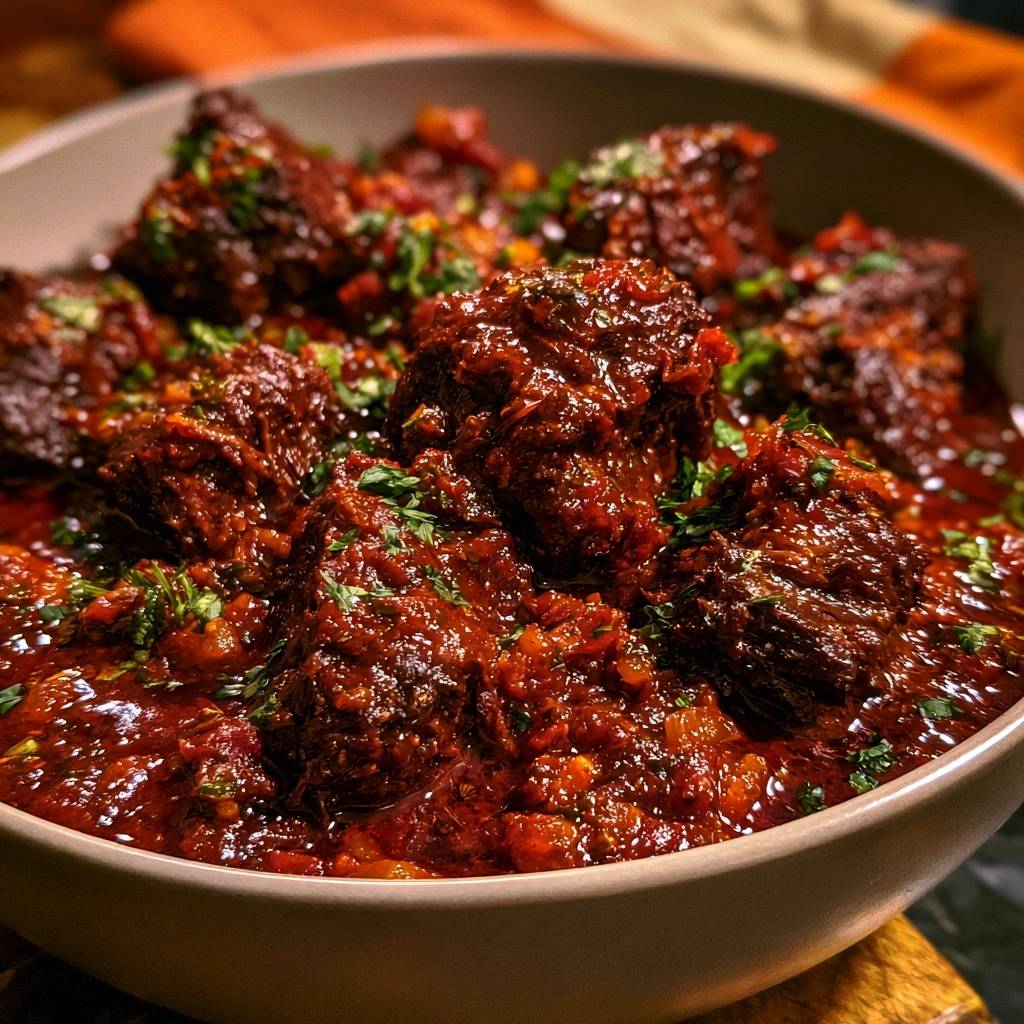
Success starts with the ingredients you choose. I always recommend bone-in short ribs because the marrow inside the bones leaks out during the three-hour braise, adding a depth of flavor and a silky body to the sauce that boneless cuts simply can’t match. The bone also acts as a heat conductor, helping the meat cook evenly from the center. If you can’t find bone-in, you’ll need to be extra careful not to overcook the meat into mush.
Quality tomato paste is another non-negotiable. It provides the concentrated umami backbone that makes the sauce taste like it has been simmering for days rather than hours. When you combine this with the crushed tomatoes, you get a thick, rustic texture. If you find your sauce is a bit too acidic, that small tablespoon of brown sugar in the recipe is your best friend. It doesn’t make the dish sweet; it just rounds off the sharp edges of the tomato.
Selecting the Right Beef Cut
When you head to the butcher, look for English-cut ribs. These are cut parallel to the bone, resulting in a thick rectangular block of meat sitting right on top of a single bone segment. This is the gold standard for braising. Flanken-style ribs, which are sliced across the bones into thin strips, are better suited for quick grilling and won’t hold up to the long, slow heat of this tomato-based braise.
The Role of Concentrated Aromatics
The foundation of our flavor is the mirepoix: a finely diced mix of onion, carrots, and celery. You want to dice these quite small so they eventually melt into the sauce, creating a thick, ragu-like consistency. I also love using smoked paprika here. It provides a subtle, earthy wood-smoke flavor that mimics the depth of a charcoal grill without you ever having to step outside. It adds a layer of complexity that keeps the tomato from feeling one-dimensional.
Step-by-Step: Achieving the Perfect Maillard Sear
The most critical technical phase is the sear. If you skip this, your meat will look gray and unappealing. The Maillard reaction is the chemical process that creates that deep mahogany crust and complex savory flavor. To get a good sear, you must pat the short ribs completely dry with paper towels. Moisture is the enemy of browning; if the meat is wet, it will steam in the pan instead of searing.
Heat your oil until it is shimmering and just starting to wispy-smoke. Place the ribs in the pot, but don’t crowd them. If you put too many in at once, the pan temperature drops and you lose that crust. Once you remove the meat, you’ll see dark brown bits stuck to the bottom of the pot. This is called the “fond,” and it is pure culinary gold. Do not wash the pot! That fond is the concentrated essence of the beef and will flavor the entire sauce.
Building the Braise: Deglazing and Layering
After the meat is out, toss in your vegetables. As they release their moisture, they will start to loosen that fond. This is where we use the “Pinçage” technique. You add the tomato paste directly to the vegetables and cook it for about three minutes. You’re looking for the paste to turn from a bright red to a deep, rusty brick color. This caramelizes the sugars and removes that metallic “canned” taste that can ruin a sauce.
Next comes the deglazing. Pour in your broth and balsamic vinegar and use a wooden spoon to vigorously scrape every last bit of browned beef from the bottom. The liquid should bubble and reduce by half, concentrating its flavor. This step ensures that all the hard work you put into the sear actually ends up in the final dish rather than stuck to the bottom of the pan.
Managing the Braising Liquid Levels
Once you add the crushed tomatoes and broth, pay close attention to the level. The liquid should come about three-quarters of the way up the sides of the ribs. If you drown the meat completely, you are essentially making a soup, and the beef will taste boiled. If there is too little liquid, the sugars in the tomato will burn before the meat is tender. That three-quarters mark is the sweet spot for a perfect braise.
The Low-and-Slow Oven Transformation
A Dutch oven is the best tool for this job because its heavy walls distribute heat evenly. Setting your oven to 325°F provides a steady, gentle environment. At the one-hour mark, the kitchen will start to smell incredible, but the meat will still be tough. By hour two, the fat begins to render. By hour three, the magic happens. The meat should start pulling away from the bone, exposing the tips as the muscle fibers relax and soften.
Reducing the Sauce for Maximum Body
For the final 20 minutes, take the lid off. This is a game-changer. It allows some of the water to evaporate, which thickens the sauce into a cohesive, chunky ragu. The fats and tomato sugars will emulsify, creating a glossy coating that clings to the beef. You’ll know it’s ready when the sauce is thick enough to coat the back of a spoon without immediately running off.
Troubleshooting Common Braising Obstacles
If your sauce feels too thin after the cooking time is up, don’t panic. Simply remove the meat and simmer the sauce on the stovetop for a few minutes to reduce it further. If the meat is still tough after three hours, it simply needs more time. Every cow is different, and some cuts have more connective tissue than others. Just put the lid back on and give it another 30 minutes; patience is the only cure for tough braised meat.
You might also notice a layer of oil on top of the sauce. This is just the rendered fat from the ribs. You can easily skim this off with a wide spoon. Don’t be too aggressive, though, as a little bit of that fat carries a ton of flavor. If you have the time, making this a day in advance allows the fat to solidify in the fridge, making it incredibly easy to lift off in one solid piece.
Optimal Pairings for Rich Beef Ragu
This dish is incredibly rich, so you need sides that can stand up to it or cut through the heaviness. Creamy polenta is my personal favorite because it acts like a soft pillow for the beef and soaks up every drop of the tomato sauce. Wide pappardelle noodles are another classic choice, as the thick ribbons of pasta are strong enough to hold the chunky vegetable bits.
To balance the meal, I always serve a bright, bitter green salad on the side. Something with arugula or radicchio tossed in a sharp lemon vinaigrette provides a necessary contrast to the deep, savory notes of the beef. The acidity in the salad refreshes your palate between bites, making the whole meal feel much lighter than it actually is.
Make-Ahead Strategy and Storage Logistics
Slow-braised tomato beef short ribs are one of those rare dishes that actually taste better the next day. As the dish cools, the flavors continue to meld and the beef absorbs even more of the sauce. If you’re cooking for a dinner party, I highly recommend making this the day before. Just let it cool completely before putting it in the fridge to prevent any steam from making the sauce watery.
For storage, keep the ribs in an airtight container for up to four days. If you want to freeze them, they will stay delicious for up to three months. When you’re ready to eat, thaw them in the fridge overnight and reheat gently on the stovetop over low heat. Add a splash of beef broth if the sauce has thickened too much during storage to bring back that perfect ragu consistency.
Expert Troubleshooting and Technical FAQ
Can I make this in a slow cooker instead?
Yes, you can definitely use a slow cooker. You will need to cook the ribs on the low setting for about 8 hours. However, you must still perform the sear and the aromatic sauté in a pan on the stovetop first. If you just throw raw meat and vegetables into a slow cooker, you will miss out on the deep caramelized flavors, and the meat will have a gray, unappealing texture.
Why add balsamic vinegar?
The tablespoon of balsamic vinegar in the broth provides the necessary acidity to help break down the meat fibers, while the extra broth maintains the liquid volume. This ensures you get a complex, tangy flavor profile.
Why did my sauce turn out bitter?
Bitterness usually comes from two things: burning the garlic or over-caramelizing the tomato paste. Garlic turns bitter the second it turns dark brown, so only sauté it until it is fragrant. If the sauce is already bitter, try adding a tiny bit more of the brown sugar mentioned in the recipe. The sweetness will help neutralize the bitter notes and bring the flavors back into balance.
How do I ensure the meat doesn’t fall off the bone too early?
The key is maintaining a gentle simmer rather than a rolling boil. If the liquid is bubbling too aggressively, the mechanical action of the bubbles will shake the meat apart before the collagen has fully dissolved. Keep your oven at 325°F and make sure the lid is tight. If you see the meat falling off the bone at the two-hour mark, drop your oven temperature by 25 degrees.
How do I store and reheat leftovers?
Store leftovers in an airtight container in the refrigerator for up to 4 days. This dish freezes exceptionally well for up to 3 months. To reheat, place the ribs and sauce in a covered pot over low heat on the stove. Add a splash of water or beef broth to loosen the sauce, as it will thicken significantly when cold. Avoid the microwave if possible, as it can make the beef rubbery.
Slow-Braised Tomato Beef Short Ribs
Course: Main CourseCuisine: AmericanDifficulty: easy4
servings20
minutes3
hours180
Minutes680
kcalAmerican
Ingredients
3 pounds beef short ribs, bone-in, cut into 2-inch chunks
2 tablespoons vegetable oil
1 large yellow onion, finely diced
2 large carrots, finely diced
2 stalks celery, finely diced
4 cloves garlic, minced
3 tablespoons tomato paste
1 can (28 ounces) crushed tomatoes
1 cup beef broth plus 1 tablespoon balsamic vinegar
1 cup beef broth
1 tablespoon brown sugar
1 tablespoon smoked paprika
2 teaspoons dried thyme
2 bay leaves
Salt and black pepper to taste
1/4 cup fresh parsley, finely chopped for garnish
Directions
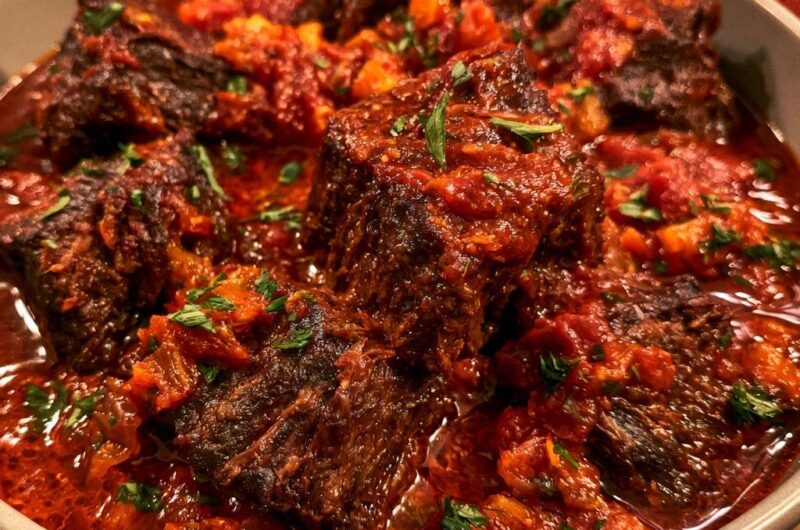
- The Sear: The most important step for flavor and the deep mahogany color shown in the image is the sear. Pat the short ribs completely dry with paper towels. Season generously with salt and pepper. Heat oil in a large Dutch oven over medium-high heat. Sear the ribs in batches for 4 to 5 minutes per side until a deep, dark brown crust forms. Remove ribs and set aside.
- The Aromatics: Lower the heat to medium. Add the onion, carrots, and celery to the rendered fat. Cook for 7 to 8 minutes until the vegetables are softened and beginning to brown. Add the garlic and tomato paste, stirring constantly for 3 minutes. This “pinsaging” process caramelizes the tomato sugars, removing the metallic taste and creating the rich, red-orange hue of the sauce.
- Deglaze: Pour in the beef broth and balsamic vinegar. Use a wooden spoon to scrape the bottom of the pot vigorously to release all the browned bits (fond). Let the liquid reduce by half.
- The Braising Liquid: Add the crushed tomatoes, beef broth, brown sugar, smoked paprika, thyme, and bay leaves. Stir well to combine.
- The Braise: Return the short ribs and any accumulated juices to the pot. The liquid should come about three-quarters of the way up the ribs. Bring to a gentle simmer on the stove. Cover with a tight-fitting lid and transfer to a preheated 325°F (165°C) oven. Braise for 3 to 3.5 hours.
- The Finish: Check the meat at the 3-hour mark. The meat should be pulling away from the bone and tender enough to break with a spoon. Remove the lid for the final 20 minutes of cooking to allow the sauce to reduce into the thick, chunky ragu consistency seen in the photo.
- Serve: Remove the bay leaves. Skim excess oil from the surface. Serve the ribs in deep bowls, ensuring each piece is heavily coated in the chunky tomato and vegetable sauce. Garnish generously with fresh parsley to provide a bright contrast to the rich, slow-cooked beef.
Notes
- The secret to the texture is the acid-balance technique; the acidity of the tomatoes breaks down tough fibers while the low heat transforms collagen into richness.