Mastering Honey Glazed Hazelnut and Walnut Clusters
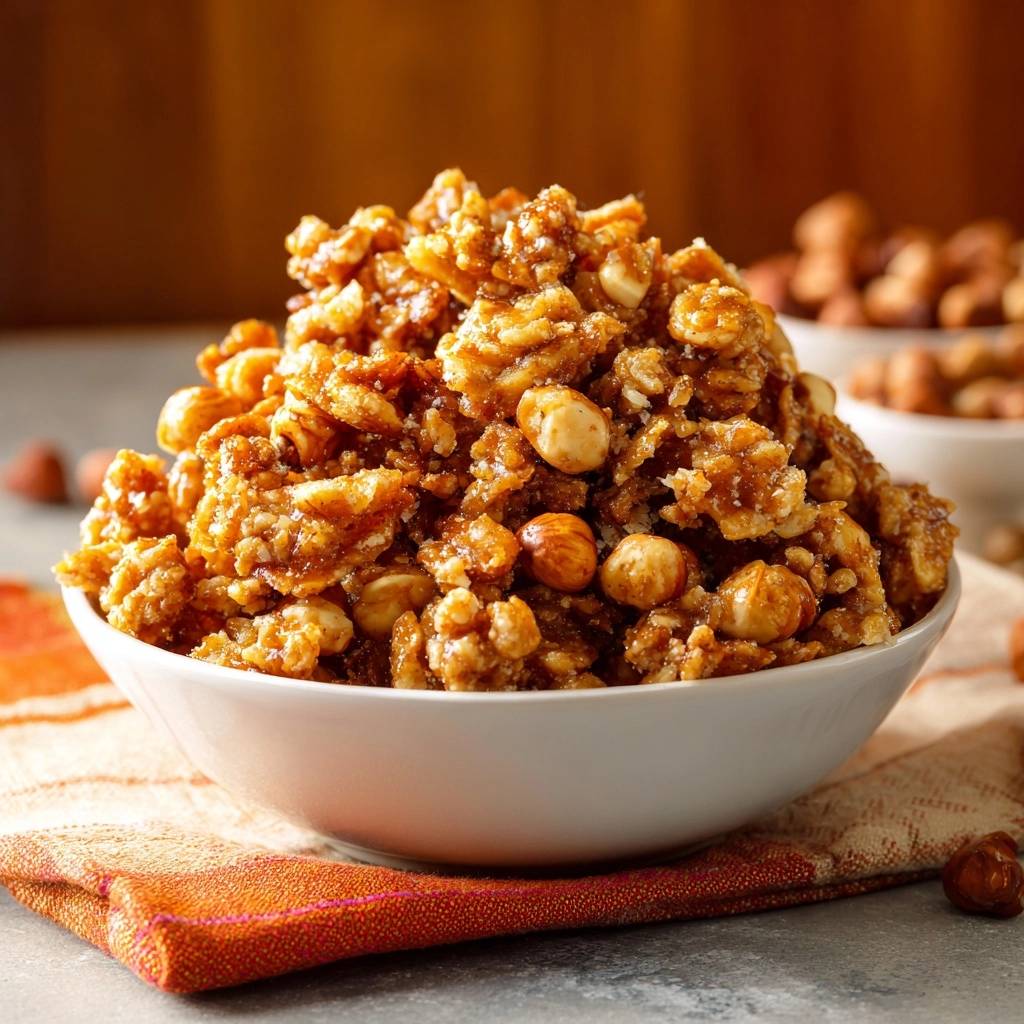
Most homemade glazed nuts end up as a disappointing, sticky mess that clings to your teeth or turns gummy within an hour. You want that satisfying, glass-like shatter that professional confectioners achieve, but it feels impossible to replicate at home. This recipe changes that by focusing on the precise science of the “Hard Crack” stage and a secret aerating technique.
The goal is a brittle, non-stick finish that stays crunchy even in humid weather. By using a specific combination of honey and granulated sugar, we create a glaze that hardens into a translucent shell. You won’t find any soft, chewy coatings here; instead, every bite offers a clean, crisp snap that highlights the toasted earthiness of the nuts.
The real secret to this professional-grade finish is the addition of a tiny amount of baking soda at the very end. This creates a micro-porous structure within the sugar, making the glaze light and easy to bite through rather than rock-hard. It’s the difference between a snack that feels like a chore to eat and one that melts away beautifully on the tongue.
The Chemistry of the Hard Crack Stage
Understanding sugar temperatures is the most important part of preventing soggy or sticky nut clusters. When you boil a mixture of honey, sugar, and water, you are essentially evaporating the moisture to concentrate the sugar solids. As the water leaves the pan, the temperature of the remaining syrup rises, moving through various stages of density.
To achieve a permanent crunch, you must reach the “Hard Crack” stage, which occurs at exactly 300°F. At this specific temperature, the water content is reduced to about 1%, meaning the syrup will set into a hard, brittle solid once it cools. If you stop at a lower temperature, like the “Soft Ball” or “Hard Ball” stages, the glaze will remain pliable and sticky, eventually absorbing moisture from the air and becoming gummy.
Reaching 300°F ensures a long shelf-life and a superior mouthfeel. Therefore, using a candy thermometer is the best way to guarantee success. However, you can also watch for the bubbles to transition from large and watery to small, tight, and slow-moving. Once the syrup hits that deep amber hue and the right temperature, it transforms from a simple liquid into a sophisticated candy coating.
Why Baking Soda Changes the Texture
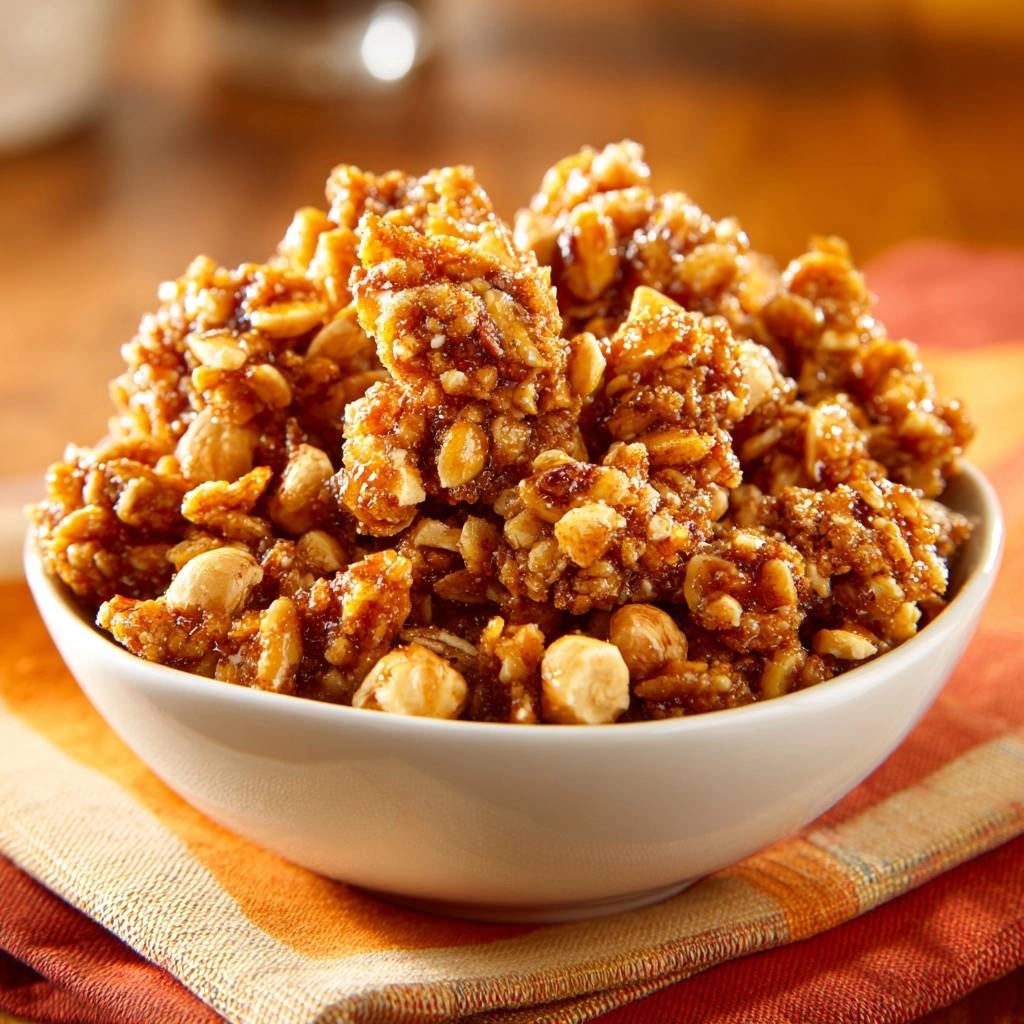
Baking soda is the “secret ingredient” that elevates these Honey Glazed Hazelnut and Walnut Clusters from good to elite. When you whisk baking soda into the hot, acidic honey syrup, a chemical reaction occurs that releases carbon dioxide gas. This causes the mixture to foam up instantly, creating thousands of tiny air bubbles throughout the glaze.
These bubbles remain trapped as the sugar sets, resulting in a light, aerated texture. Without this step, the sugar would cool into a dense, solid sheet that could be difficult to bite. The baking soda ensures the coating is “shatter-prone,” providing that addictive crunch without the risk of hurting your teeth. It also helps neutralize some of the sharp acidity in the honey, rounding out the flavor profile.
Essential Components for Honey Glazed Nut Clusters
Quality ingredients are the foundation of this snack, starting with the choice of nuts. Walnuts provide a soft, buttery crunch and a slightly bitter skin that balances the sweetness of the honey. Hazelnuts, on the other hand, offer a firm, woody texture and a distinct floral aroma that pairs perfectly with the cinnamon.
We use unsalted butter in this recipe to control the sodium profile precisely. Butter adds a rich, velvety mouthfeel to the glaze and helps prevent the sugar from becoming too brittle to handle. It also aids in emulsification, ensuring the honey and sugar stay bonded as they cook. Using unsalted butter allows the sea salt to stand out as a bright, finishing note rather than getting lost in the background.
Granulated sugar acts as a vital stabilizer for the honey. While honey provides the primary flavor, it is a humectant, meaning it naturally attracts moisture. By adding granulated sugar, we increase the sucrose content, which helps the glaze set firmly and stay dry. This combination ensures your clusters remain crisp for days rather than turning into a sticky pile by the next morning.
Selecting and Prepping Raw Hazelnuts and Walnuts
Always start with raw, unsalted nuts to ensure you have total control over the toasting process. When buying walnuts, look for light-colored halves; darker walnuts can sometimes indicate age or rancidity. Give them a quick sniff before starting; they should smell mildly nutty, never paint-like or sour.
The same fragrant, toasted quality also defines the science of the ultimate deep glaze caramel corn.
For the hazelnuts, you can choose to leave the skins on for a rustic look or rub them off after toasting for a cleaner finish. The skins contain tannins that add a pleasant astringency, which cuts through the sugar. However, if the skins are very loose, they might prevent the honey glaze from adhering properly to the nut itself.
Phase One: Developing Deep Nutty Aromatics
Pre-toasting the nuts is a non-negotiable step for maximum flavor. We set the oven to 325°F, which is the “sweet spot” for drawing out natural oils without scorching the delicate fats. At this temperature, the heat penetrates the center of the walnuts and hazelnuts, ensuring they are crunchy all the way through.
Spread the nuts in a single layer to ensure even heat distribution. You are looking for a fragrant, toasted aroma and a very slight change in color. This usually takes about 5 to 7 minutes. Keep a close eye on them during the final two minutes, as nuts can go from perfectly toasted to burnt very quickly.
Once you smell that warm, toasted scent, remove them from the oven immediately. They will continue to cook slightly from the residual heat as they sit on the tray. This step also removes any lingering moisture from the raw nuts, which is essential for maintaining the integrity of the hard-crack glaze later on.
Phase Two: Precision Syrup and Glaze Construction
The stovetop process requires your full attention. Start by combining the honey, sugar, water, and butter in a medium, heavy-bottomed saucepan. Stir the mixture over medium heat only until the sugar has completely dissolved. Once the syrup begins to boil, stop stirring entirely to prevent unwanted crystallization.
As the mixture boils, you will see the bubbles change shape and size. The water is evaporating, and the sugar is concentrating. If you aren’t using a thermometer, look for the syrup to turn a deep, rich amber color. This visual cue usually happens around the 3 to 5-minute mark, depending on your stove’s heat output.
Be careful not to let the syrup get too dark, or the honey will begin to taste bitter. You want a color that resembles a shiny copper penny. This precision ensures that the glaze will be hard enough to snap but still retain the floral, sweet notes of the honey and the richness of the butter.
The Foaming Technique: Adding the Aerators
Once the syrup reaches 300°F, remove the pan from the heat immediately. This is the most critical moment of the recipe. Quickly whisk in the sea salt, cinnamon, and baking soda. You will see the mixture react instantly, puffing up into a thick, pale gold foam.
Speed is essential here because the sugar begins to cool and set the moment it leaves the heat. You must fold the toasted nuts into this foam quickly but gently. Use a heat-resistant spatula to ensure every nook and cranny of the walnuts and hazelnuts is coated in the aerated syrup.
The goal is to fold the nuts in just enough to coat them without deflating all the air bubbles. These air pockets are what give the clusters their signature “shatter” texture. If you work too slowly, the glaze will harden in the pan, making it difficult to spread onto your baking sheet.
Phase Three: Forming the Signature Craggy Clusters
Immediately pour the hot, foaming mixture onto a baking sheet lined with high-quality parchment paper or a silicone mat. Do not try to separate the nuts into individual pieces. Instead, use your spatula to spread them out into small, rustic clusters.
For a perfect pairing, try our Ultra-Crispy Oat Crackers: Shatterproof Crunch Recipe.
These craggy, artisanal chunks are what give the snack its visual appeal. The syrup will settle into the gaps between the nuts, creating a “bridge” of glass-like candy. This method is much faster than separating individual nuts and results in a more satisfying texture when you break them apart later.
Let the slab cool completely at room temperature for at least 30 minutes. Resist the urge to touch them while they are warm, as the sugar is still pliable and very hot. Once the glaze has fully set into a hard, non-sticky finish, you can break the large mass into bite-sized chunks for serving.
Troubleshooting Common Glazing Obstacles
The most common issue is “Sticky Nut Syndrome,” which happens when the syrup doesn’t reach a high enough temperature. If your clusters stay tacky after cooling, it means there was still too much water in the syrup. Next time, ensure you hit that 300°F mark on your thermometer for a dry finish.
If you notice the syrup separating or looking oily, it usually means the butter didn’t emulsify properly. This can happen if the heat is too high too fast. To fix this, keep the heat at a steady medium and ensure the sugar is fully dissolved before the mixture reaches a rolling boil.
Humidity is another silent enemy of sugar work. In very tropical or rainy climates, the sugar can “weep” or absorb moisture from the air. If you live in a humid area, work quickly and move the cooled clusters into an airtight container as soon as they are set to protect that hard-crack finish.
Optimal Storage for Long-Lasting Crunch
To keep that perfect snap, store your Honey Glazed Hazelnut and Walnut Clusters in a high-quality airtight container. Glass jars with a silicone seal work best. At room temperature, these clusters will stay perfectly crunchy for up to two weeks, provided they are kept away from heat sources.
Never store glazed nuts in the refrigerator. The cold environment creates condensation when you take the container out, which will immediately dissolve the sugar glaze and turn your clusters into a sticky mess. Room temperature in a cool, dark pantry is the ideal environment for sugar-based snacks.
If you want to keep them longer, you can actually freeze these clusters. Place them in a freezer-safe bag and squeeze out as much air as possible. They can last for up to two months in the freezer. When you’re ready to eat them, let them come to room temperature inside the sealed bag to prevent moisture from settling on the glaze.
Sophisticated Ways to Serve Nut Clusters
While these are incredible as a standalone snack, they also work beautifully as a component in more complex dishes. Try pairing them with a cheese board featuring sharp, aged cheddar or a creamy goat cheese. The sweetness of the honey and the crunch of the nuts provide a brilliant contrast to salty, savory cheeses.
You can also crumble the clusters over an autumn salad of arugula, sliced pears, and balsamic vinaigrette. The aerated glaze adds a sophisticated texture that won’t get soggy as quickly as standard candied nuts. They also make a fantastic topping for dairy-free yogurt parfaits or even a simple bowl of oatmeal.
For a quick dessert, serve a handful of these clusters alongside a piece of dark chocolate. The combination of the floral honey, toasted hazelnuts, and bitter chocolate is a classic for a reason. Because they don’t stick to your teeth, they are a much more elegant option for dinner parties than traditional toffee.
What to Try Next
These honey-glazed nut clusters are rich and crunchy. Round out the meal with something soft and buttery or a lightly sweet bread that picks up the sugary notes.
- For a warm, flaky side that soaks up extra honey or butter, pair the clusters with a batch of Flaky Buttermilk Biscuits.
- The nutty sweetness in the clusters works well alongside a slice of
Get the full recipe in your inbox in seconds – perfect for shopping and cooking.
Hazelnut and Walnut Clusters
Course: SnackCuisine: AmericanDifficulty: easy8
servings10
minutes15
minutes265
kcal25
MinutesA professional-grade snack featuring toasted hazelnuts and walnuts coated in a honey-butter glaze. The addition of baking soda creates a brittle, shatter-prone texture that avoids the common pitfalls of sticky or chewy homemade glazed nuts.
Ingredients
1 cup raw hazelnuts
1 cup raw walnut halves
1/3 cup honey
1/4 cup granulated sugar
2 tablespoons unsalted butter
1/2 teaspoon sea salt
1/4 teaspoon cinnamon
1/4 teaspoon baking soda (The secret for the aerated, non-stick texture)
1 tablespoon water
Directions
- Preheat your oven to 325°F (165°C). Spread the raw hazelnuts and walnuts on a baking sheet and toast for 5-7 minutes until fragrant. This ensures the nuts are crunchy all the way through.
- Line a large baking sheet with high-quality parchment paper or a silicone baking mat.
- In a medium saucepan over medium heat, combine the honey, sugar, water, and butter. Stir until the sugar dissolves.
- Increase the heat slightly and bring the mixture to a boil. To solve the sogginess issue, use a candy thermometer and let the syrup reach 300°F (Hard Crack stage). If you don’t have a thermometer, boil for about 3-5 minutes until the bubbles become small and the syrup turns a deep amber.
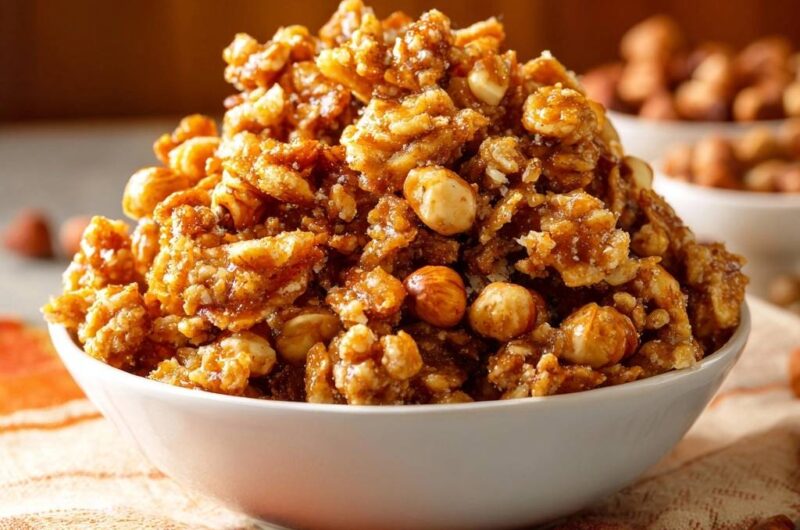
- Remove the pan from the heat. Immediately whisk in the sea salt, cinnamon, and baking soda. The mixture will foam up-this is essential for the light, “shatter-prone” texture seen in the image.
- Quickly fold in the toasted hazelnuts and walnuts, stirring until every nut is thickly coated in the foaming syrup.
- Immediately pour the mixture onto the prepared baking sheet. Unlike traditional glazed nuts, do not separate them completely; leave them in small, craggy clusters to match the visual style of the image.
- Let the clusters cool completely at room temperature for at least 30 minutes. The glaze will harden into a crisp, glass-like finish that won’t stick to your teeth. Once fully set, break into large chunks and store in an airtight container.
Notes
- The baking soda is the secret ingredient that creates an aerated, non-stick texture. Ensure you use a candy thermometer to reach 300 degrees Fahrenheit for the perfect glass-like finish.