Skillet Sweet Peas with Crispy Bacon
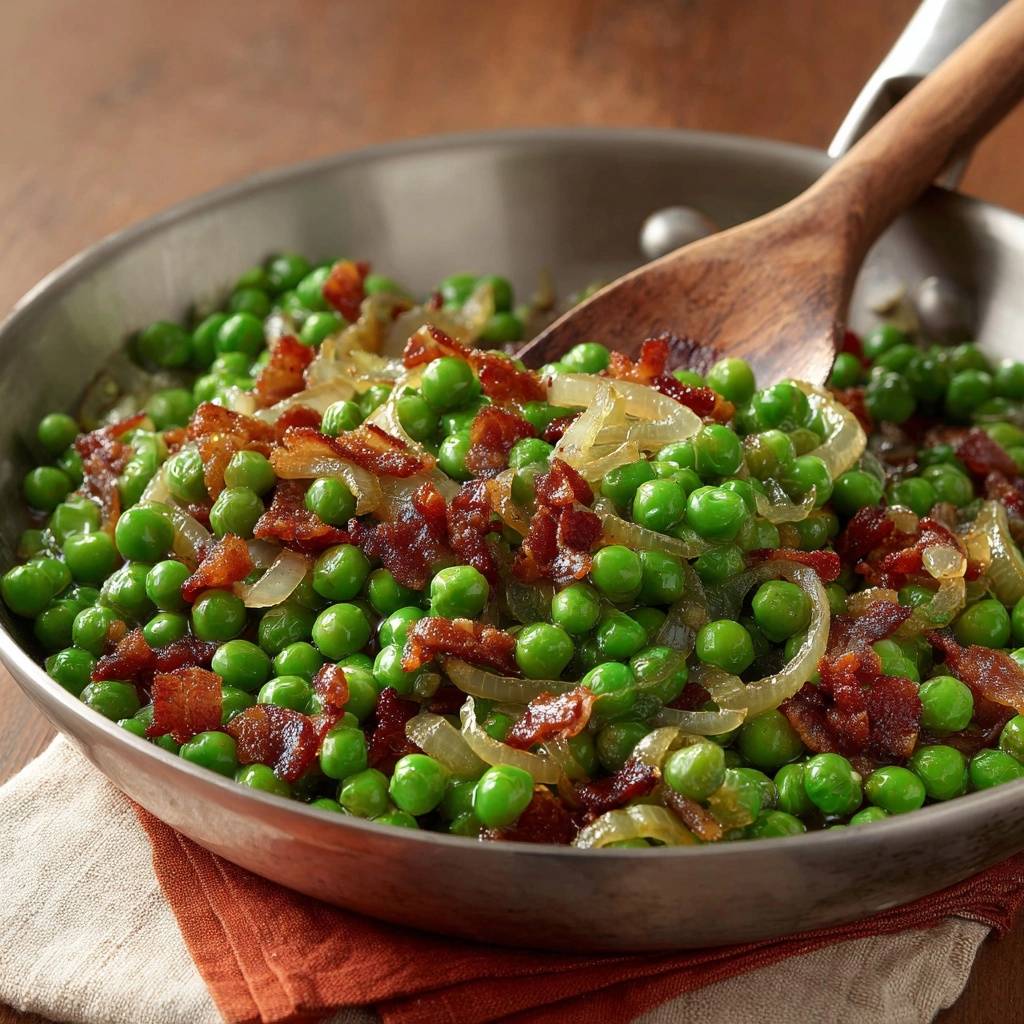
Forget everything you know about those sad, gray, wrinkled peas that usually sit untouched at the corner of a dinner plate. Most people treat peas as an afterthought, boiling them in a pot of water until the skins burst and the vibrant flavor vanishes down the kitchen drain. It is a culinary tragedy that has turned generations of eaters away from one of the sweetest, most versatile vegetables in the freezer aisle.
The secret to a truly addictive side dish lies in moisture control and fat emulsification. By ditching the boiling water and reaching for a heavy skillet, you can achieve a snappy, “pop-in-your-mouth” texture that contrasts beautifully with salty, rendered fat. This method transforms the humble pea into a star that actually competes with the main course for attention.
I’ve found that the real trick to success is the temperature shock. When you toss frozen peas directly into a hot, butter-slicked pan, the exterior sears instantly while the interior stays bright and sweet. This flash-sear technique locks in the chlorophyll, ensuring your Skillet Sweet Peas with Crispy Bacon look as incredible as they taste. Oh man, the first time you hear that sizzle, you’ll know you’re never going back to the saucepan.
The Problem with Traditional Boiling Methods
When you submerge peas in boiling water, you are essentially inviting a chemical breakdown of the vegetable’s structural integrity. Water is a solvent that leaches out the natural sugars and vitamins, leaving you with a bland, watery shell. Furthermore, the heat of boiling water quickly breaks down the pectin in the cell walls, which is why boiled peas often feel mushy or mealy against the roof of your mouth.
Chlorophyll, the pigment responsible for that gorgeous emerald green, is also highly sensitive to prolonged heat and acidity. In a boiling pot, the heat causes the magnesium atom in the center of the chlorophyll molecule to be replaced by hydrogen, turning the peas a dull, unappetizing olive drab. This process happens in minutes, meaning by the time you drain the pot, the damage is already done.
Finally, there is the issue of carry-over cooking. Because boiled peas are saturated with hot water, they continue to cook themselves even after they hit the serving bowl. This residual heat turns a slightly overcooked pea into a literal puree before it even reaches the table. The skillet method solves this by using dry, high heat that evaporates surface moisture and stops the cooking process the moment the pan leaves the burner.
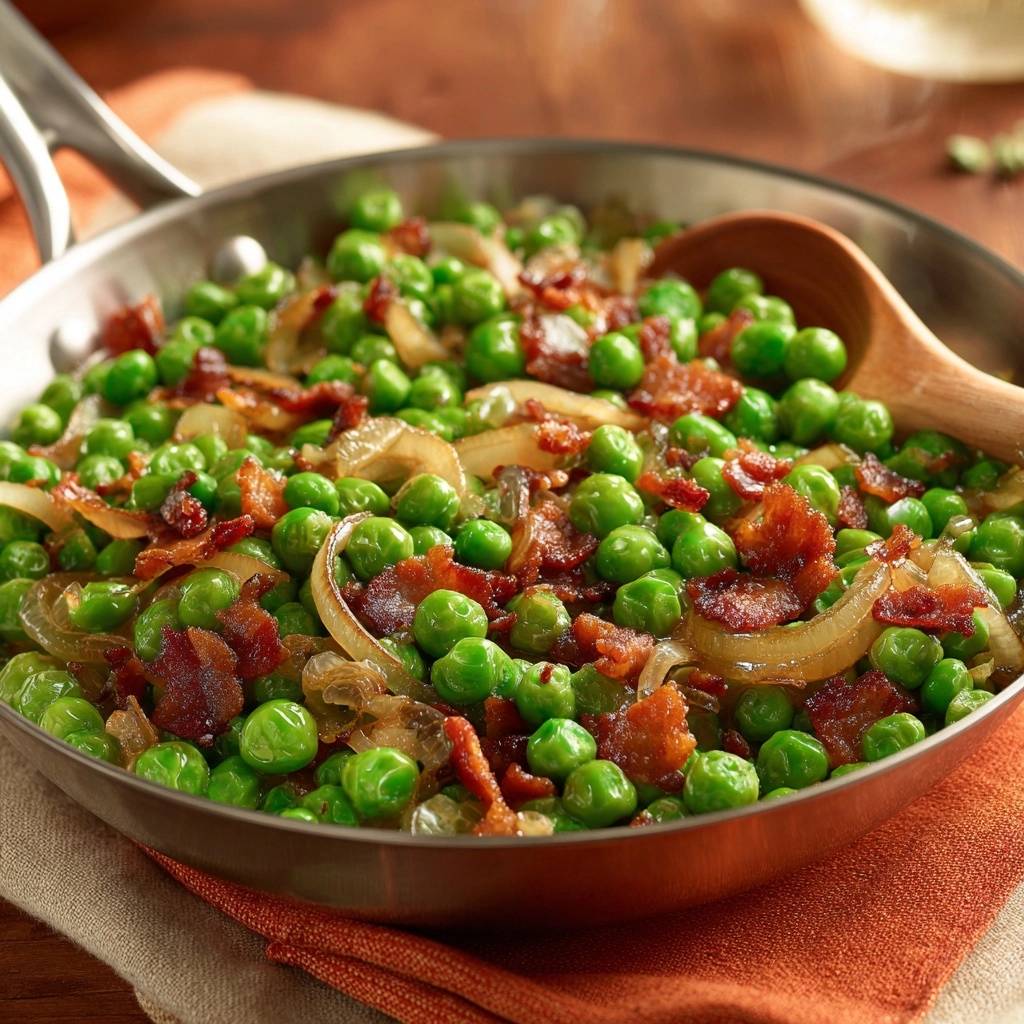
Essential Components for Skillet Sweet Peas
Success starts with the right fat. Thick-cut bacon is the MVP here because it provides a significant amount of rendered lipid compared to thin, flimsy slices. This fat has a higher smoke point than butter alone, allowing you to get the pan screaming hot without the fat breaking down or tasting bitter. Plus, those chunky bacon bits provide a necessary textural crunch against the soft onions.
Yellow onions are the best choice for this specific dish because of their high sugar content. As they sit in the warm bacon fat, they undergo a beautiful transformation, releasing their juices and beginning to caramelize. While red onions might bleed color and white onions can be a bit too sharp, yellow onions mellow out into a savory sweetness that bridges the gap between the salty bacon and the sugary peas.
Don’t skip the unsalted butter at the end. While the bacon fat does the heavy lifting for the sear, the butter adds a luxurious, velvety mouthfeel. Using unsalted butter allows you to control the seasoning perfectly with your kosher salt, ensuring the dish is savory rather than a salt bomb. The combination of these two fats creates a glossy emulsion that coats every single pea.
If you enjoy this bright lemon twist, you’ll love the extra kick in these zesty bacon peas.
Why Frozen Peas Outperform Fresh
It might sound counterintuitive, but frozen peas are almost always superior to the “fresh” pods found in the produce section. Peas are unique because their sugars begin converting into starches the very second they are plucked from the vine. Unless you have a garden in your backyard, those fresh pods have likely been sitting in transport for days, losing their sweetness and becoming starchy and tough.
Frozen peas are flash-frozen within hours of harvest. This process pauses the sugar-to-starch conversion at its peak, locking in that candy-like flavor. Because they are frozen individually, they also act as tiny ice cubes when they hit the pan, creating a localized “micro-steam” effect that cooks the inside of the pea while the outside sears in the fat.
The Role of High-Smoke Point Fats
Using rendered bacon fat is a classic chef’s move for a reason. Animal fats have a complex flavor profile that vegetable oils simply cannot match. When you render the bacon slowly, you’re creating a high-heat vehicle that can handle the temperature needed to sear the onions and peas without smoking out your kitchen.
The butter is added later in the process specifically because it has a lower smoke point. If you started with only butter, the milk solids would burn before the bacon got crispy. By layering the fats, you get the high-heat benefits of the bacon grease and the nutty, toasted flavor of the butter right at the finish line.
Step-by-Step: Mastering the Flash-Sear Technique
The most important rule of this recipe is to resist the urge to walk away from the stove. This is a fast-paced process that requires your full attention for about twelve minutes. You are looking for specific visual and auditory cues—the hiss of the peas hitting the fat, the golden edges of the onions, and the darkening of the bacon bits.
Start with a cold skillet. This is a non-negotiable step for the bacon. If you drop bacon into a hot pan, the outside seizes up before the fat has a chance to melt away. By starting cold and bringing the heat up gradually, you ensure the bacon ends up shatteringly crisp while leaving behind a generous pool of liquid gold for the rest of the ingredients.
Phase 1: Rendering the Bacon Fat
Place your chopped bacon in the cold pan and turn the dial to medium. As the pan warms, you’ll see the white fat start to turn translucent and then liquid. Stir it occasionally to make sure the bits aren’t sticking. You are looking for a deep golden brown color and a foamy appearance in the fat, which signals that the moisture has evaporated from the meat.
Once the bacon is crisp, use a slotted spoon to move it to a paper towel-lined plate. This is crucial! If you leave the bacon in the pan while you cook the onions and peas, it will absorb the moisture from the vegetables and turn rubbery. Keeping it separate preserves that “crunch factor” that makes this dish so satisfying.
If sugar snap peas are your thing, this skillet sugar snap peas recipe follows the same quick-cooking approach.
Phase 2: Caramelizing the Onion Half-Moons
Turn the heat up to medium-high. The bacon fat should be shimmering. Toss in your sliced onions. You aren’t looking for a deep, dark French onion soup style caramelization here. Instead, you want “blonde” caramelization. This means the onions should be soft, translucent, and just starting to show little charred, brown kisses on the edges.
This usually takes about four minutes. The onions will pick up the smoky flavor of the bacon fat, creating a savory base for the peas. If the onions look like they are burning rather than browning, turn the heat down slightly, but keep them moving. The goal is a sweet, jammy texture that melts into the background of the dish.
Phase 3: The High-Heat Pea Sauté
Now comes the magic. Add the butter to the pan, and as soon as it melts, dump in the frozen peas. Do not thaw them! Thawing causes the cell walls to collapse, which leads to that mushy texture we are trying to avoid. The frozen peas will hit the hot fat and create a burst of steam. This steam cooks the interior of the pea in seconds.
Toss the peas constantly. You want every single pea to be coated in the bacon-butter mixture. This fat coating acts as a barrier, preventing the skins from shriveling. After about two or three minutes, the peas will turn a bright, neon green. Taste one—it should be hot all the way through but still have a distinct “snap” when you bite down. Season them immediately and fold the bacon back in.
Avoiding Common Mushy Pea Mistakes
The biggest mistake you can make is overcrowding the pan. If you try to double this recipe in a small skillet, the temperature will drop too low when the frozen peas hit the pan. Instead of searing, the peas will sit in a pool of cold moisture and steam themselves slowly. If you need to feed a crowd, work in batches or use your largest 12-inch skillet.
Another trap is the “Water Trap.” Some people think adding a splash of water or stock will help the peas cook faster. In reality, water is the enemy of the snap. Any added liquid will soften the skins and wash away the flavorful fats you’ve worked so hard to render. Trust the heat and the fat; they are all you need for a perfect result.
Flavor Variations and Ingredient Swaps
While the bacon and onion combo is a classic, you can easily dress this up. A teaspoon of fresh lemon zest added at the very end provides a bright acidity that cuts through the richness of the bacon fat. If you like a bit of heat, a pinch of red pepper flakes tossed in with the onions adds a lovely back-end glow to the sweetness of the peas.
For a vegetarian version, you can swap the bacon for a heavy glug of extra virgin olive oil and a teaspoon of smoked paprika. You won’t get the same crunch, but the paprika mimics that smoky depth. You could also add some toasted pine nuts at the end to regain that lost textural contrast. However, the skillet technique remains exactly the same.
What’s Next?
Try these delicious pairings:
- The Ultimate Loaded Sheet Pan Fries: A Masterclass in Texture
- Brown Sugar Bacon Wrapped Smokies: Crispy Perfection Guide
What to Serve with Skillet Sweet Peas
These peas are incredibly versatile, but they shine brightest next to roasted or pan-seared proteins. A simple roasted chicken with crispy skin is a natural partner, as the sweetness of the peas balances the savory herbs like rosemary or thyme. The bright green color also makes a stunning contrast on the plate next to a golden-brown bird.
If you’re a fan of seafood, try serving these alongside a pan-seared salmon fillet. The richness of the fish is cut by the snap of the peas, and the bacon fat adds a smoky element that complements the oils in the salmon. It’s a restaurant-quality meal that takes less than twenty minutes to pull together. A garlic-rubbed beef roast is another heavy hitter that benefits from the light, sweet lift these peas provide.
Equipment: Why Cast Iron or Stainless Steel Wins
To get the best sear, you need a pan that can hold onto heat. Cast iron is the gold standard here. When those cold, frozen peas hit a cast iron surface, the pan doesn’t lose its temperature. This ensures the “flash” part of the flash-sear actually happens. Stainless steel is a great second choice because it allows for excellent fond (those little brown bits) to develop from the onions.
Non-stick pans are generally not recommended for this specific method. They often struggle to reach the high temperatures needed for a proper sear without damaging the coating. Furthermore, you won’t get the same level of caramelization on your onions. If you want that professional, charred edge and snappy texture, go with heavy-bottomed metal every time.
Expert Troubleshooting and Preparation Tips
Can I make this ahead of time?
Peas are best served immediately because they lose their bright color and snappy texture as they sit. However, you can prep the components. Render the bacon and sauté the onions up to a day in advance. When you’re ready to eat, heat the onion and bacon fat mixture until shimmering, then proceed with the frozen peas. This saves you ten minutes during the dinner rush.
How do I fix over-salted peas?
Bacon can vary wildly in saltiness. If you find the dish is too salty, don’t panic. A tiny pinch of granulated sugar can help balance the sodium. Alternatively, a splash of heavy cream at the very end creates a slight sauce that mellows out the salt. Next time, taste your bacon first and adjust the added kosher salt accordingly.
Why are my peas shriveling?
Shriveling is the classic sign of overcooking. It means the internal moisture has evaporated and the cell structure has collapsed. This usually happens around the five-minute mark in a hot pan. To prevent this, stick strictly to the 2-3 minute window. As soon as they are hot through and bright green, get them out of the pan and onto the plate.
Is it possible to use canned peas?
Strictly speaking, no. Canned peas have already been cooked to the point of total structural collapse during the canning process. If you put them in a hot skillet, they will simply turn into mush or paste. This recipe relies entirely on the structural integrity of frozen or very fresh peas to withstand the high-heat sauté method.
How do I store and reheat leftovers?
Store leftovers in an airtight container in the fridge for up to three days. To reheat, avoid the microwave if possible, as it will turn the peas gray. Instead, toss them back into a hot skillet with a tiny knob of butter for 60 seconds. This wakes up the fats and restores some of the texture without overcooking the centers.
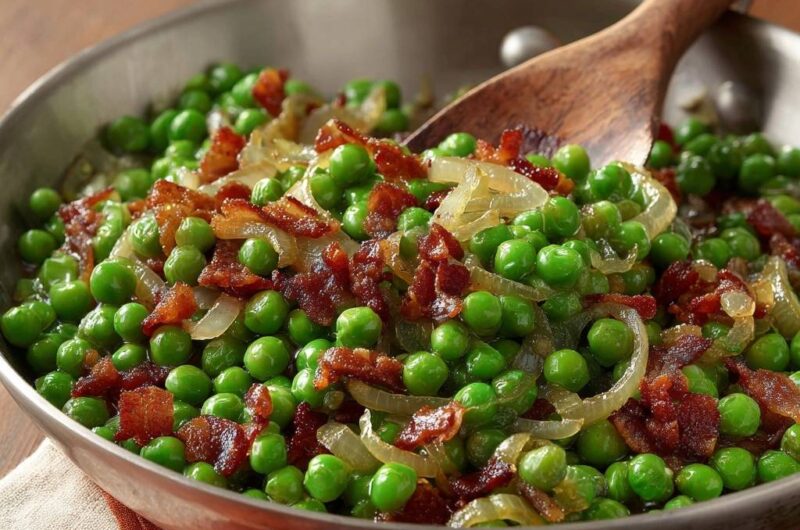
Skillet Sweet Peas
Course: Side DishCuisine: AmericanDifficulty: easy4
servings5
minutes12
minutes185
kcal17
MinutesA fast and flavorful side dish that transforms frozen peas into a gourmet treat. By searing frozen peas in rendered bacon fat and butter, you achieve a perfect texture and savory taste that appeals to all ages.
Ingredients
1 pound frozen sweet peas (do not thaw)
4 slices thick-cut bacon, chopped
1 medium yellow onion, thinly sliced into half-moons
1 tablespoon unsalted butter
1/2 teaspoon kosher salt
1/4 teaspoon cracked black pepper
Directions
- Start with a cold skillet. Place the chopped bacon in the pan and turn the heat to medium. This slow render is the secret to perfectly crispy bits without burning the fat. Cook until the bacon is golden and crisp, about 6 to 8 minutes.
- Use a slotted spoon to remove the bacon bits and set them aside on a paper towel. Keep the rendered fat in the pan.
- Increase the heat to medium-high. Add the sliced onions to the bacon fat. Sauté for 3 to 4 minutes until they are softened and just beginning to caramelize around the edges.
- Here is the fix for mushy peas: Add the frozen peas directly to the hot pan with the butter. Do not add water. The high heat will evaporate the surface moisture instantly while the butter coats the skin to prevent shriveling.
- Toss the peas constantly for only 2 to 3 minutes. You want them heated through but still popping with a bright green hue.
- Season with salt and pepper. Fold the crispy bacon back into the pan right before serving to ensure the bacon stays crunchy and the peas stay firm. Serve immediately.
Notes
- Do not thaw the peas before cooking. Using a cold skillet to start the bacon ensures a better fat render for sautéing the onions and peas.