Mastering the Slow-Simmered Beef and Potato Stew
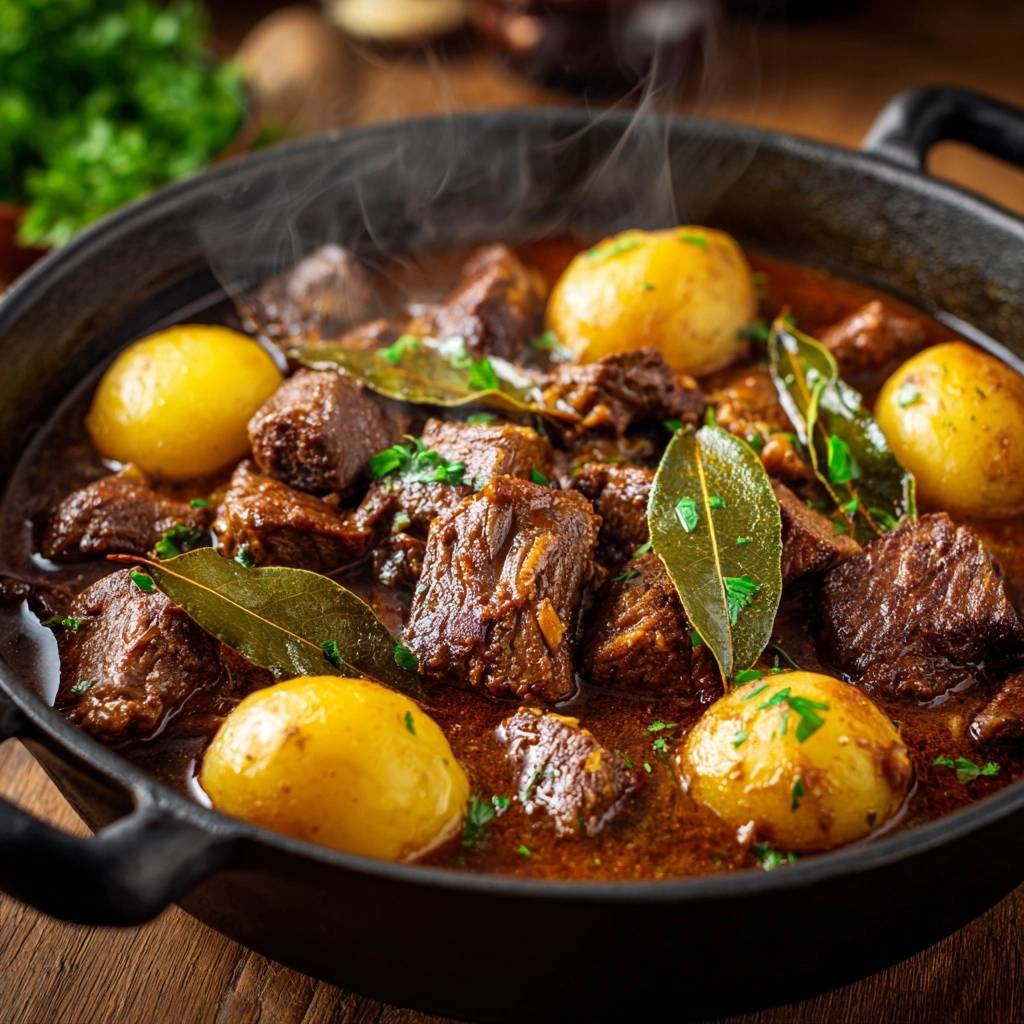
Imagine sinking your spoon into a bowl where the beef doesn’t just break; it practically dissolves. The potatoes aren’t a grainy mush, but rather buttery, golden globes that hold their shape until they hit your tongue. This is the ultimate comfort, a rich and velvety landscape of deep umami that fills your kitchen with a scent so savory it feels like a warm hug. Most people settle for mediocre stew, but you’re about to create something legendary.
The problem with most recipes is a lack of patience and poor temperature control. If you’ve ever ended up with “beef gum” or a watery broth, it’s likely because the heat was too high or the vegetables went in too soon. We’re moving away from the “dump-and-go” mentality to embrace a refined, low-and-slow philosophy. This method ensures the proteins relax and the starches soften without disintegrating into the sauce.
The secret to this specific success lies in the “smiling” simmer. You aren’t looking for a rolling boil, which actually tightens muscle fibers and makes meat rubbery. Instead, you want a surface that barely moves, with just an occasional bubble breaking through. This gentle heat is the only way to transform tough connective tissue into succulent gelatin while keeping your potatoes perfectly intact. Trust the process, and your patience will be rewarded with the best bowl of stew you’ve ever tasted.
The Science of Tenderness in Beef Chuck
Beef chuck roast is the undisputed king of the stew pot, but it requires a bit of biological understanding to master. This cut comes from the shoulder of the animal, a hard-working muscle group loaded with collagen and connective tissue. While a quick sear on a grill would make this meat inedible, a long, moist-heat simmer performs a culinary miracle. As the internal temperature of the beef stays between 160°F and 180°F, that tough collagen physically melts into gelatin.
This gelatin is what gives the stew its luxurious, lip-smacking mouthfeel. However, size matters immensely here. We cut the beef into large 2-inch cubes because smaller pieces would lose their moisture and turn into dry strings before the collagen has a chance to fully break down. A 2-inch cube provides enough surface area for a beautiful sear while maintaining a moist, tender core during the three-hour journey. If you cut them too small, you’ll end up with “fiber desiccation,” where the meat feels dry even though it’s submerged in liquid.
Essential Components for a Rich Stew Base
A great stew is only as good as its foundation, and that starts with high-quality bone broth. Unlike standard stock, bone broth is simmered longer to extract minerals and natural gelatin, providing a built-in thickness and depth. When you combine this with three tablespoons of tomato paste, you’re creating an umami powerhouse. The tomato paste acts as a natural flavor enhancer, adding a subtle acidity that cuts through the richness of the beef fat.
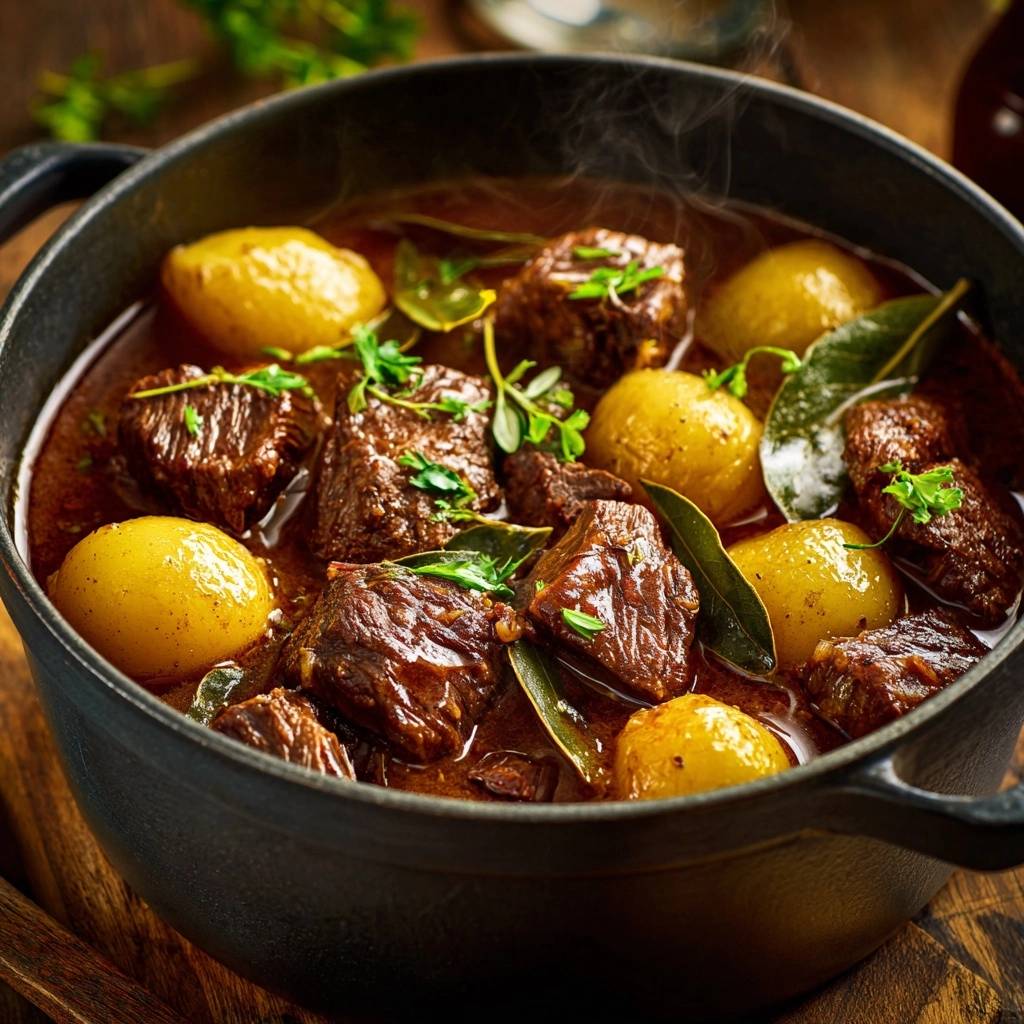
Don’t be intimidated by the call for six whole bay leaves. While many recipes treat a single bay leaf as a decorative afterthought, using six creates a powerful herbal backbone. This isn’t about a single “bay” flavor; it’s about a complex, tea-like layer that balances the heavy savory notes of the meat. It provides a floral lift that prevents the stew from feeling too “muddy” or one-dimensional after hours of cooking.
Selecting the Right Potato Variety
Choosing the wrong potato is the fastest way to ruin a slow-simmered dish. Starchy potatoes, like Russets, are designed to fall apart, which is great for mash but terrible for stew. We use baby yellow potatoes because they are naturally waxy and hold their structural integrity. By peeling them but leaving them whole, you create a protective barrier that allows the inside to become creamy and buttery while the outside stays firm and beautiful.
The Role of Aromatics and Deglazing
After you sear the beef, you’ll notice dark, crusty bits stuck to the bottom of your pot. This is called “fond,” and it is concentrated flavor gold. Deglazing is the process of adding liquid—like broth or an optional splash of grape juice or vinegar—to loosen those bits. This chemical reaction incorporates the caramelized proteins back into the sauce. While the acidity helps balance the fats, the primary goal is to ensure every ounce of flavor from the sear ends up in your bowl.
Phase One: Achieving the Perfect Maillard Sear
The most important rule of searing is one most people ignore: you must pat the beef completely dry with paper towels. If the meat is damp, it will steam in the pot instead of browning. Steam creates a grey, rubbery exterior, whereas a dry surface allows for the Maillard reaction. This is the chemical process that creates that deep, dark brown crust and the complex flavors we associate with roasted meat. Take your time and do this in batches; if you crowd the pan, the temperature drops and you lose that crucial sear.
Once the meat is browned and removed, you’ll focus on the aromatics. When you add the tomato paste to the sautéed onions and garlic, don’t just stir it in and move on. Cook it for about three minutes until it shifts from a bright red to a deep, dark brick red. This “toasting” of the paste removes the raw metallic taste and develops a concentrated sweetness. If you rush this stage, your gravy will taste thin and acidic rather than rich and savory. Look for the paste to start sticking slightly to the bottom—that’s your cue to deglaze.
Phase Two: The Low-Temperature Simmering Technique
Once your liquids are in and the pot is covered, your main job is heat management. You want the liquid to “smile.” This means the surface should show only the occasional small bubble, rather than a rolling, turbulent boil. If you see heavy steam and constant bubbling, your heat is too high. On a gas stove, this usually means the lowest possible setting. On an electric stove, you might even need to move the pot slightly off-center to find that sweet spot of gentle heat.
Boiling meat is the enemy of tenderness. High heat causes muscle fibers to contract violently, squeezing out all their internal moisture like a wrung-out sponge. By keeping the temperature just below a boil, you allow the fibers to remain relaxed while the heat slowly dissolves the connective tissues. This is the only way to achieve that “fork-tender” result where the meat yields to the slightest pressure without falling into dry shreds.
Phase Three: Timing the Vegetable Addition
Timing is everything when it comes to texture. If you add the potatoes at the beginning, they will be overcooked and grainy by the time the beef is ready. By waiting until the 1-hour 45-minute mark, you give the potatoes exactly enough time to reach a “buttery” consistency. They absorb the seasoned broth without losing their shape. Because they are whole, they don’t release as much starch into the liquid, which keeps your sauce clear and glossy rather than cloudy.
During this final hour, the potatoes act like little sponges. They soak up the salt, the thyme, and the beef essence. You’ll know they are done when a paring knife slides into the center with zero resistance. If the sauce looks a bit thin at this stage, you can crack the lid for the last 15 minutes. This allows a small amount of evaporation to concentrate the flavors and thicken the gravy to a coat-the-back-of-a-spoon consistency.
If you love how the potatoes soak up all that flavor here, you will enjoy the same tender, hearty comfort in this rustic beef stew.
Troubleshooting Common Stew Textures
If your sauce feels too thin after the cooking time is up, don’t panic. Simply remove the lid and turn the heat up slightly for 10 to 15 minutes. The reduction will intensify the flavor and thicken the liquid naturally. Avoid adding more flour at the end, as it can create a pasty taste. If the meat is still tough, it simply hasn’t cooked long enough. Every cow is different, and some cuts need an extra 20 minutes to fully break down. Just keep it at a low simmer; more heat won’t help, only more time will.
If the flavor feels “flat” or dull, it usually needs a tiny hit of salt or acid. Even though you seasoned at the start, the potatoes can soak up a lot of salt. A final pinch of coarse salt or a tiny drop of vinegar can wake up all the other flavors. Always taste your sauce right before serving to ensure the balance is perfect. The fresh parsley garnish isn’t just for looks; the bright, grassy flavor provides a necessary contrast to the heavy, savory stew.
Optimal Equipment: The Heavy Dutch Oven
For a three-hour simmer, the vessel you use is just as important as the ingredients. A heavy cast iron Dutch oven is the gold standard for stew. Cast iron has incredible heat retention, meaning it stays at a consistent temperature even if your stovetop fluctuates. It also distributes heat evenly across the bottom and up the sides, preventing “hot spots” that can scorch your sauce over a long cook time.
Thin aluminum or stainless steel pots often have thin bottoms that can cause the bottom layer of your stew to burn while the top stays cool. If you don’t have a heavy-bottomed pot, you’ll need to stir much more frequently to prevent sticking. A tight-fitting lid is also essential to keep the moisture inside. If your lid is loose, the liquid will evaporate too quickly, leaving you with dry meat and a salty, over-reduced sauce.
Make-Ahead Strategies and Storage Physics
There is a scientific reason why stew tastes better the next day. As the stew cools, the flavors continue to meld and the starches in the potatoes stabilize. The beef actually reabsorbs some of the seasoned liquid as it rests. If you have the time, make this a day in advance. To store it safely, let the pot cool on the counter for about 40 minutes, then transfer the stew to airtight containers and refrigerate. Never put a giant, piping-hot pot directly into the fridge, as it can raise the internal temperature of your refrigerator to unsafe levels.
When you’re ready to reheat, do it gently on the stove over medium-low heat. Adding a splash of water or broth can help loosen the gravy, which will have thickened significantly in the fridge. Avoid using the microwave if possible, as it can heat unevenly and turn the potatoes rubbery. Slow reheating ensures the beef stays tender and the potatoes maintain that creamy, buttery texture you worked so hard to achieve.
Serving Suggestions and Texture Pairings
This stew is incredibly rich, so you want side dishes that offer a crisp or acidic contrast. A thick slice of toasted sourdough bread is the perfect tool for mopping up every last drop of the gravy. The tang of the sourdough cuts through the fat of the beef chuck beautifully. Alternatively, a simple green salad with a sharp lemon vinaigrette can cleanse the palate between bites of the savory stew.
Don’t skip the heavy garnish of fresh parsley. It provides a pop of color, but more importantly, it adds a fresh, clean finish to a very “heavy” dish. Serve the stew directly from the cast iron pot at the table. There’s something deeply satisfying and rustic about ladling thick, steaming portions straight from the vessel it was cooked in. It keeps the food hot and honors the slow-cooked process.
Expert Troubleshooting and Preparation FAQ
Can I use lean stew meat instead of chuck roast?
I strongly recommend against using lean cuts like round or sirloin for this recipe. Lean meat lacks the intramuscular fat and collagen necessary for a long simmer. If you try to cook lean meat for three hours, it will become incredibly dry, tough, and “woody” in texture. Stick with chuck roast or bone-in short ribs for the best results.
What if I don’t have a heavy lid for my pot?
If your lid is lightweight or doesn’t fit tightly, you can create a “cartouche” or a foil seal. Place a piece of heavy-duty aluminum foil over the top of the pot and crimp the edges tightly before placing the lid on top. This creates an extra barrier that prevents steam from escaping, ensuring your beef stays submerged and moist throughout the long cooking process.
Can this be adapted for a pressure cooker?
You can use a pressure cooker to save time, but there is a trade-off in texture. While the meat will get tender quickly, the potatoes often end up overcooked or “blown out” because of the high pressure. If you use this method, cook the beef first, then release the pressure and add the potatoes for a final 5-10 minute cycle. You also lose the flavor development that comes from the slow reduction of the sauce.
Why are my bay leaves still in the pot?
Leaving the bay leaves in the pot for the final presentation is a classic rustic touch. It signals to your guests that the flavor was built over time with real herbs. Just be sure to warn everyone not to actually eat them! They continue to infuse the sauce with a subtle aroma even as the dish sits on the table, enhancing the sensory experience of the meal.
How do I fix a stew that is too salty?
If you accidentally over-salted the base, the best fix is to add more bulk. You can add a few more potatoes or a splash of unsalted broth to dilute the saltiness. Some people suggest adding a raw potato to “absorb” the salt, but it’s more effective to simply increase the volume of the liquid. A tiny pinch of sugar or a squeeze of lemon juice can also help mask the perception of excess salt on the tongue.
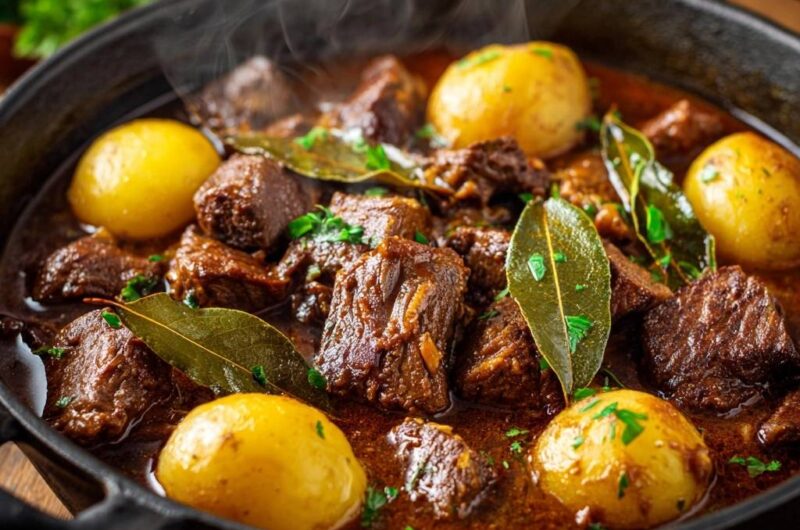
Beef and Potato Stew
Course: Main CourseCuisine: AmericanDifficulty: medium6
servings20
minutes2
hours435
kcal180
MinutesA hearty, comforting stew featuring beef chuck roast and baby yellow potatoes. This recipe focuses on temperature control and timing to transform tough cuts of meat into a tender masterpiece with a rich, thick gravy.
Ingredients
2.5 pounds beef chuck roast, cut into large 2-inch cubes
1.5 pounds small baby yellow potatoes, peeled and left whole
4 cups high-quality beef bone broth
3 tablespoons tomato paste
4 cloves garlic, minced
1 large yellow onion, finely diced
6 whole bay leaves
3 tablespoons vegetable oil
1 teaspoon dried thyme
2 tablespoons all-purpose flour (for thickening)
Salt and coarse black pepper to taste
Fresh parsley, finely chopped for garnish
Directions
- Pat the beef cubes completely dry with paper towels. Season generously with salt and pepper. Dust the beef lightly with the flour, shaking off any excess; this helps create the rich, thick gravy seen in the image.
- Heat oil in a heavy cast iron pot or Dutch oven over medium-high heat. Sear the beef in batches, ensuring each piece has a deep, dark brown crust. Do not crowd the pan. Remove beef and set aside.
- In the same pot, sauté the onion until translucent. Add the garlic and tomato paste, cooking for 3 minutes while stirring constantly until the paste turns a deep brick red.
- Deglaze the pot with a splash of broth, scraping up all the browned bits (fond) from the bottom.
- Return the beef and any accumulated juices to the pot. Add the beef bone broth, thyme, and 6 whole bay leaves.
- Bring the liquid to a gentle simmer, then immediately reduce the heat to the lowest possible setting. Cover with a tight-fitting lid. The liquid should barely “smile” (occasional small bubbles). Simmer for 1 hour and 45 minutes.
- Add the whole peeled baby potatoes to the pot. Ensure they are submerged in the liquid. By adding them whole and later in the process, they cook to a buttery texture without breaking apart.
- Continue to simmer on low, covered, for another 45 to 60 minutes. The beef is done when it is fork-tender and the potatoes are easily pierced with a knife.
- For the final presentation shown in the image, do not remove the bay leaves before serving. If the sauce needs further thickening, simmer uncovered for the last 15 minutes. Garnish heavily with fresh parsley and serve directly from the cast iron pot.
Notes
- For the best results, do not rush the simmering process. If the sauce needs further thickening, simmer uncovered for the final 15 minutes. Garnish with fresh parsley before serving.