Mastering Classic Zesty Lemon Bars with a Crisp Shortbread Base
You bite into a lemon bar expecting a sharp, citrus snap and a buttery crunch, but instead, you get a mouthful of mush. It’s a common kitchen heartbreak where the lemon curd migrates into the crust, turning a delicate shortbread into a soggy, pale mess. Most people assume it’s just the nature of the dessert, but the truth is that a perfect lemon bar requires a bit of pastry physics to stay structurally sound.
The secret to a professional-grade bar lies in creating a temperature barrier between the layers. By mastering the par-bake and using a specific compression technique, you can ensure your crust remains crisp and golden under that luscious, tart filling. This guide isn’t just a recipe; it’s a technical masterclass in preventing the dreaded soggy bottom once and for all.
I’ve found that the most important step is pouring your liquid filling onto a piping hot crust. This immediate contact causes the bottom of the curd to set instantly, creating a seal that prevents the juice from soaking into the starch. It’s a simple move that makes a world of difference in the final texture.
The Anatomy of a Perfect Citrus Square
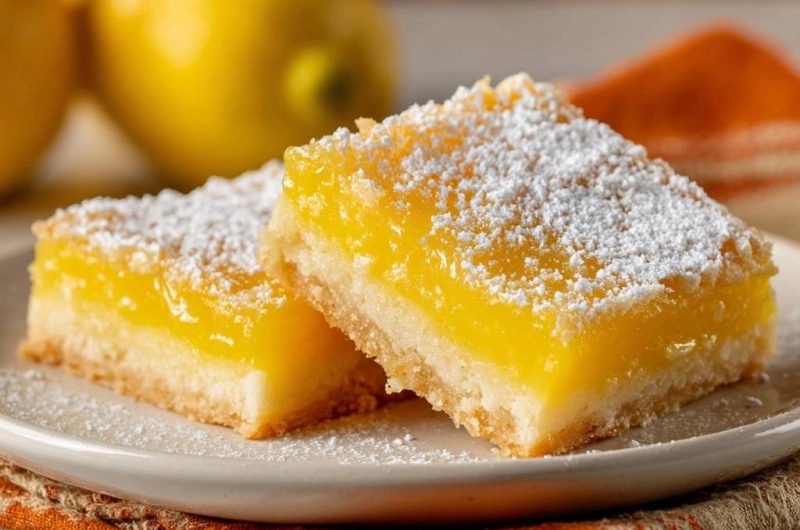
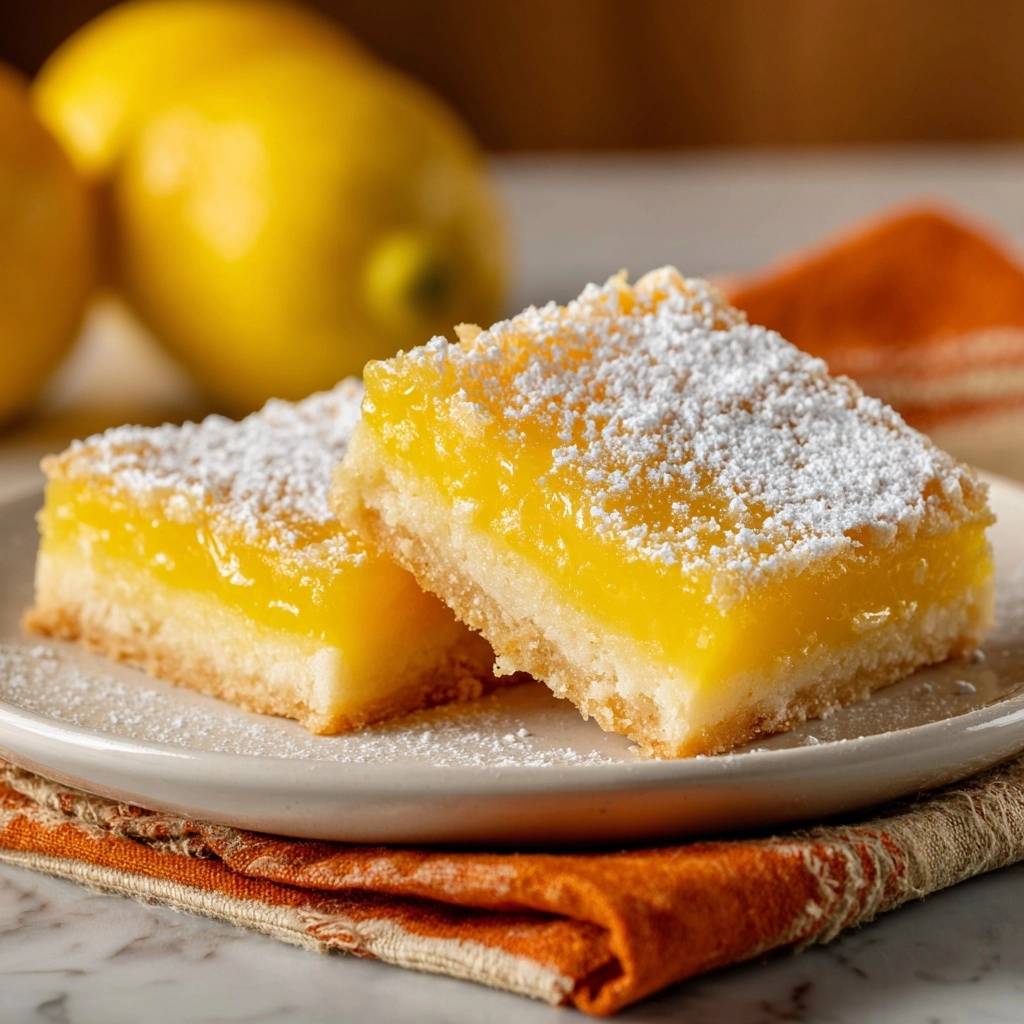
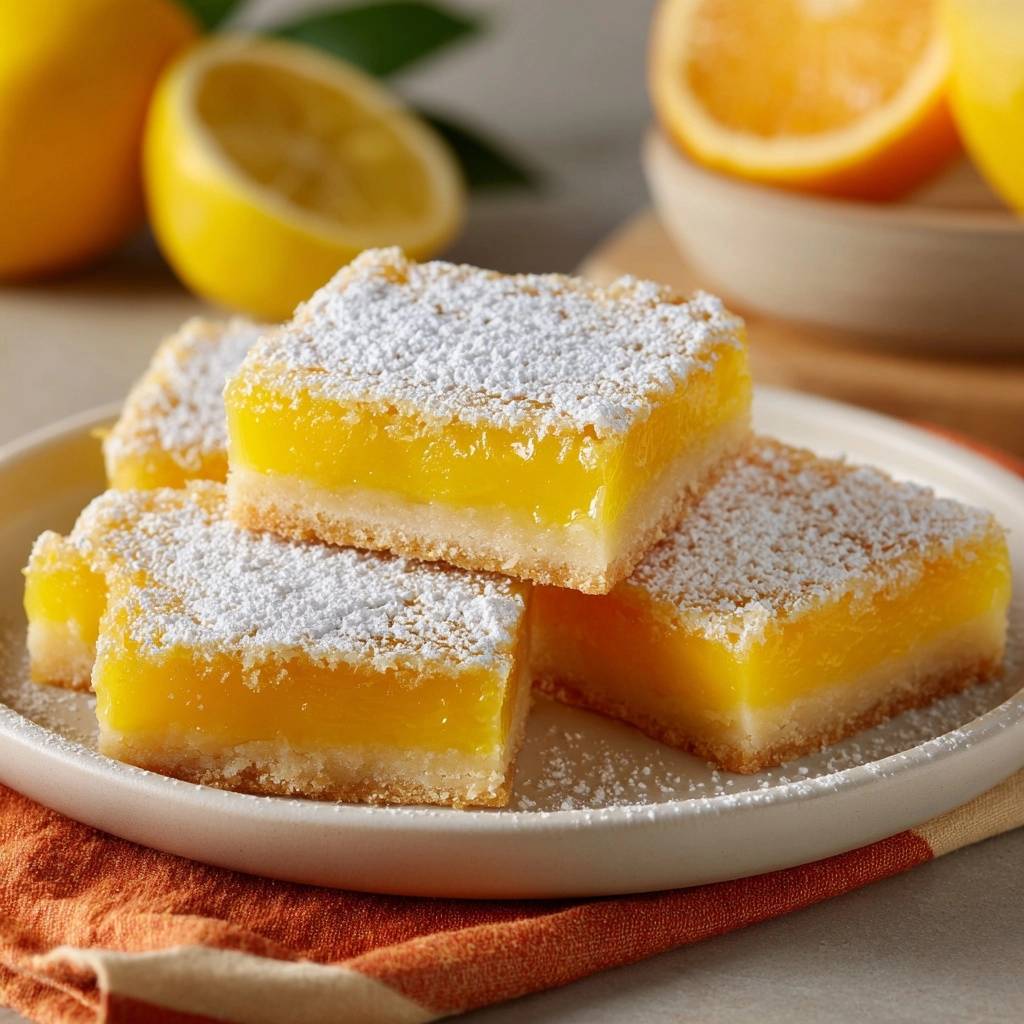
A superior Classic Zesty Lemon Bar is defined by the contrast between its two distinct layers. You want a crust-to-curd ratio of roughly 1:2, providing enough buttery base to support the heavy, acidic filling without overwhelming it. The crust should shatter slightly when bitten, offering a short, crumbly texture that melts away into the silky lemon layer.
The sensory experience starts with the initial crunch of the shortbread, followed by the bright, puckering punch of fresh lemon. As the curd dissolves, the lingering oils from the zest provide a floral, aromatic finish that cuts through the richness of the butter. It’s a balanced dance of fat, sugar, and acid that keeps you coming back for a second square.
For another take on bright citrus treats, try this glazed lemon blueberry loaf.
Essential Components for the Shortbread and Curd
Quality ingredients are the foundation of this bake, and small choices have a massive impact on the final result. Unsalted butter is mandatory here because it allows you to control the sodium levels precisely. Since different brands of salted butter vary in salt content, using unsalted ensures your shortbread doesn’t end up tasting like a savory cracker.
For the structure, all-purpose flour is the hero. While cake flour might seem like a good idea for a tender crumb, it lacks the protein needed to hold up the weight of the lemon curd. All-purpose flour provides the necessary “backbone” to keep the bars from falling apart when you lift them out of the pan.
Never reach for the bottled lemon juice in the green plastic squeeze bottle. Fresh lemons are essential because they provide the correct pH levels for the eggs to thicken properly. Furthermore, the zest contains essential oils that provide a depth of flavor that juice alone cannot replicate. If you want that vibrant, sunshine-yellow taste, you have to squeeze the fruit yourself.
Why Cold Butter is Non-Negotiable
Using cold, cubed butter is the only way to achieve a truly “short” pastry. When you pulse cold fat into flour, you create tiny, solid pockets of butter throughout the dough. As the crust bakes, these pockets melt and create steam, leaving behind a tender yet sturdy crumb. If the butter is warm, it simply coats the flour, resulting in a greasy, dense base that absorbs lemon juice like a sponge.
The Role of Granulated Sugar in Texture
Granulated sugar does much more than just provide sweetness in this recipe. In the crust, sugar crystals interfere with gluten development, ensuring the base stays crumbly rather than chewy. In the filling, the sugar stabilizes the egg proteins, preventing the lemon curd from becoming rubbery or over-coagulated during the second bake.
The Science of the Anti-Soggy Bottom Barrier
The “Temperature Barrier” is the most critical technical element of this recipe. By par-baking the crust at 350°F, you trigger the Maillard reaction, which browns the surface and creates a hydrophobic seal. This toasted layer acts as a shield, preventing the liquid filling from migrating into the dry starch of the crust.
When you pour the cold lemon mixture onto the hot crust, the thermal shock causes the proteins in the eggs to bond immediately at the point of contact. This creates a thin, cooked film of curd that acts as a secondary waterproof liner. Without this step, the liquid would seep into the par-baked crust before the oven could set the filling, leading to a gummy interface.
Step-by-Step: Engineering the Structural Crust
Start by pulsing your cold butter, flour, sugar, and salt until the mixture looks like coarse crumbs. You don’t want a smooth dough; you want distinct bits of butter visible. Once the mixture is ready, dump it into your lined 9×13 inch pan and spread it out evenly with your fingers.
Now comes the “Compression Technique.” Use the bottom of a flat-bottomed measuring cup to pack the dough down hard into the pan. You want to eliminate any air pockets, as these are the enemy of a clean, professional slice. Bake until the edges are a deep golden brown, which usually takes about 20 to 22 minutes. This deep color is your visual cue that the crust is fully sealed and ready for the filling.
If you enjoy working with bright citrus flavors, the same shortbread base technique works beautifully in this golden cherry cobbler.
Step-by-Step: Whisking the Zesty Lemon Filling
While the crust is in the oven, whisk your sugar and flour together first to break up any lumps. Add the eggs, fresh lemon juice, and zest, then whisk vigorously for at least 2 full minutes. This aeration process is vital; you are looking for a smooth, slightly frothy consistency where the sugar is completely dissolved.
The moment the crust comes out of the oven, pour that frothy mixture directly over it. You should hear a slight sizzle as the liquid hits the hot pan. This is exactly what you want. The immediate heat transfer starts the setting process for the curd before the pan even goes back into the oven, ensuring the layers stay perfectly separated.
Precision Baking and the Jiggle Test
After adding the filling, reduce your oven temperature to 325°F. This lower heat allows the eggs to set gently without curdling or cracking. Bake for another 22 to 26 minutes, keeping a close eye on the center of the pan. You are looking for the “jiggle test” to tell you when they are done.
Gently shake the pan; the edges should be firm, but the center should have a slight, gelatinous shimmy—think of it like firm Jell-O. If the center sloshes like a liquid, it needs more time. However, if it doesn’t move at all, you’ve likely overbaked it, which can lead to a rubbery texture and unsightly cracks on the surface.
The Critical Cooling and Setting Phase
Patience is the hardest part of this recipe, but it is non-negotiable for the thermodynamics of the set. You must allow the bars to cool at room temperature for at least one hour before moving them to the fridge. This slow cooling prevents the crust from becoming soggy due to condensation and allows the egg proteins to realign slowly.
Once the pan is no longer hot to the touch, refrigerate the bars for at least 3 hours. This cold environment firms up the butter in the crust and the fats in the curd, which is the secret to getting those sharp, clean edges. If you try to slice them while they are even slightly warm, the filling will tear and the crust will crumble.
Achieving Professional Bakery-Style Slices
To get those perfect squares, use the parchment paper overhang to lift the entire block of lemon bars out of the pan and onto a cutting board. Dust the top heavily with a thick layer of powdered sugar. I like to use a fine-mesh sieve to ensure the coating is even and cloud-like.
Use a long, very sharp knife to make your cuts. The “wipe-between-cuts” rule is essential here; after every single slice, wipe the blade clean with a damp paper towel. This prevents the sticky lemon curd from dragging through the next cut, ensuring every square has a pristine, professional appearance.
Troubleshooting Common Citrus Pastry Issues
If you see a thin layer of white bubbles on top of your bars, don’t panic. This is simply air from the whisking process that rose to the top during baking. A heavy dusting of powdered sugar hides this perfectly. To avoid it next time, let the filling sit for 5 minutes after whisking to let the bubbles subside before pouring.
If your bars are “weeping” or sweating, it’s usually due to sugar crystallization or being stored in a humid environment. Always wait to add the powdered sugar until right before serving. If the crust is crumbling upon touch, you likely didn’t compress it hard enough with the measuring cup. Remember, a dense crust is a strong crust. Finally, if they lack tartness, check your lemons; smaller, thinner-skinned lemons are often more acidic and flavorful than large, thick-skinned ones.
Storage Logistics and Make-Ahead Strategies
These bars stay fresh in the refrigerator for up to 4 days when stored in an airtight container. They actually make a great make-ahead dessert because the flavor deepens after a day. If you need to store them longer, they freeze surprisingly well. Wrap individual un-sugared squares in plastic wrap and freeze for up to 3 months.
What to Pair with Lemon Bars
After enjoying those bright, tangy lemon bars with their buttery shortbread crust, you might want more citrusy treats to keep the momentum going. These two recipes share the same sunny vibe and work great for brunch or a sweet snack later in the day.
- Wake up with a stack of Lemon Poppy Seed Pancakes — the same lemony zing and a fluffy texture that complements the crisp bar base.
- For a softer, sweeter contrast, try Coconut Dream Muffins; the tropical coconut mellows the lemon tartness and adds a
When you are ready to serve, thaw them in the fridge overnight. The most important rule for storage is to hold off on the powdered sugar. Powdered sugar is hygroscopic, meaning it absorbs moisture. If you sugar them before putting them in the fridge, the sugar will “melt” into a clear, sticky film within an hour. Always dust them fresh!
Creative Flavor Variations and Swaps
Once you master the base chemistry, you can play with the flavors. For a sweeter, more floral profile, swap the standard lemons for Meyer lemons. If you want something more exotic, a “Lime and Ginger” variation works beautifully; just swap the juice and add a teaspoon of freshly grated ginger to the crust dough.
You can also add an earthy note by rubbing fresh thyme or rosemary into the sugar before making the crust. The herbs pair wonderfully with the bright acidity of the lemon. Just be sure to keep the ratios of liquid to dry ingredients the same, as the balance of flour and eggs is what maintains the structural integrity of the bar.
How should I store leftover lemon bars?
Store your lemon bars in an airtight container in the refrigerator for up to 4 days. If you need to stack them, place a piece of parchment paper between the layers to prevent the curd from sticking to the bottom of the bar above it. For the best texture, do not store them at room temperature, as the curd can soften too much. You can also freeze them for up to 3 months; just thaw them in the refrigerator before serving.
Why did my lemon bars turn out runny?
Runny lemon bars are usually the result of underbaking or inaccurate measurements. If the center didn’t pass the “jiggle test” (it should shimmy like gelatin, not slosh like liquid), it needed more time in the oven. Additionally, ensure you are using large eggs; if the eggs are too small, there won’t be enough protein to set the liquid juice. Finally, always whisk the flour into the sugar before adding liquids to ensure it incorporates fully as a thickening agent.
Can I use bottled lemon juice instead of fresh?
While you can technically use bottled juice, I strongly advise against it. Bottled juice often has a metallic aftertaste and lacks the vibrant acidity of fresh fruit. More importantly, bottled juice doesn’t provide the zest, which contains the essential oils responsible for the deep citrus aroma. If you are in a pinch, bottled juice will work, but the bars will taste significantly flatter and less “zesty.”
Why is my powdered sugar disappearing?
Powdered sugar dissolves when it comes into contact with moisture. If you dust the bars while they are still warm, or if you store them in the fridge with the sugar already on top, the moisture from the curd will absorb the sugar. To keep that beautiful white finish, always wait until the bars are completely cold and dust them immediately before you plan to serve them.
Can I make these gluten-free?
Yes, you can substitute the all-purpose flour with a high-quality 1:1 gluten-free flour blend. Look for a blend that contains xanthan gum, as this helps provide the structural “stretch” that the crust needs to stay together. The texture may be slightly more crumbly than the original, so be extra firm when compressing the crust into the pan with your measuring cup.
Lemon Bars
Course: DessertCuisine: AmericanDifficulty: mediumYields24
barsPrep Time15
minutesCook Time45
minutesCalories210
kcalTotal Time240
MinutesA foolproof recipe for lemon bars featuring a specific par-baking and pressing technique to ensure a firm, crunchy crust topped with a bright, tangy lemon layer.
Ingredients
For the Crust:
1 cup unsalted butter, cold and cubed
2 cups all-purpose flour
1/2 cup granulated sugar
1/2 teaspoon salt
For the Lemon Filling:
2 cups granulated sugar
6 tablespoons all-purpose flour
6 large eggs
3/4 cup fresh lemon juice
2 tablespoons lemon zest
Powdered sugar for dusting
Directions
- Preheat your oven to 350°F (175°C). Line a 9×13 inch baking pan with parchment paper, leaving an overhang on the sides for easy removal.
- To solve the soggy bottom issue, combine the cold cubed butter, 2 cups flour, 1/2 cup sugar, and salt in a food processor or bowl. Pulse or use a pastry cutter until the mixture resembles coarse crumbs.
- Press the dough firmly and evenly into the bottom of the prepared pan. Use the bottom of a flat measuring cup to pack it down hard. This compression creates a dense barrier that prevents the lemon juice from seeping into the crust.
- Bake the crust alone for 20 to 22 minutes or until the edges are a deep golden brown. This par-baking creates a moisture-proof seal.
- While the crust bakes, whisk together the 2 cups sugar and 6 tablespoons flour. Add the eggs, lemon juice, and zest. Whisk vigorously for at least 2 minutes until the mixture is smooth and slightly frothy.
- Pour the lemon mixture directly over the crust while the crust is still piping hot from the oven. This immediate contact helps the bottom of the curd set instantly, further protecting the crust.
- Reduce oven temperature to 325°F (160°C) and bake for another 22 to 26 minutes until the filling is set and no longer jiggles in the center.
- Allow the bars to cool completely in the pan at room temperature for 1 hour, then refrigerate for at least 3 hours. This cooling period is vital for the clean, sharp edges seen in the image.
- Lift the bars out using the parchment paper. Dust heavily with a thick layer of powdered sugar and slice into squares using a sharp, clean knife (wipe the knife between cuts for the best presentation).
Notes
- The secret to the anti-soggy bottom is pressing the crust firmly with a flat measuring cup and pouring the filling over the crust while it is still piping hot. For clean slices, wipe your knife with a damp cloth between every cut.