Mastering Cheesy Sausage Breakfast Puffs with a Crisp Crust
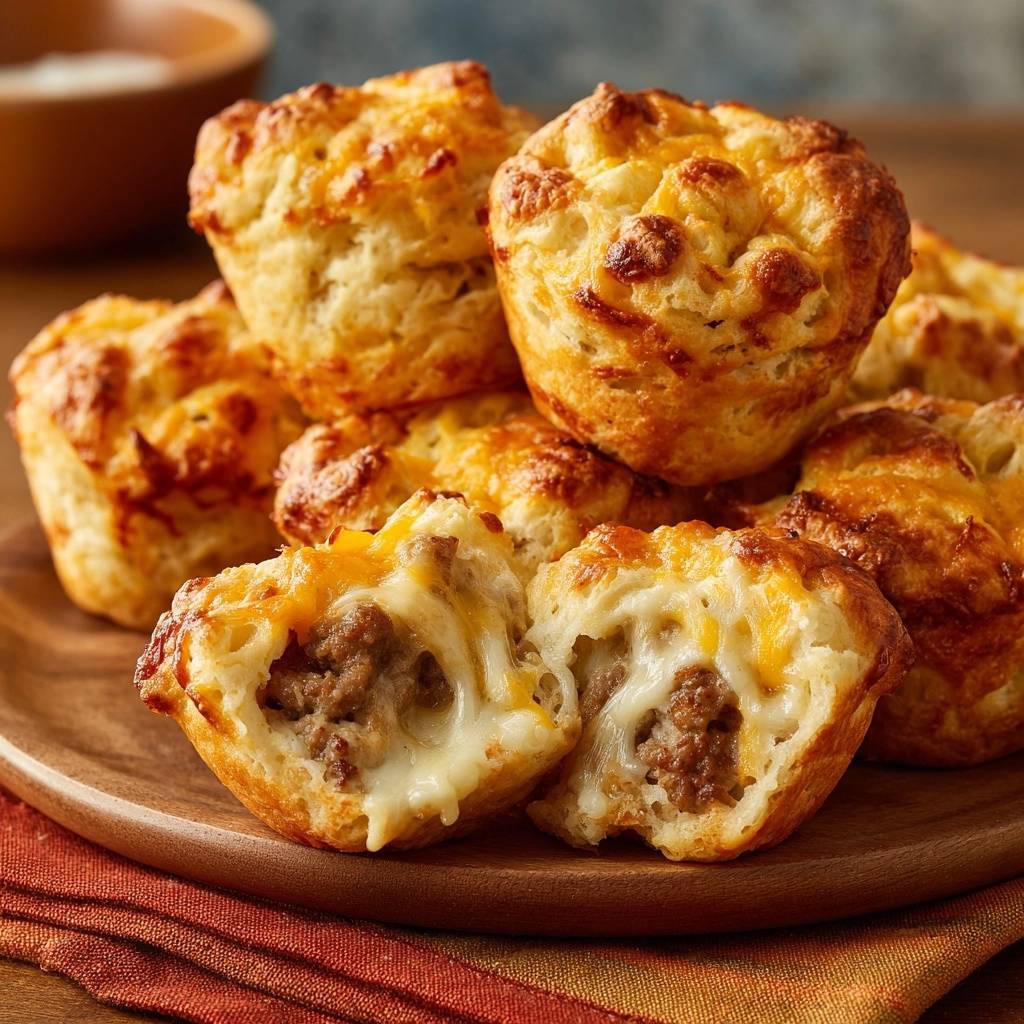
You know that disappointing moment when you bite into a beautiful breakfast muffin only to find a greasy, mushy mess at the bottom? It’s a common heartbreak in savory baking where the fats from the meat and cheese migrate downward, turning a potential masterpiece into a soggy disaster. These Cheesy Sausage Breakfast Puffs solve that problem entirely with a shattering, golden crust that gives way to a fluffy interior and a molten, gooey mozzarella core.
The secret to this texture isn’t just luck; it’s a specific “Anti-Soggy Bottom” philosophy that focuses on moisture control and structural integrity. By treating the ingredients with a bit of scientific care, you can achieve a bakery-style rise that holds its shape and stays crisp until the very last bite. It’s the kind of breakfast that feels like a weekend luxury but works perfectly for a busy Tuesday morning.
The same layering method that creates that molten center also gives these cheddar herb biscuits their flaky structure.
I’ve found that the real trick to professional-grade puffs lies in the temperature of your fats and the way you coat your proteins. If you’ve ever struggled with heavy, dense savory muffins, the culprit is usually “lipid migration.” We’re going to fix that today by creating a flour-based barrier that locks the juices inside the sausage rather than letting them soak into the dough. Let’s get into the kitchen and build a better breakfast.
The Science of Structural Integrity in Savory Baking
When you bake with high-fat ingredients like breakfast sausage and cheddar cheese, the heat of the oven causes those fats to liquefy almost immediately. In a standard batter, this liquid fat seeps into the surrounding flour, preventing the gluten from forming a strong structure and resulting in a dense, oily bottom. However, by using the “Barrier Layer” technique, we toss the cooked sausage and cheese directly into the dry flour mixture before adding any liquids.
This simple step coats every morsel of fat-heavy ingredient in a protective layer of starch. Therefore, when the puffs hit the heat, the flour absorbs the initial release of oils, creating a localized savory crust around each piece of meat. This prevents the fats from pooling at the base of the muffin tin and ensures the dough can rise freely around the fillings.
Furthermore, we bake these at 400°F for a very specific reason. This high temperature triggers rapid steam-leavening. As the moisture in the cold butter and the milk evaporates quickly, it pushes the dough upward, creating those airy pockets and a tall, proud puff. If the temperature were lower, the butter would simply melt and leak out before the structure had a chance to set.
Essential Components for Cheesy Sausage Breakfast Puffs
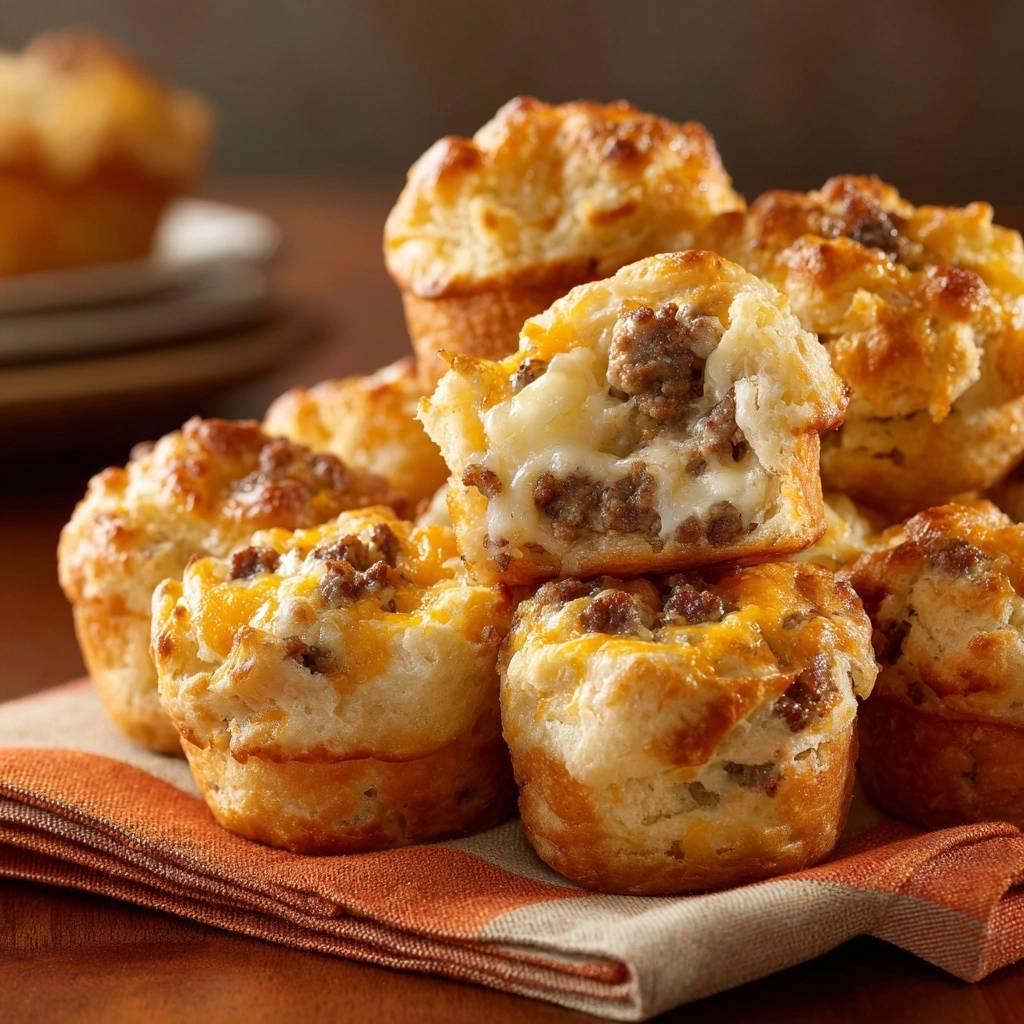
Quality ingredients are the foundation of this dish, and small choices make a massive difference in the final flavor profile. I always recommend using sharp cheddar cheese rather than mild or medium varieties. Sharp cheddar has a lower moisture content and a more robust, tangy punch that doesn’t get lost when baked alongside the savory sausage and garlic powder.
Whole milk is another non-negotiable element for the perfect crumb. The fat content in whole milk provides the necessary richness to keep the interior tender, while the natural sugars help the exterior achieve that deep, mahogany brown color. If you use skim or low-fat milk, you’ll likely find the puffs are tougher and lack that signature “melt-in-your-mouth” quality.
Garlic powder acts as the essential flavor bridge in this recipe. While it might seem like a minor addition, it seasons the dough itself, ensuring that the bread isn’t just a vessel for the meat but a flavorful component on its own. It complements the savory notes of the sausage and the sharpness of the cheese, tying the whole profile together into one cohesive bite.
Selecting and Preparing the Breakfast Sausage
The beauty of this recipe is that you can customize the vibe based on the sausage seasoning you choose. A classic sage-heavy breakfast sausage offers a nostalgic, cozy flavor, while a spicy variety can add a nice morning kick. Regardless of the flavor, you must crumble the meat finely as it browns in the skillet to ensure every single bite of the puff contains a bit of protein.
Once the sausage is cooked, don’t just scoop it out with a spoon. I highly recommend using a fine-mesh strainer to drain the meat. A slotted spoon often leaves behind small pools of grease in the curves of the meat, but a strainer allows every drop of excess fat to fall away. This is your first line of defense against a soggy puff.
The Role of Cold Fats in Dough Rise
To get that “puff” in the title, you have to treat the butter with respect. You want to “cut in” the cold, cubed butter until you see pea-sized bits remaining in the flour. These tiny chunks of solid fat are actually little steam engines; as they melt in the oven, they leave behind a void that fills with steam, lifting the dough and creating a flaky, light texture.
Be careful not to let the heat of your hands melt the butter while you’re working. If the butter turns soft or greasy before it hits the oven, your puffs will be flat and heavy. If you have warm hands, use a pastry blender or two chilled forks to incorporate the fat. Keeping everything cold until the very last second is the secret to that incredible bakery-style lift.
Step-by-Step: Engineering the Perfect Breakfast Puff
Creating these puffs is more about the “how” than the “what.” Following the steps in order ensures that the physics of the bake work in your favor. We are essentially building a reinforced structure that can hold a heavy load of meat and cheese without collapsing.
Phase 1: Degreasing the Protein for Maximum Crispness
Start by browning your sausage until it is “slightly crispy.” You’re looking for those deep brown, caramelized edges that provide a texture contrast against the soft dough. Once it’s cooked and strained, move the meat to a plate lined with double paper towels. This is the “Sausage Secret” that changes everything.
Take another paper towel and press down firmly on the meat. You want to remove about 95% of the rendered fat. If the meat still looks shiny or has a visible sheen of oil, keep blotting. Removing this excess moisture is the only way to guarantee that the bottom of your puff stays crisp and golden rather than oily and soft.
Phase 2: Aerating the Dry Base and Incorporating Solids
Whisk your flour, baking powder, salt, and garlic powder thoroughly. You aren’t just mixing; you’re aerating the flour to keep the puffs light. Once the butter is cut in, it’s time for the “Toss and Coat” method. Add the drained sausage and the first cup of cheddar to the dry mix and stir until every piece of meat is white with flour.
This reinforces that barrier layer we discussed earlier. By the time the liquid hits the bowl, the sausage and cheese are already “insulated.” This prevents the ingredients from sinking to the bottom of the muffin tin during the first few minutes of baking, ensuring an even distribution of flavor from top to bottom.
Phase 3: Hydration and the Dangers of Overworking Dough
When you pour the milk and egg mixture into the dry ingredients, put down the whisk and pick up a spatula. You are looking for a “shaggy dough”—one that is just barely moistened and looks a bit lumpy. If you stir until the dough is perfectly smooth, you’ve gone too far and developed too much gluten.
Overworked gluten results in a tough, rubbery puff that is difficult to chew. Stop stirring the moment you no longer see streaks of dry flour at the bottom of the bowl. The dough should look thick and a little messy; this is exactly what you want for a tender, biscuit-like interior that pulls apart easily.
Phase 4: The Mozzarella Core and Final Assembly
To create the molten center, fill your greased muffin cups about one-third of the way. Use your thumb or the back of a small spoon to create a well in the center, but be careful not to pierce all the way through to the bottom of the tin. Drop in a generous pinch of mozzarella and then cover it with more dough.
Make sure you pinch the top and bottom layers of dough together to “seal” the cheese inside. If the mozzarella has a clear path to the edge of the tin, it will leak out and burn against the metal, making the puffs stick. A proper seal ensures that when you pull the puff apart, you get that satisfying, stretchy cheese pull every time.
Critical Heat Management and the Cooling Rule
The 18 to 20-minute bake time is a precise window where the Maillard reaction occurs on the cheddar crust. You are looking for a deep, golden brown color on top. This isn’t just for looks; that toasted cheese crust provides a savory, umami crunch that balances the soft dough inside. If they look pale, give them another minute or two.
However, the most important part of the process happens after you take them out of the oven. You must follow the “2-Minute Rule.” Let the puffs sit in the tin for exactly two minutes to let the structure set, then immediately move them to a wire rack. If you leave them in the metal tin, the residual heat creates steam between the puff and the pan.
That trapped steam will quickly turn your engineered crisp bottom into a soft, damp mess. By moving them to a rack, air can circulate around the entire puff, locking in that golden crust. Serve them while they are still warm to ensure the mozzarella core is at its peak melty performance.
Troubleshooting Common Savory Pastry Failures
If your puffs didn’t rise as much as you’d hoped, check the age of your baking powder. It loses its potency over time, and for a heavy dough like this, you need maximum leavening power. Additionally, if your butter was too warm when you started, the dough will be more like a cookie than a puff, leading to a flatter shape.
Did the cheese leak out and make a mess? This usually happens if the “well” was too shallow or the top layer of dough wasn’t pressed firmly enough against the bottom layer. Next time, ensure the mozzarella is completely encased in the shaggy dough. If the center feels doughy or undercooked, your oven might be running cool; use an oven thermometer to verify you’re hitting that 400°F mark.
Flavor Variations and Ingredient Swaps
Once you master the base technique, you can play with the flavors. For a Mediterranean-inspired morning, swap the sausage for chopped sun-dried tomatoes and use feta cheese in the dough with the mozzarella core. The salty feta provides a beautiful contrast to the sweet tomatoes, and the technique remains exactly the same.
If you want something with more heat, try using a spicy beef chorizo or a pepper jack cheese instead of cheddar. You can even add finely diced jalapeños to the flour mixture. Just remember to always drain any cooked meats thoroughly and blot them with paper towels to maintain that crisp structural integrity we’ve worked so hard to build.
Make-Ahead Strategies and Flash Freezing
These puffs are a dream for meal prepping. You can bake a full batch on Sunday, let them cool completely on a wire rack, and then flash-freeze them on a baking sheet for an hour. Once they are solid, toss them into a freezer bag. They will stay fresh for up to two months and provide a quick, high-protein breakfast on the go.
When you’re ready to eat, avoid the microwave if possible, as it can make the dough chewy. Instead, pop them into an air fryer or a toaster oven at 350°F for about 5 to 8 minutes. This reheating method restores the original crispness of the crust and ensures the mozzarella center gets perfectly melty again without drying out the bread.
Optimal Pairings for a Balanced Morning Meal
Because these puffs are rich and savory, they pair best with something bright and acidic to cleanse the palate. A simple citrus salad with grapefruit and orange segments works beautifully. The sharp acidity of the fruit cuts through the fat of the sausage and cheese, making the whole meal feel much lighter and more balanced.
If you prefer something more substantial, a vinegar-based slaw or even a few slices of fresh tomato with a sprinkle of salt can provide that necessary contrast. For your morning beverage, a robust, dark roast coffee has the bitterness needed to stand up to the sharp cheddar. These pairings ensure that the richness of the puff is the star of the show without being overwhelming.
Expert Tips for High-Volume Batch Cooking
If you’re doubling the recipe for a crowd, be careful when browning the sausage. If you crowd the pan with too much meat at once, the sausage will steam in its own juices rather than browning. Cook the meat in two batches to ensure you get those crispy, flavorful edges that are so vital for the final texture of the puffs.
In a standard home oven, heat distribution can be uneven. If you are baking two tins at once, rotate them halfway through the baking time—move the bottom tin to the top rack and the top to the bottom. This ensures that every puff gets that direct heat needed for the golden cheddar crust and the perfect “Anti-Soggy Bottom” finish.
Frequently Asked Questions
Can I use pre-shredded cheese for this recipe?
While you can use pre-shredded cheese in a pinch, I highly recommend grating your own from a block. Pre-shredded cheeses are coated in potato starch or cellulose to prevent clumping in the bag. This coating can interfere with how the cheese melts and can sometimes lead to a grainier texture. Freshly grated cheese melts more smoothly and integrates better with the flour barrier layer.
Why is my dough so sticky and hard to handle?
Dough consistency can change based on the humidity in your kitchen or how you measure your flour. If you scoop the flour directly with the measuring cup, you might be packing it down and using too much. Use the “spoon and level” method for accuracy. If it’s still too sticky, chill the dough for 10 minutes before filling the muffin tins; this firms up the butter and makes it much easier to work with.
Can I substitute the milk with a dairy-free alternative?
Yes, you can use unsweetened almond or soy milk. However, keep in mind that dairy-free milks often lack the natural sugars and fats found in whole milk, which may result in a paler crust and a slightly less tender crumb. To compensate, you might want to brush the tops with a little melted butter or oil before baking to help with the browning process.
How do I know when the sausage is sufficiently drained?
Perform the “no-sheen” test. After browning and straining the meat, press it firmly between layers of paper towels. Look at the surface of the meat; it should look matte and dull rather than shiny. If you still see a glistening reflection of oil on the crumbles, change the paper towels and press again. This step is the most critical factor in preventing a soggy bottom.
How should I store leftovers?
Store any leftover puffs in an airtight container in the refrigerator for up to 4 days. Because of the high moisture content in the cheese and meat, they will soften in the fridge. To bring back that “just-baked” crunch, always reheat them in an oven or air fryer rather than the microwave. Do not store them at room temperature, as the meat and cheese require refrigeration for safety.
Sausage Breakfast Puffs
Course: BreakfastCuisine: AmericanDifficulty: easy12
puffs20
minutes20
minutes315
kcal40
MinutesA savory breakfast muffin featuring browned sausage and sharp cheddar, engineered with a specific flour-coating method to prevent soggy bottoms and ensure a bakery-style rise.
Ingredients
1 pound ground breakfast sausage
2 cups all-purpose flour
1 tablespoon baking powder
1 teaspoon salt
1/2 teaspoon garlic powder
1/2 cup cold unsalted butter, cubed
1 1/2 cups shredded sharp cheddar cheese (divided)
1 cup shredded mozzarella cheese
1 cup whole milk
1 large egg
Directions
- Preheat and Prep: Preheat your oven to 400°F (200°C). Generously grease a 12-cup muffin tin with butter or non-stick spray.
- The Sausage Secret: Brown the sausage in a skillet over medium-high heat until fully cooked and slightly crispy. Drain the cooked sausage thoroughly in a fine-mesh strainer, then transfer to a plate lined with double paper towels. Press down firmly on the meat with more paper towels to remove every drop of excess grease. Let it cool slightly.
- Dry Mix: In a large bowl, whisk together the flour, baking powder, salt, and garlic powder.
- Cut in the Fat: Use a pastry cutter or your fingers to work the cold cubed butter into the flour until the mixture resembles coarse crumbs with some pea-sized bits remaining.
- The Barrier Layer: Stir 1 cup of the shredded cheddar cheese into the flour mixture. Add the drained sausage and toss well. Coating the meat and cheese in the dry flour mixture before adding liquids creates a structural barrier that prevents grease from migrating to the bottom.
- Combine: In a small bowl, whisk the milk and egg together. Pour this into the dry ingredients and stir with a spatula just until a thick, shaggy dough forms. Do not overmix.
- The Stuffed Core: Fill each muffin cup about 1/3 of the way with the dough. Create a small well in the center and stuff it with a generous pinch of shredded mozzarella. Top with the remaining dough to seal the cheese inside.
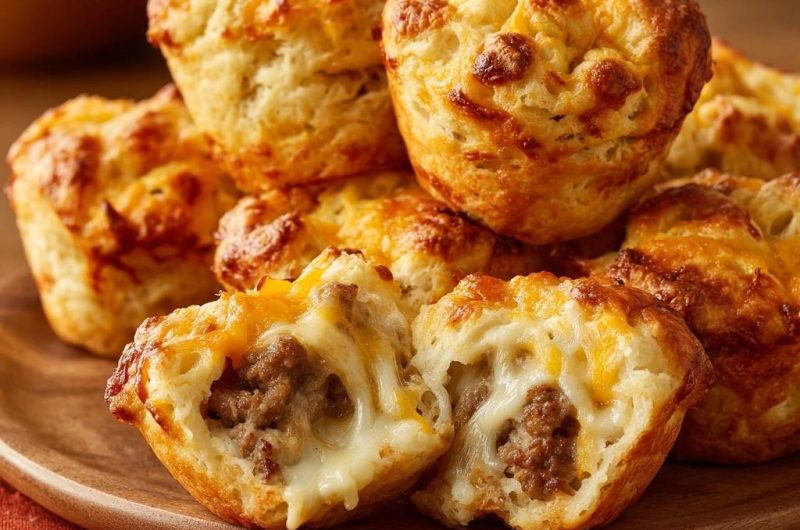
- The Golden Crust: Sprinkle the remaining 1/2 cup of cheddar cheese over the tops of the puffs. This creates the toasted cheese crust seen in the image.
- Bake: Bake for 18 to 20 minutes until the tops are deeply golden brown and the cheese is bubbling.
- The Cooling Rule: Let the puffs cool in the pan for only 2 minutes. Immediately move them to a wire rack. Leaving them in the tin creates steam, which ruins the crisp bottom you just worked so hard to achieve. Serve warm to ensure the mozzarella center is perfectly melty.
Notes
- To maintain the crispy bottom, remove the puffs from the muffin tin after exactly 2 minutes of cooling to prevent steam buildup. Ensure sausage is pressed thoroughly with paper towels to remove all excess grease.